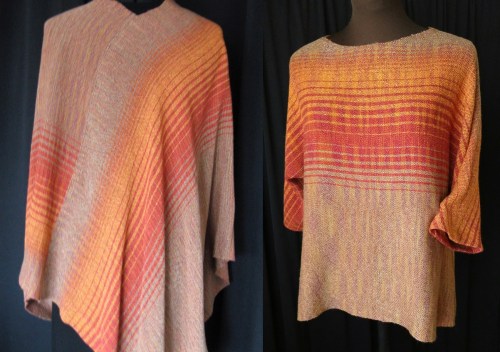
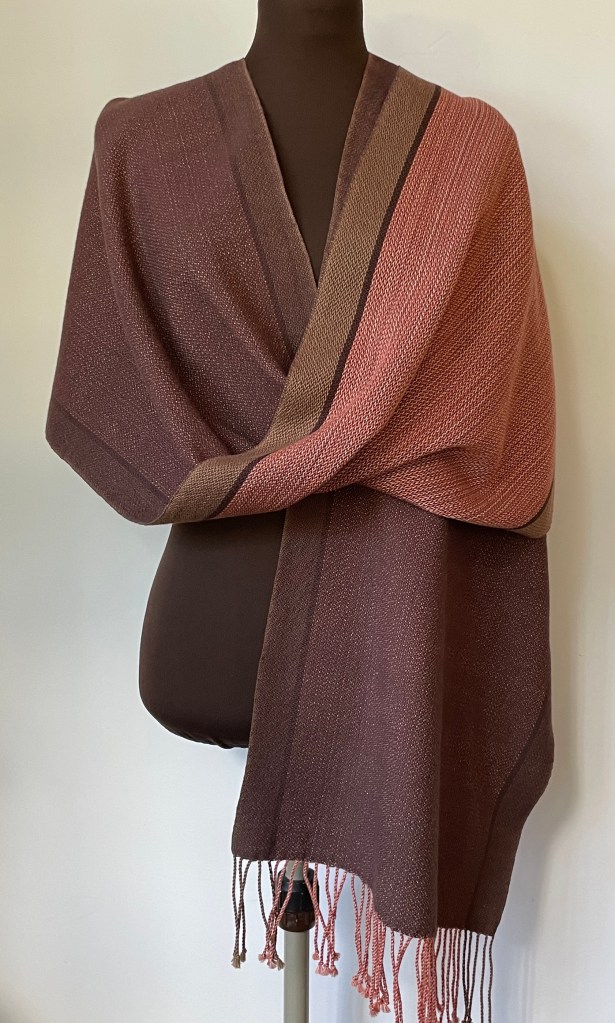
For over 20 years I’ve been donating handwoven shawls to several organizations’ silent auctions to raise money for scholarships and grants. Each shawl is unique which brings in generous bids, plus they’re a ‘one size fits all’ item so I don’t have to know the size of the person who will receive it. In January I wove a shawl for theNational Storytelling Network’s Online Auction. The monies raised will be used to help strengthen the storytelling community, with all proceeds supporting member awards that nurture tellers, programs, and creative work across the country.
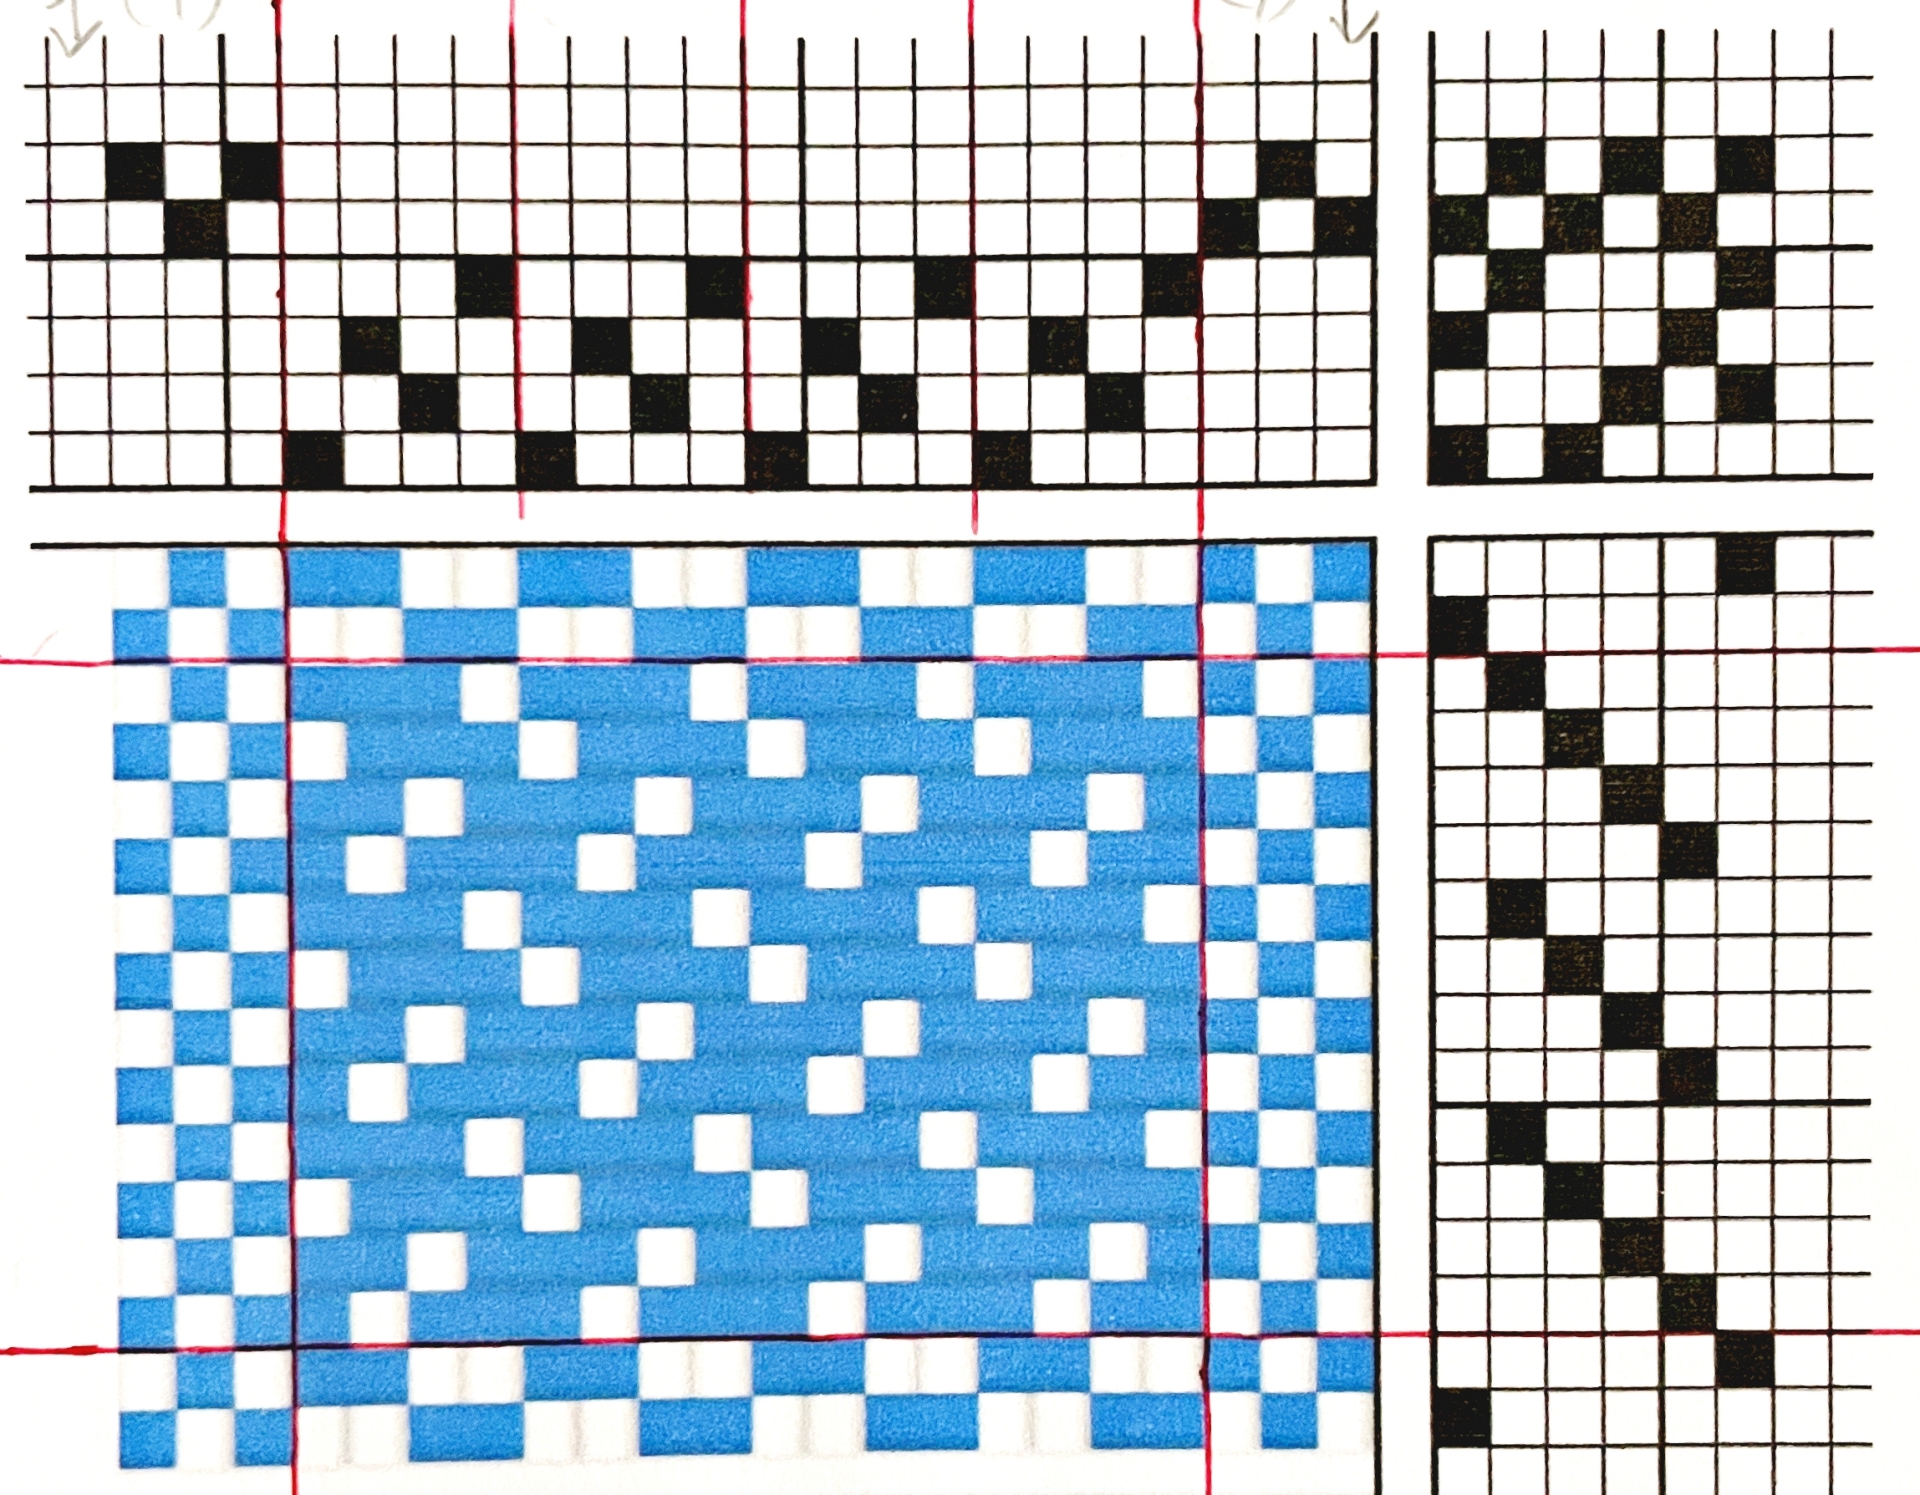
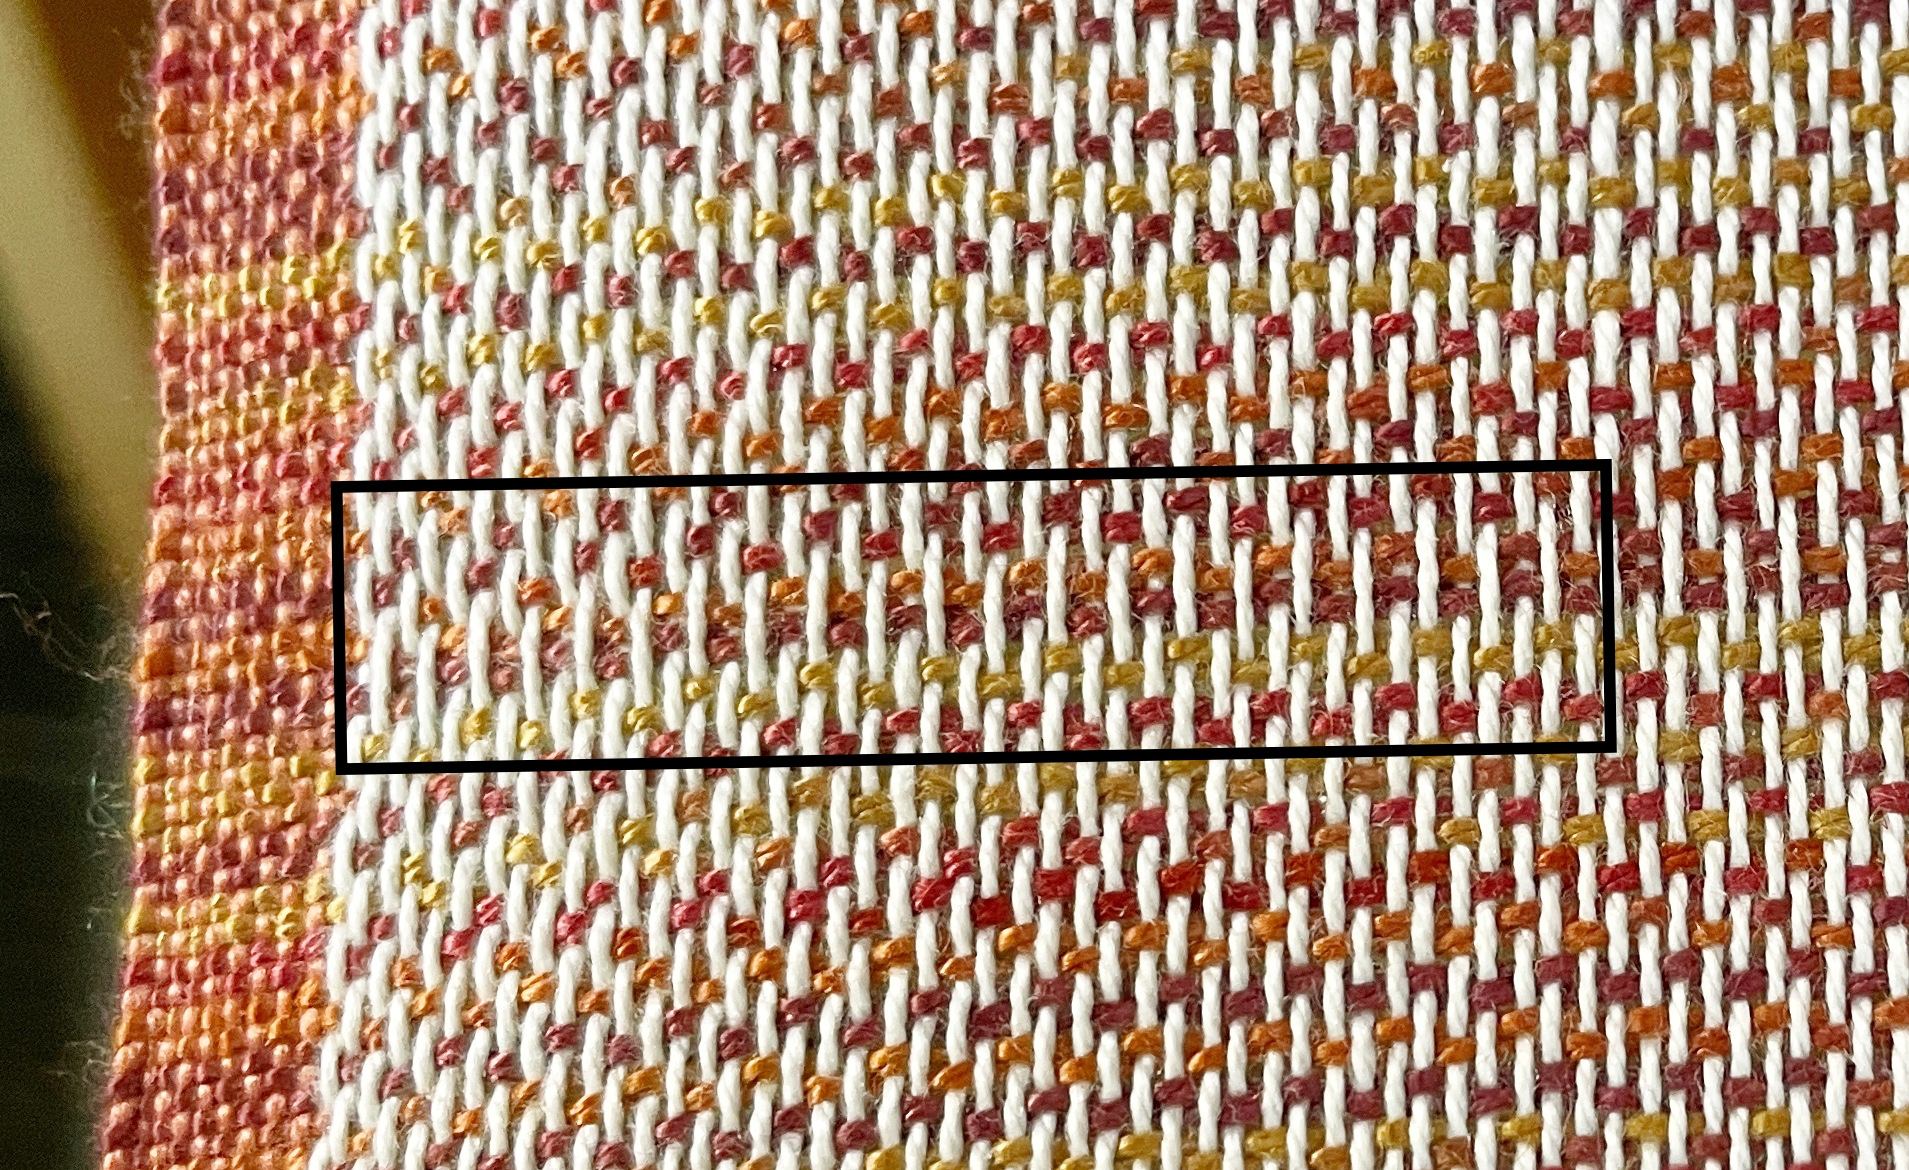
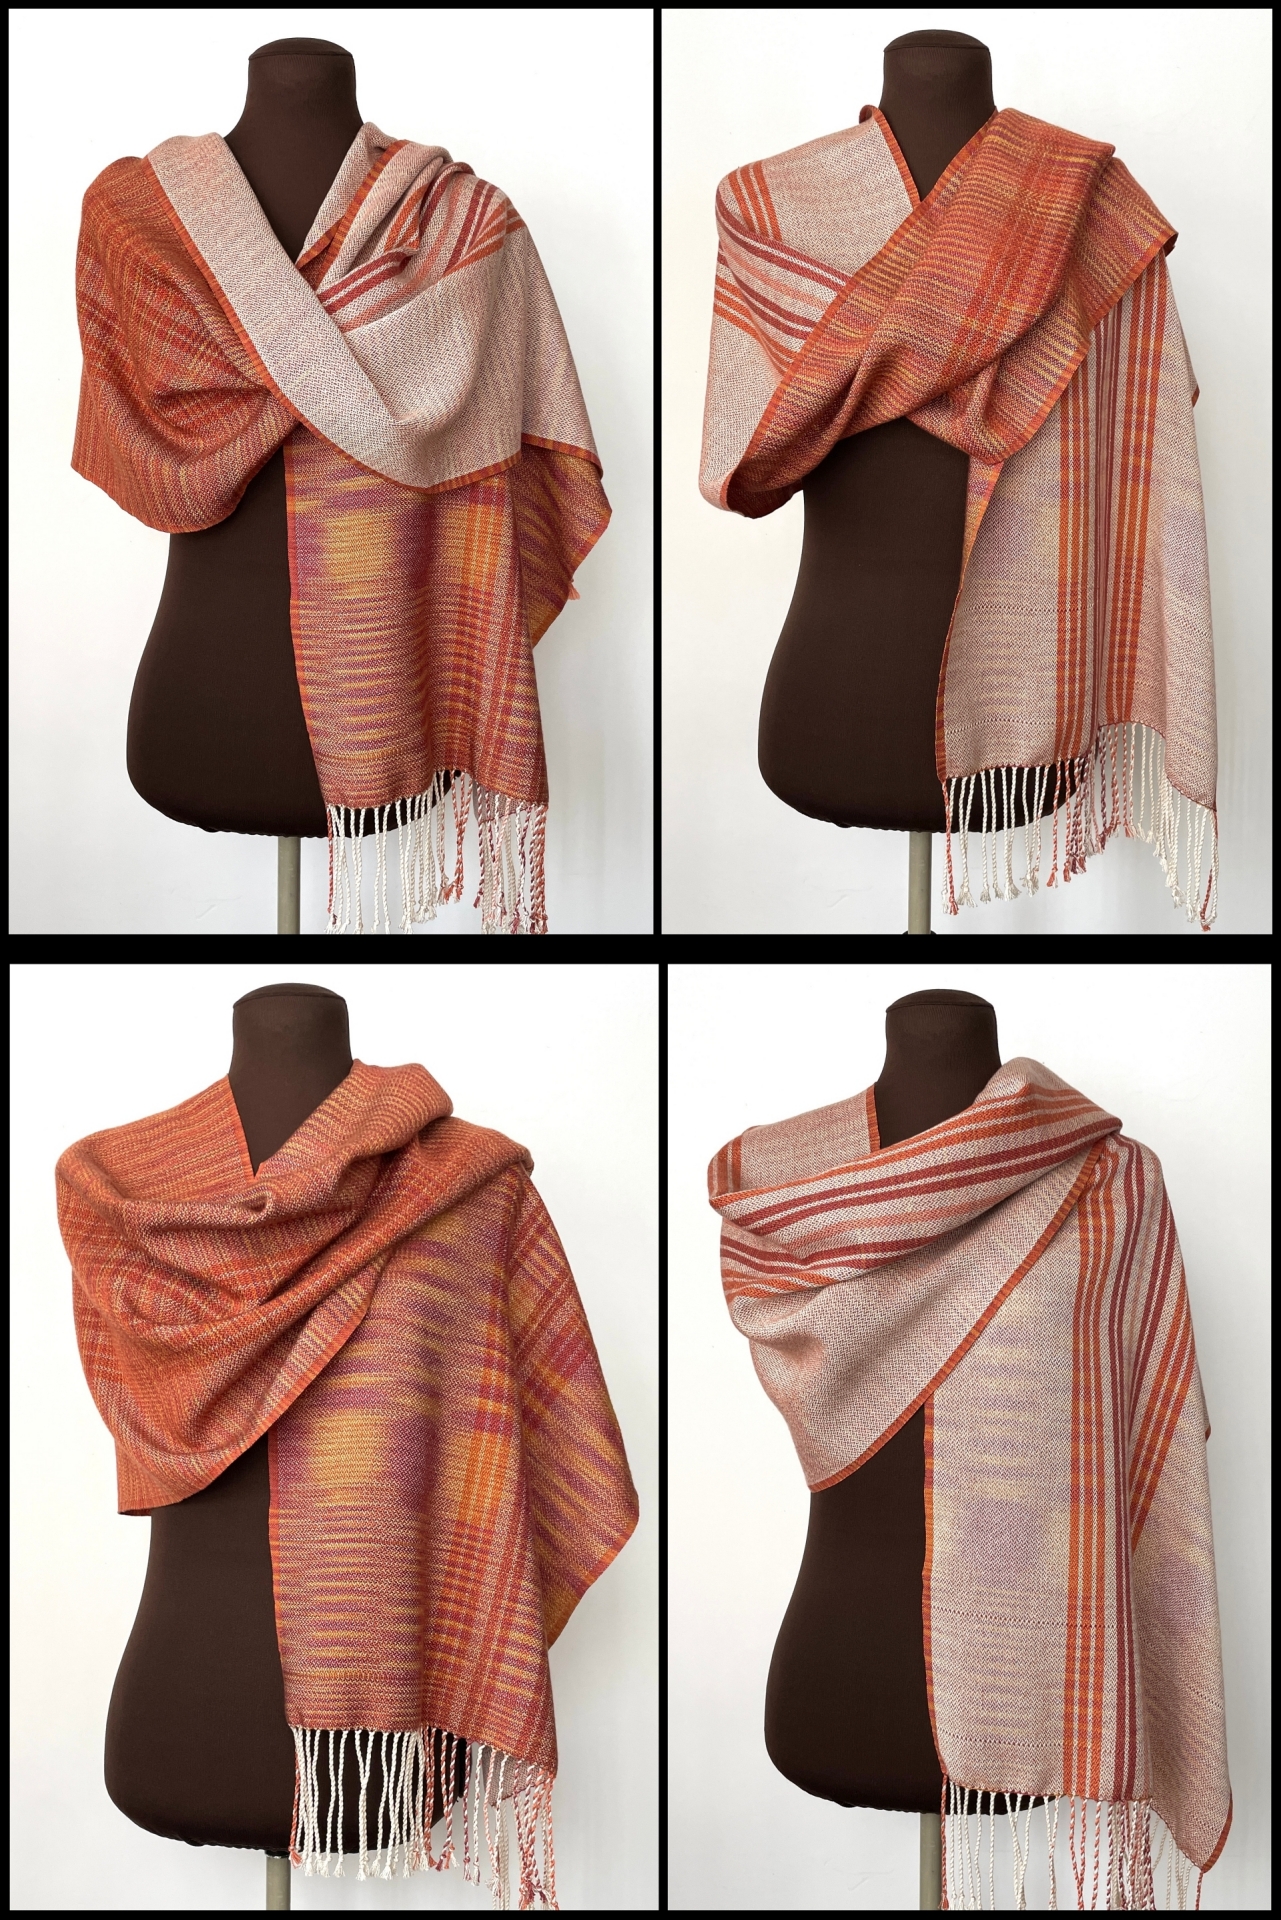
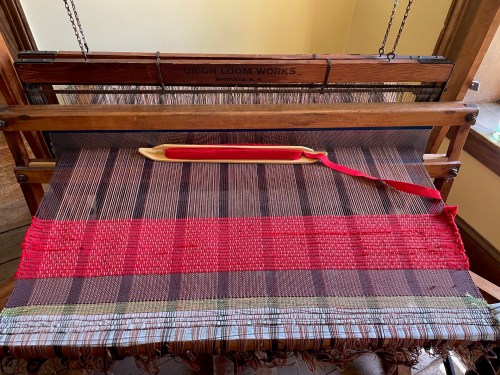
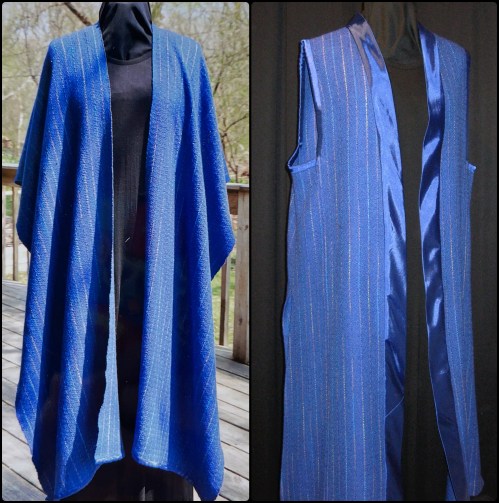
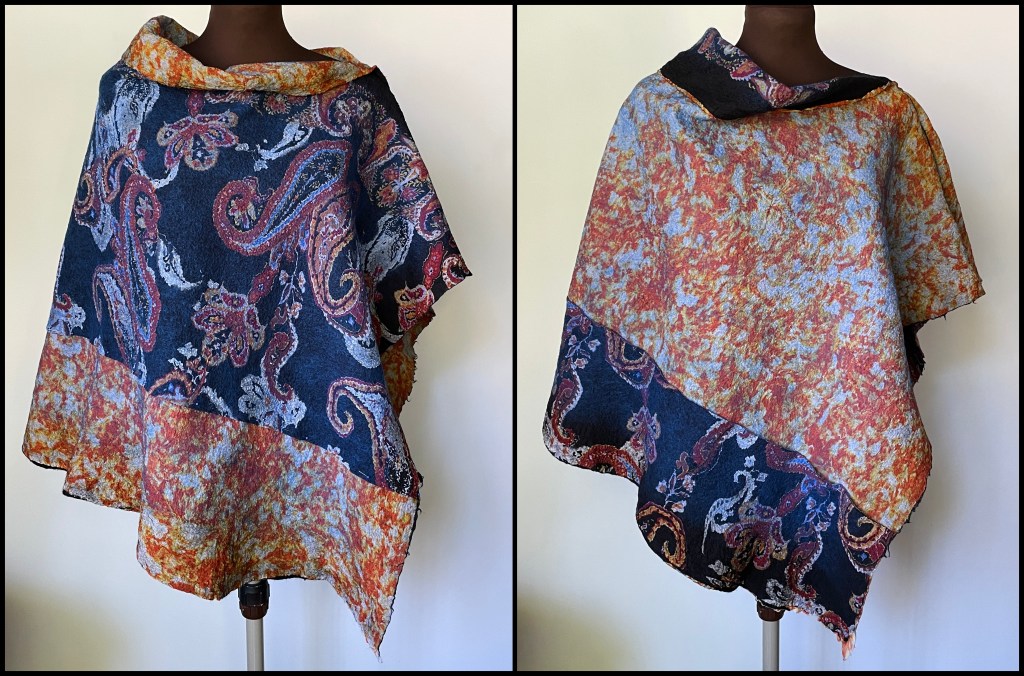
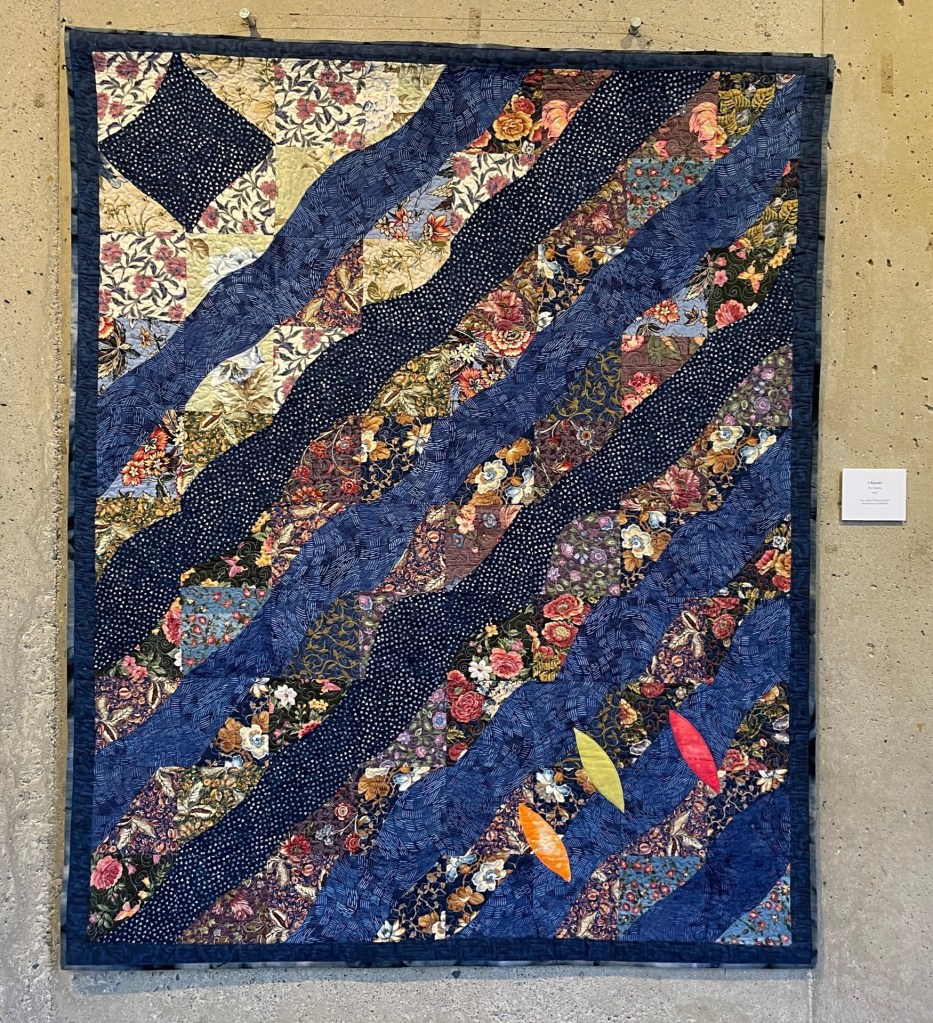
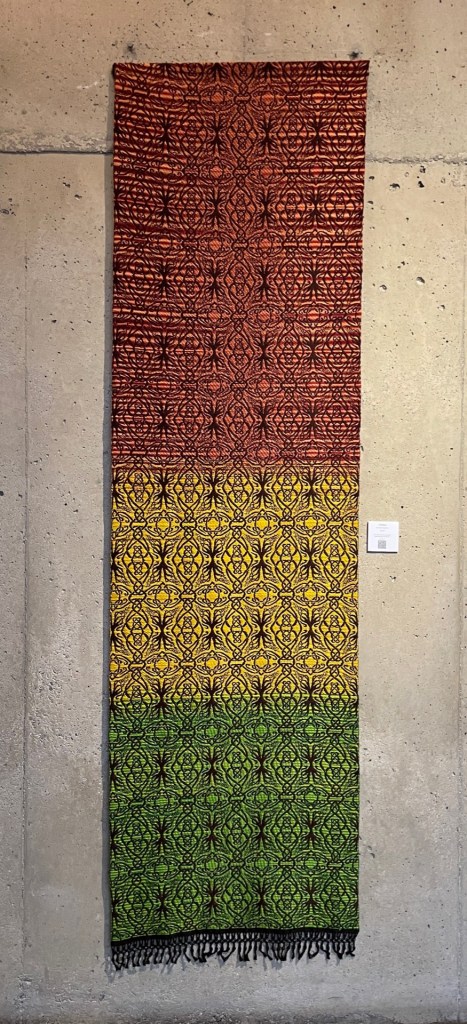
The last few years I’ve used a 3/1 twill threading – also called a ‘false damask’.
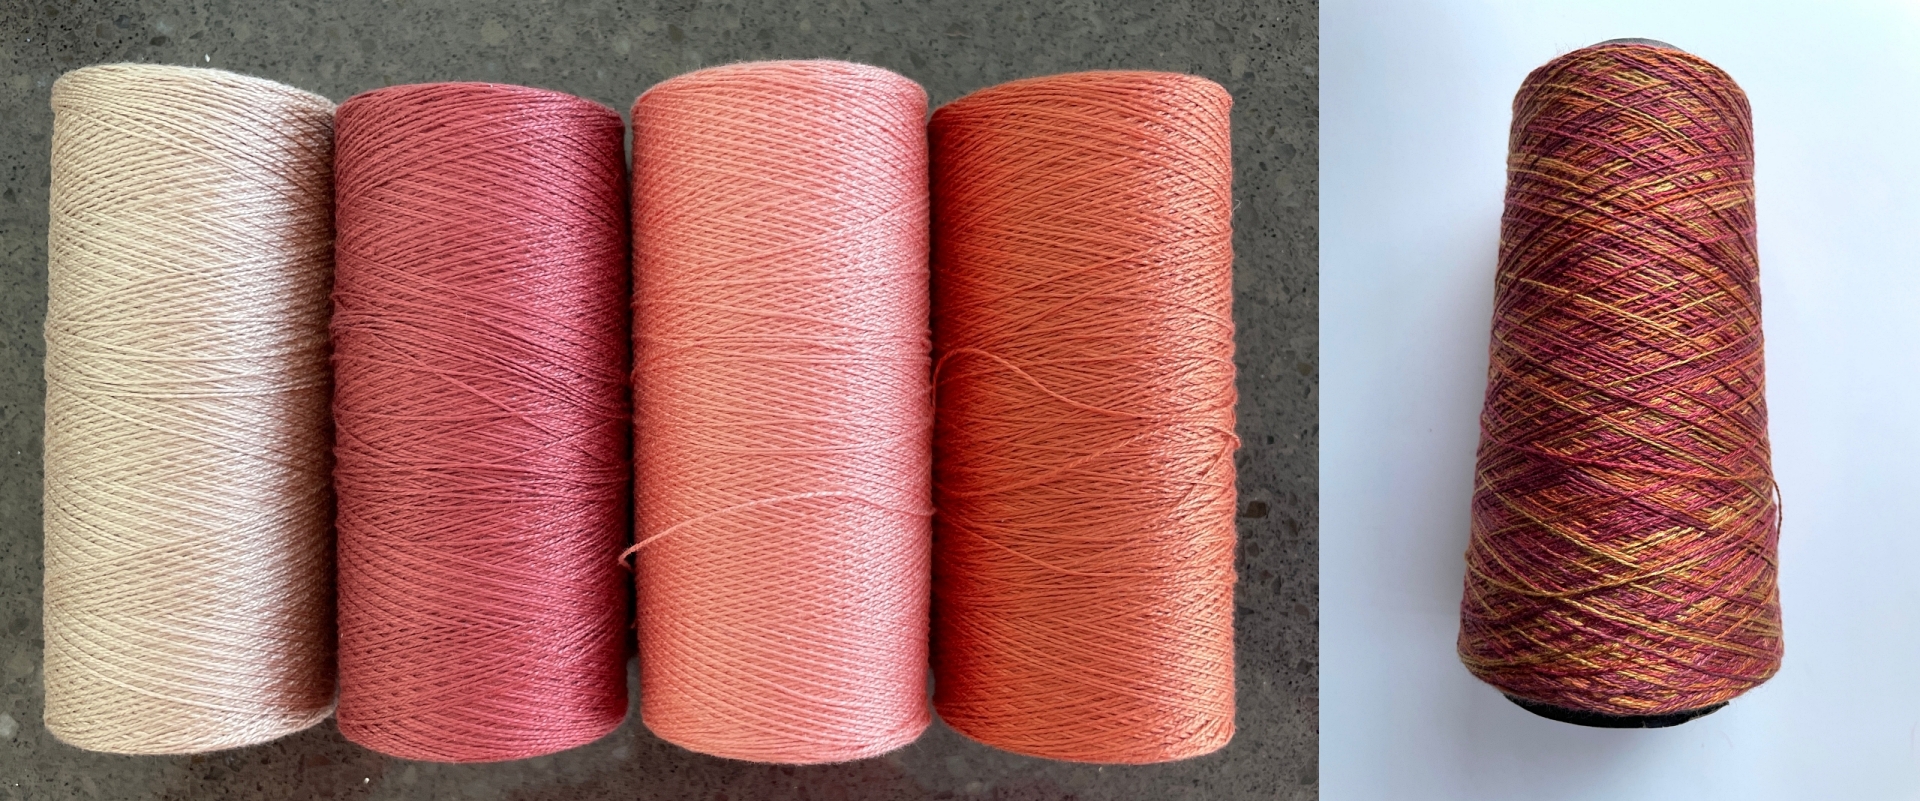
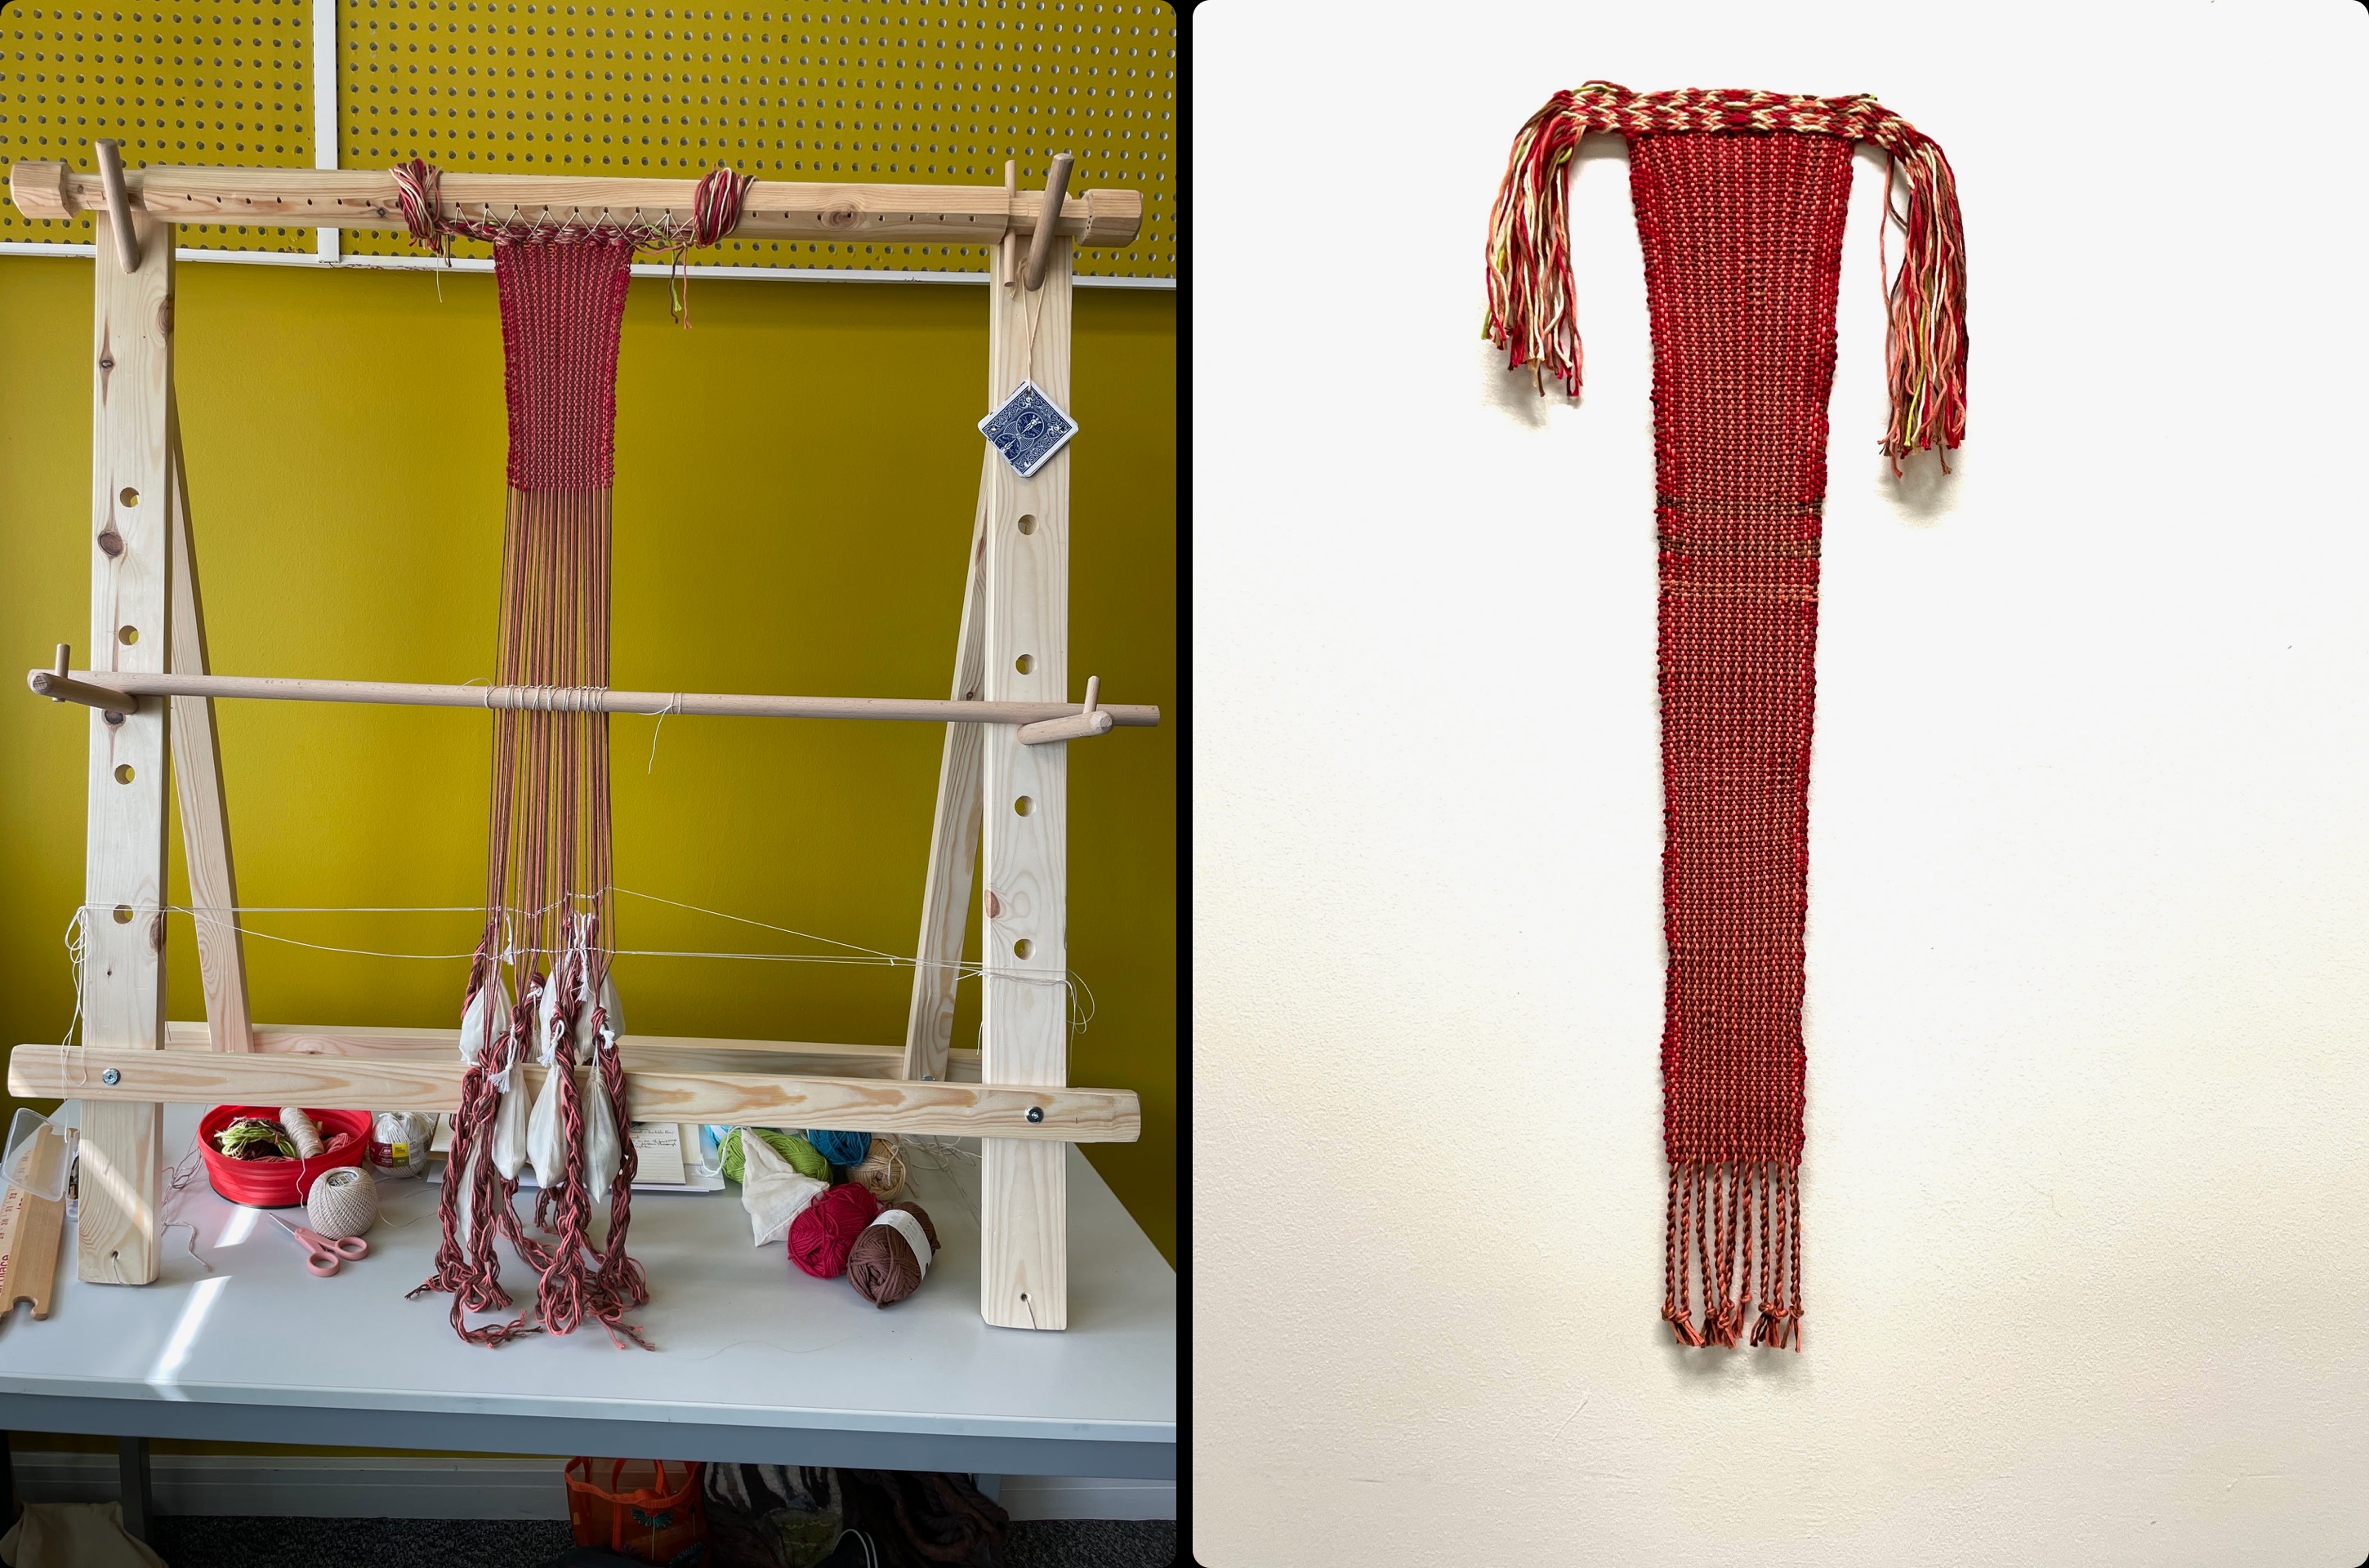
For the 2026 shawl I used cotton for the warp and space dyed tencel for the weft.
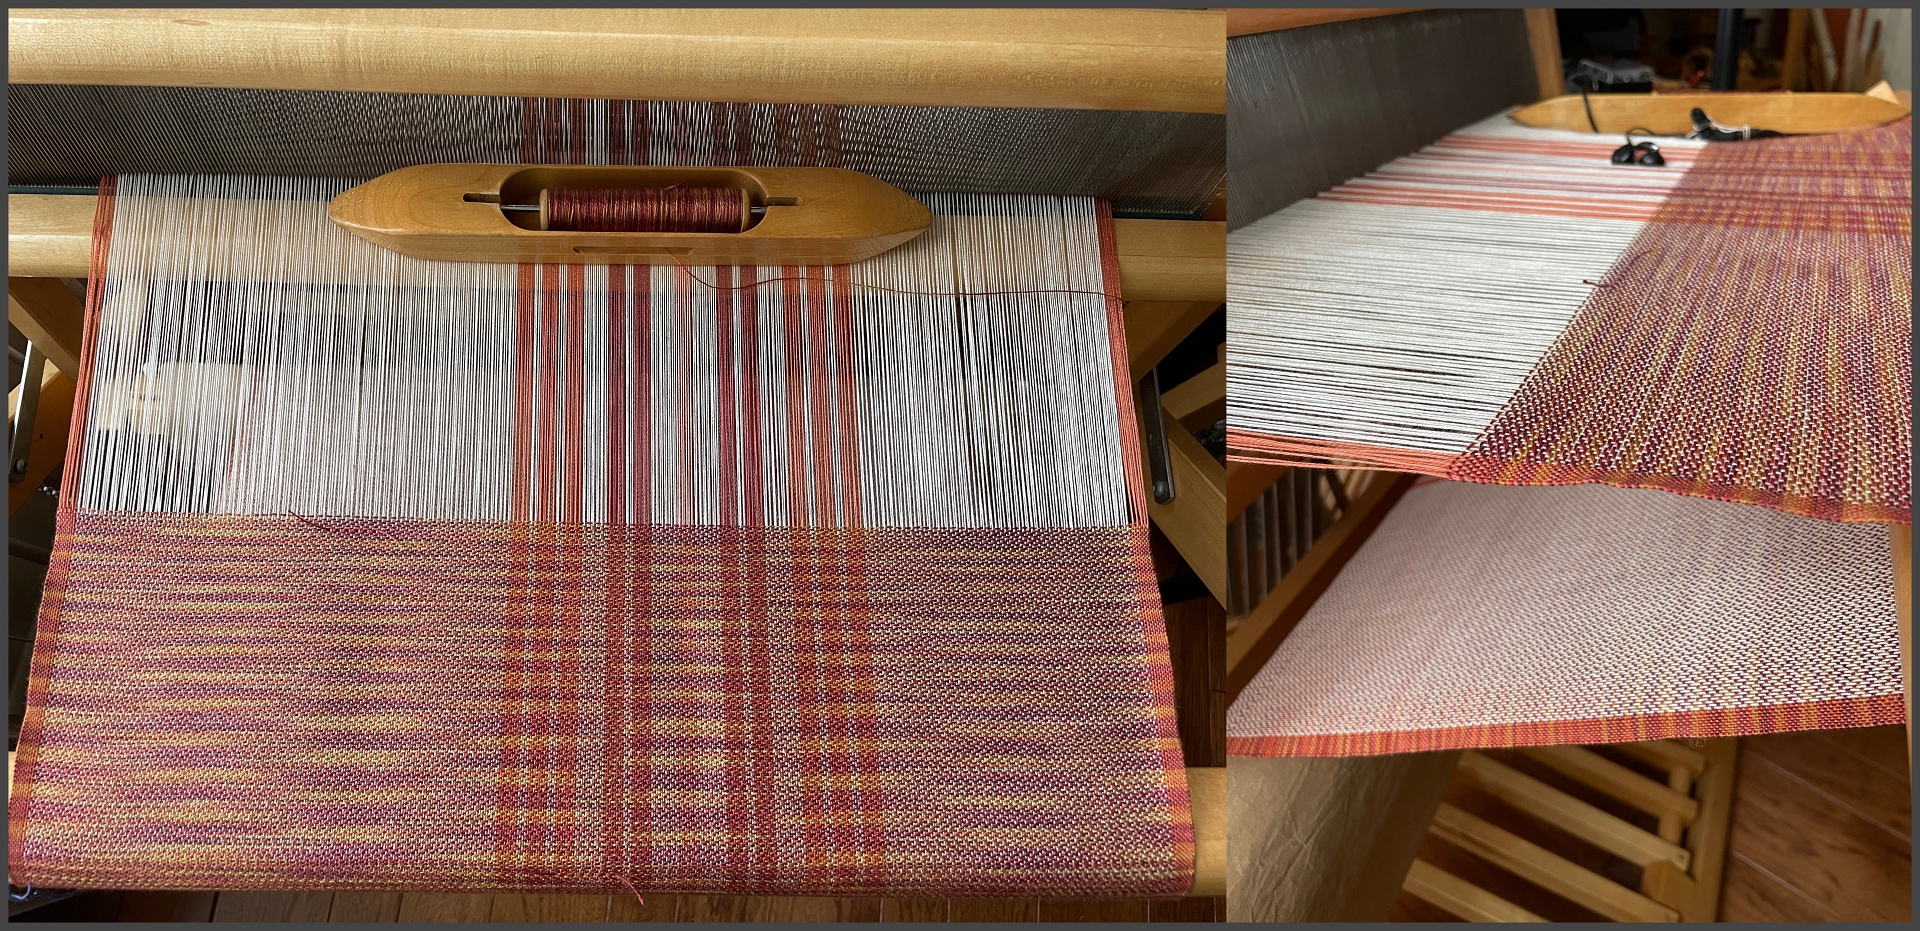
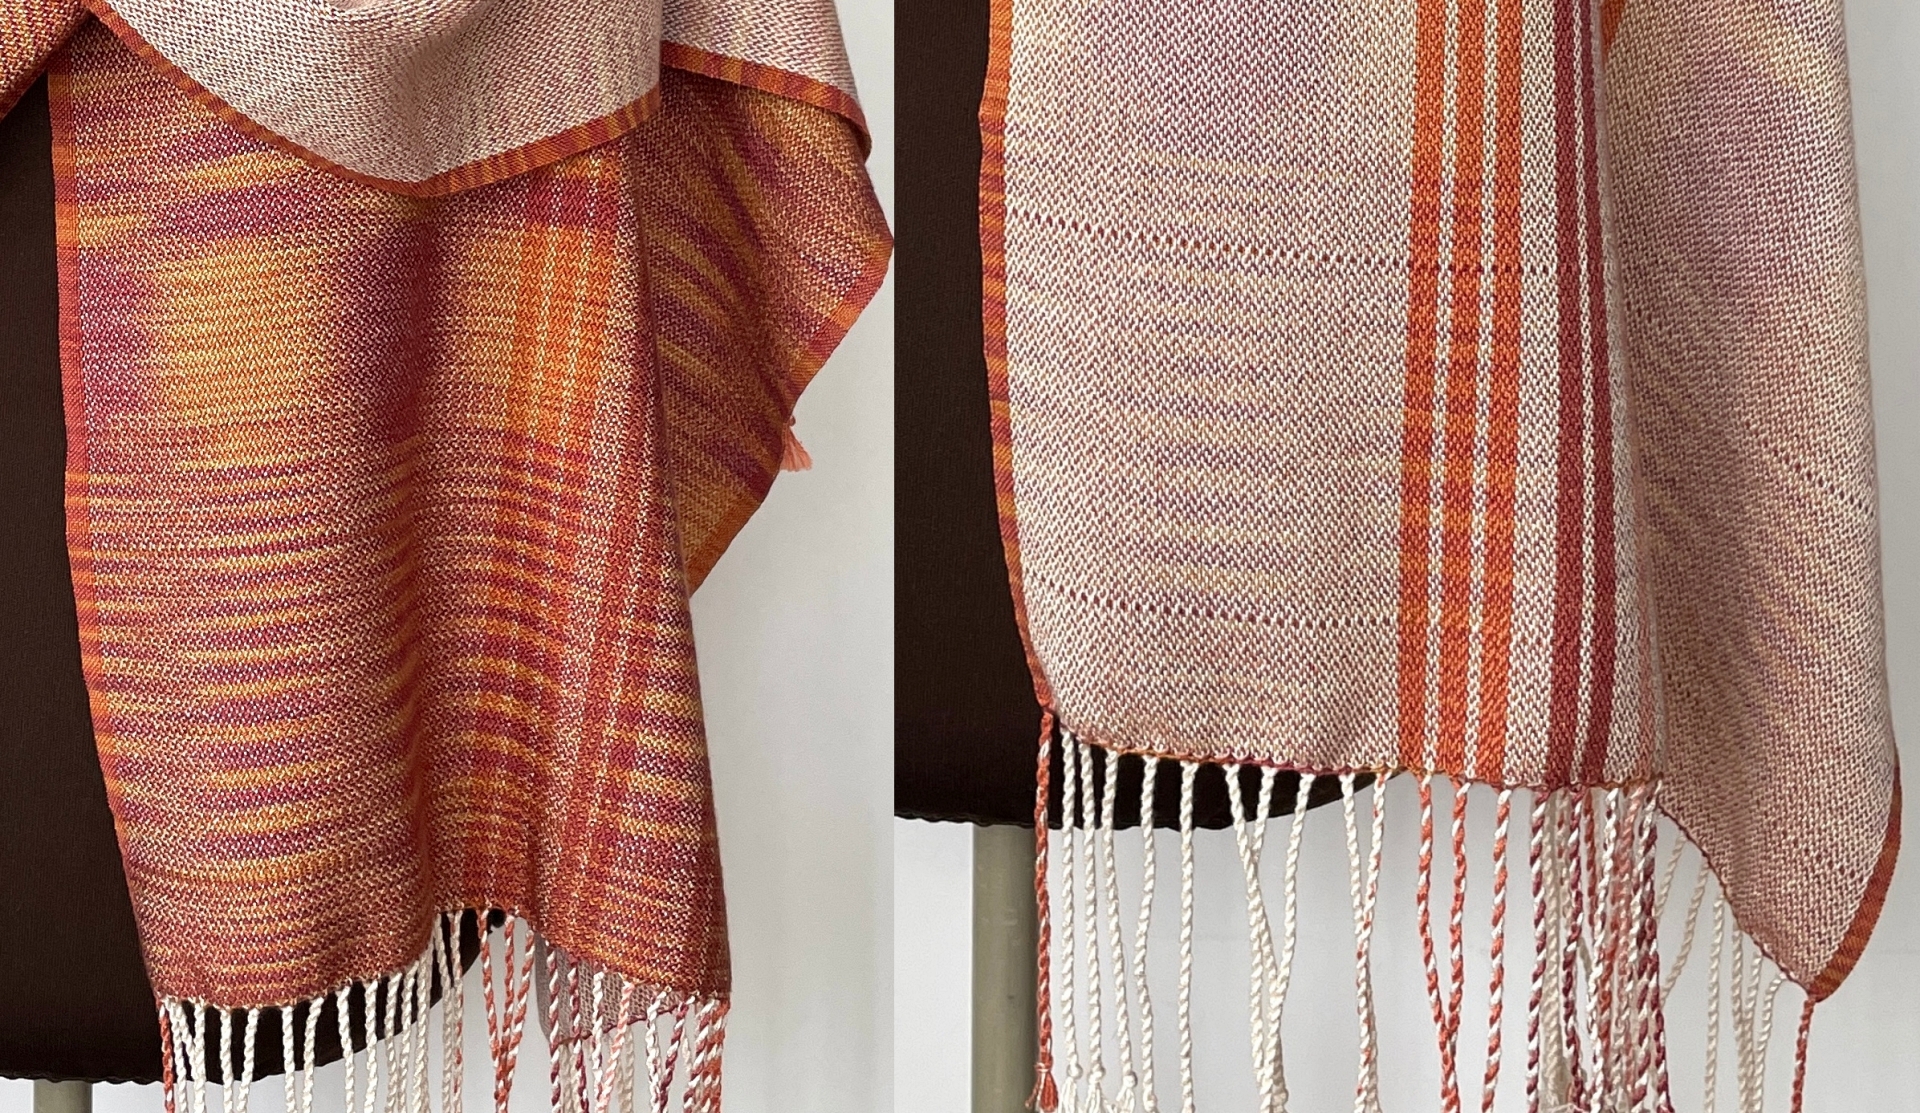
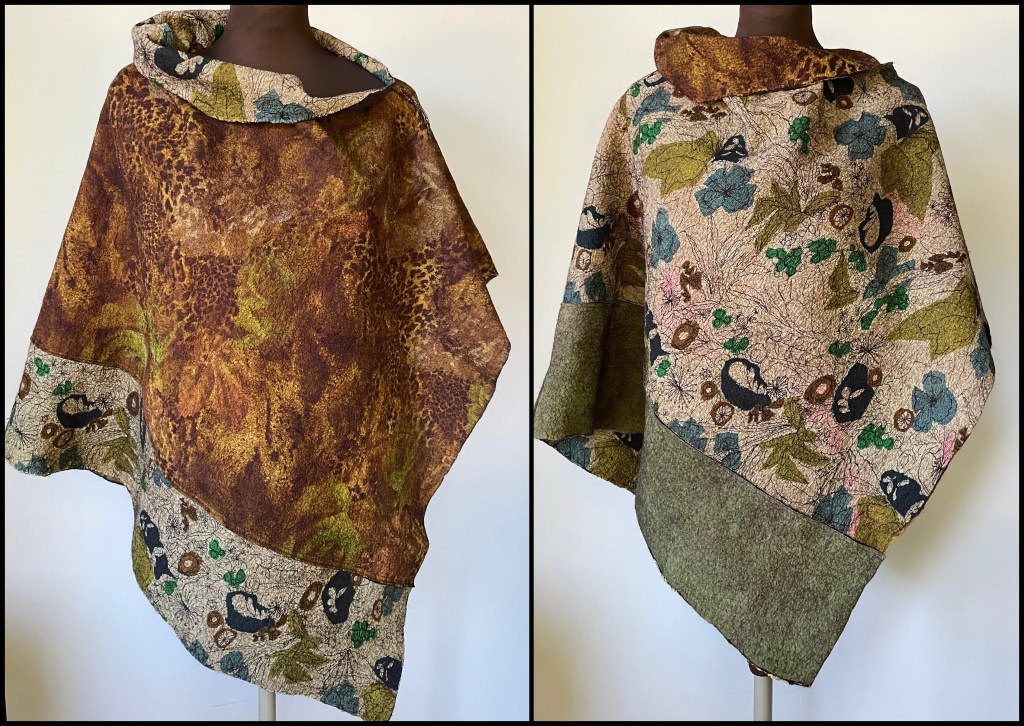
This threading creates a two-sided fabric with the warp dominant on one side and the weft dominant on the other.
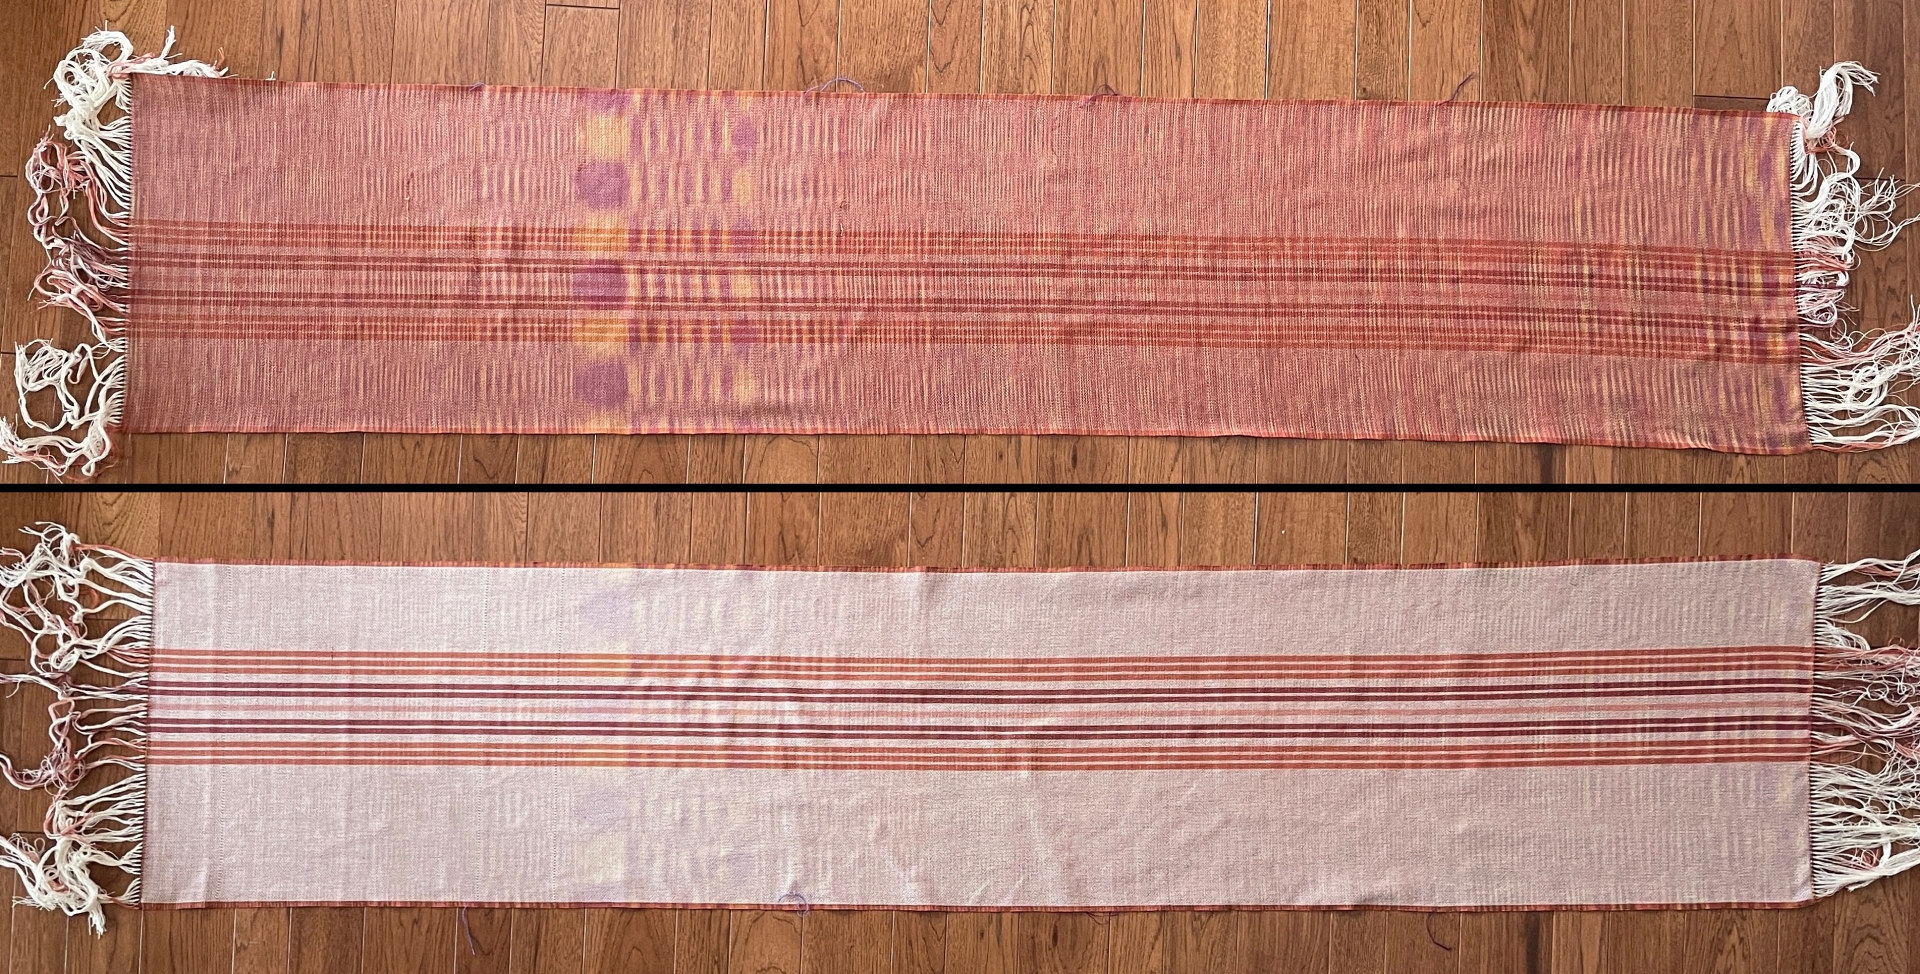
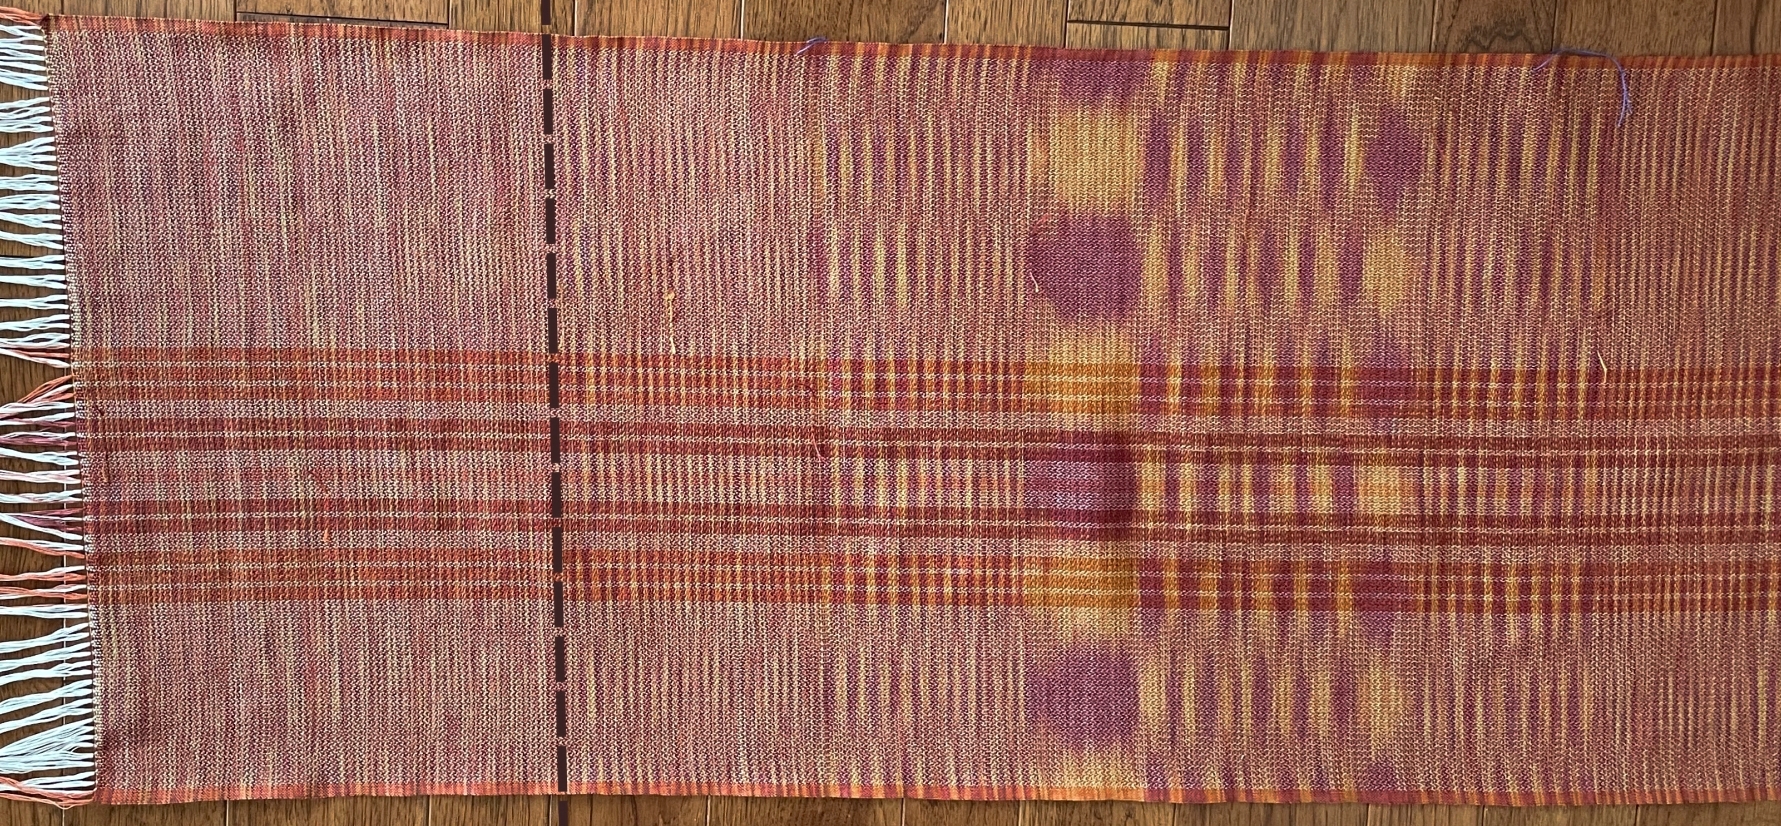
I was pleased with the dramatic difference between the warp and weft sides. But using space dyed yarns for the weft is always an adventure because the changes in color are not always the same size and it is not easy to see if the pattern has been shifting until it comes off the loom…..SURPRISE!
And it was not easy to see if there were any treadling errors on the white underside = OOPS!
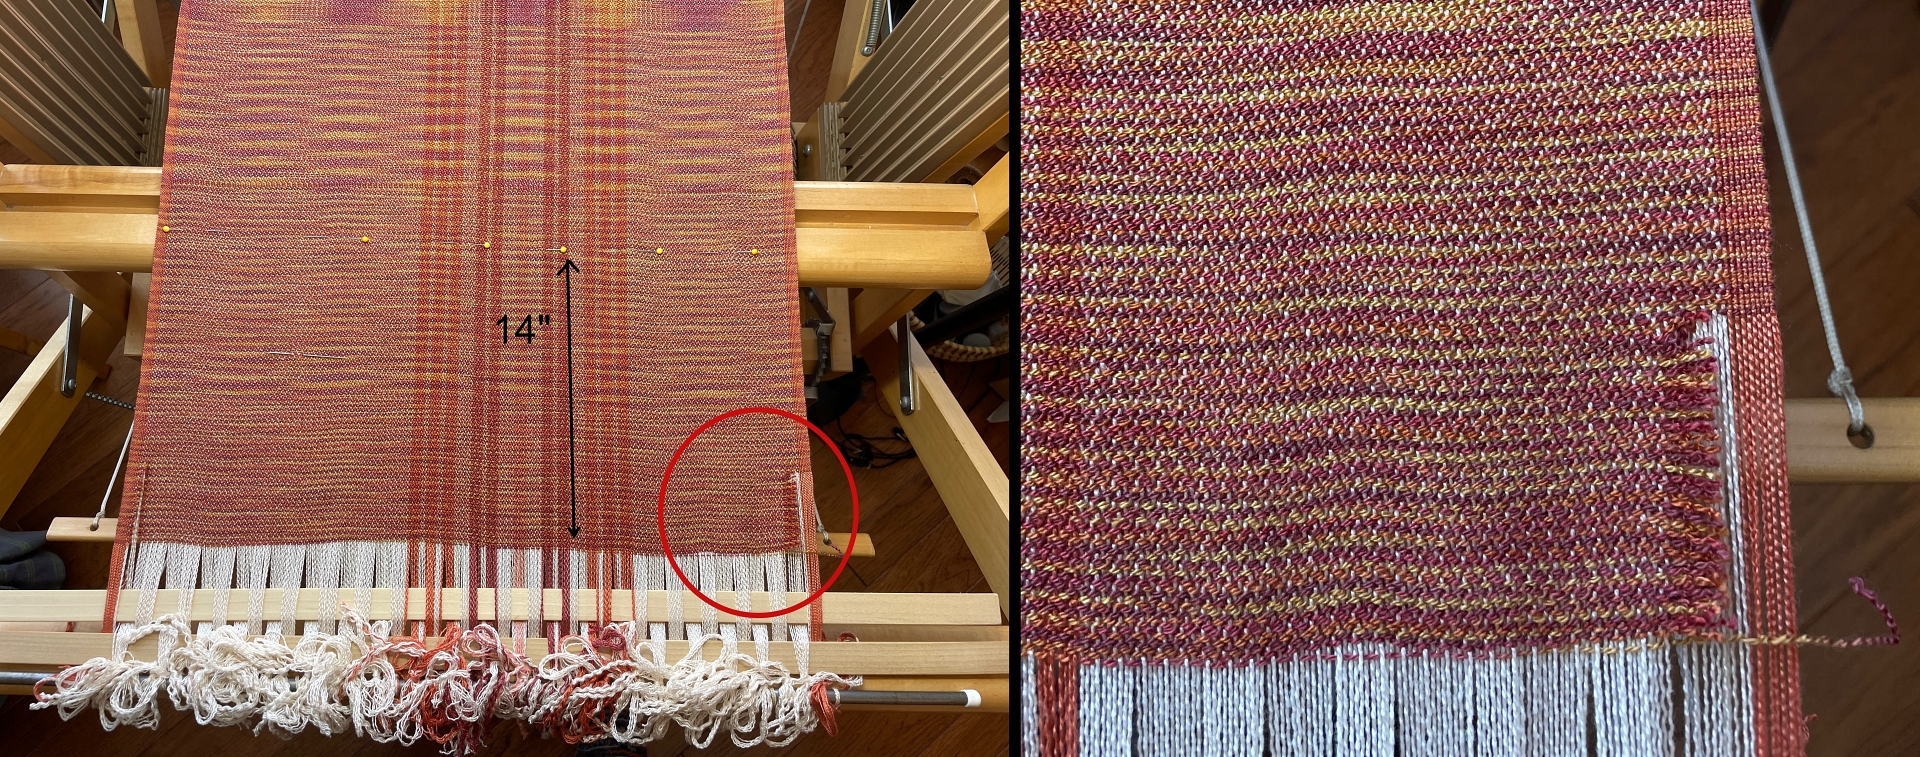
There were no easy fixes here so time to use the ancient technique used by artisans for centuries – incorporate technical errors into design elements. There was plenty of length on the shawl so I shortened it 14″ which removed one of the weaving errors and brought the other 2 and obvious change in weft color pattern closer to the end to become an accent feature.
I used the loom as a frame tying the warp to at the cloth beam, draped the shawl over the back beam and using weights to provide tension so I could CAREFULLY cut and remove each warp yarn without cutting the warp yarn.
It was a LOOOONG afternoon but mission accomplished!
Another year comes to end. It’s been an exciting year filled with a wide range of fiber activities!
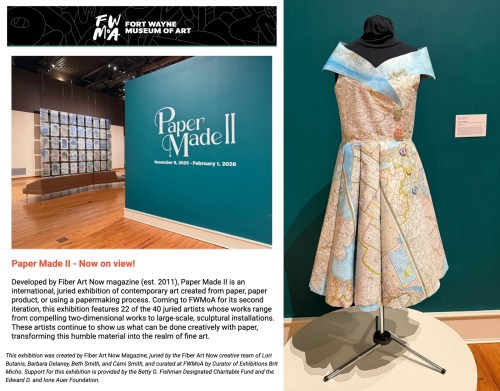
**More ribbon and map weaving **Weaving on a Warp Weight Loom at the AGWSD Summer School **Creating woven and felt pieces for AAFG exhibits & sales **Weaving a rag rug for historic Cobblestone Farm **Presenting wet felting demonstrations and workshops **Sharing a folktale from SriLanka in The Journal autumn edition **Attending AAFG workshops –Encaustic Wax & Fiber –Creative Approaches to Visual Design –Needle Felting **Couture Cartography map dress made the rounds this year: –Part of the In Style exhibit at the Gutman Gallery. –Selected to be one of 40 featured pieces in FiberArt Now Magazine fall edition – Paper Made II. –Selected for the Paper Made II exhibit at the Fort Wayne Museum of Art.
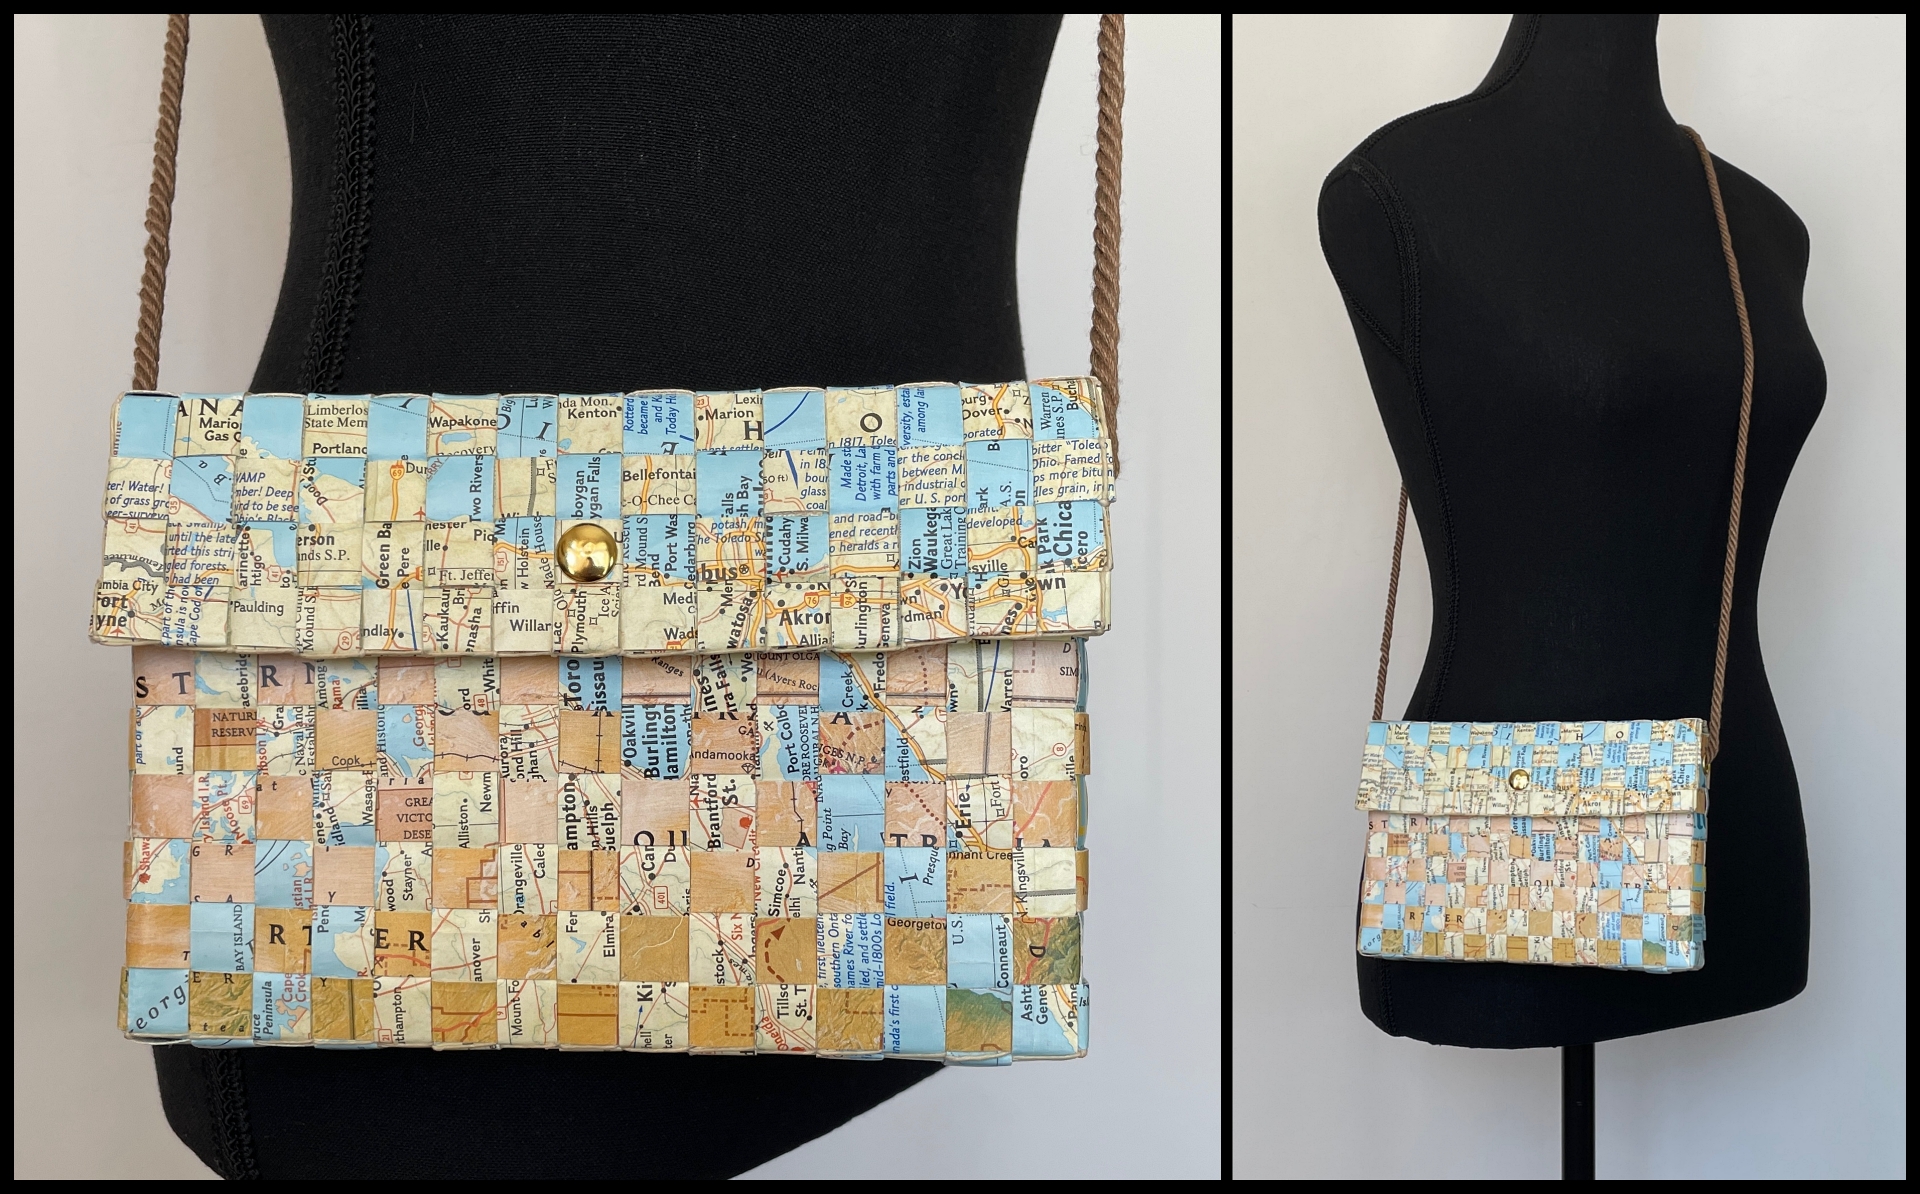
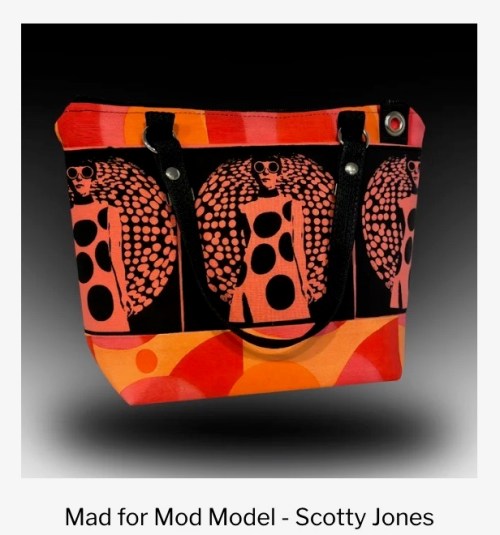
Marcia’s purse
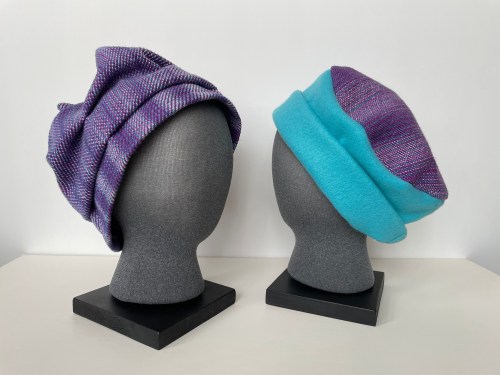
Hats for Anne
What to do with fabric scraps….
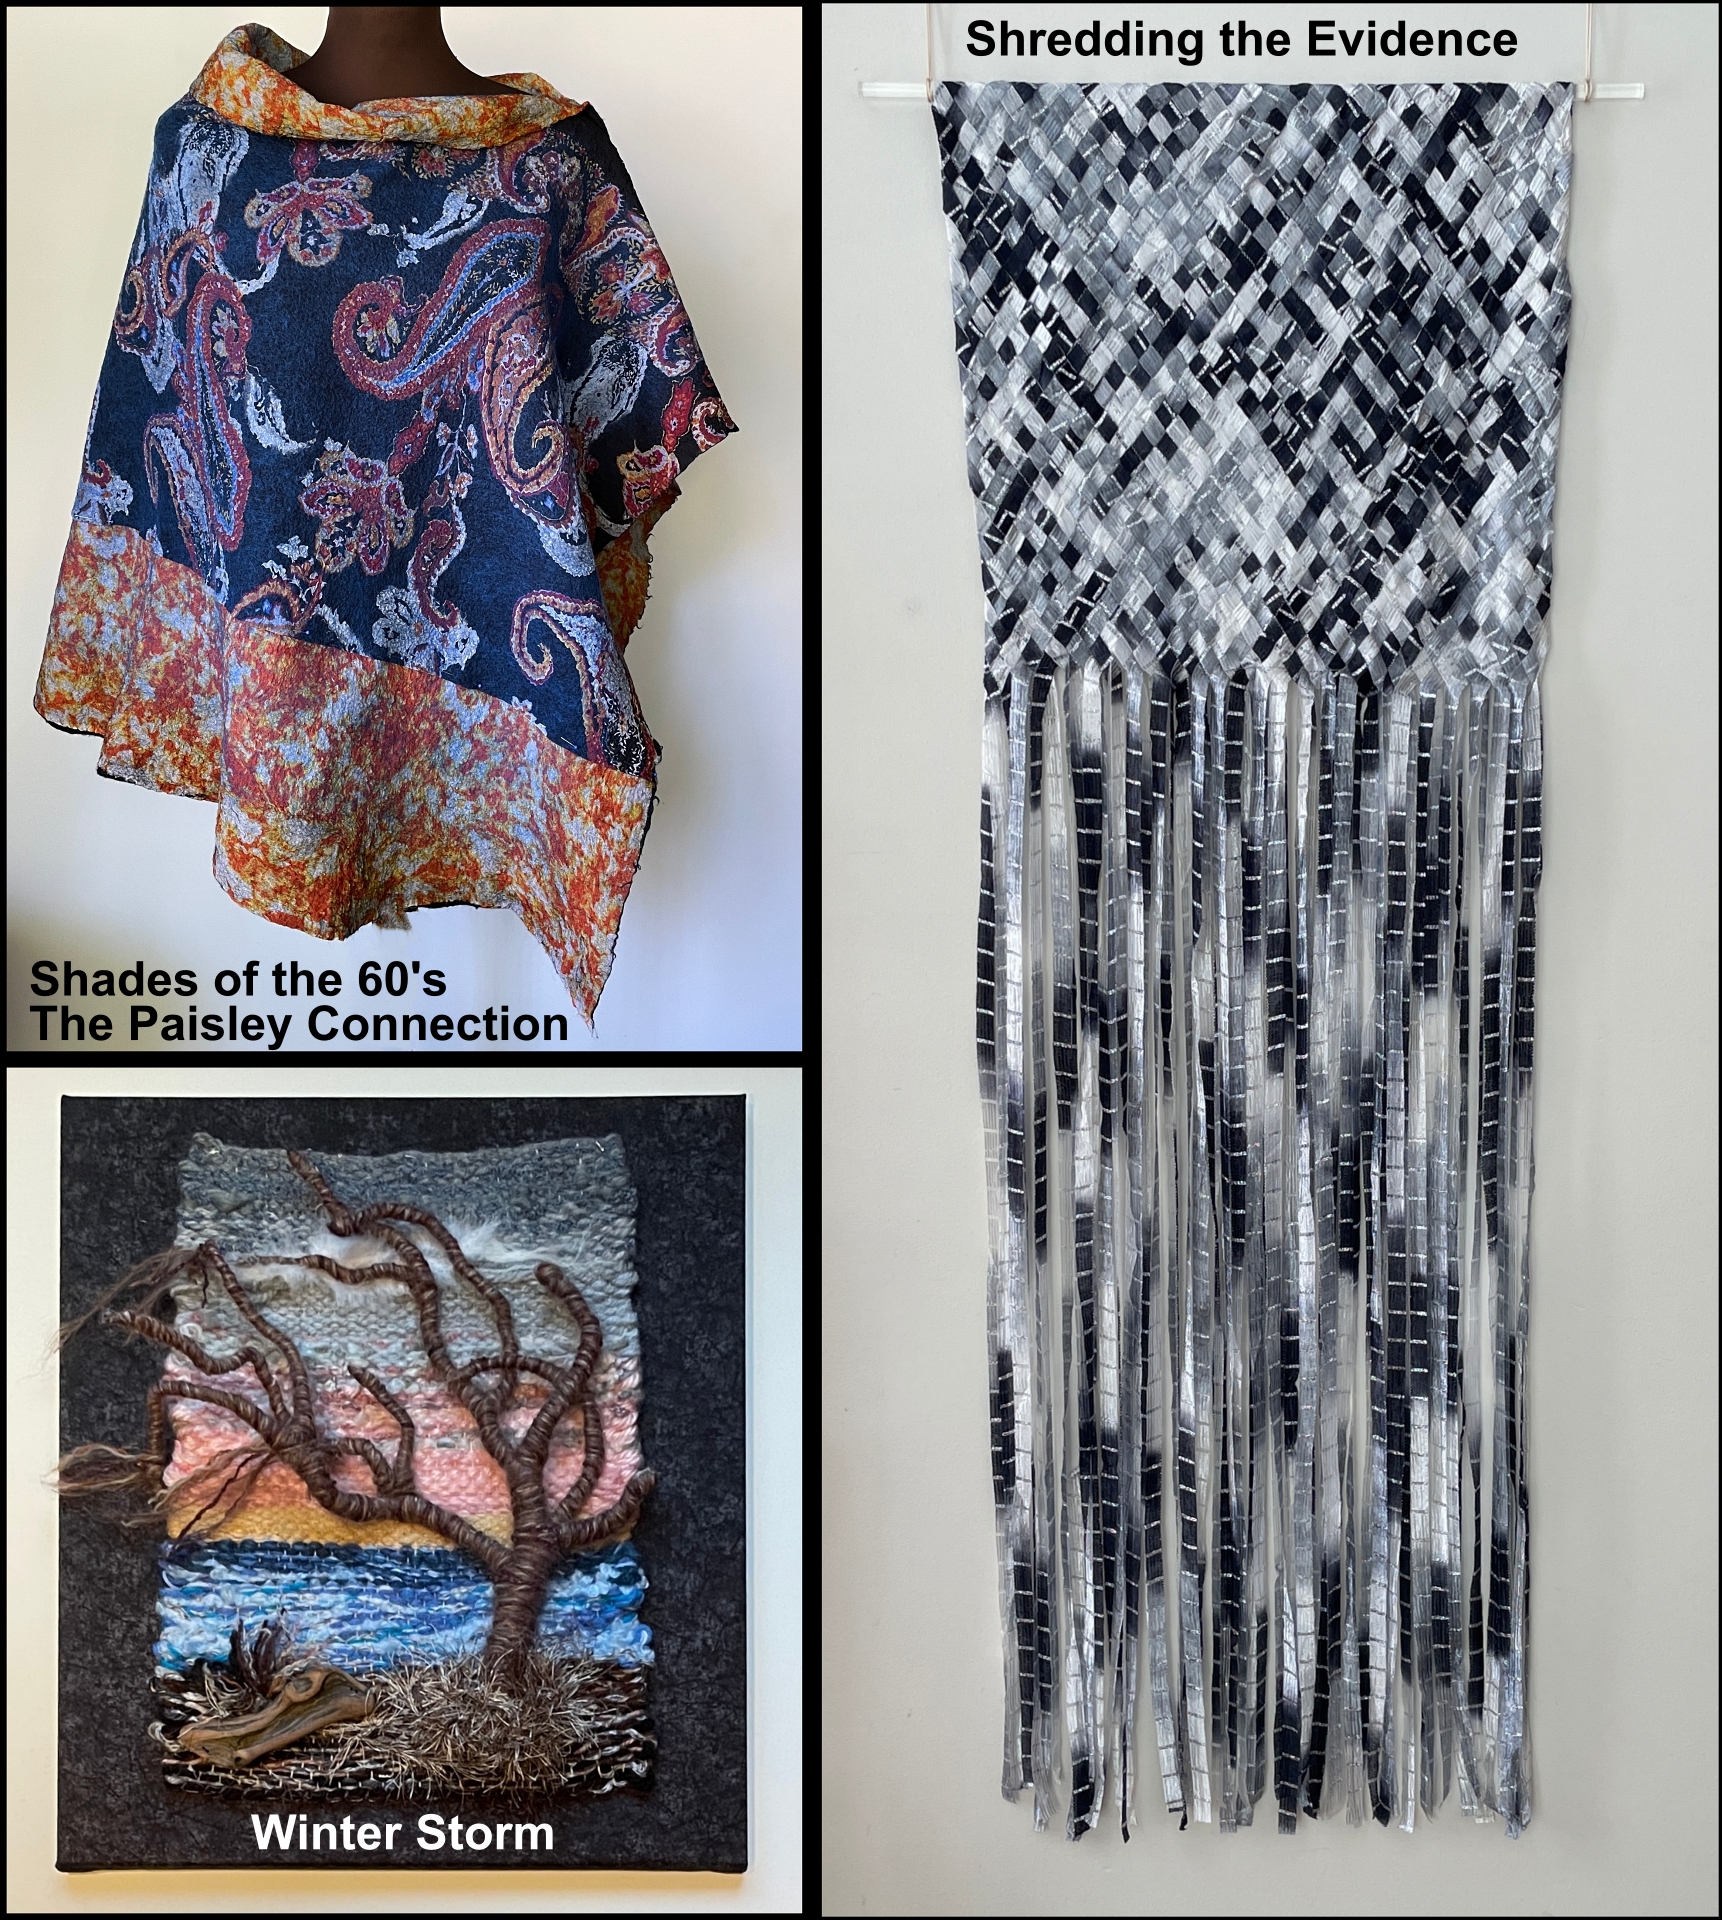
Shredding the Evidence
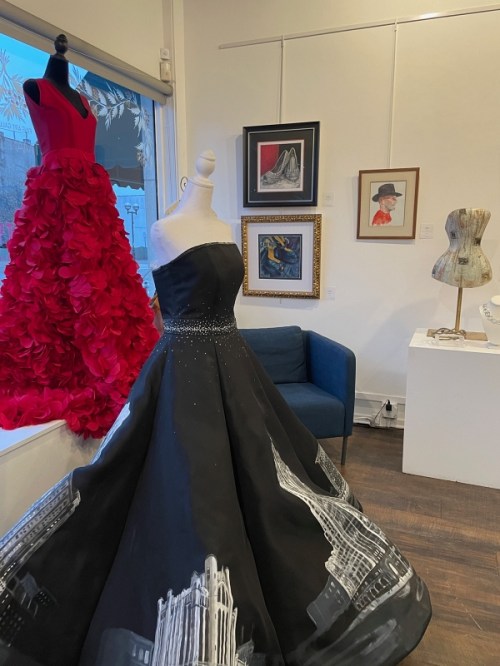
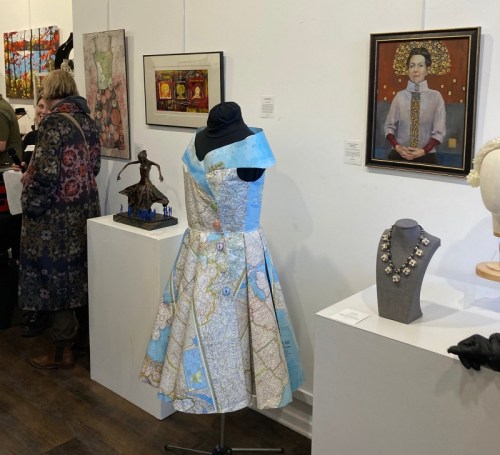
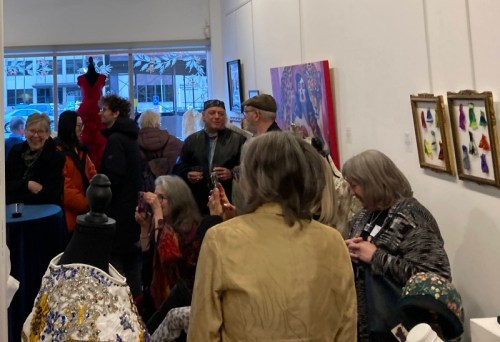
In-Style Exhibit – Gutman Gallery April 4 – May 17, 2025
AAFG Encaustic Wax workshop
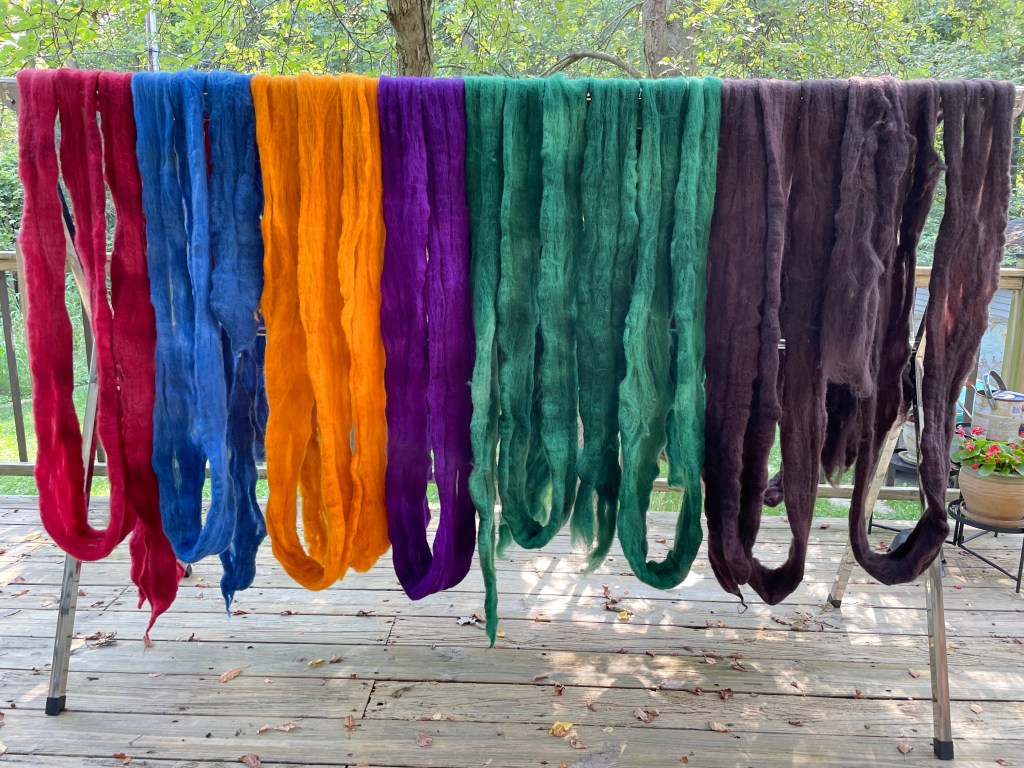
Backyard Dyeing
Weaving on a Warp Weighted Loom
Summer School Samples 2025
Beware the Will-o’-the-Wisps
AAFG Creative Approaches to Visual Design workshop
FiberArt Now – Fall2025 Paper Made II
FWMoA Paper Made II – Nov 9, 2025 – Feb 1, 2026
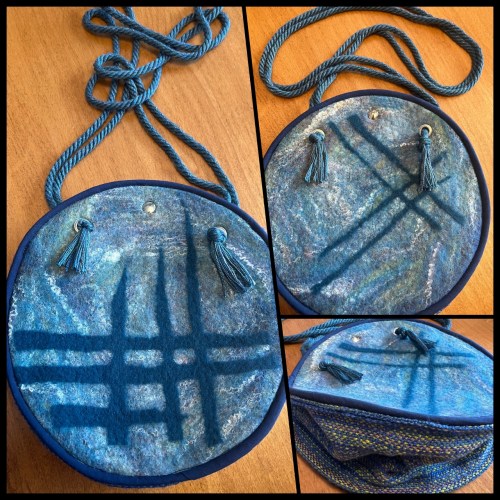
AAFG Holiday Sale purses
AAFG Needle Felting workshop
The Journal for Weavers, Spinners, and Dyers -Autumn 2025 – The Cotton Issue
Fiber Art Now —Paper Made is returning for a second year! Enter your 2D or 3D artwork for Paper Made II Artwork must be made primarily from paper or a paper product or created using a paper-making process. Juried selections will be featured in the fall 2025 issue of Fiber Art Now and will be eligible for the on-site exhibition at the Fort Wayne Museum of Art in Fort Wayne, Indiana, on view November 8, 2025 through February 1, 2026.
FellowAnn Arbor Fiberarts Guildmember, Jan Frank, sent me the above call for submissions notice. “Thought you might like to see this. What about the map dress?” I submitted Couture Cartography.
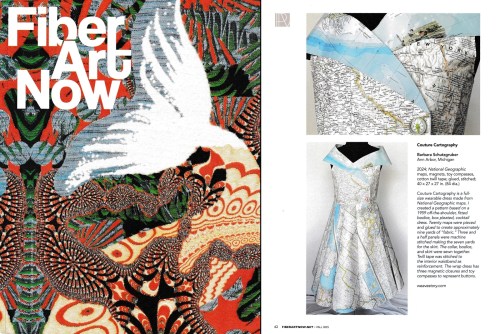
Couture Cartography was accepted to be one of 40 juried pieces featured in theFall Issue of Fiber Art Now. The 40 pieces selected are amazing and highlights the broad scope of creativity you can achieve working with paper.
Couture Cartography was also selected to part of the Paper Made II in-person exhibit at theFort Wayne Museum of Artin Fort Wayne, Indiana.
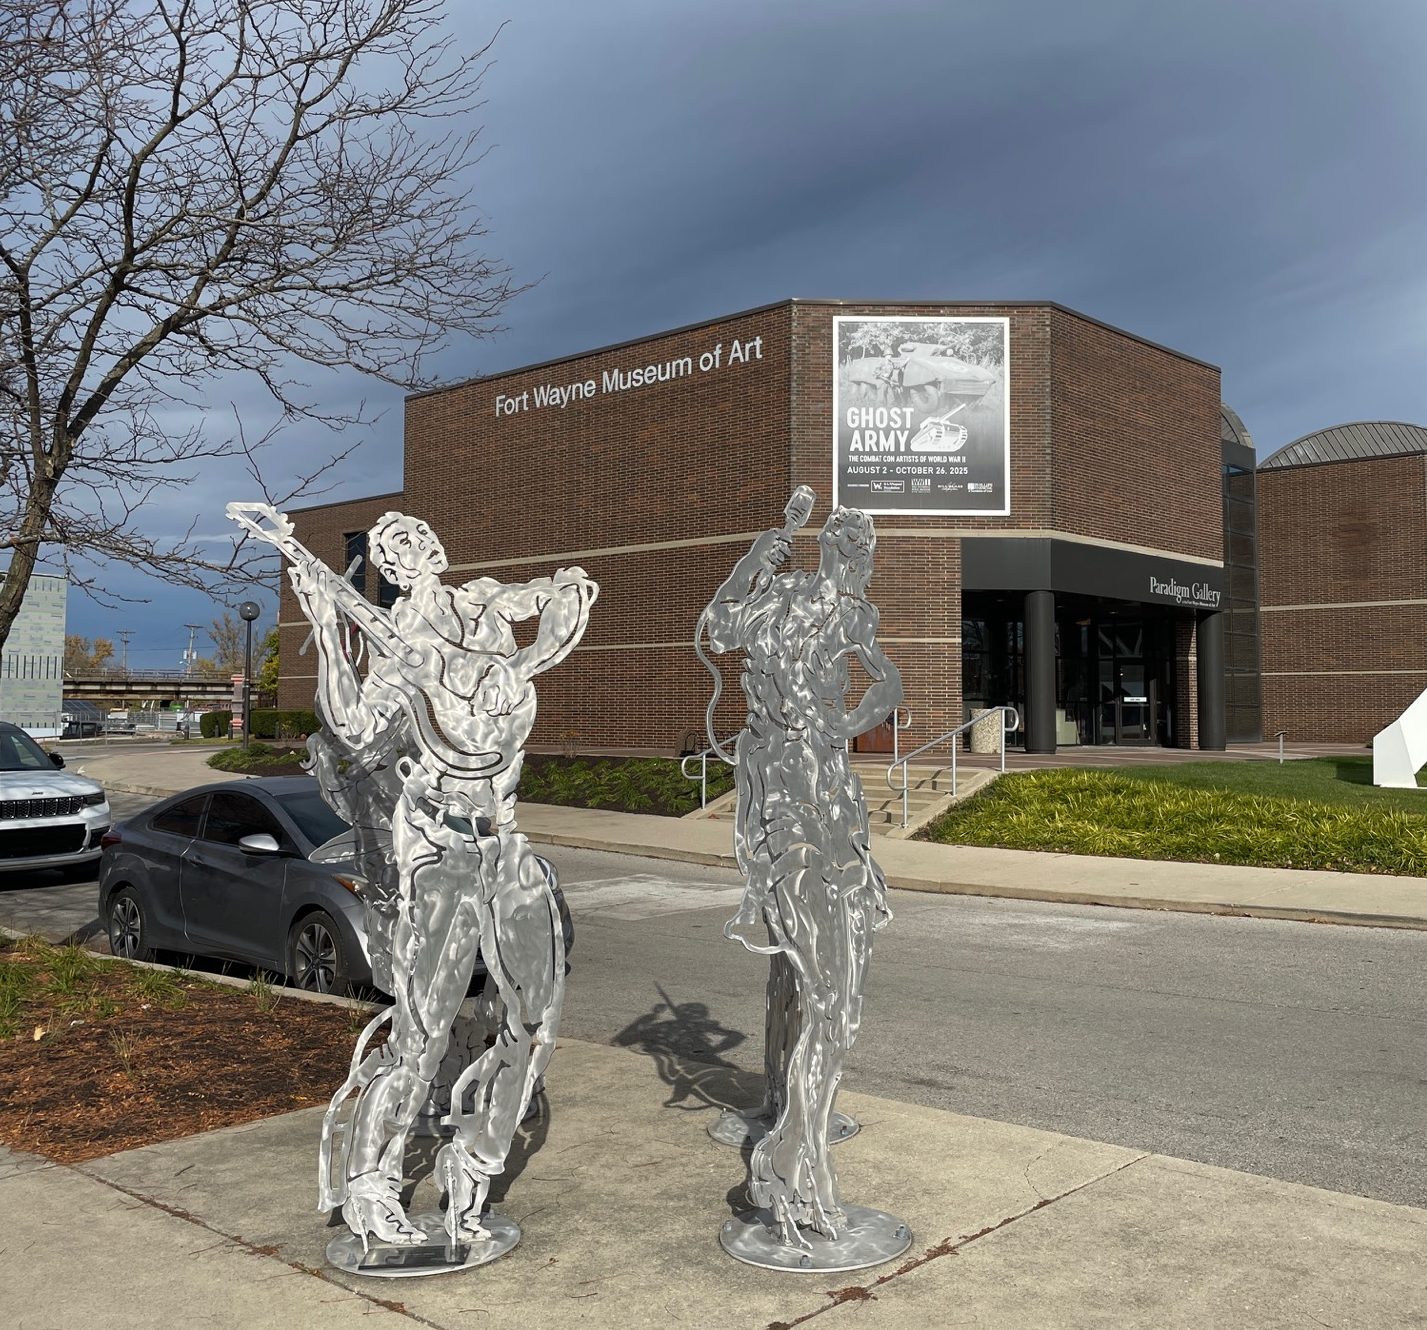
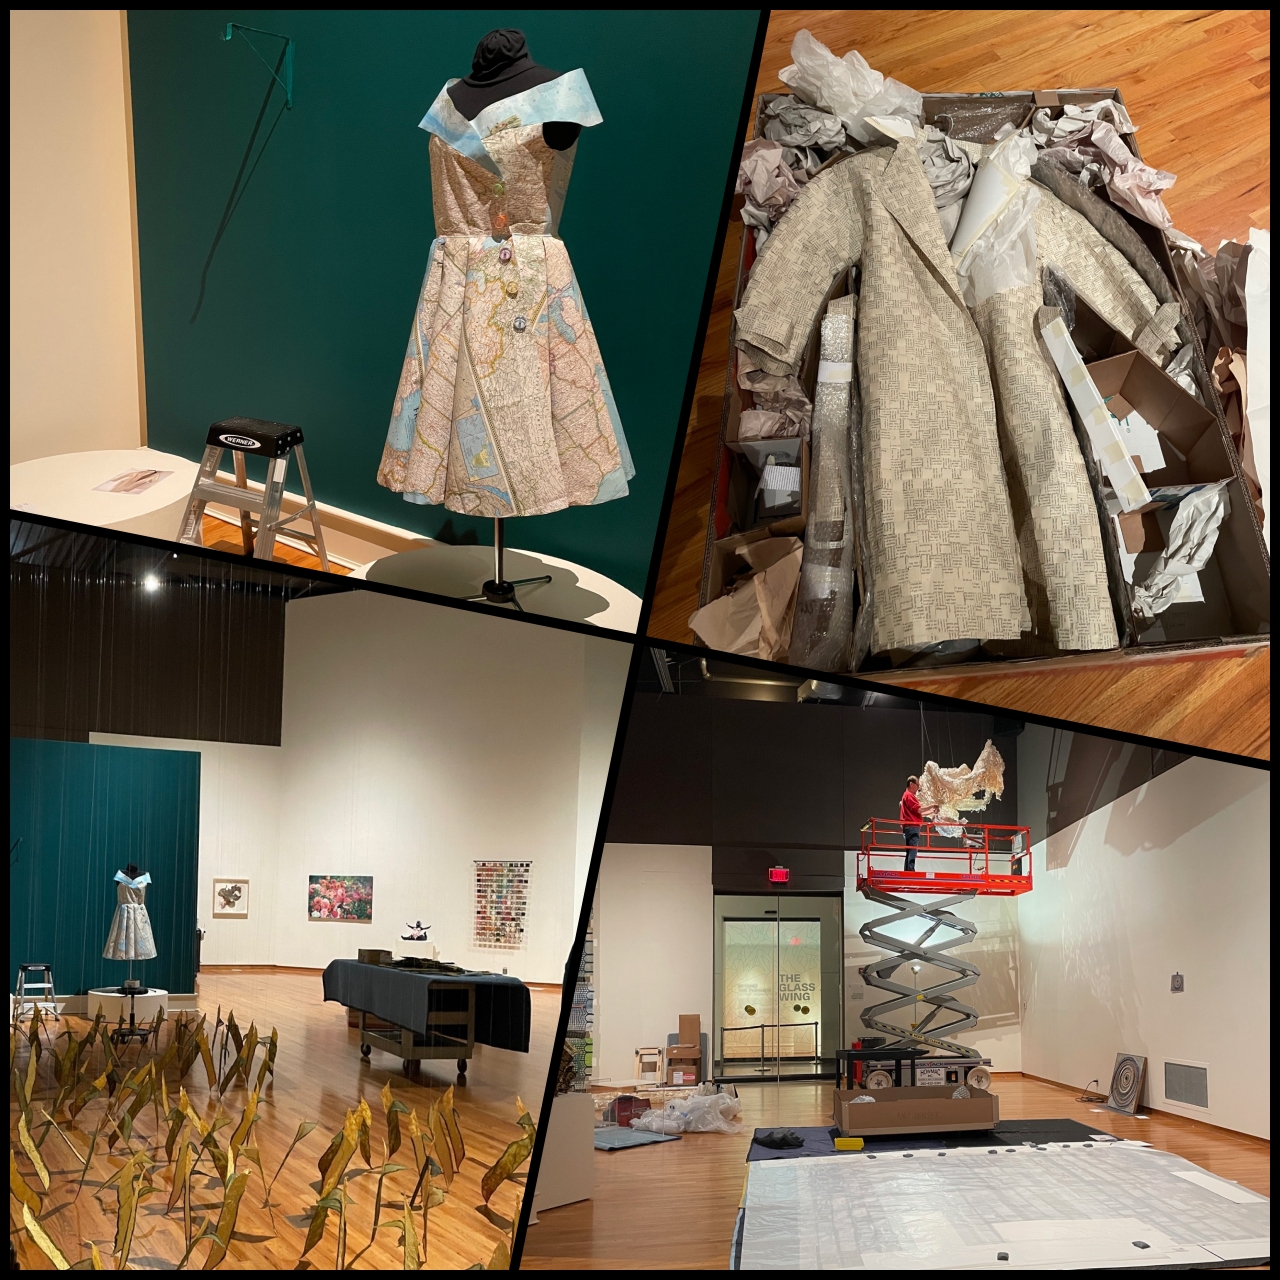
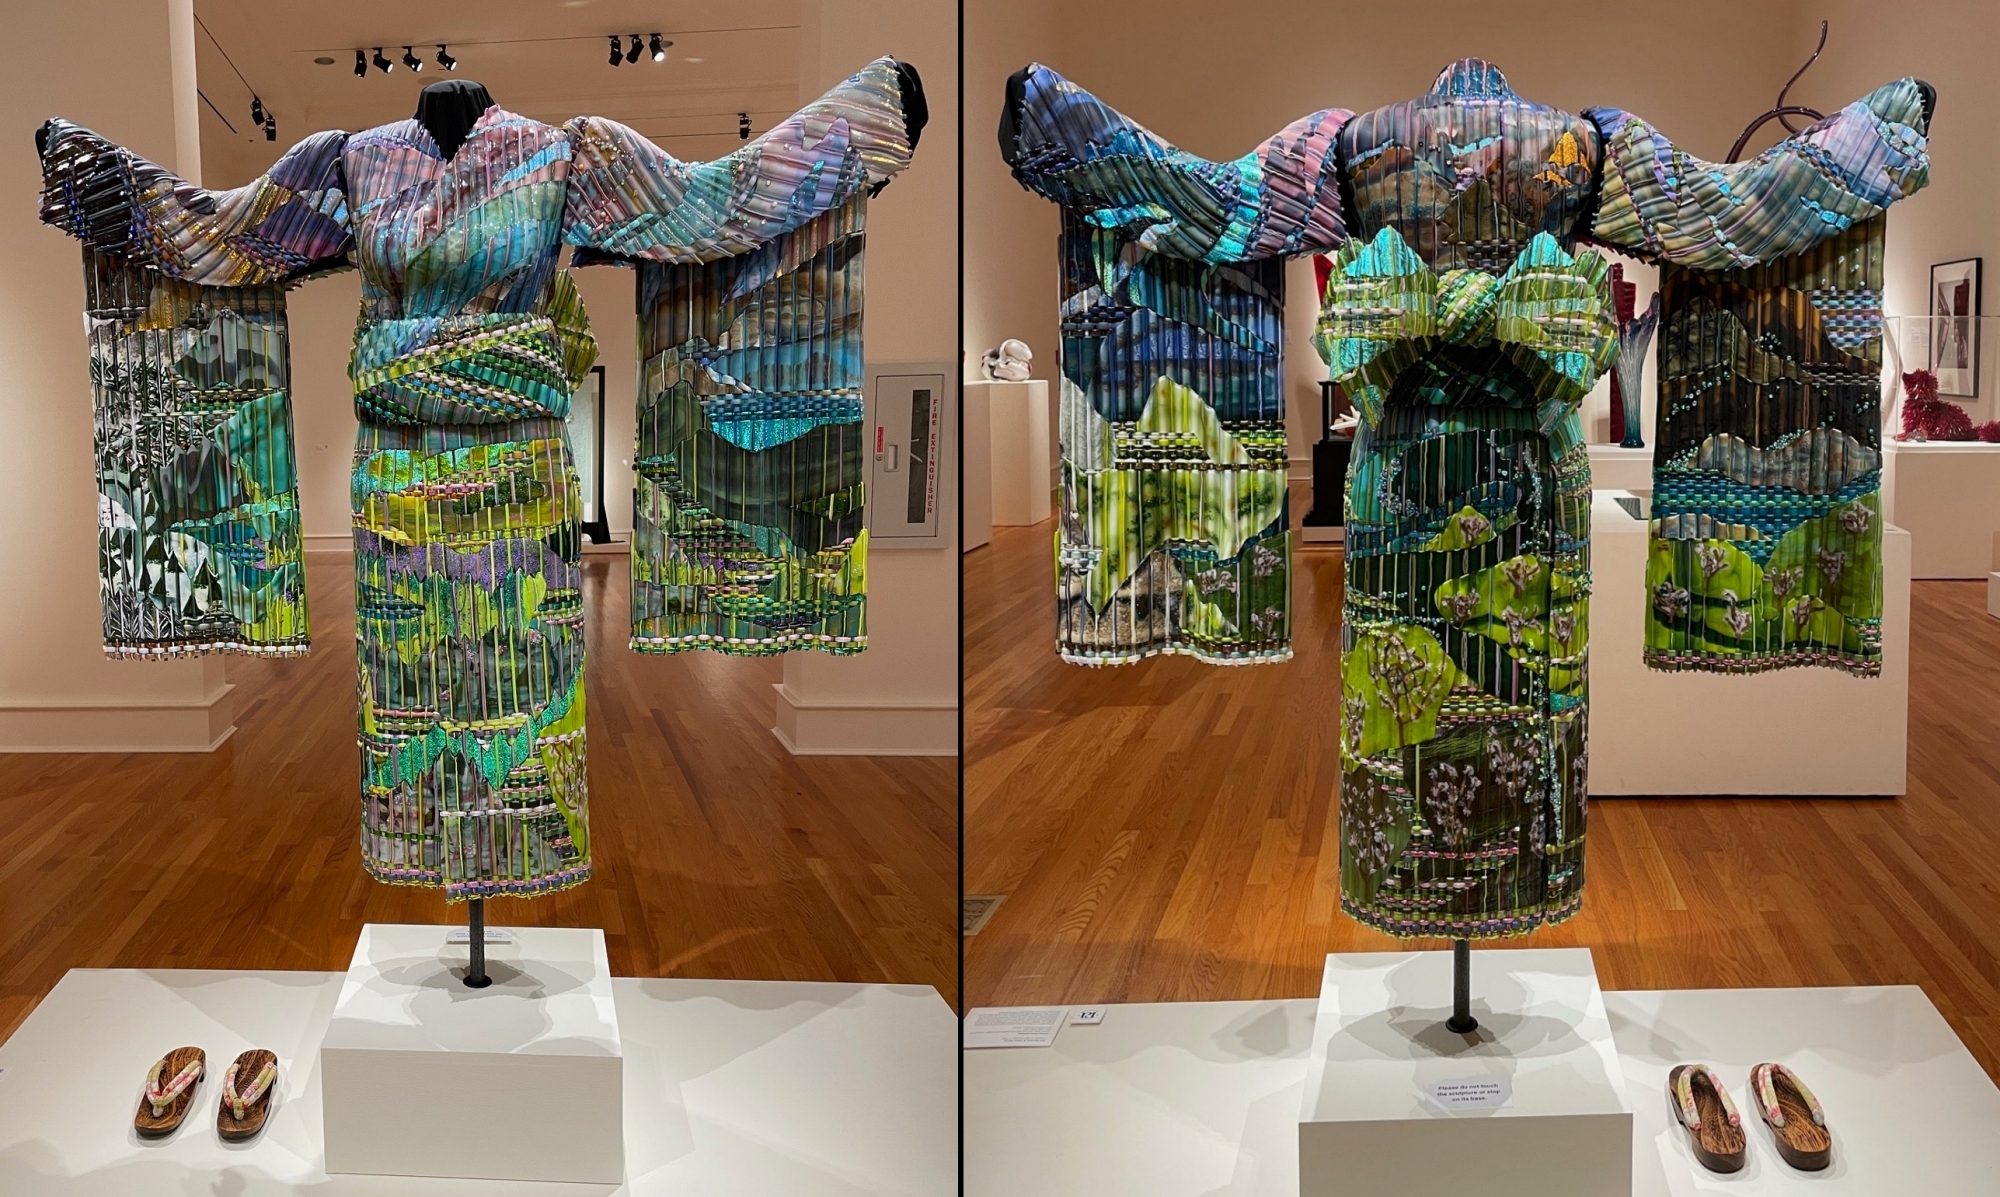
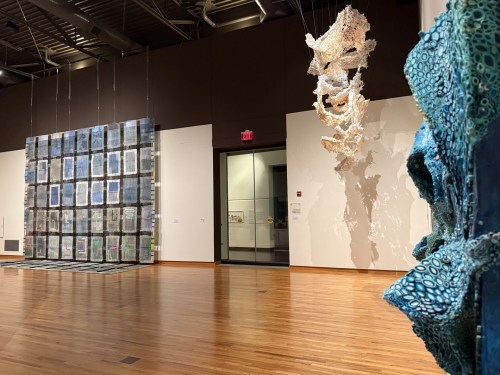
Packing the map dress for shipping would not be easy so I drove the dress to Fort Wayne, IN at the beginning of November for the instillation at the Fort Wayne Museum of Art’s.
It was fascinating to see several of the items being installed.
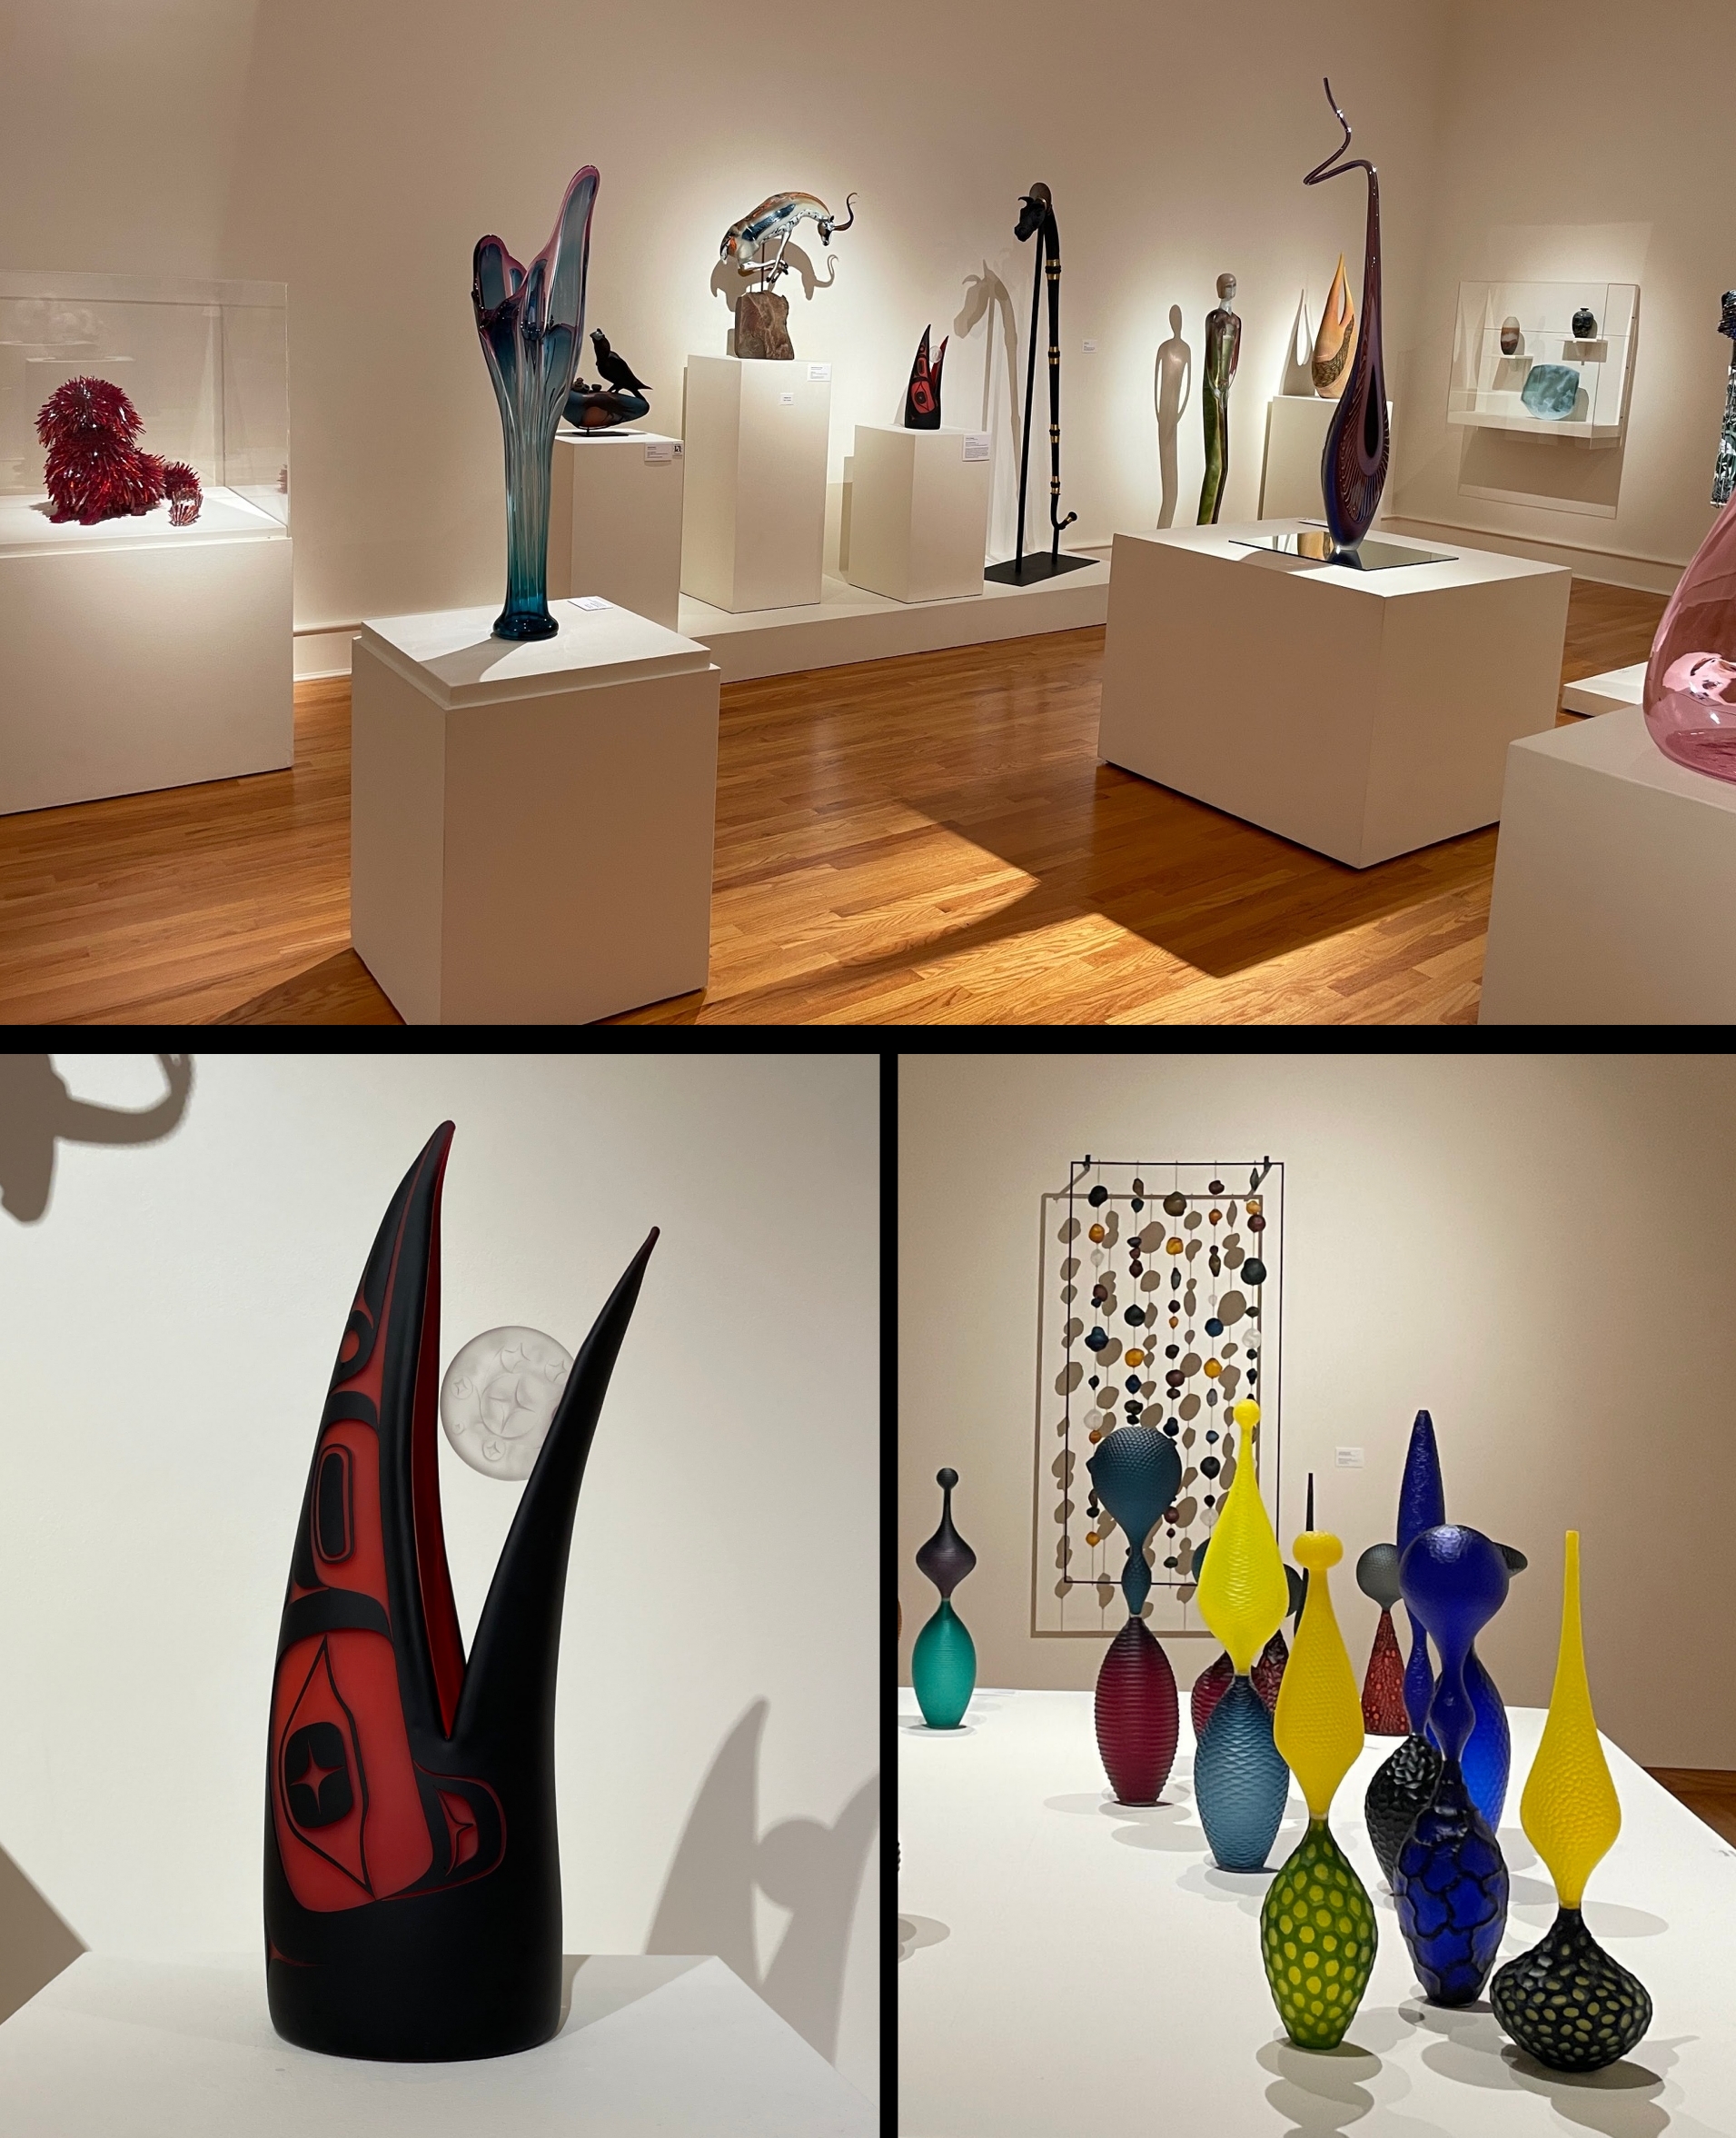
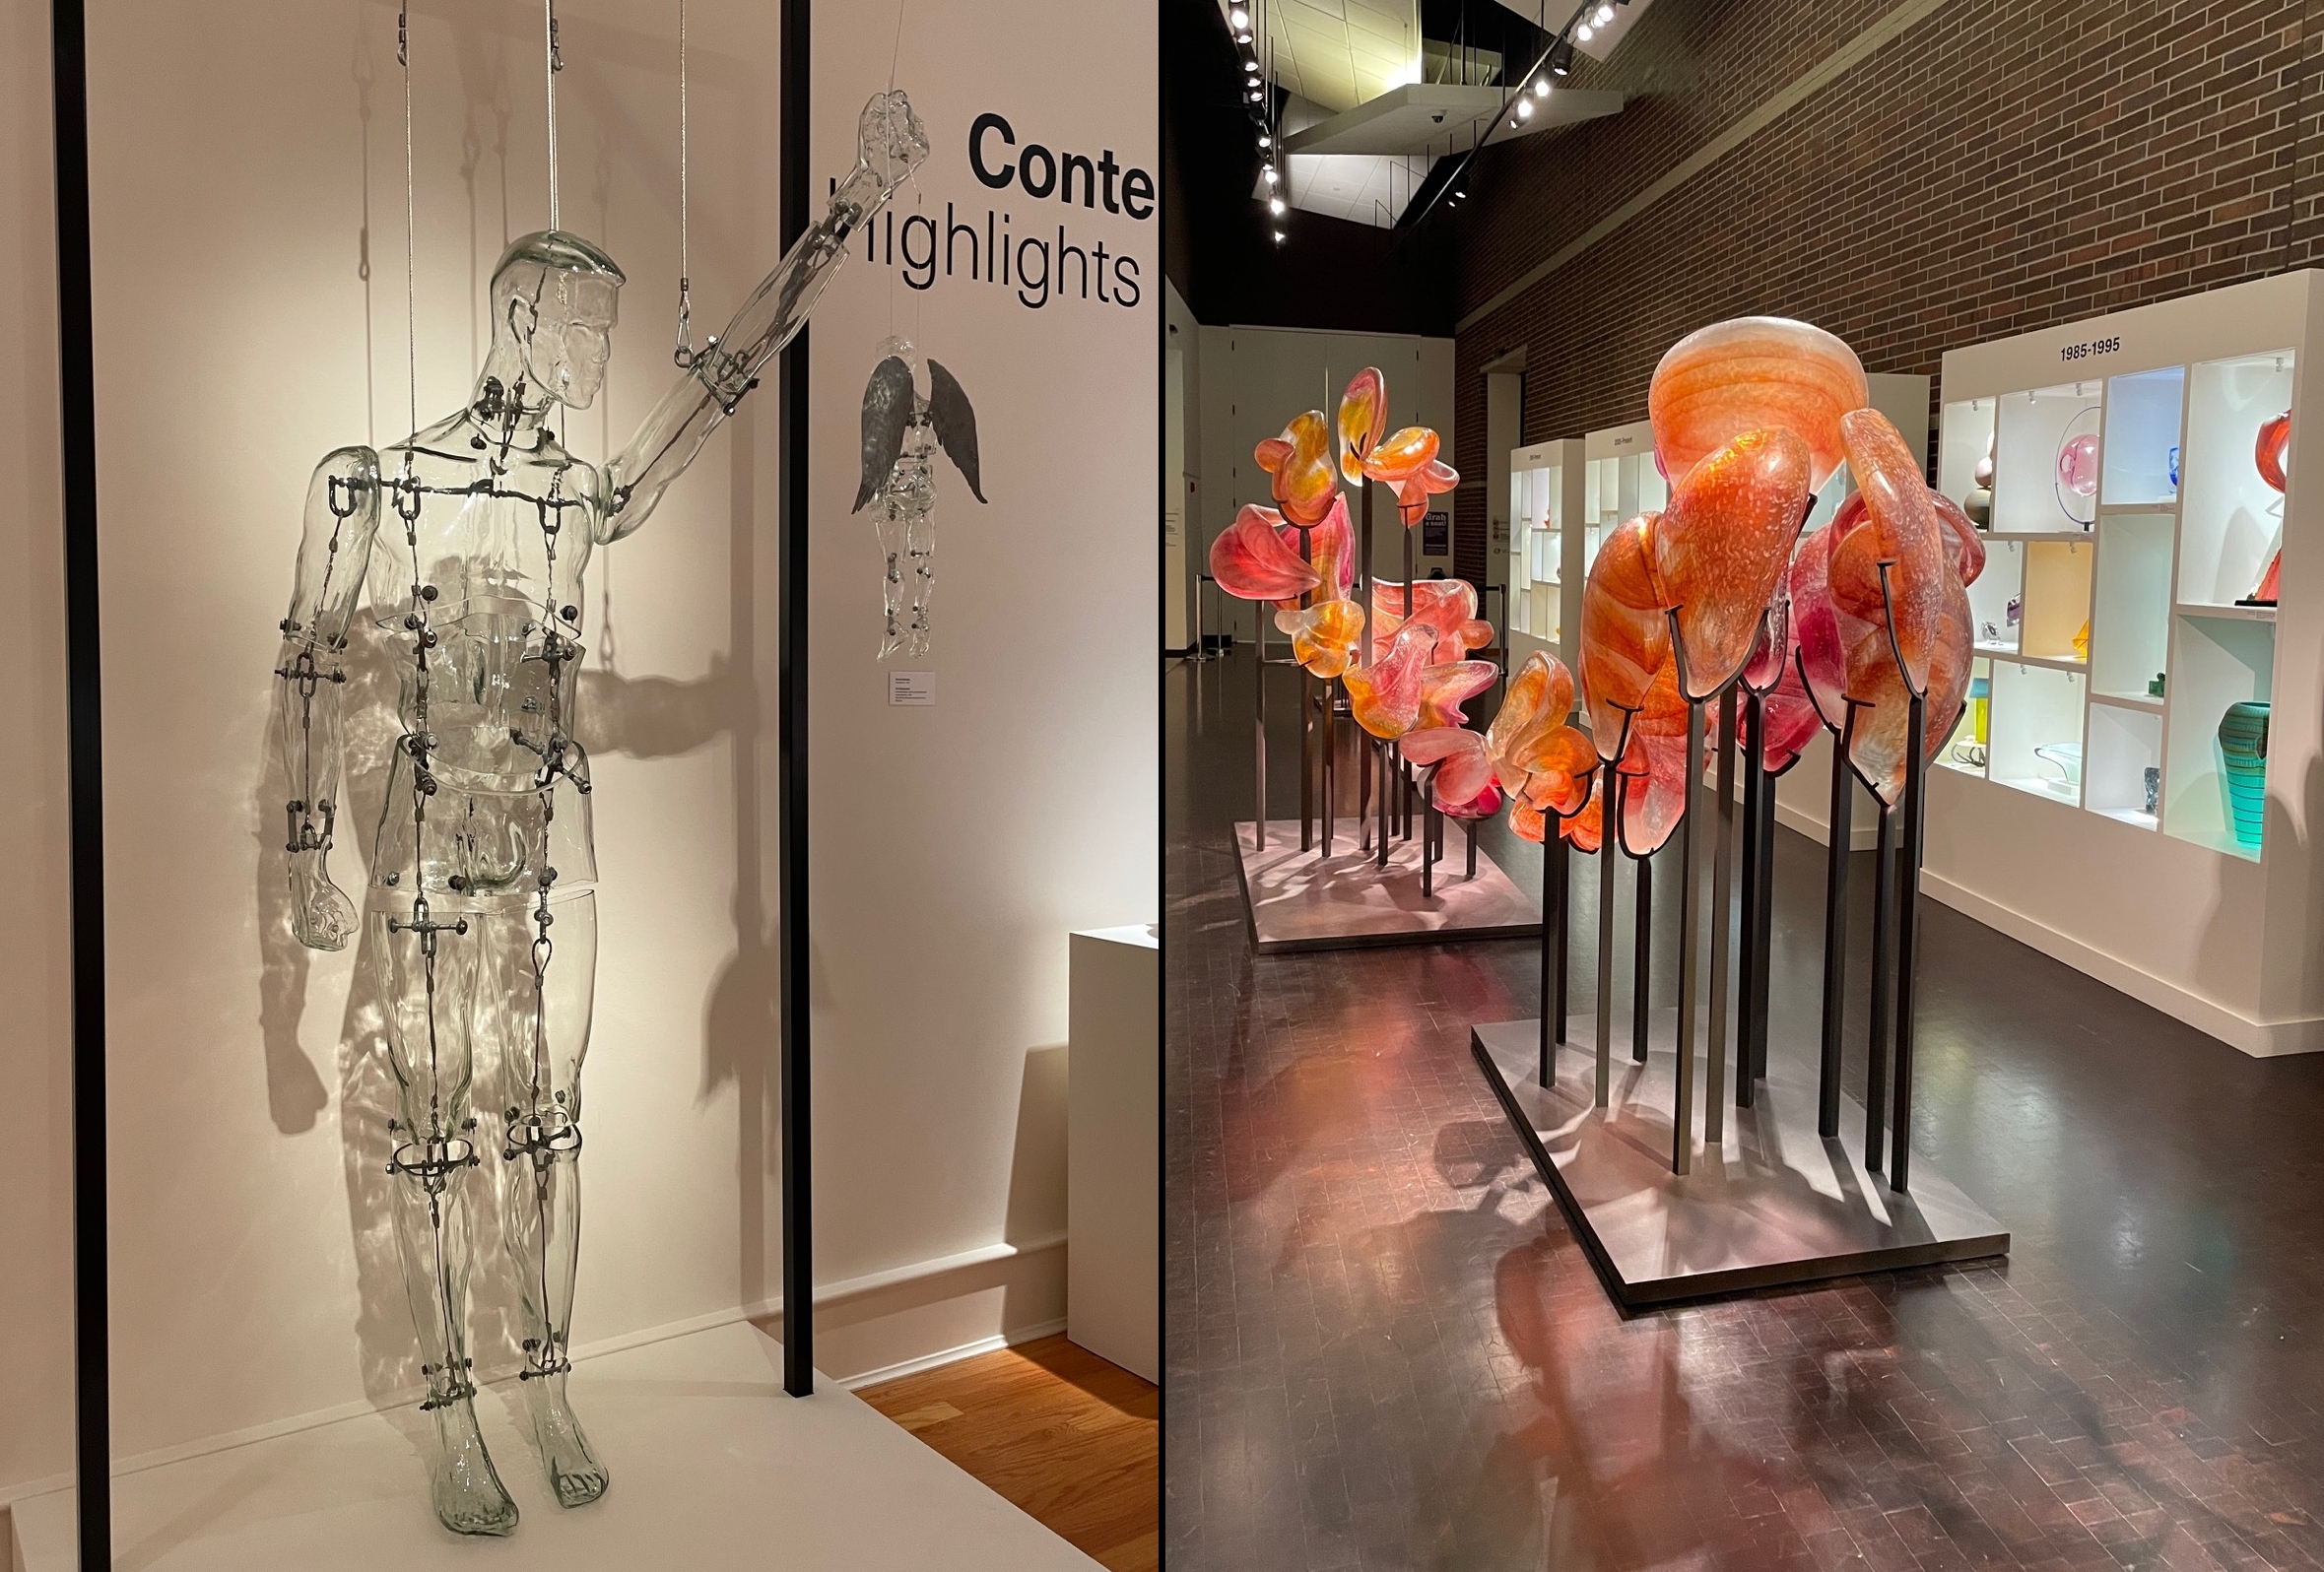
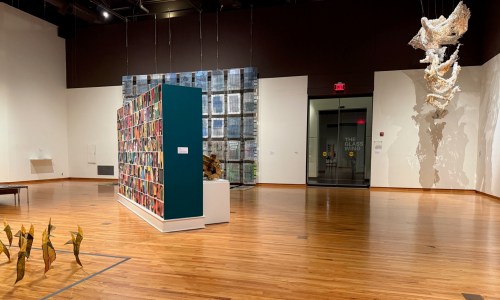
This was my first time visiting FWMoA so I spent some time wandering the galleries especially the The Glass Wing.
FWMoA has one of the largest permanent collection of contemporary glass work. It is impressive! “Since 2013, the FWMoA has committed to building a world-class collection of studio glass sculpture, with the aim of becoming a center for glass in the Midwest. Now at nearly 700 sculptures, the FWMoA glass collection includes some of the earliest experimental work of Harvey Littleton and Dominick Labino, followed by examples of the development of glass sculpture from every decade to the present from around the world. Visitors will find major works on view from Dale Chihuly, Martin Blank, Howard Ben Tré, Paul Stankard, Therman Statom, and dozens more in our 4,000 square foot Glass Wing.”
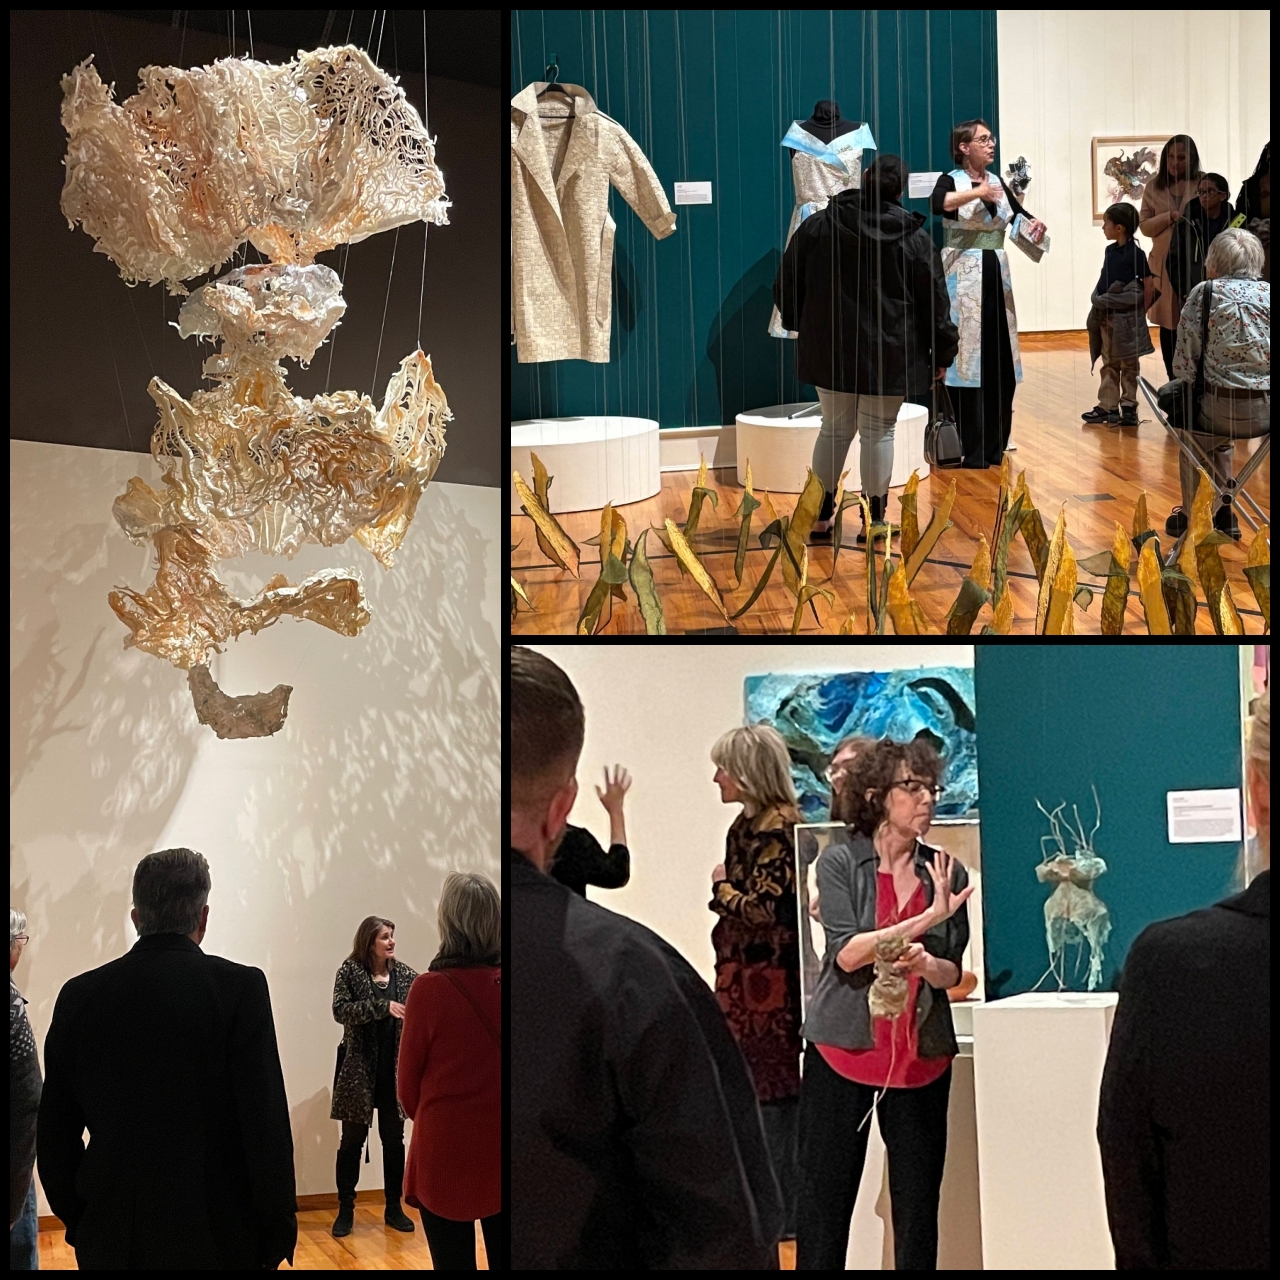
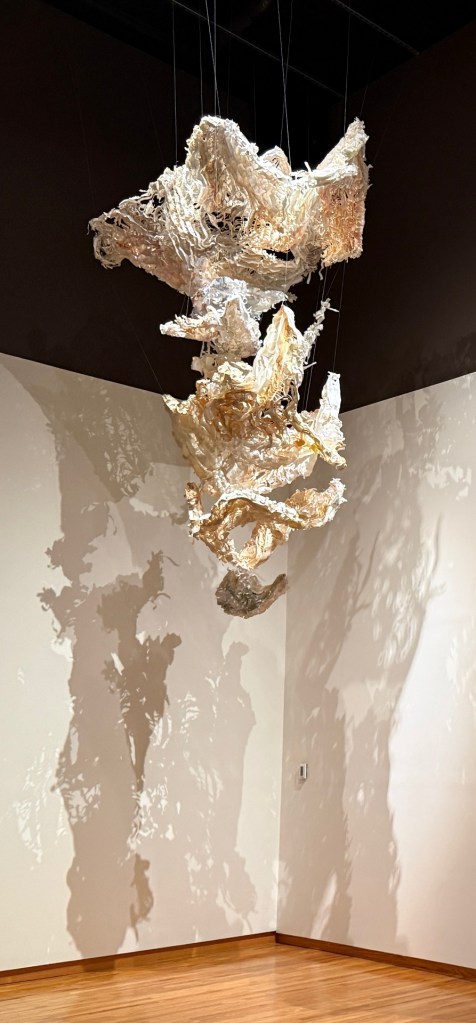
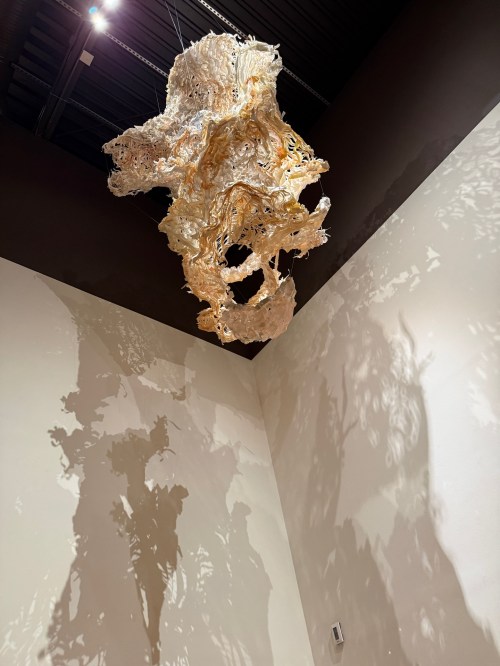
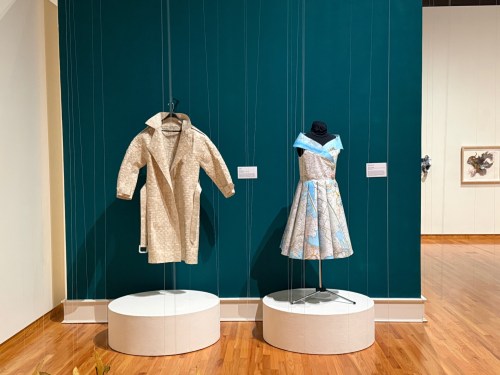
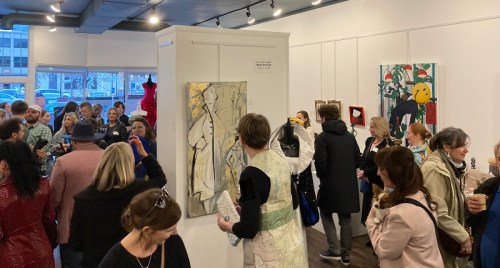
The 2nd Thursday at FWMoA event for November featured Paper Made II. Cash bar and hors d’oeuvres with tours of the exhibit scheduled for 5:30 & 6:30. Two other artists were there –Lisa Merida-Payteswho created the large piece that was being hung from the ceiling when I delivered Couture Cartography andDiane Brittwho made a miniature Armored Bodice.
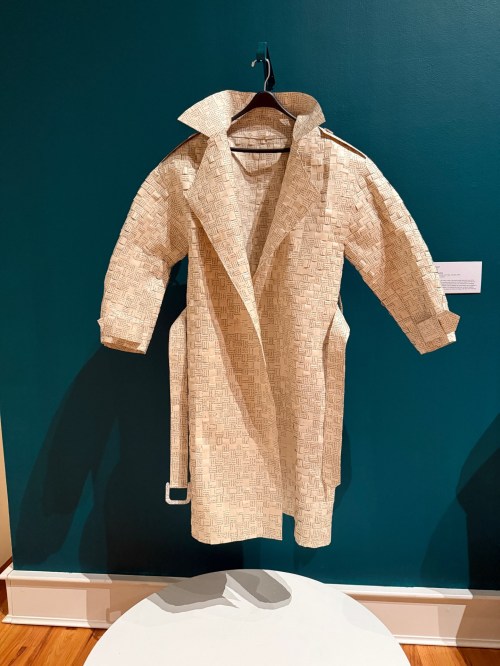
For the tours we each gave a 10 min artist talk about our pieces, our process and answered questions. I also read the description card for the trench coat next to Couture Cartography and highlighted difference between its woven structure vs the map dress being sewn. Excellent turnout of people – lots of interest and questions, many conversations and hearing how the other artists work with paper was fascinating.
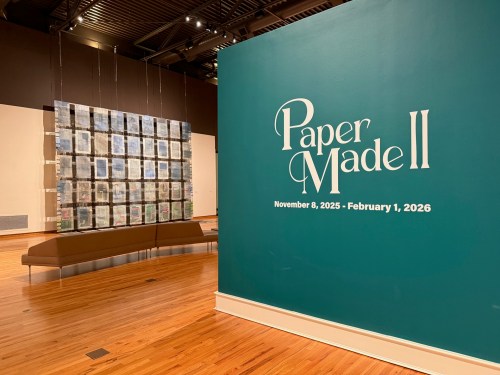
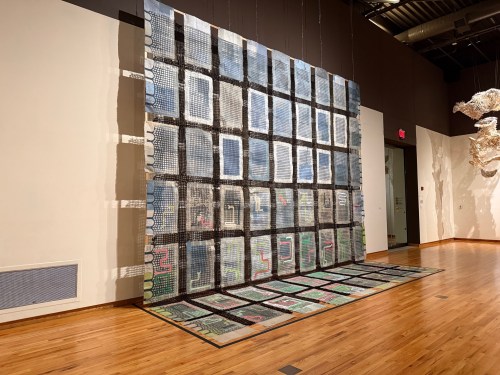
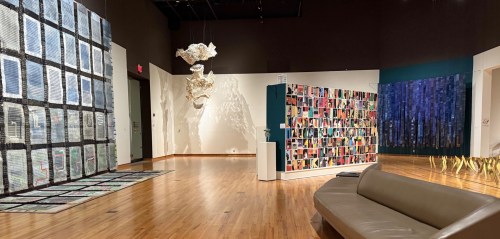
The Paper Made II exhibition is well worth seeing in-person! The feedback from visitors has been overwhelmingly positive. Many thanks to Brit Micho, Curator of Exhibitions, and the FWMoA staff who made this exhibit happen!!
Paper Made ll Now through February 1, 2026 Fort Wayne Museum of Art Fort Wayne, Indiana
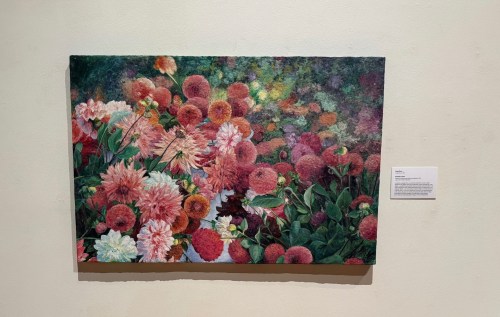
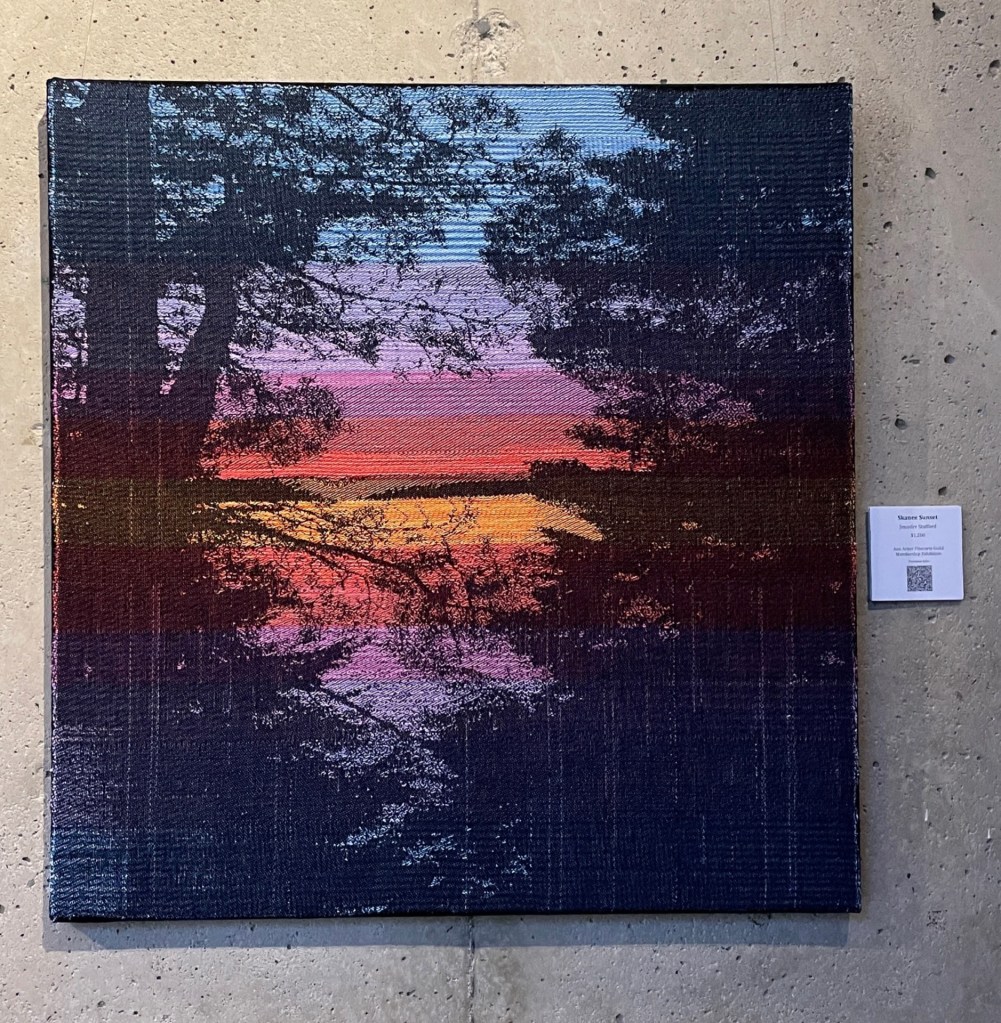
Summer’s End – Meg Black
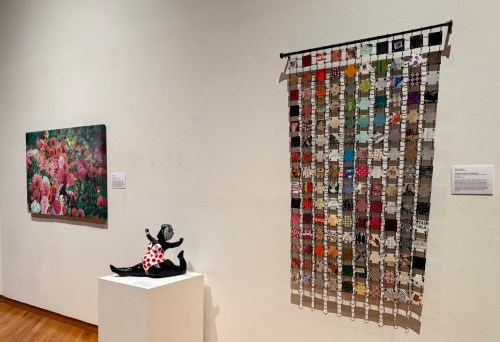
So Can I – Tina Vincent
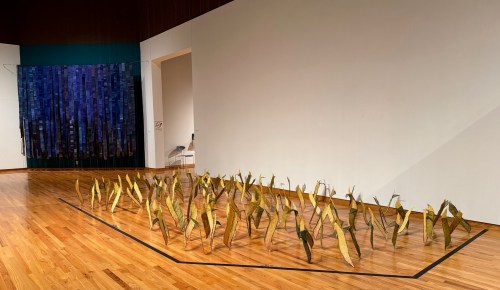
Meadow – Seiko Purdue
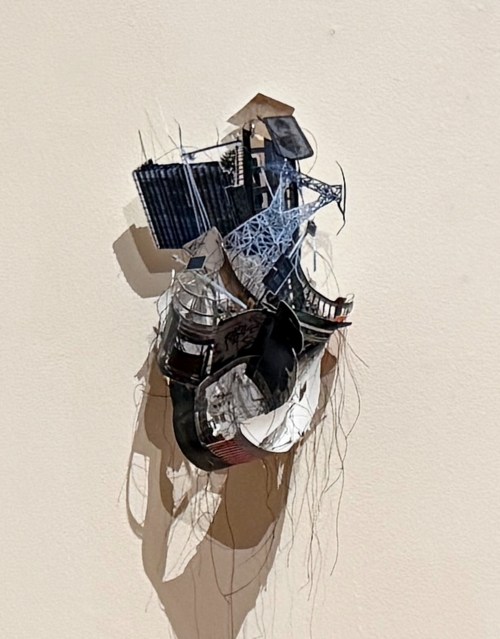
Still.Black.Sketches – John Heintzman
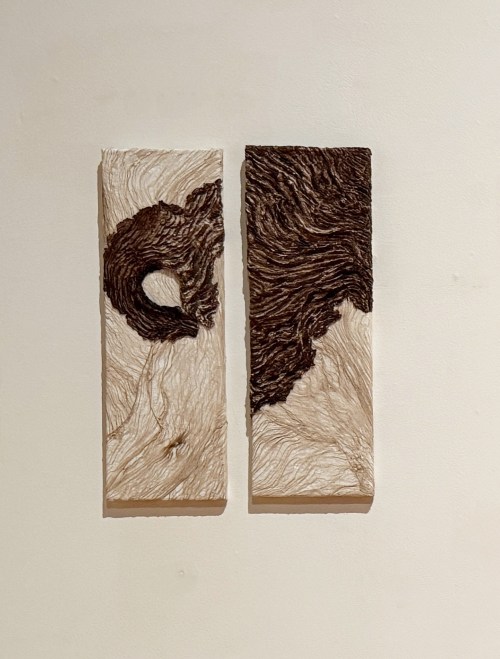
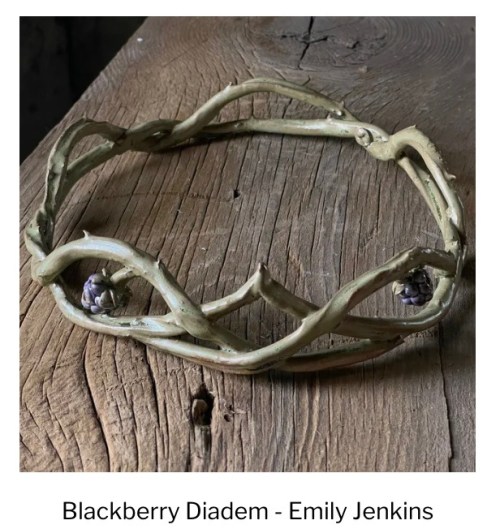
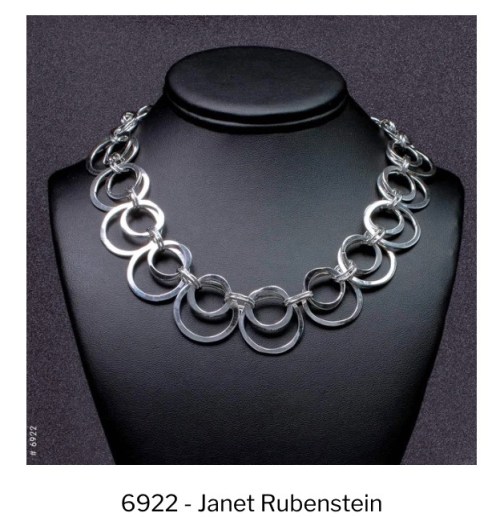
Ring Story 1 – Mari Jablonski
Interwoven – Agathe Bouton
In Camouflage – Lars Shimabukuro
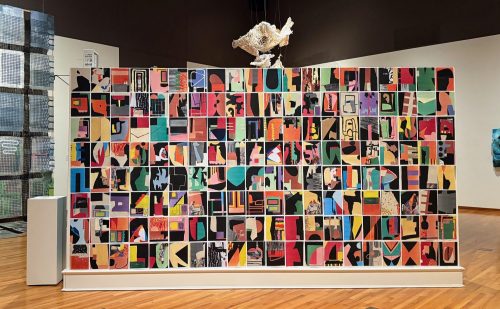
Anamorphosis – Lisa Merida-Paytes
Blossom Series : Monarch – Anette Millington
Convolution 2 – Orsolya Illes
Overprocessed – Vanda Berecz
Capricious – Annette Kraayeveld
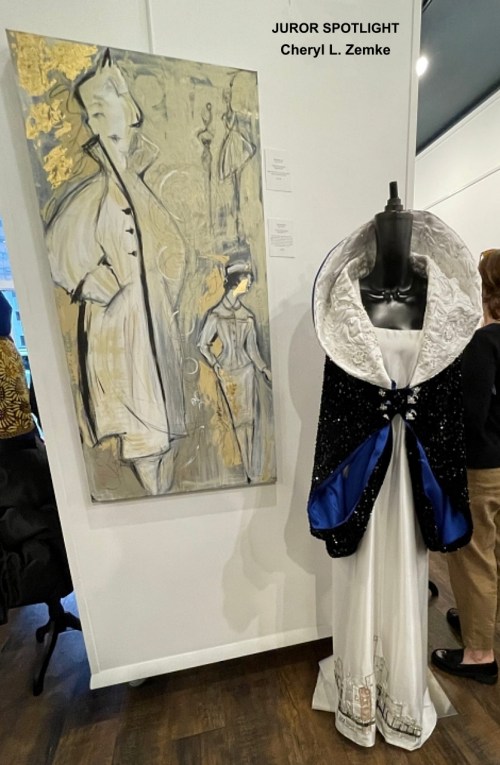
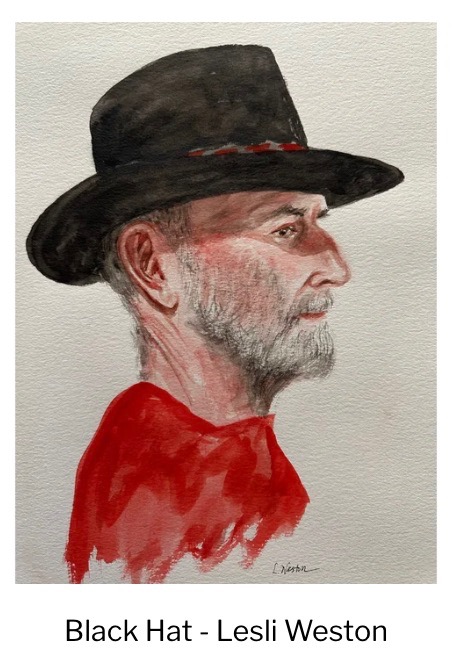
Noir Detective – Ilke Bauer
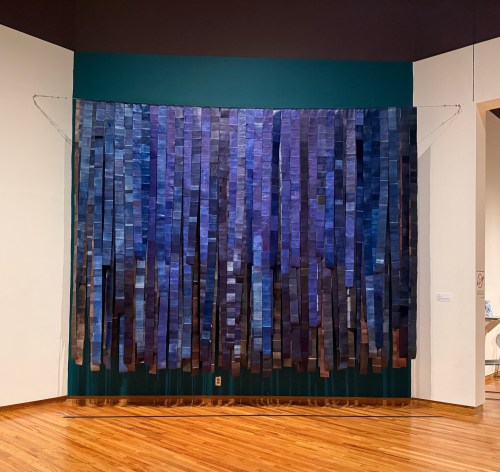
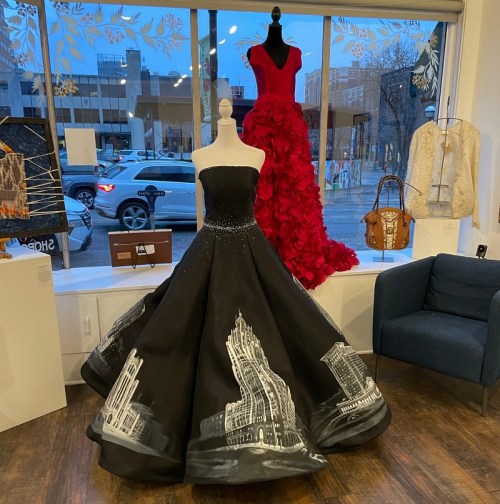
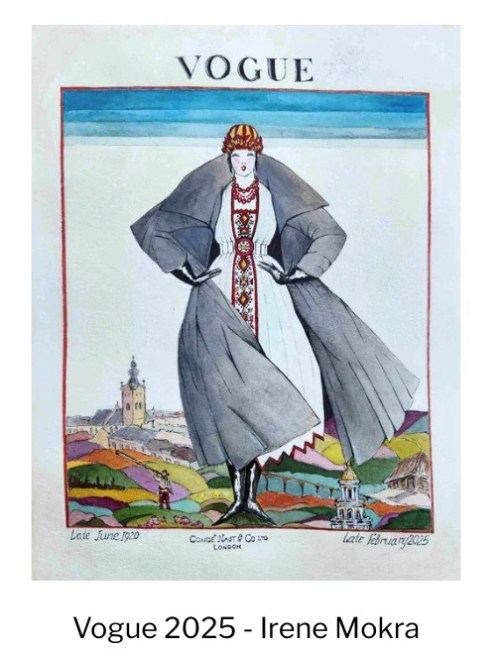
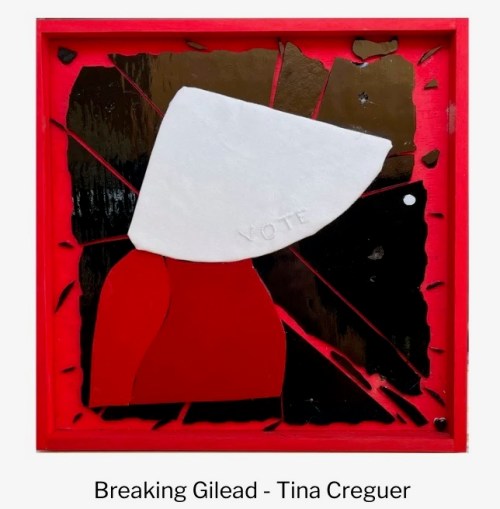
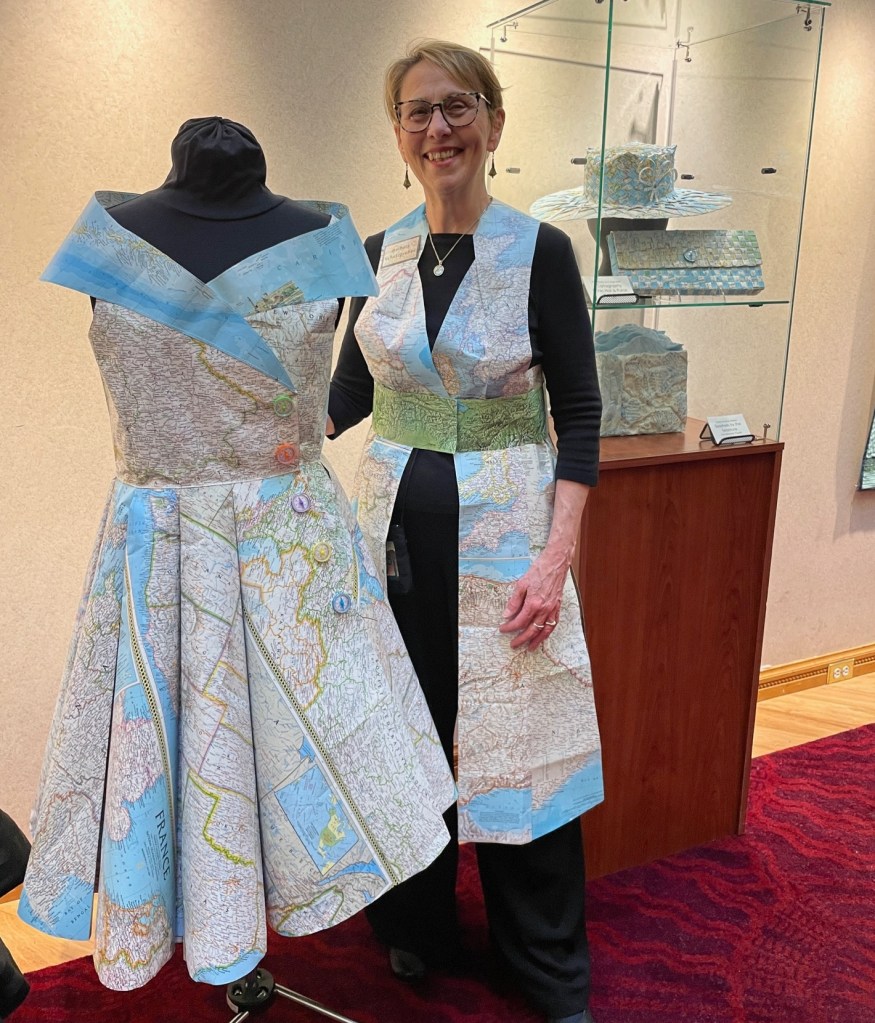
Couture Cartography – Barbara Schutzgruber
The Blue Route – Azin Majooni
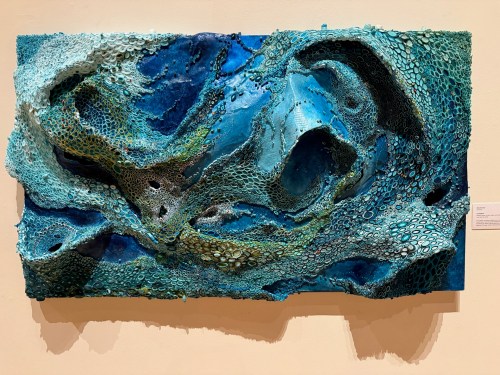
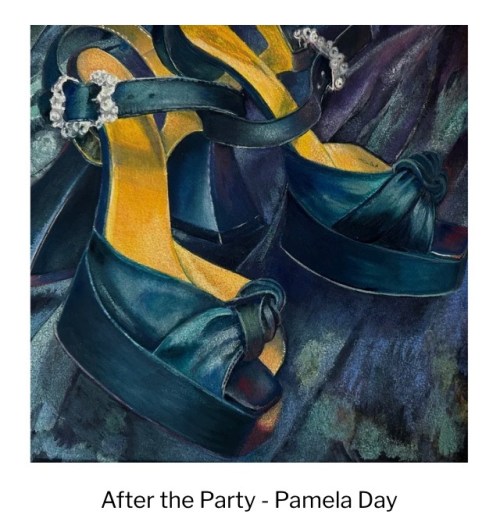
O Captain! – Amy Genser
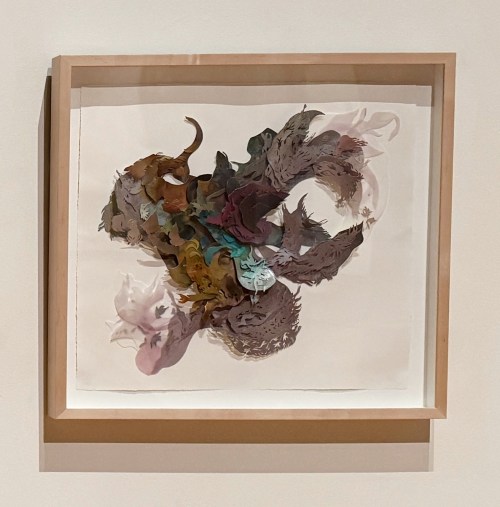
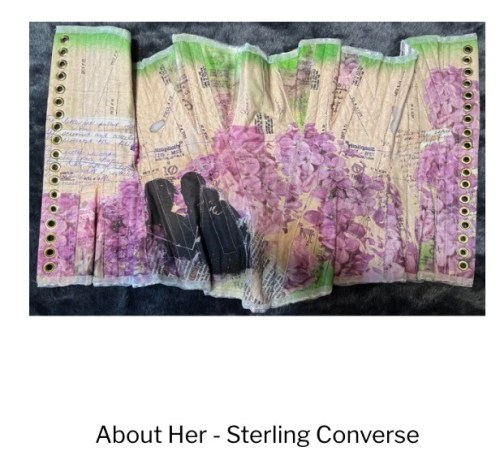
Tender Momnets – Alexandra Chiou
Survival Ornament – Amy Yoshitsu
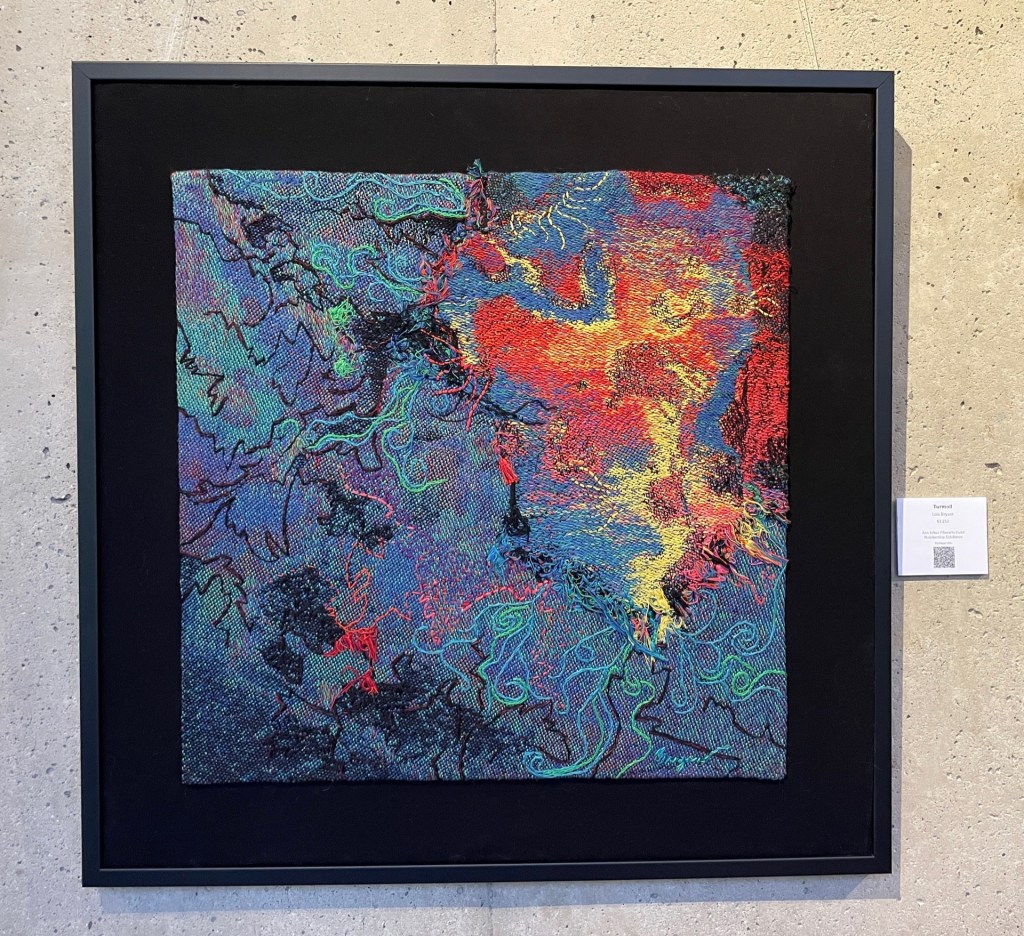
Turbulence – Jill Powers
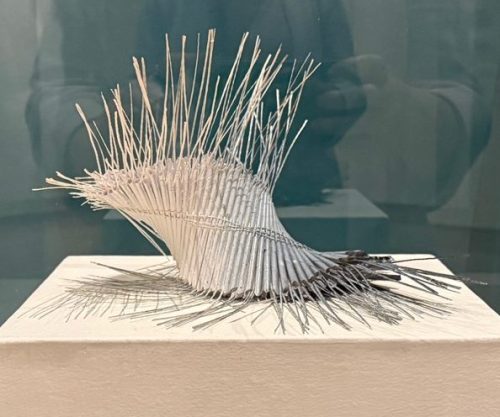
Prototype for Couture Armored Bodice – Diane Britt
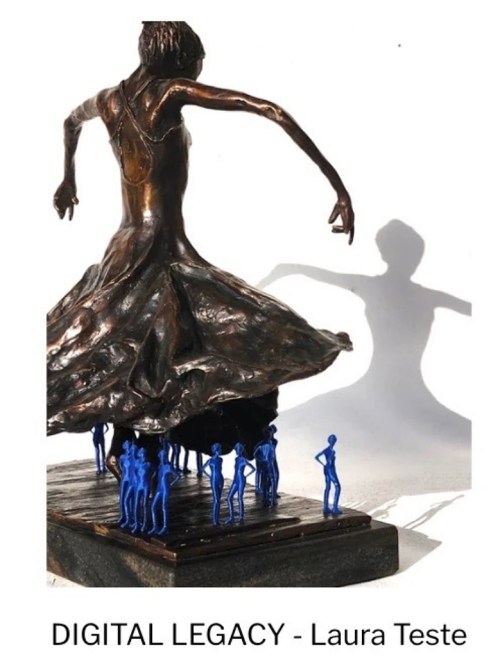
Tangible Connections in the Digital Age – Eleftheria Easley
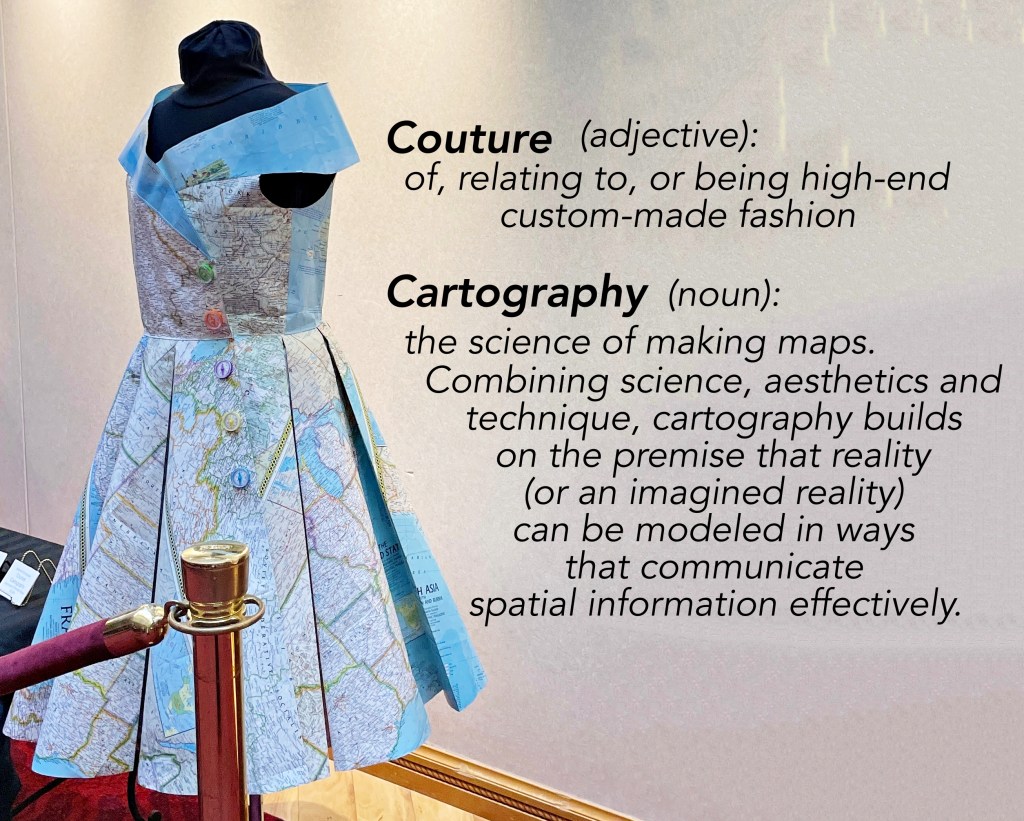
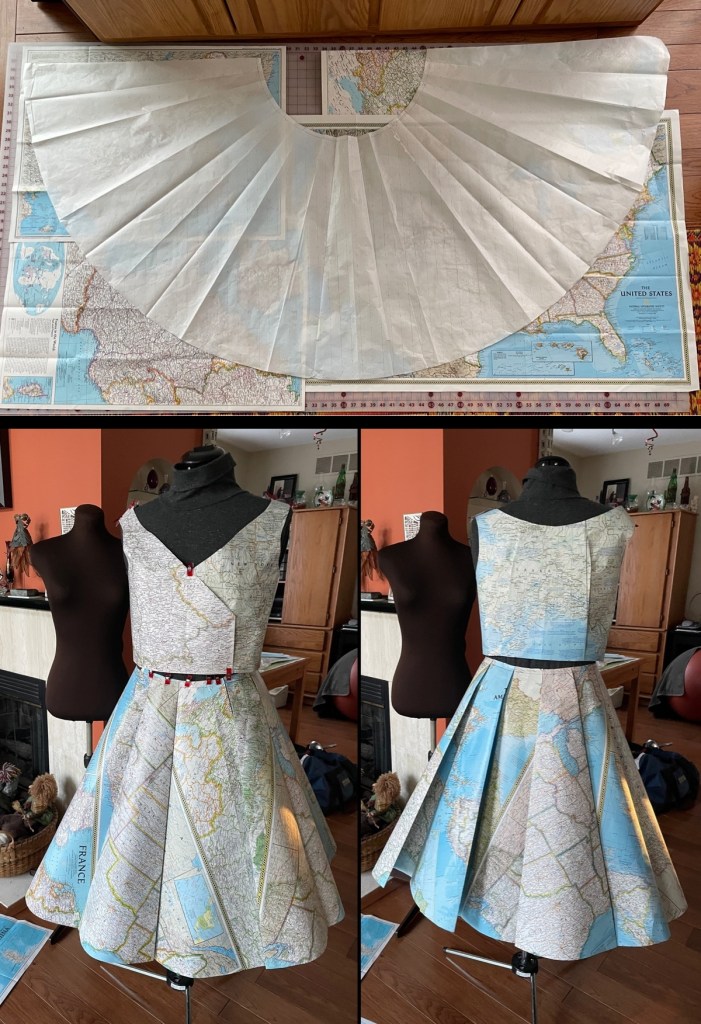
[To learn how the map dress was made – see March 2024 blogCouture Cartography]
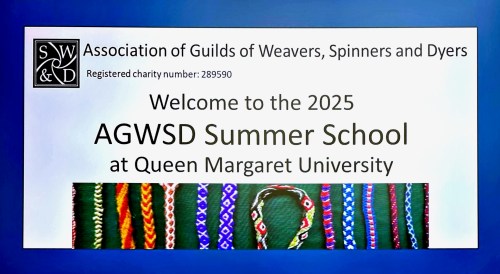
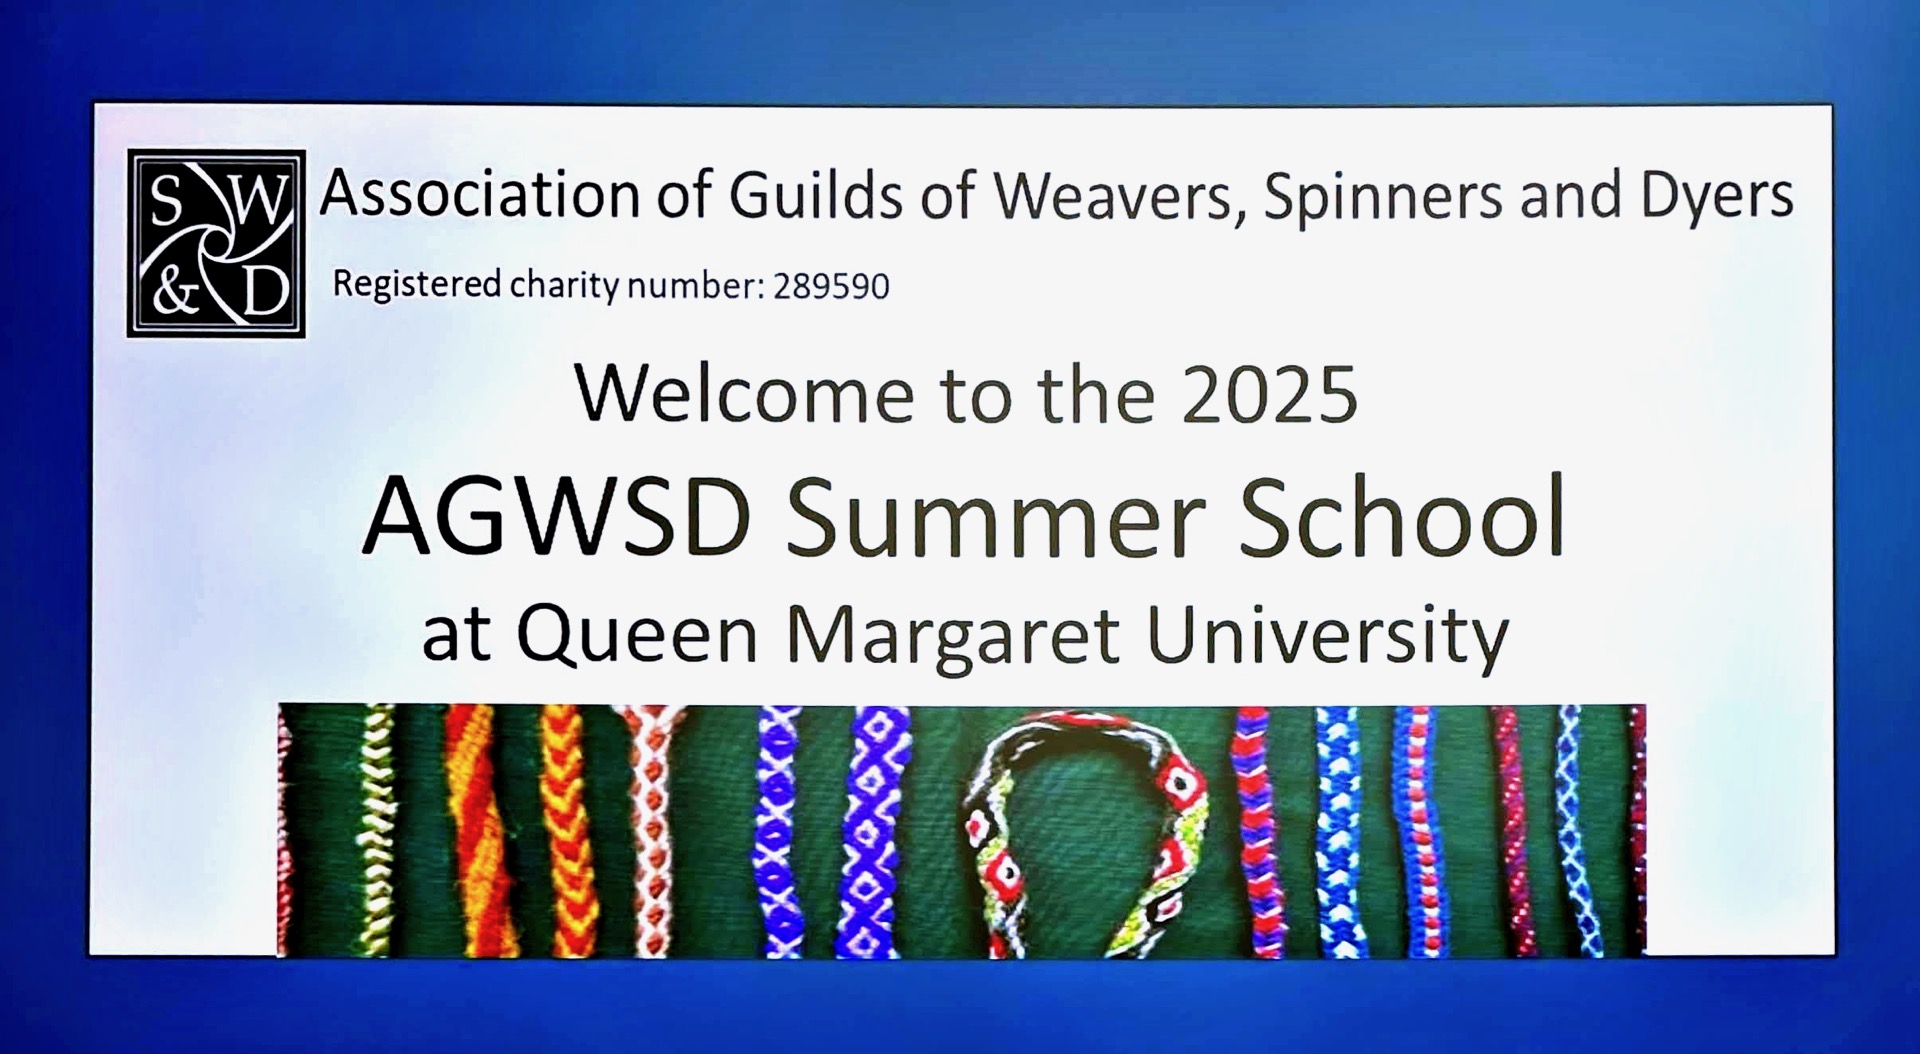
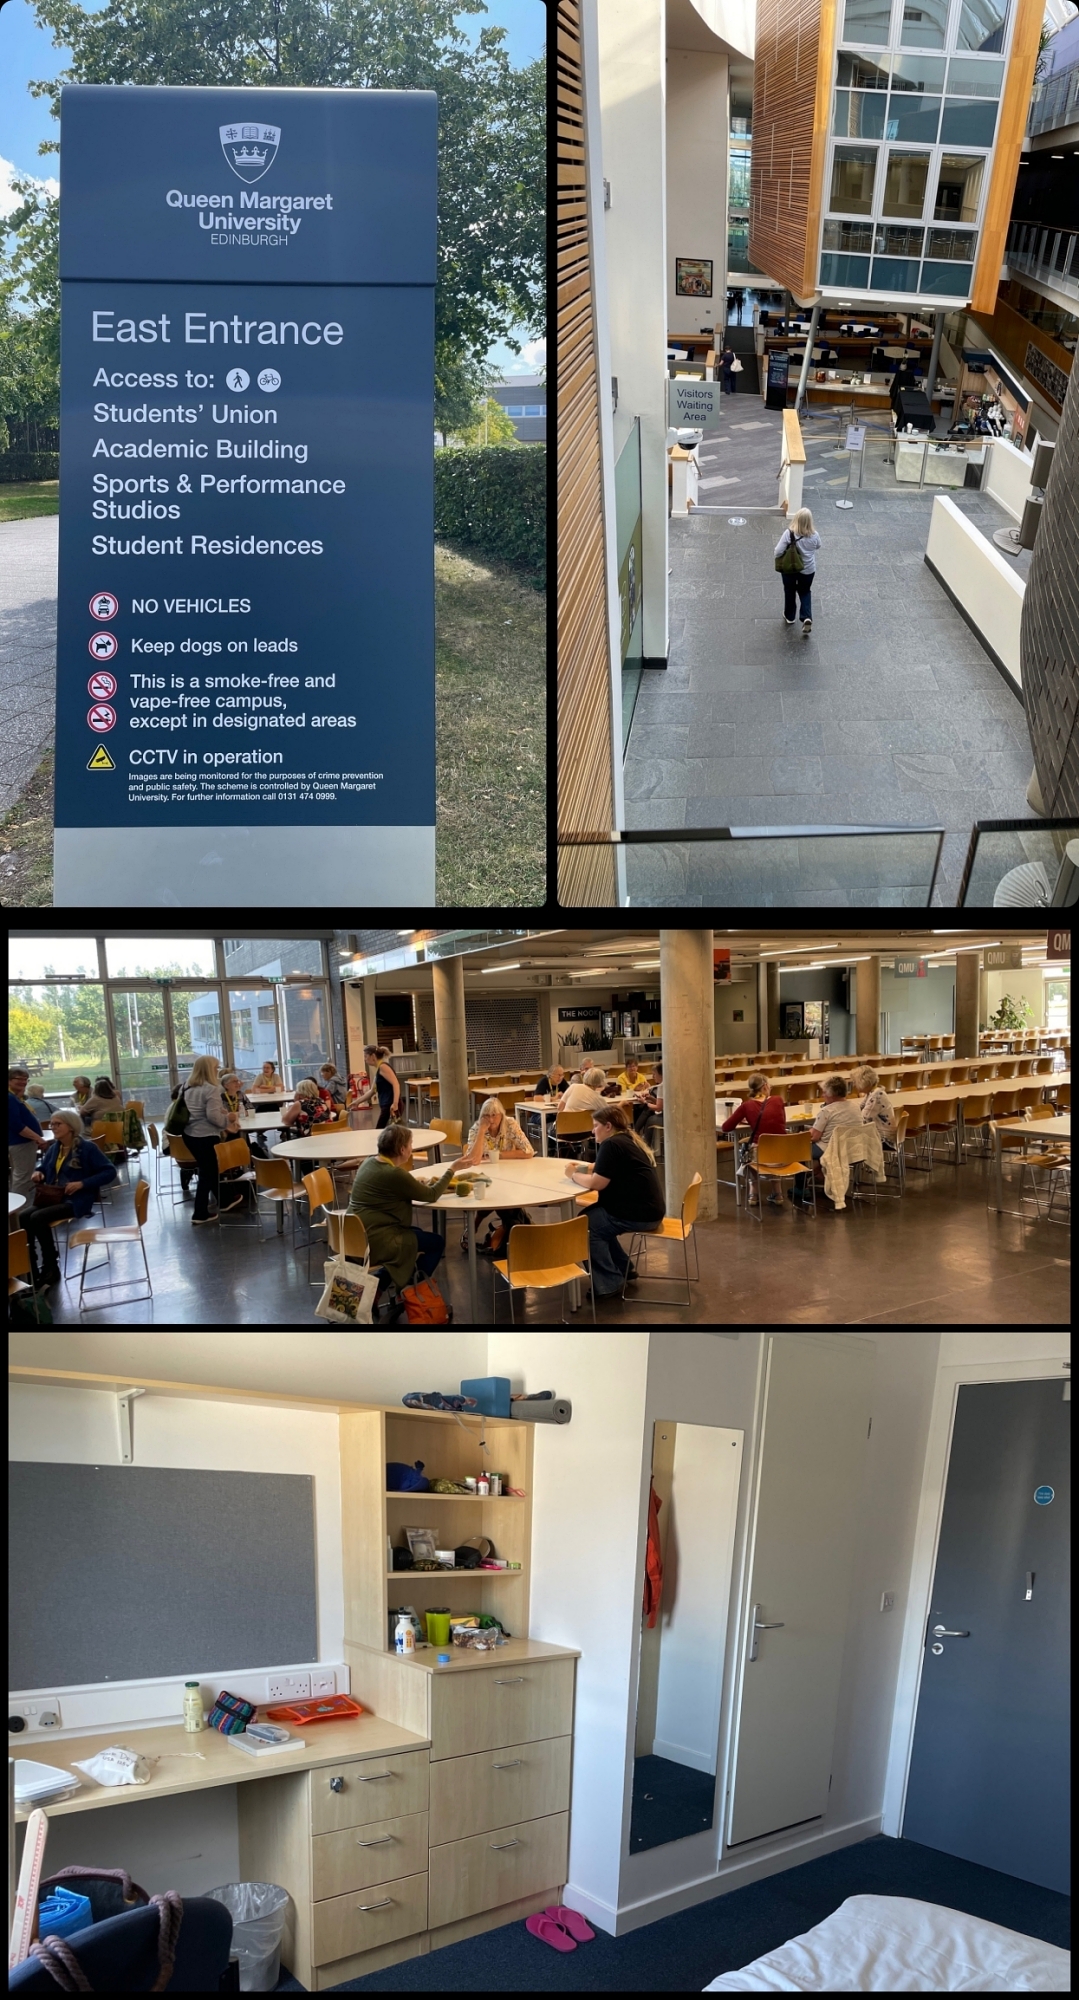
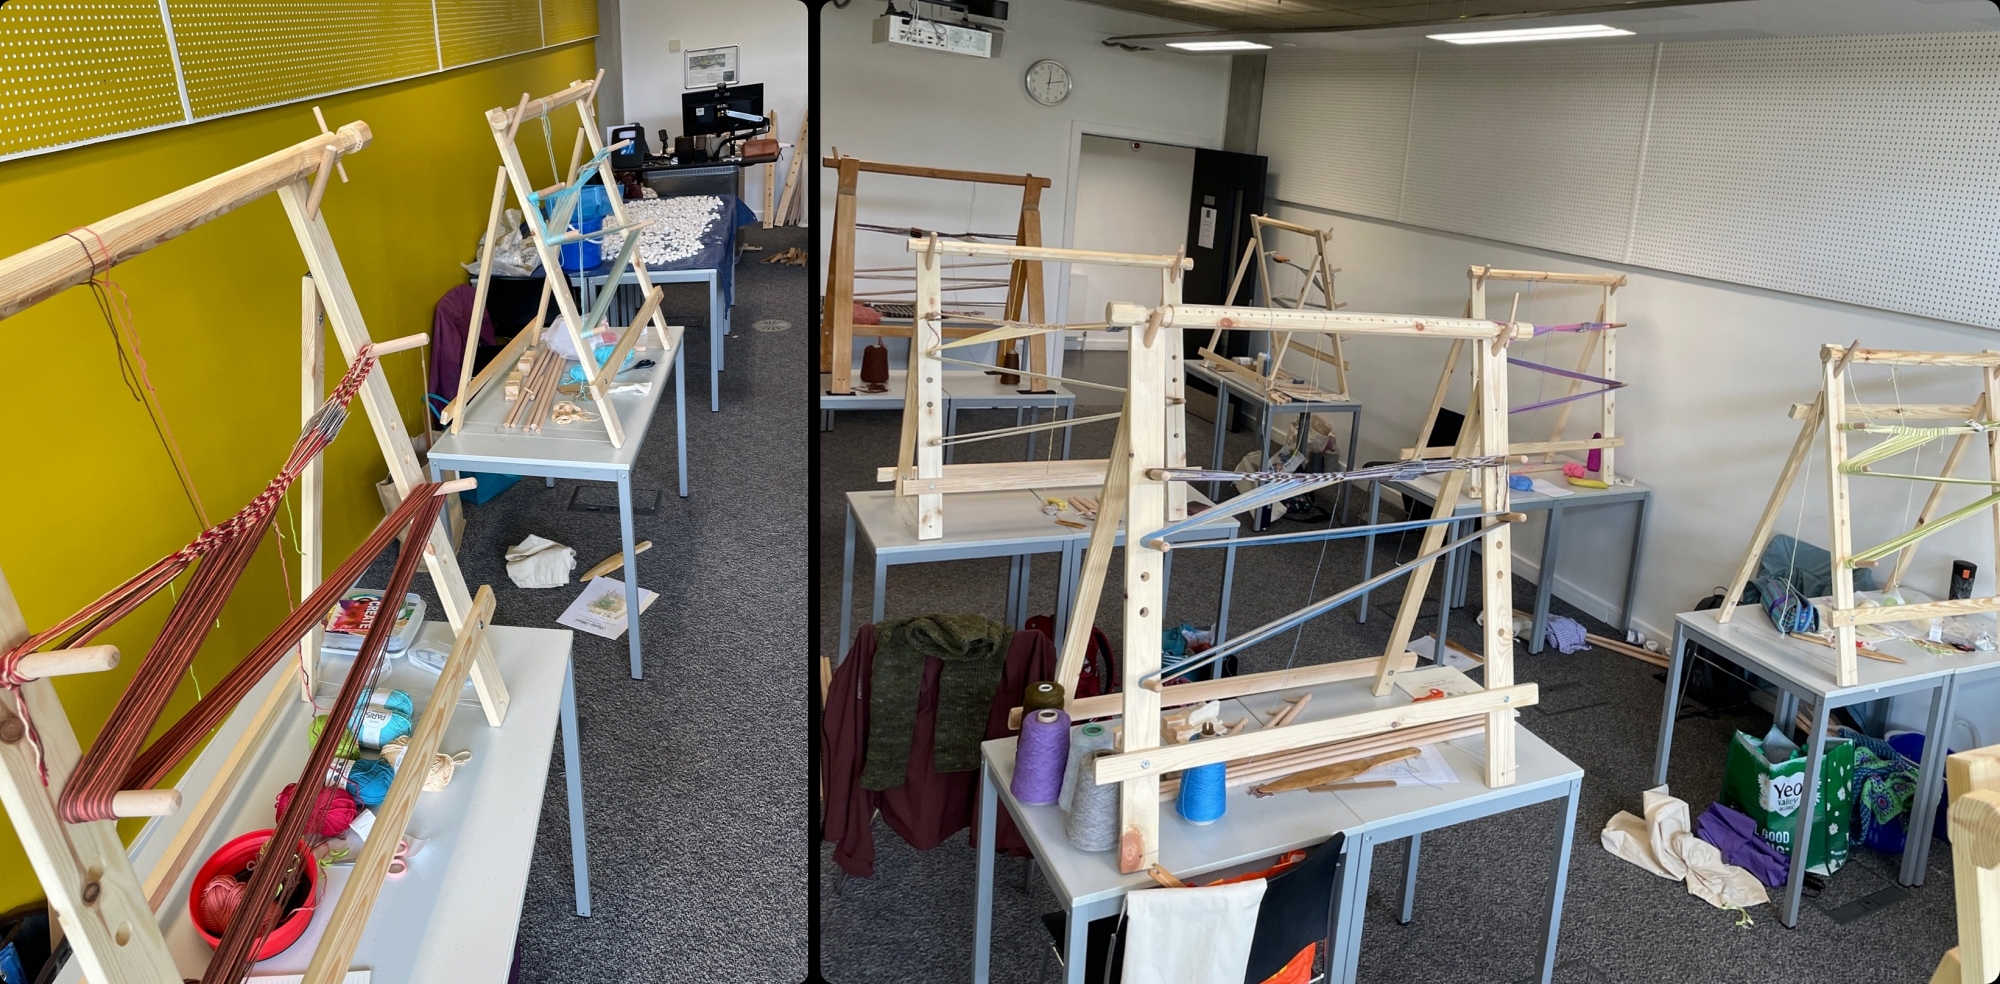
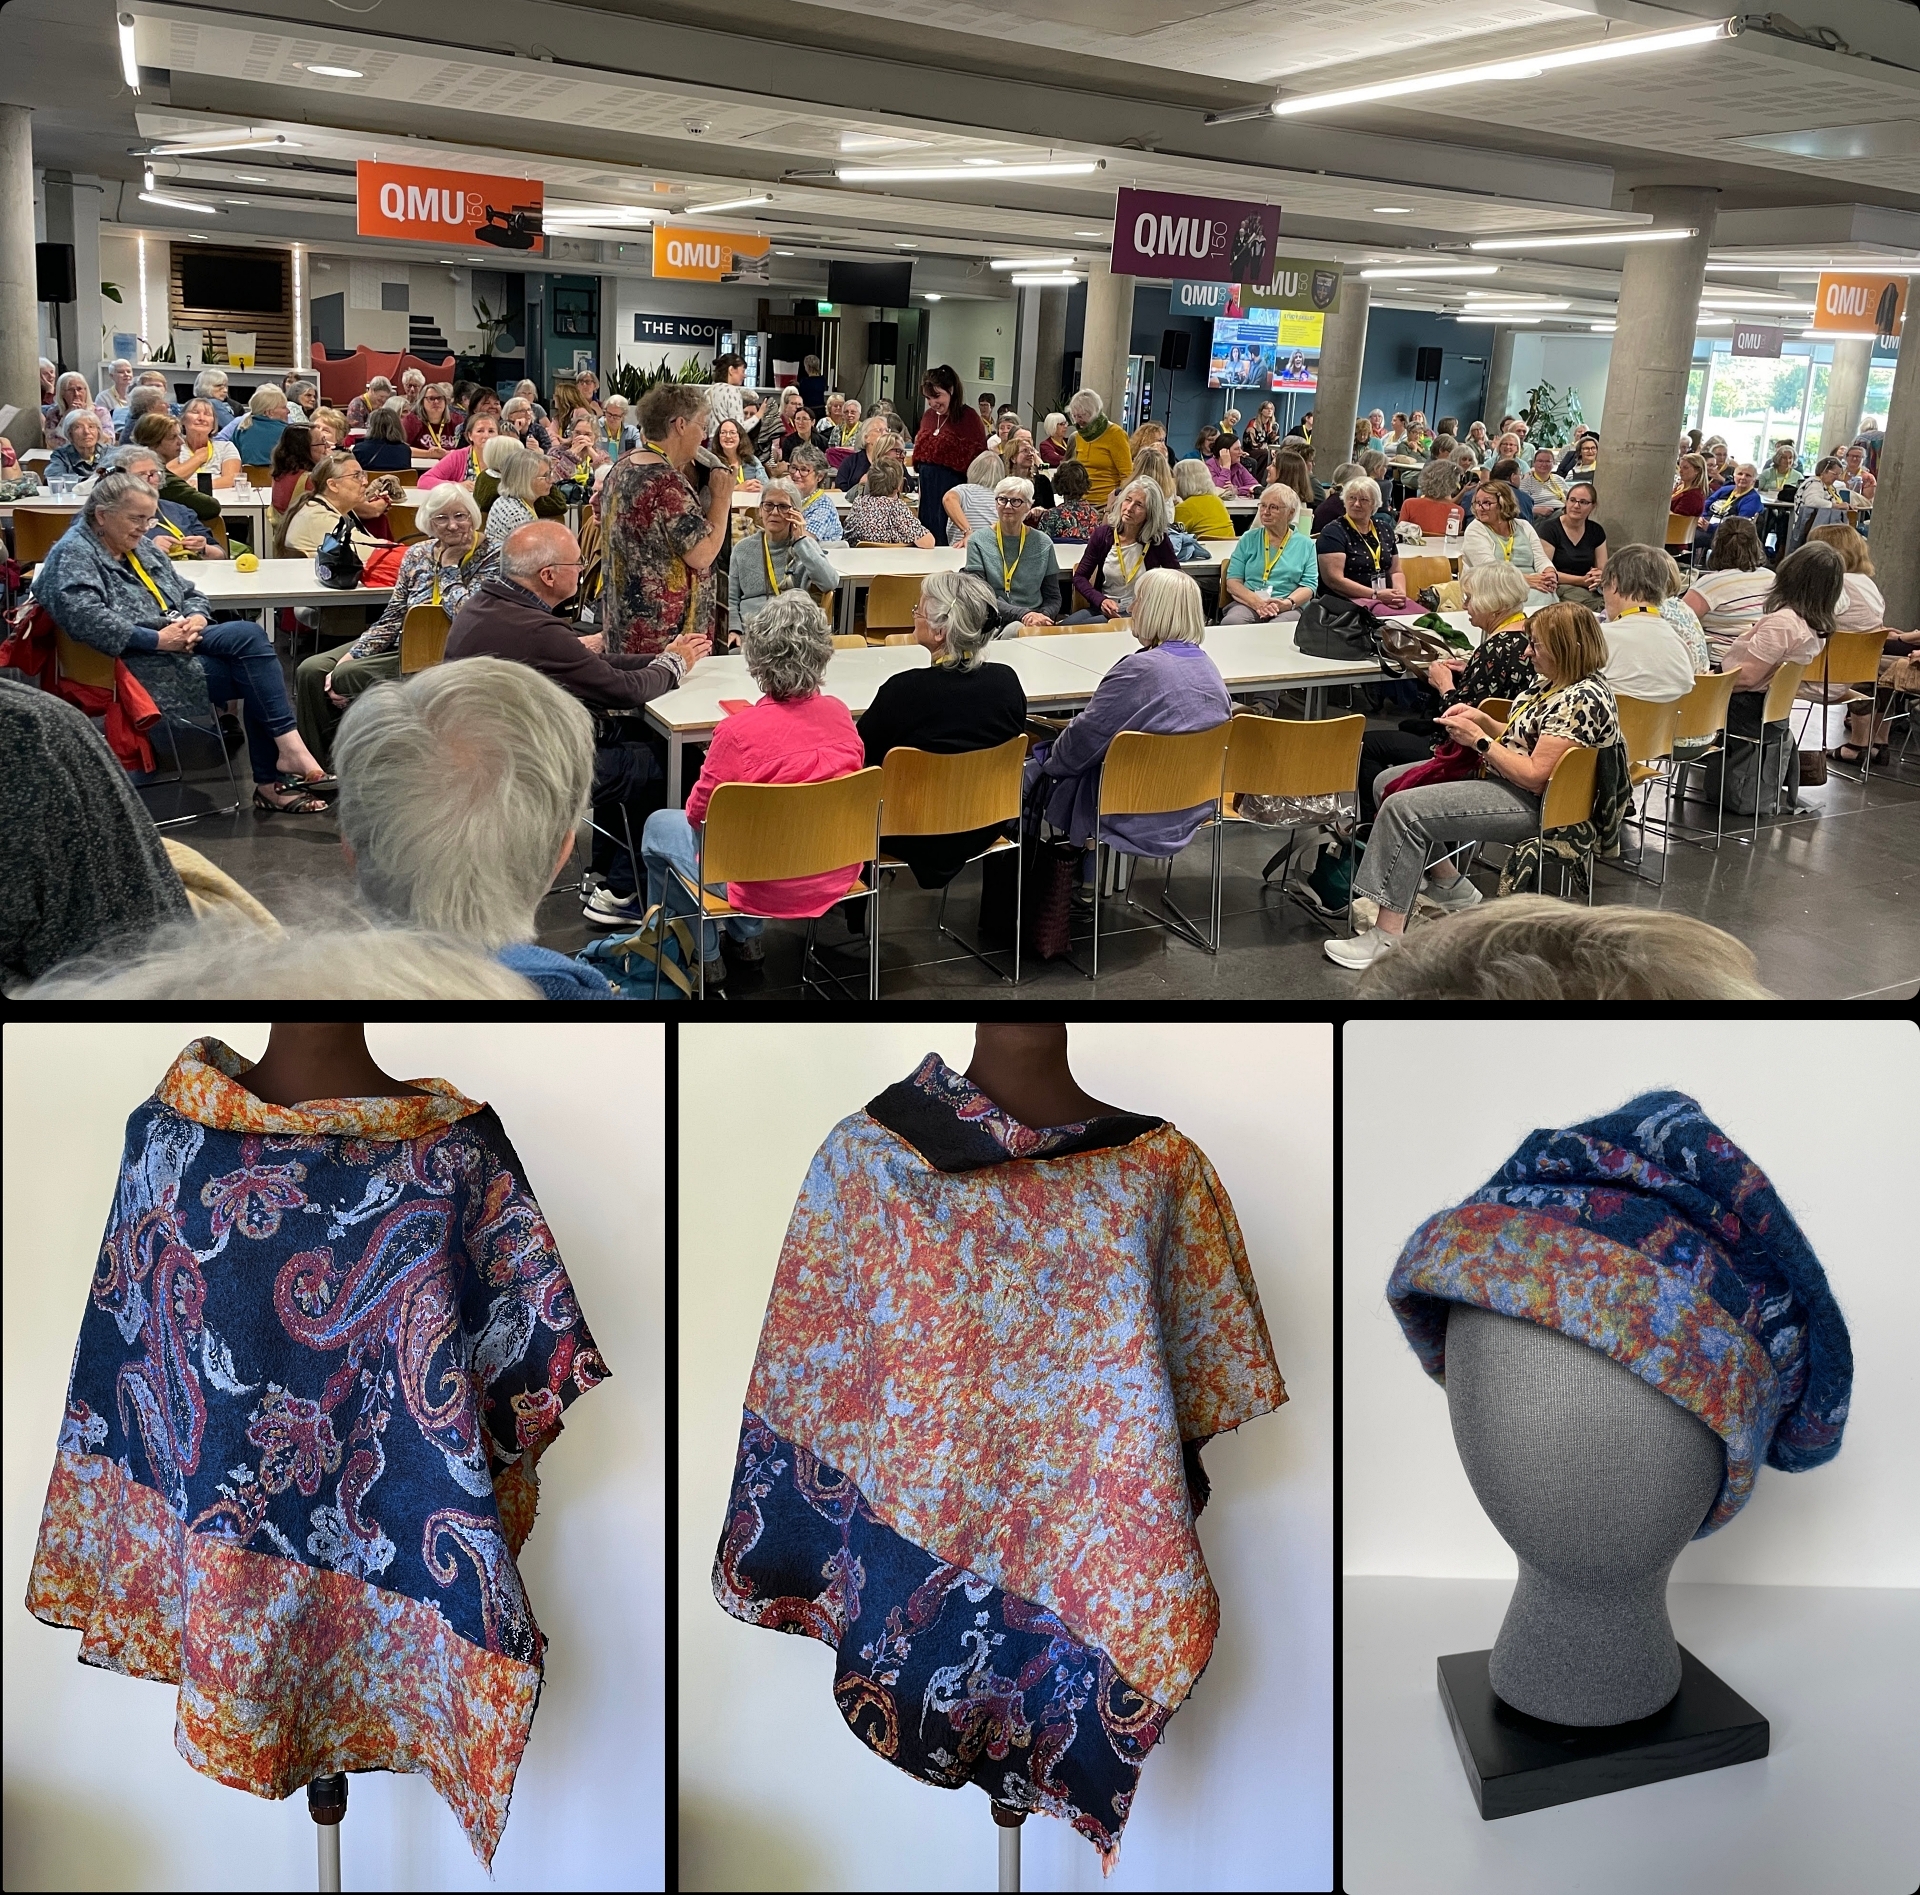
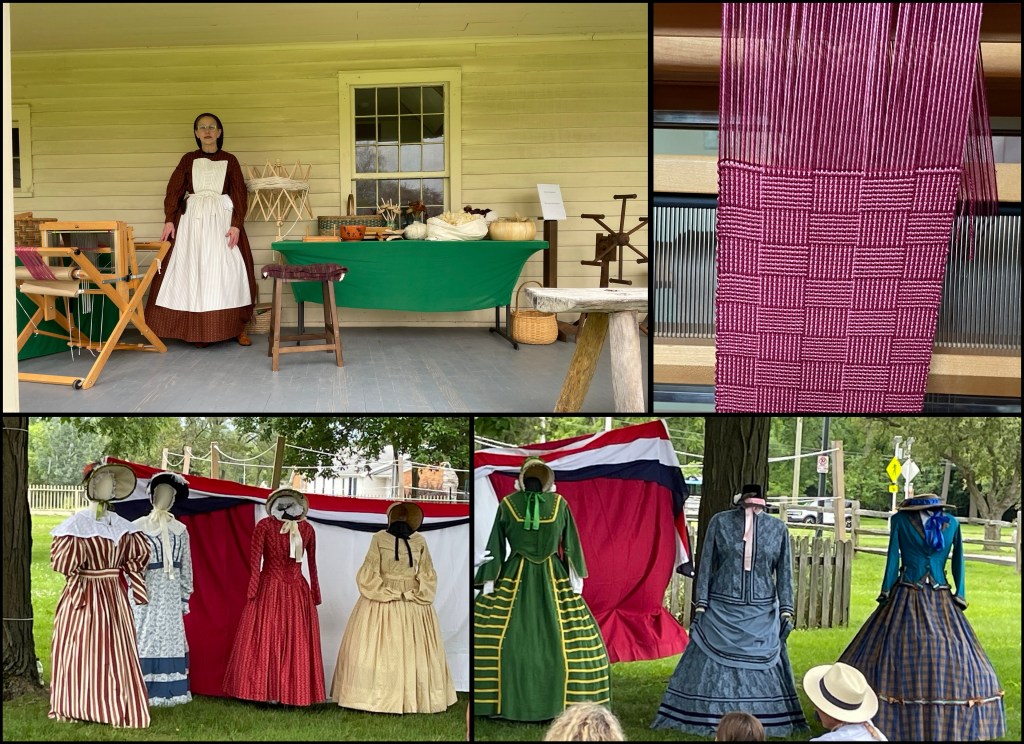
The Association of Guilds of Weavers, Spinner and Dyers Biennial Summer School was held from August 3-10 this year in Scotland at Queen Margaret University just a 10 minute train ride from Edinburgh. 246 students participated in 18 courses in weaving, spinning, dyeing and felting.
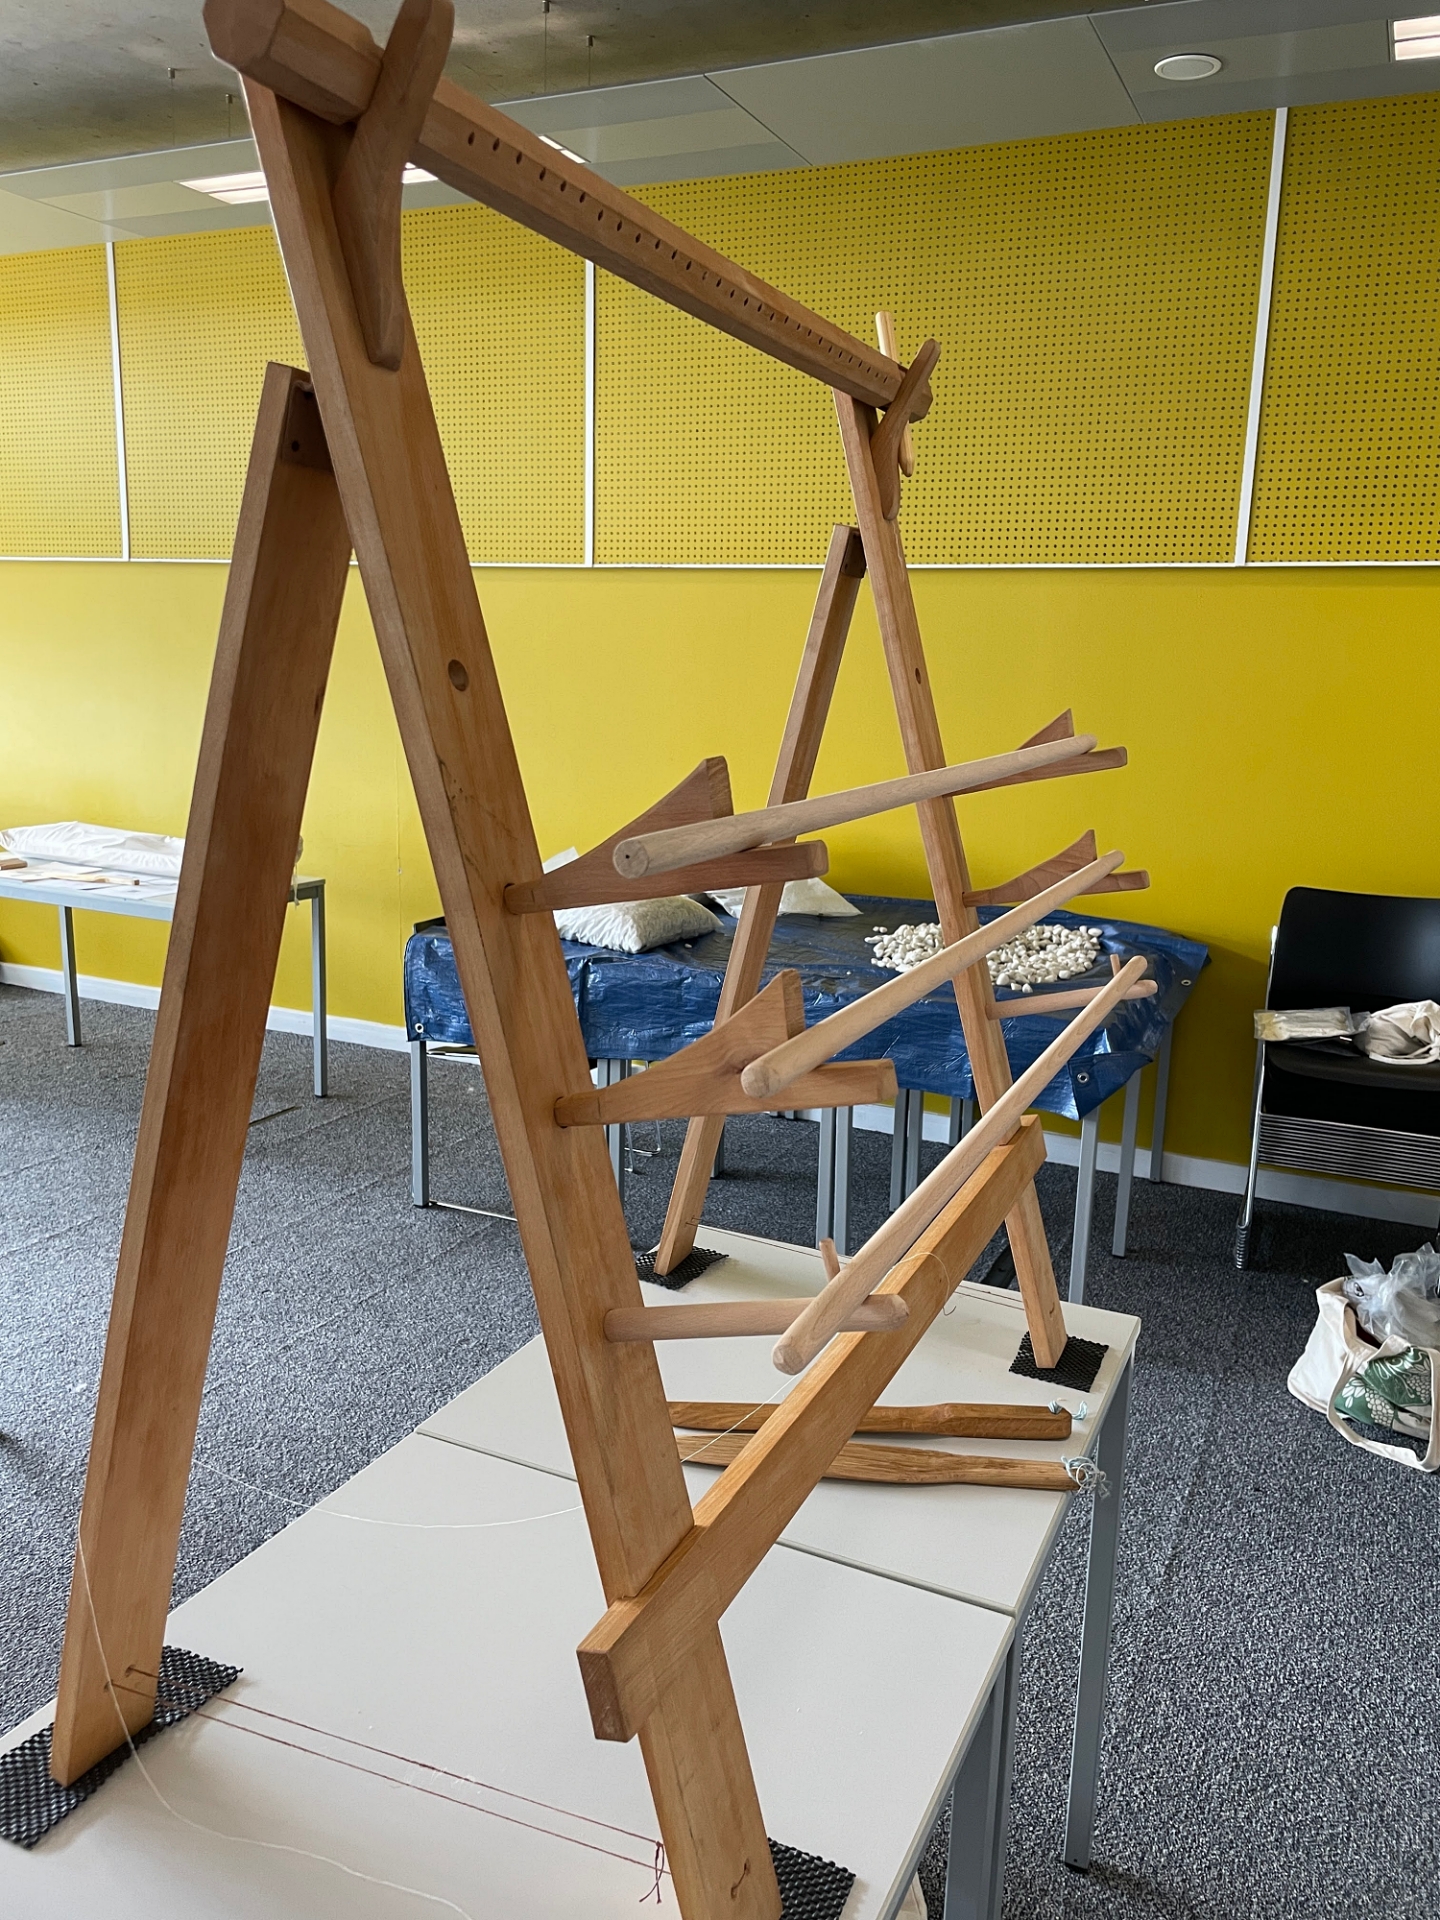
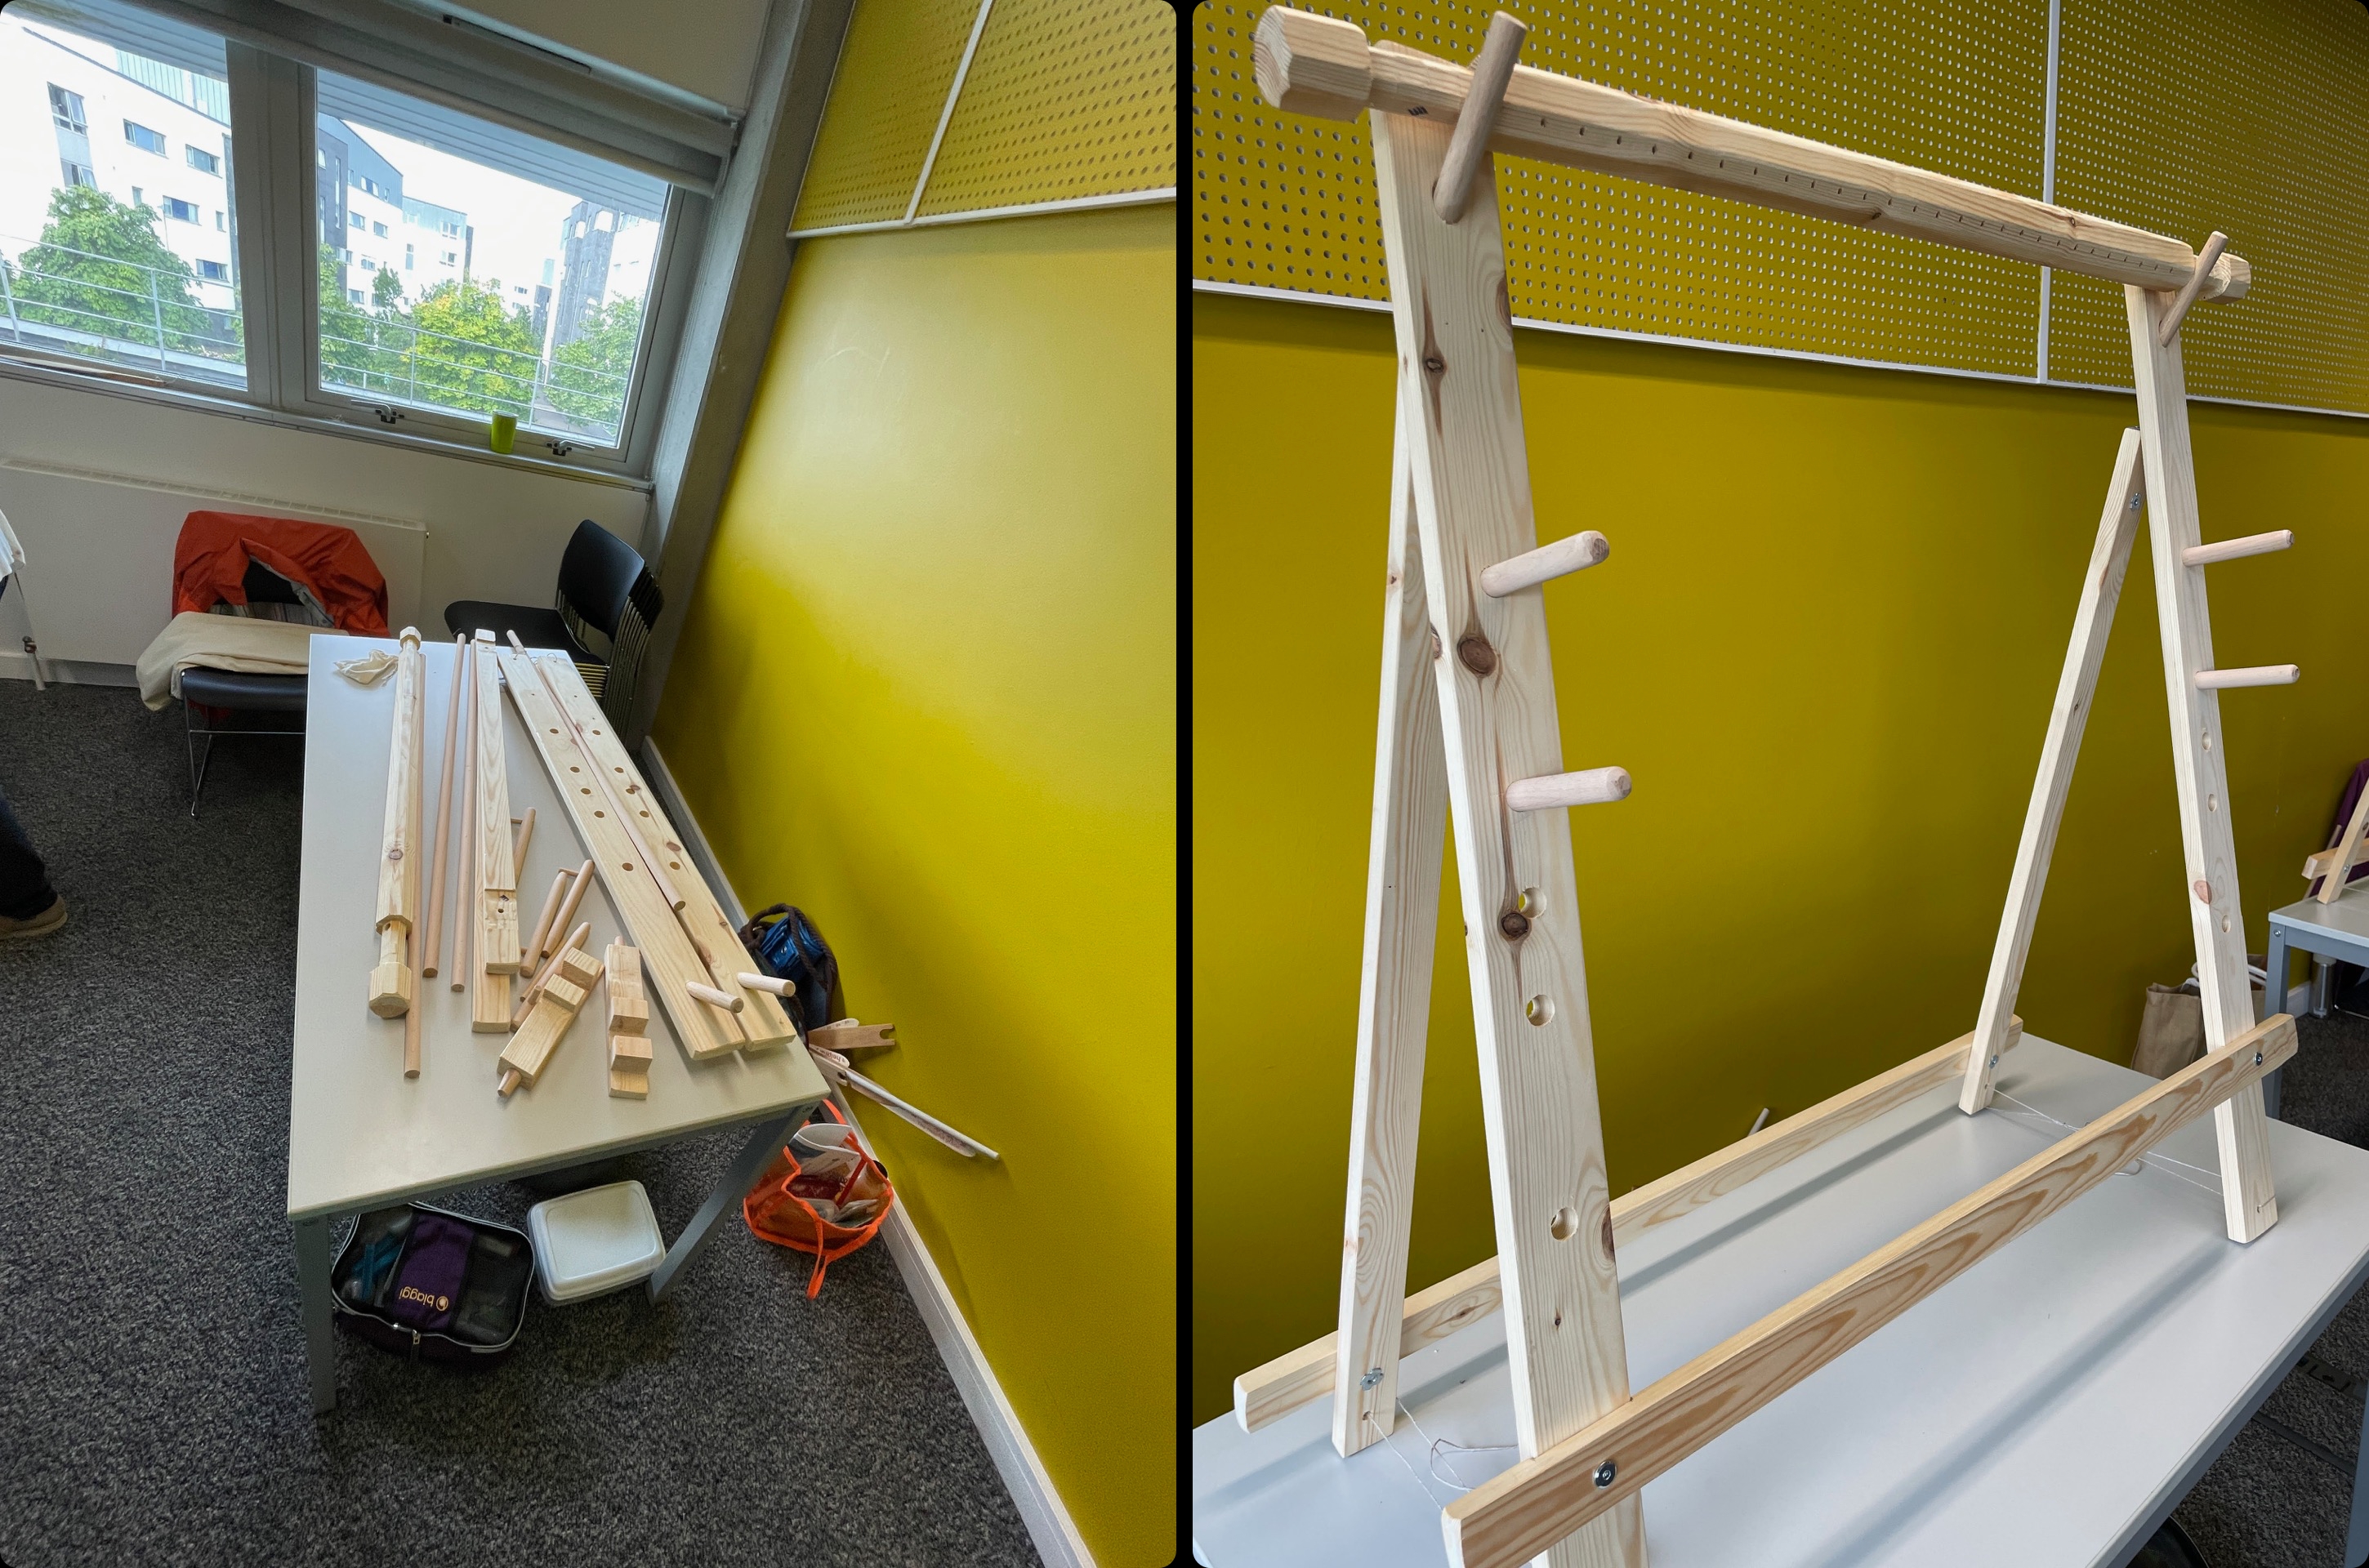
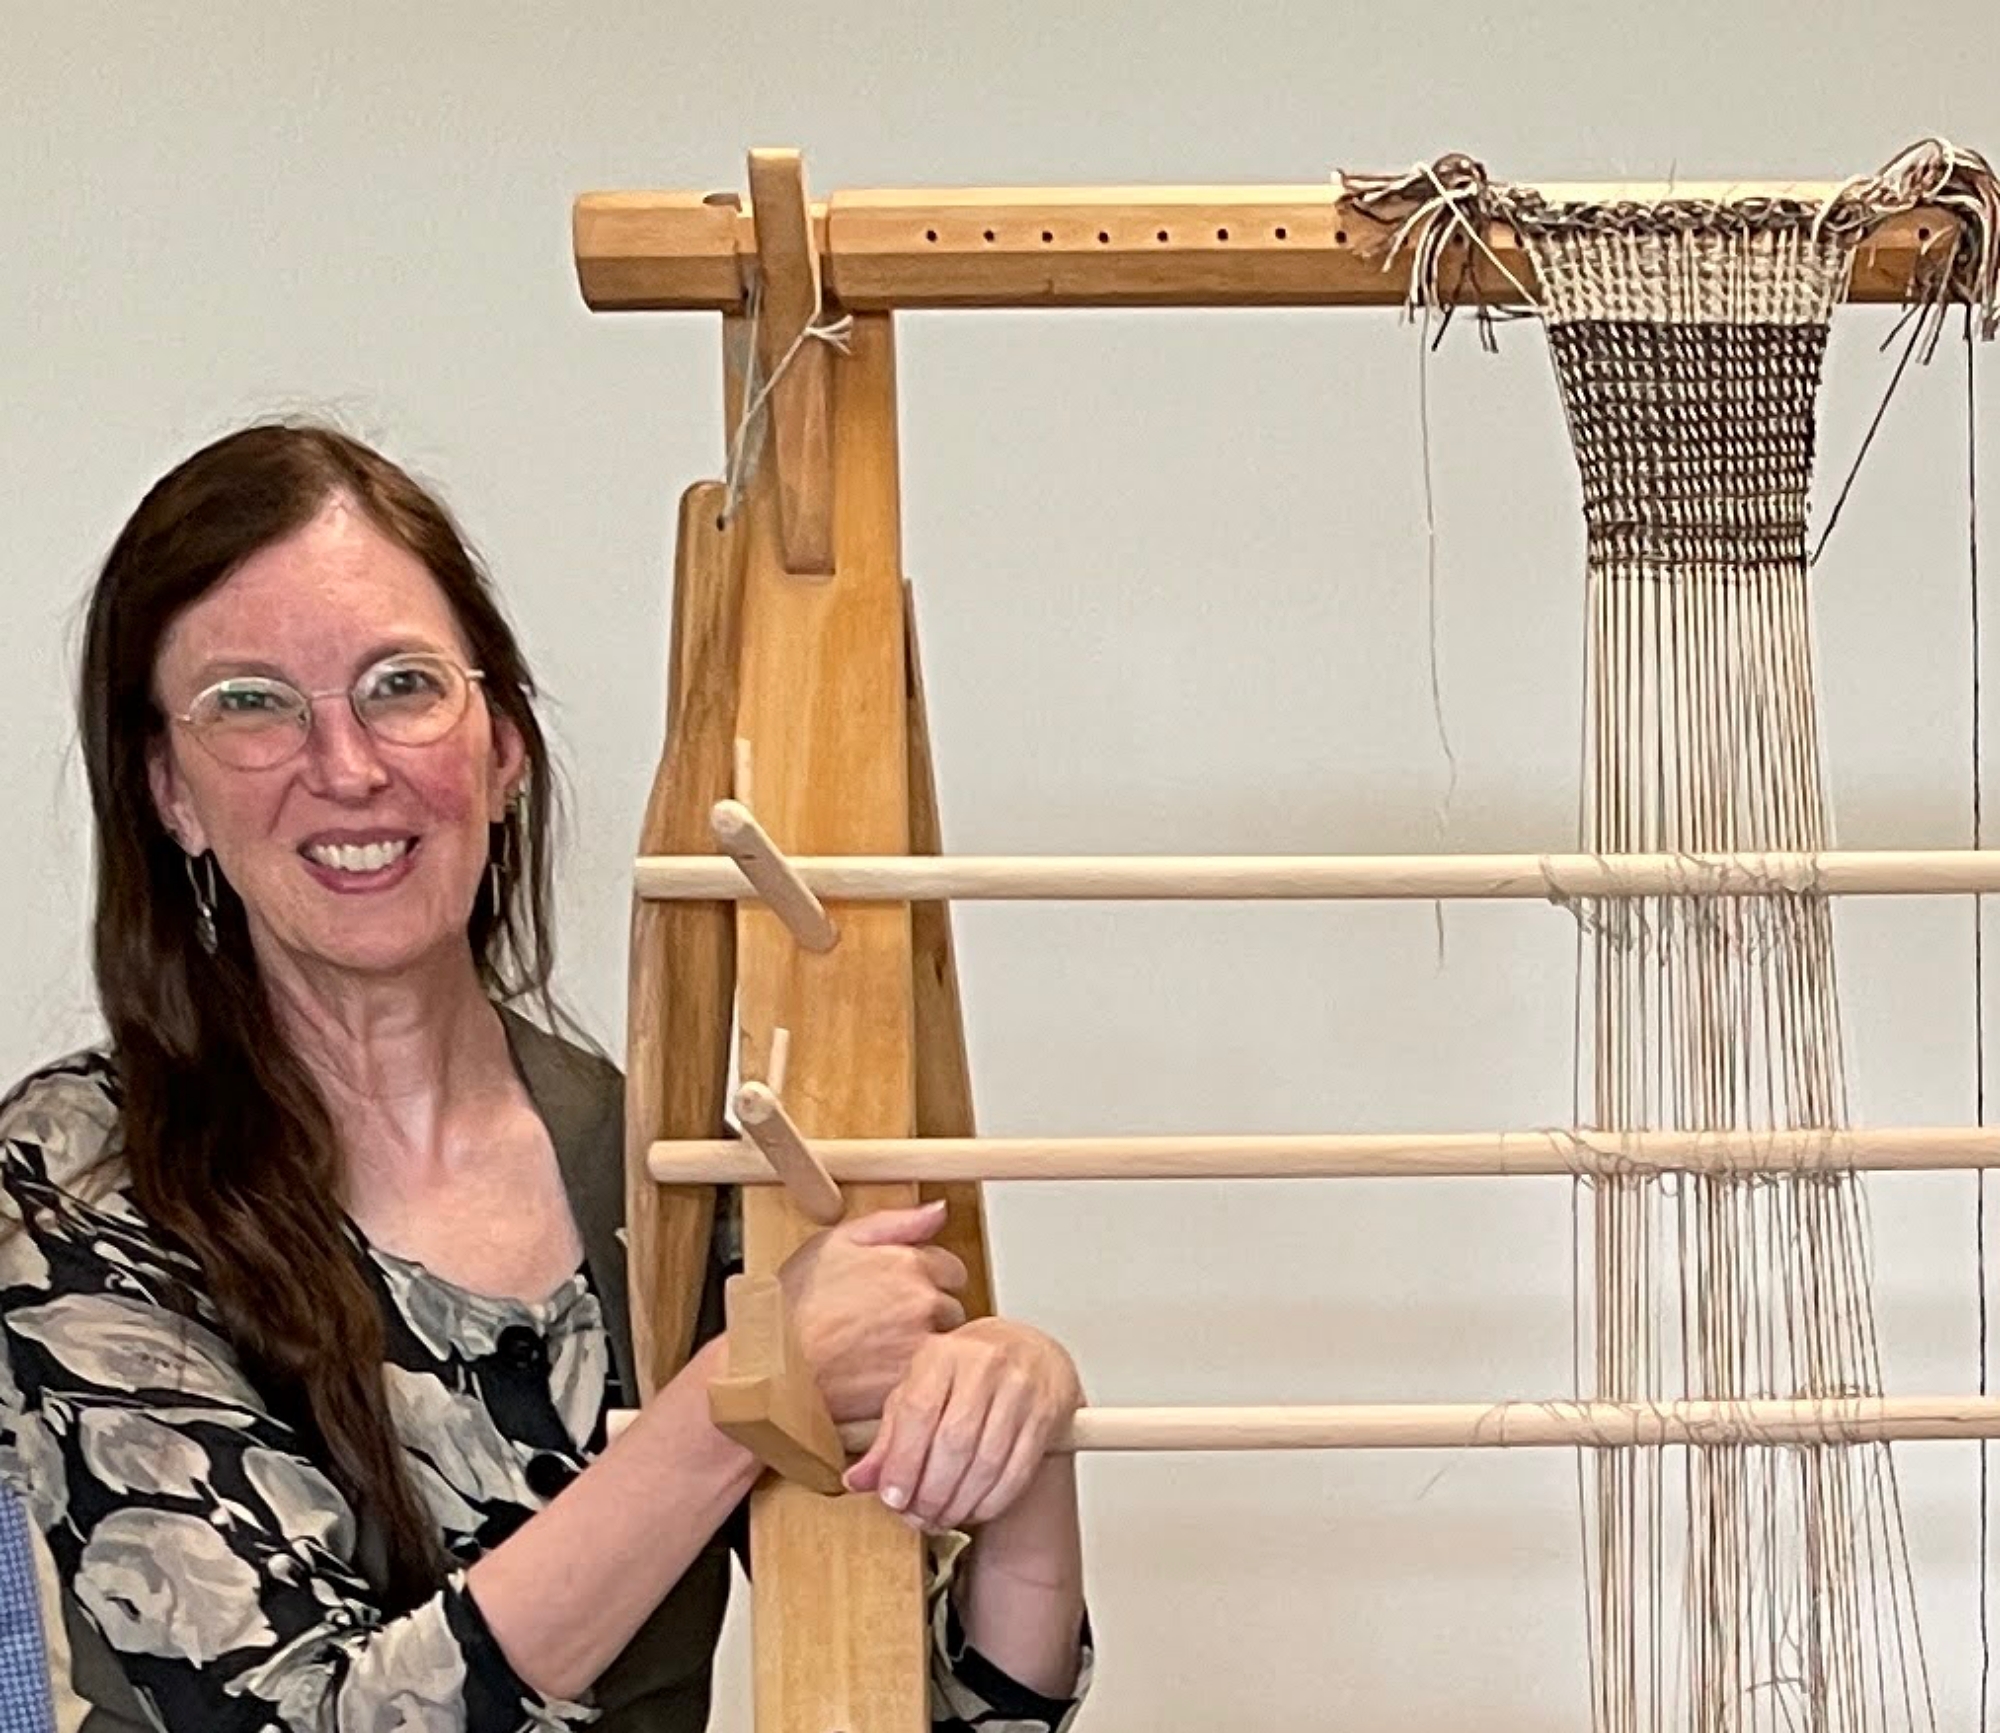
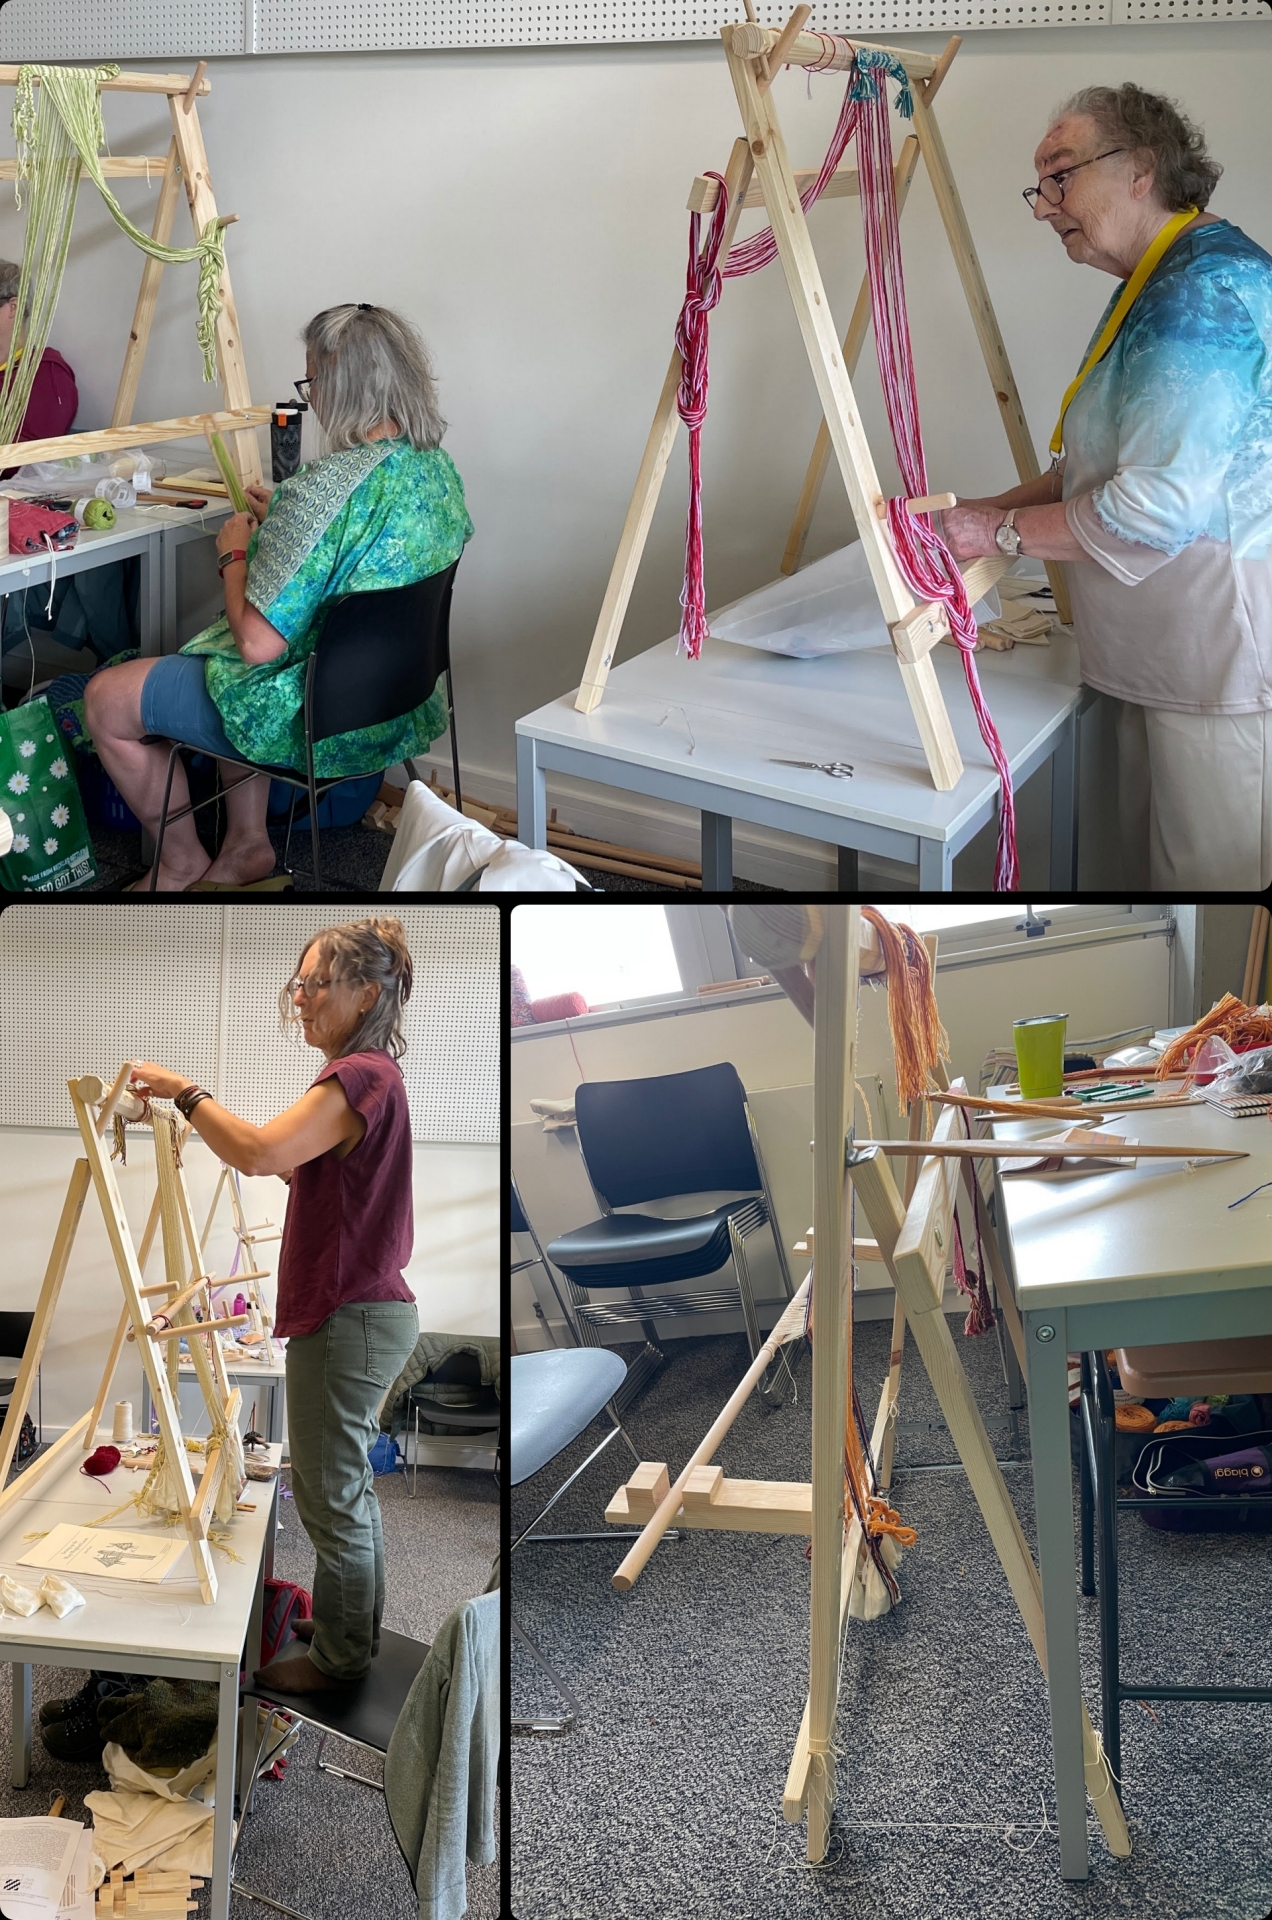
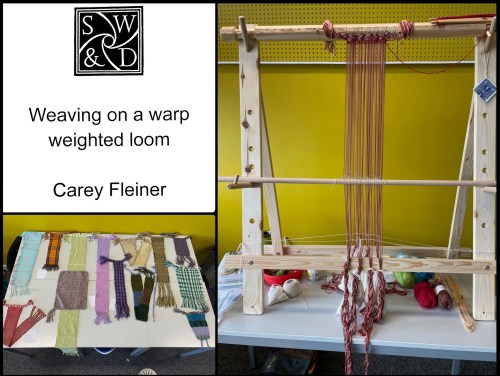
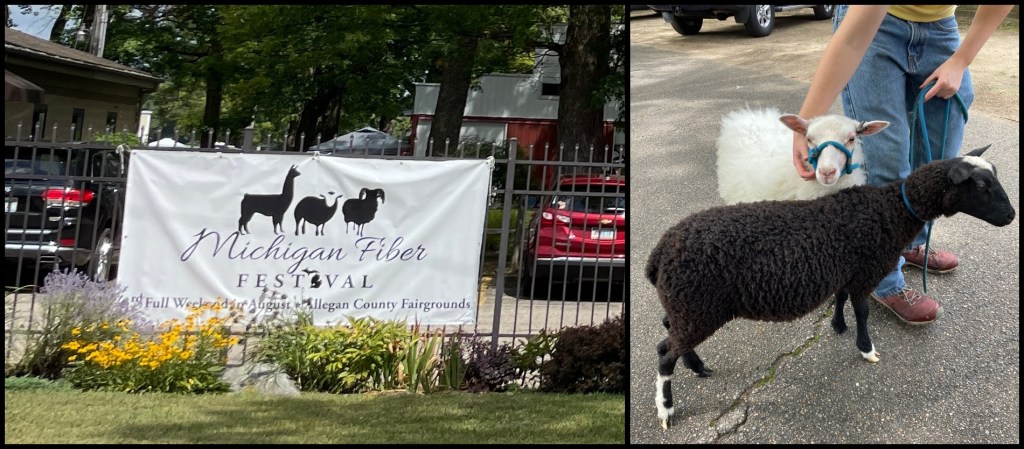
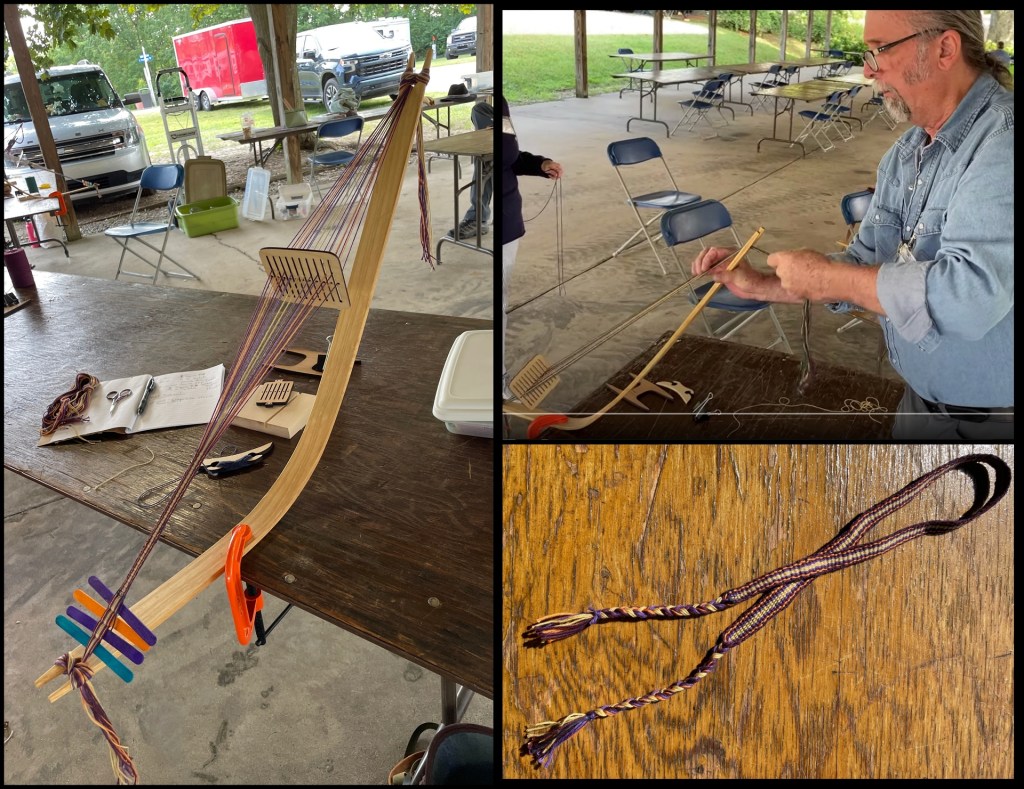
My course this year was Weaving on a Warp Weighted Loom with Dr. Carey Fleiner. This course is an introduction to and working with a warp-weighted loom. We will talk about the history of these looms. Students will learn basic techniques to produce a woven project – from dressing the loom, planning/designing, and weaving a small project. One of the workshops I took at the 2018 Michigan Fiber Festival was building a warp weighted loom. [see August 2018 blogBig Looms..little looms and a bit of color] Here was a chance to have a better understanding how to warp this type of loom and learn how to include a tablet woven header.
Sunday evening was an orientation meeting held in the large lecture hall
then to our classrooms to meet with our tutors for a brief introduction to the week.
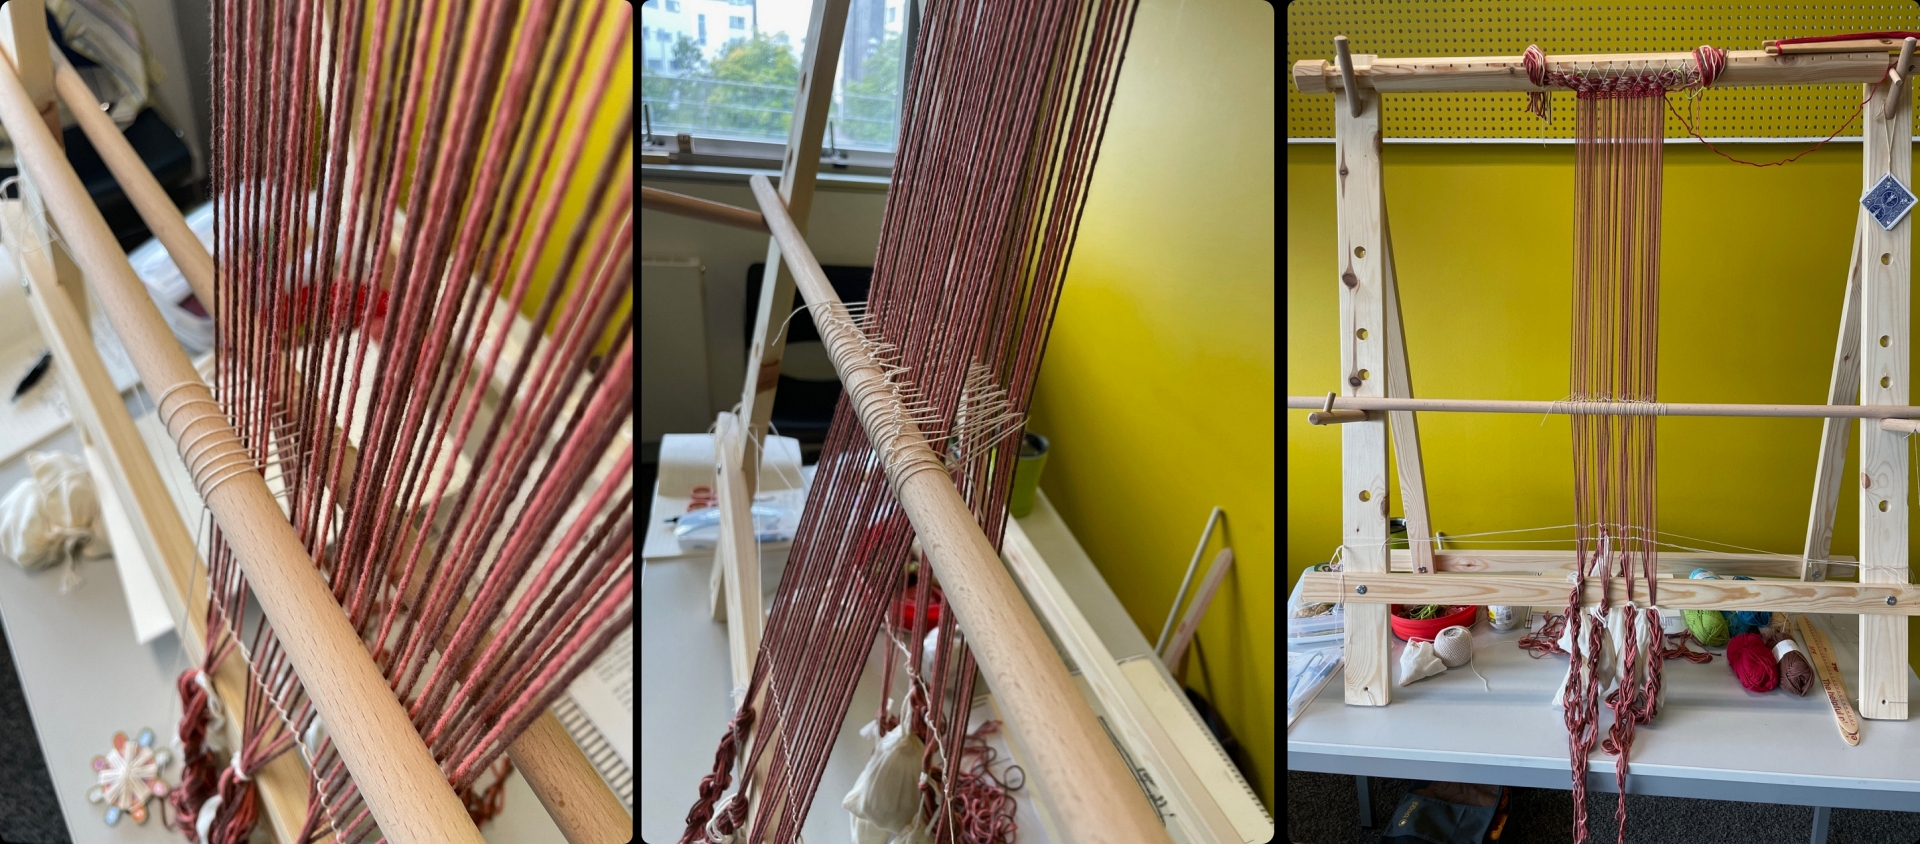
Monday – a VERY busy day! 1. Assemble our looms.
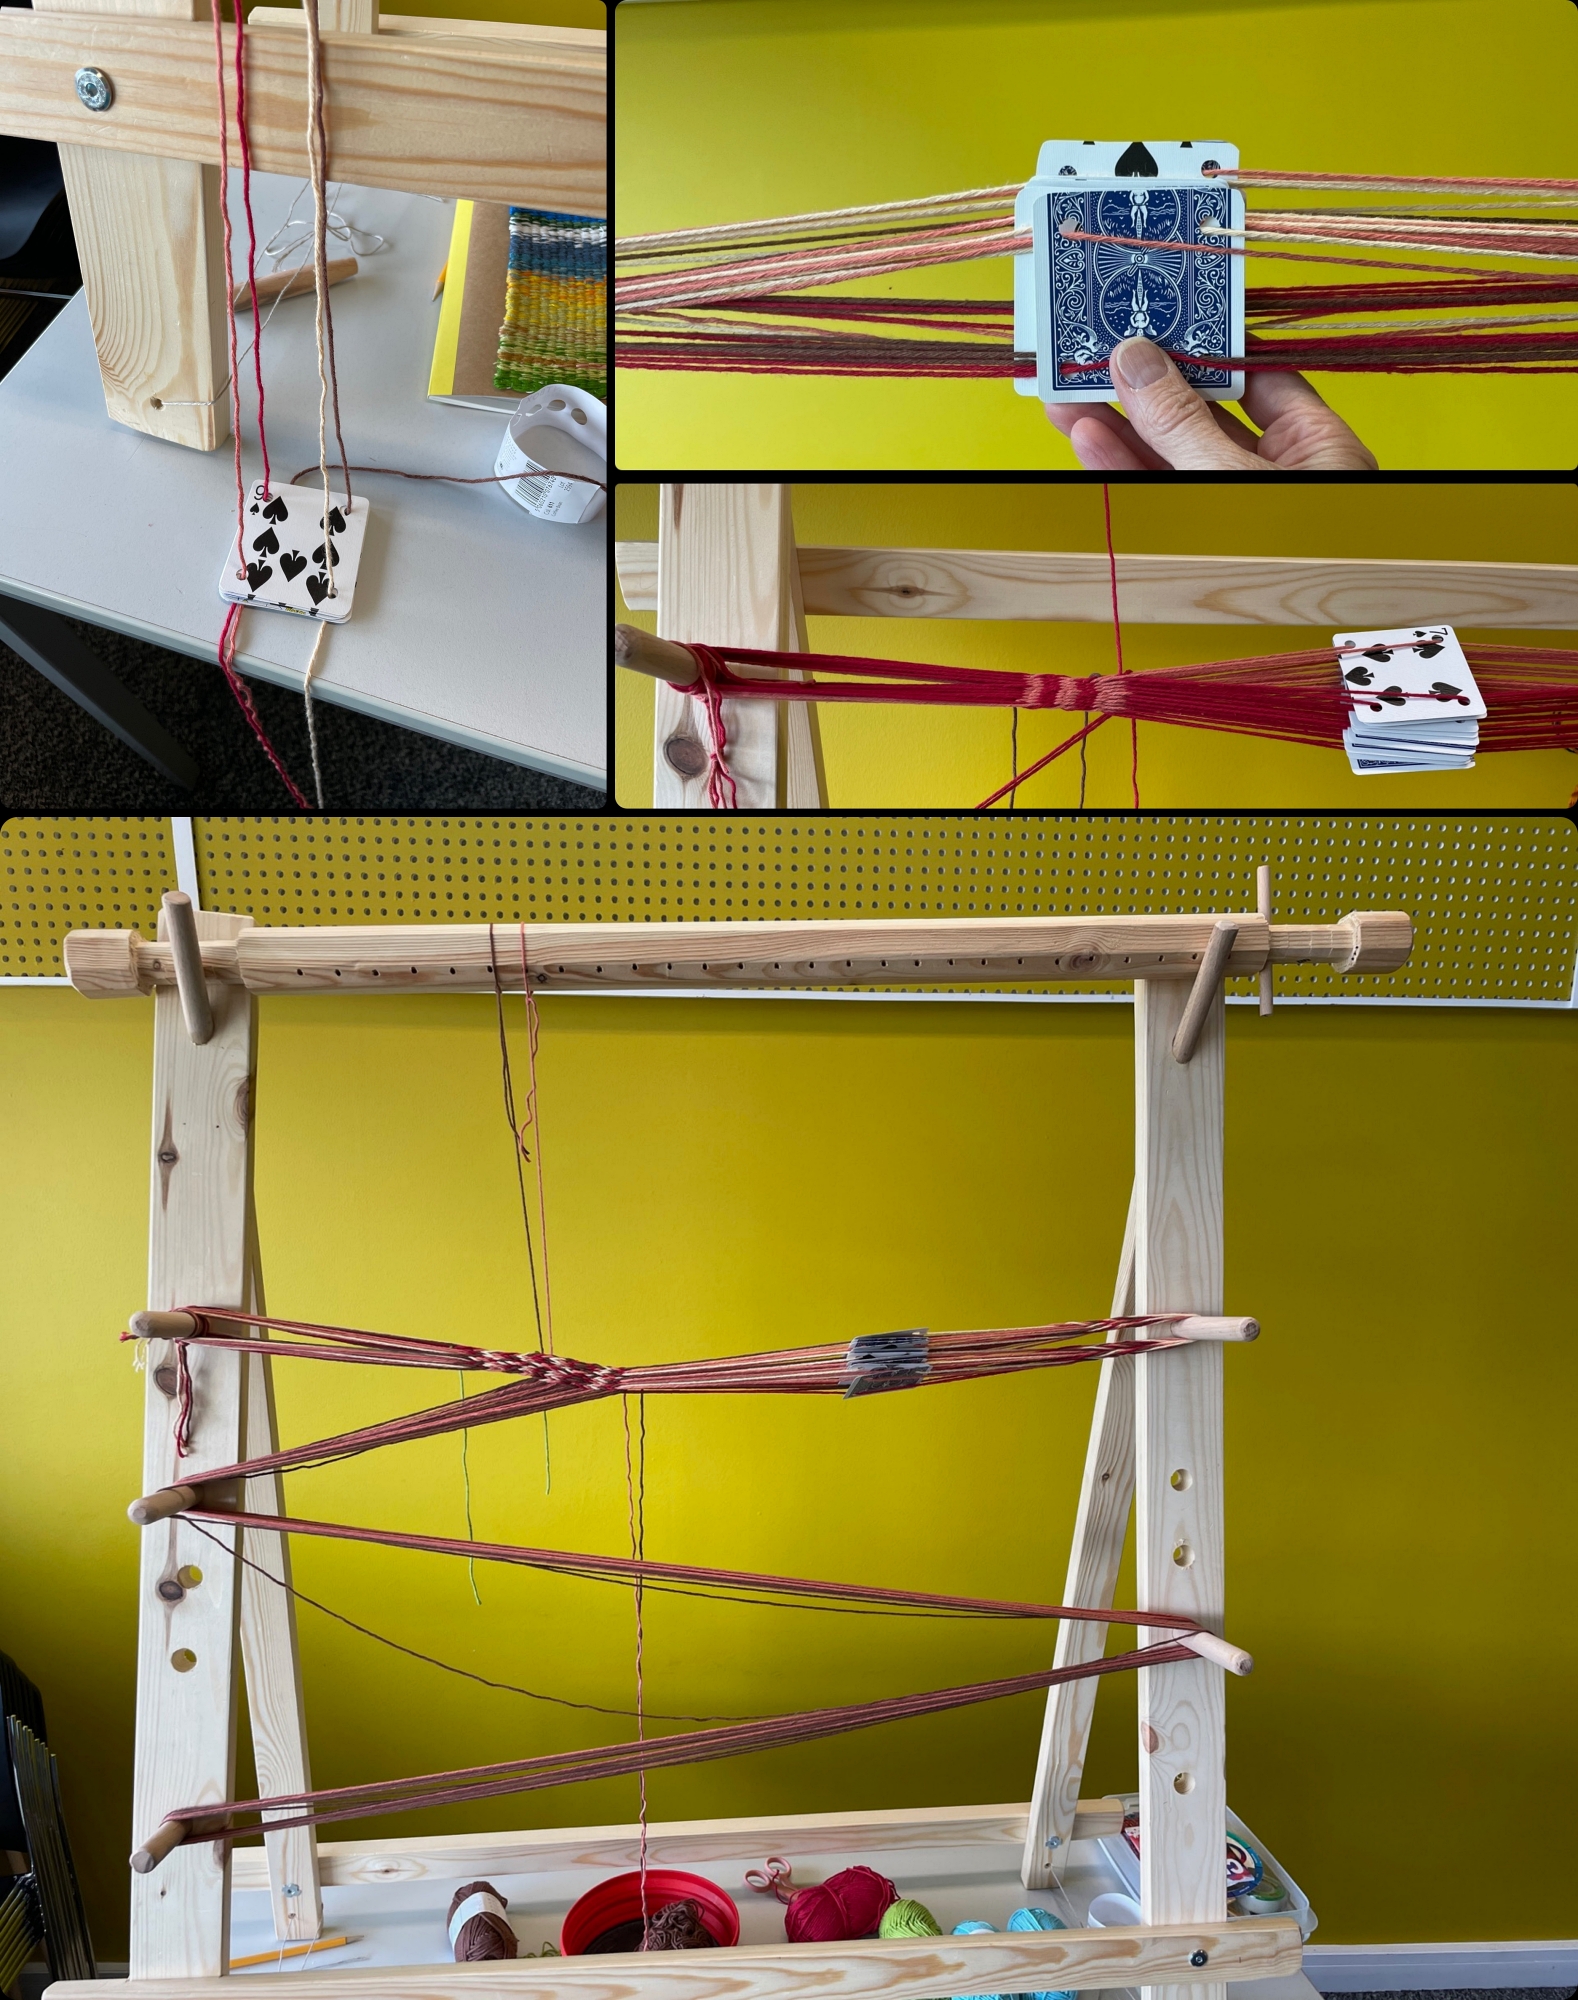
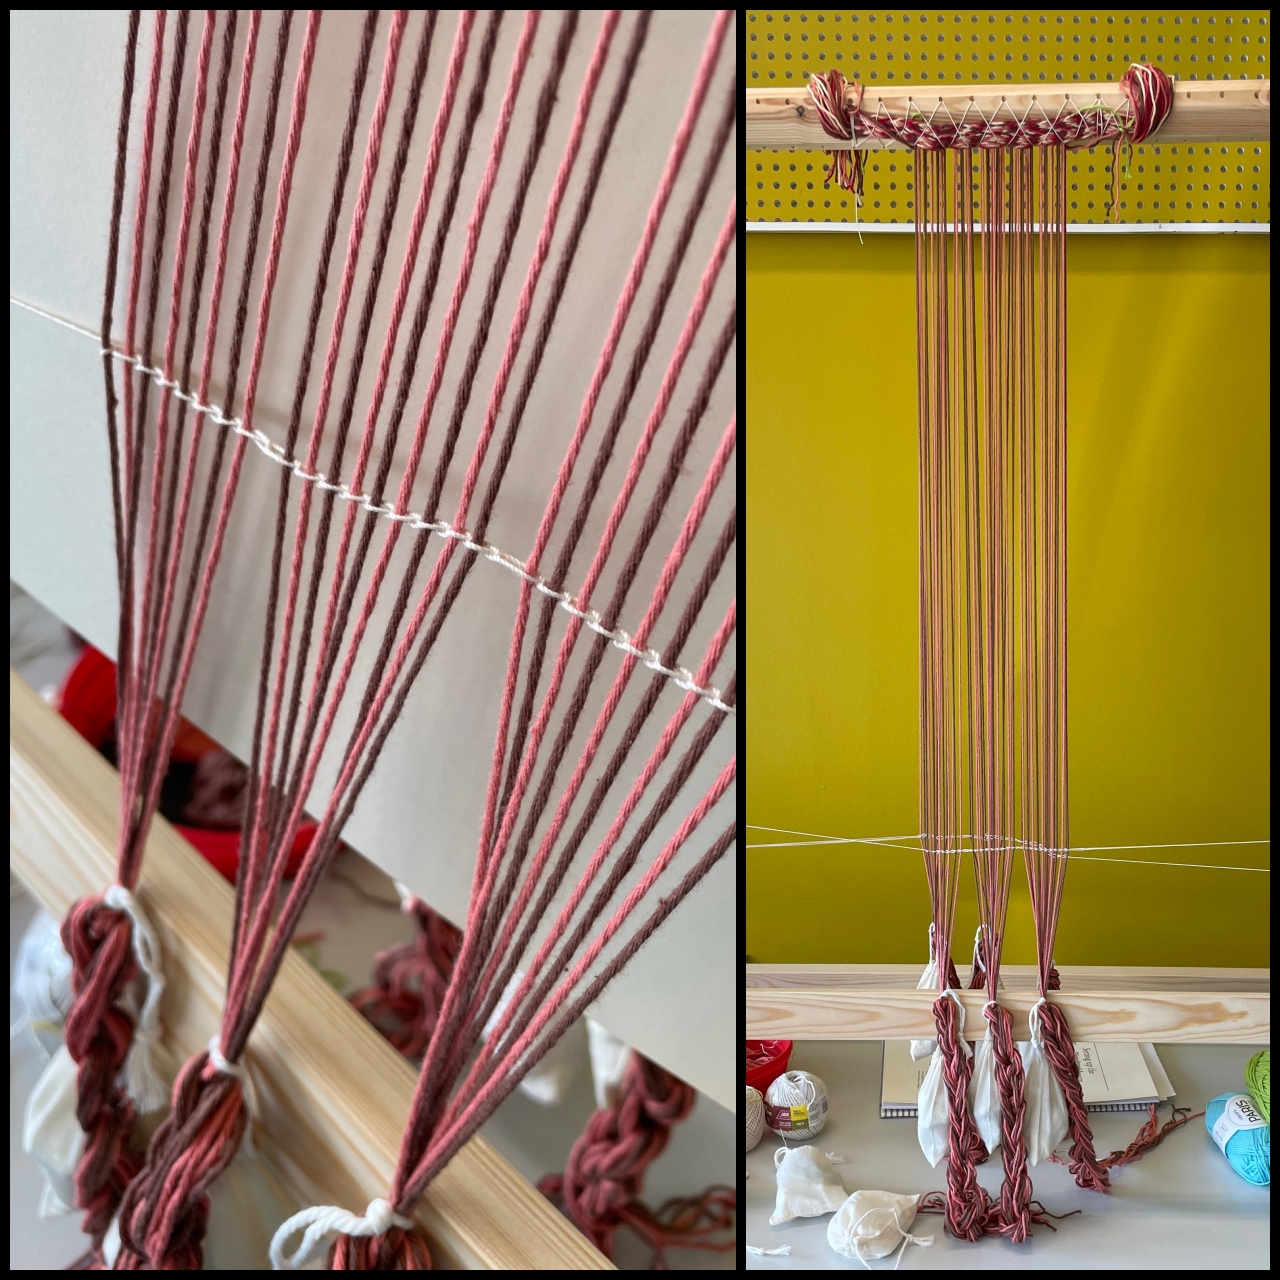
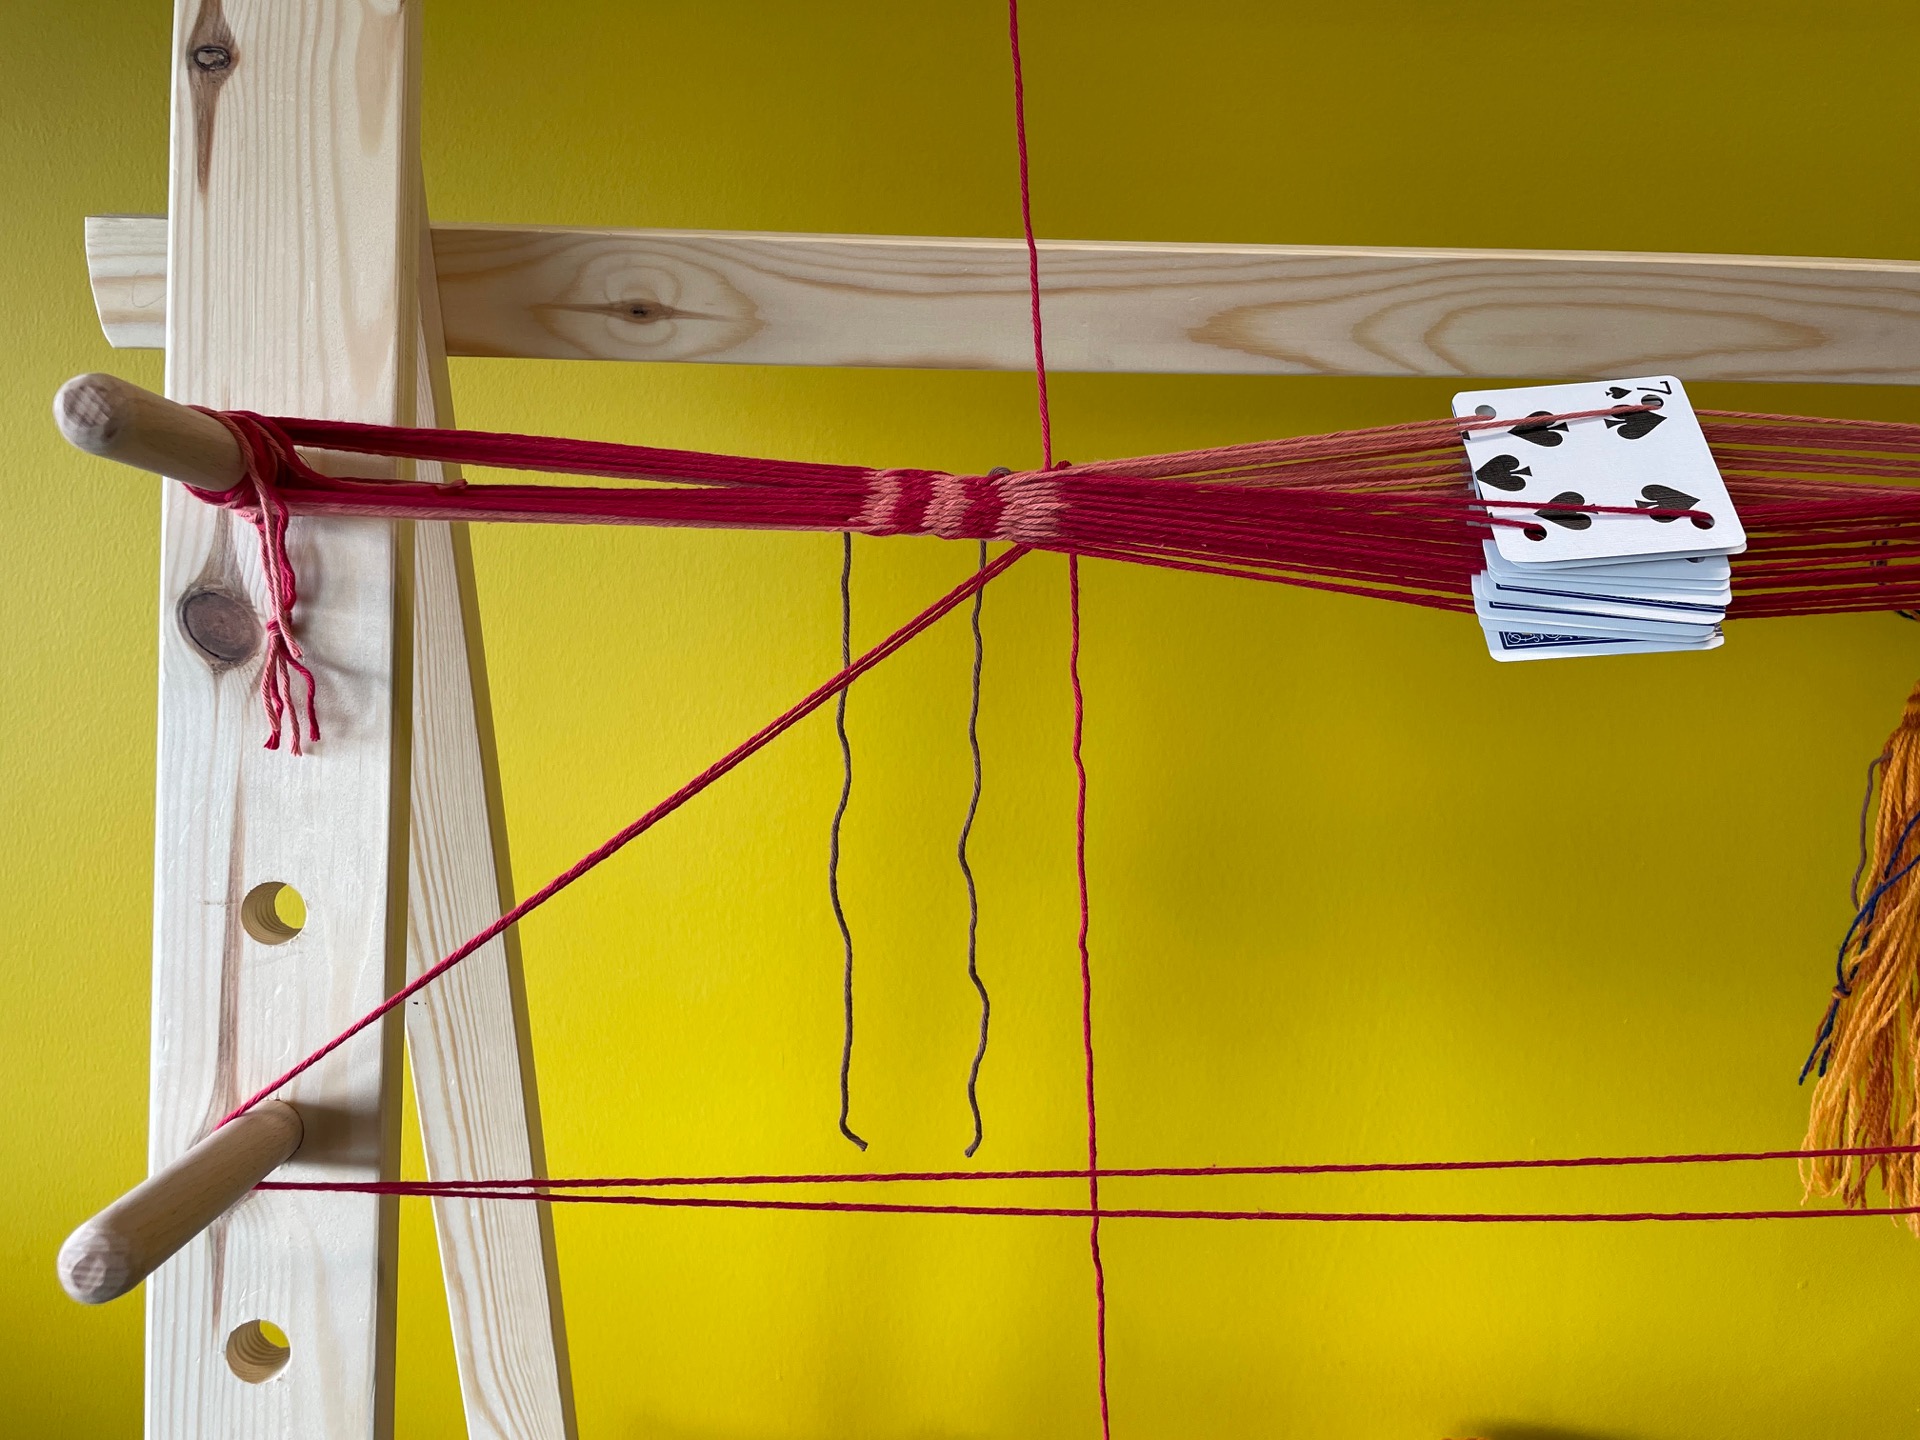
2. Weave a tablet boarder and wind out the warp. We used cotton yarns for this first project as cotton is less ‘sticky’ to work with than wool.
3. Lash the tablet woven header to the cloth beam and separate the front and back warp yarns.
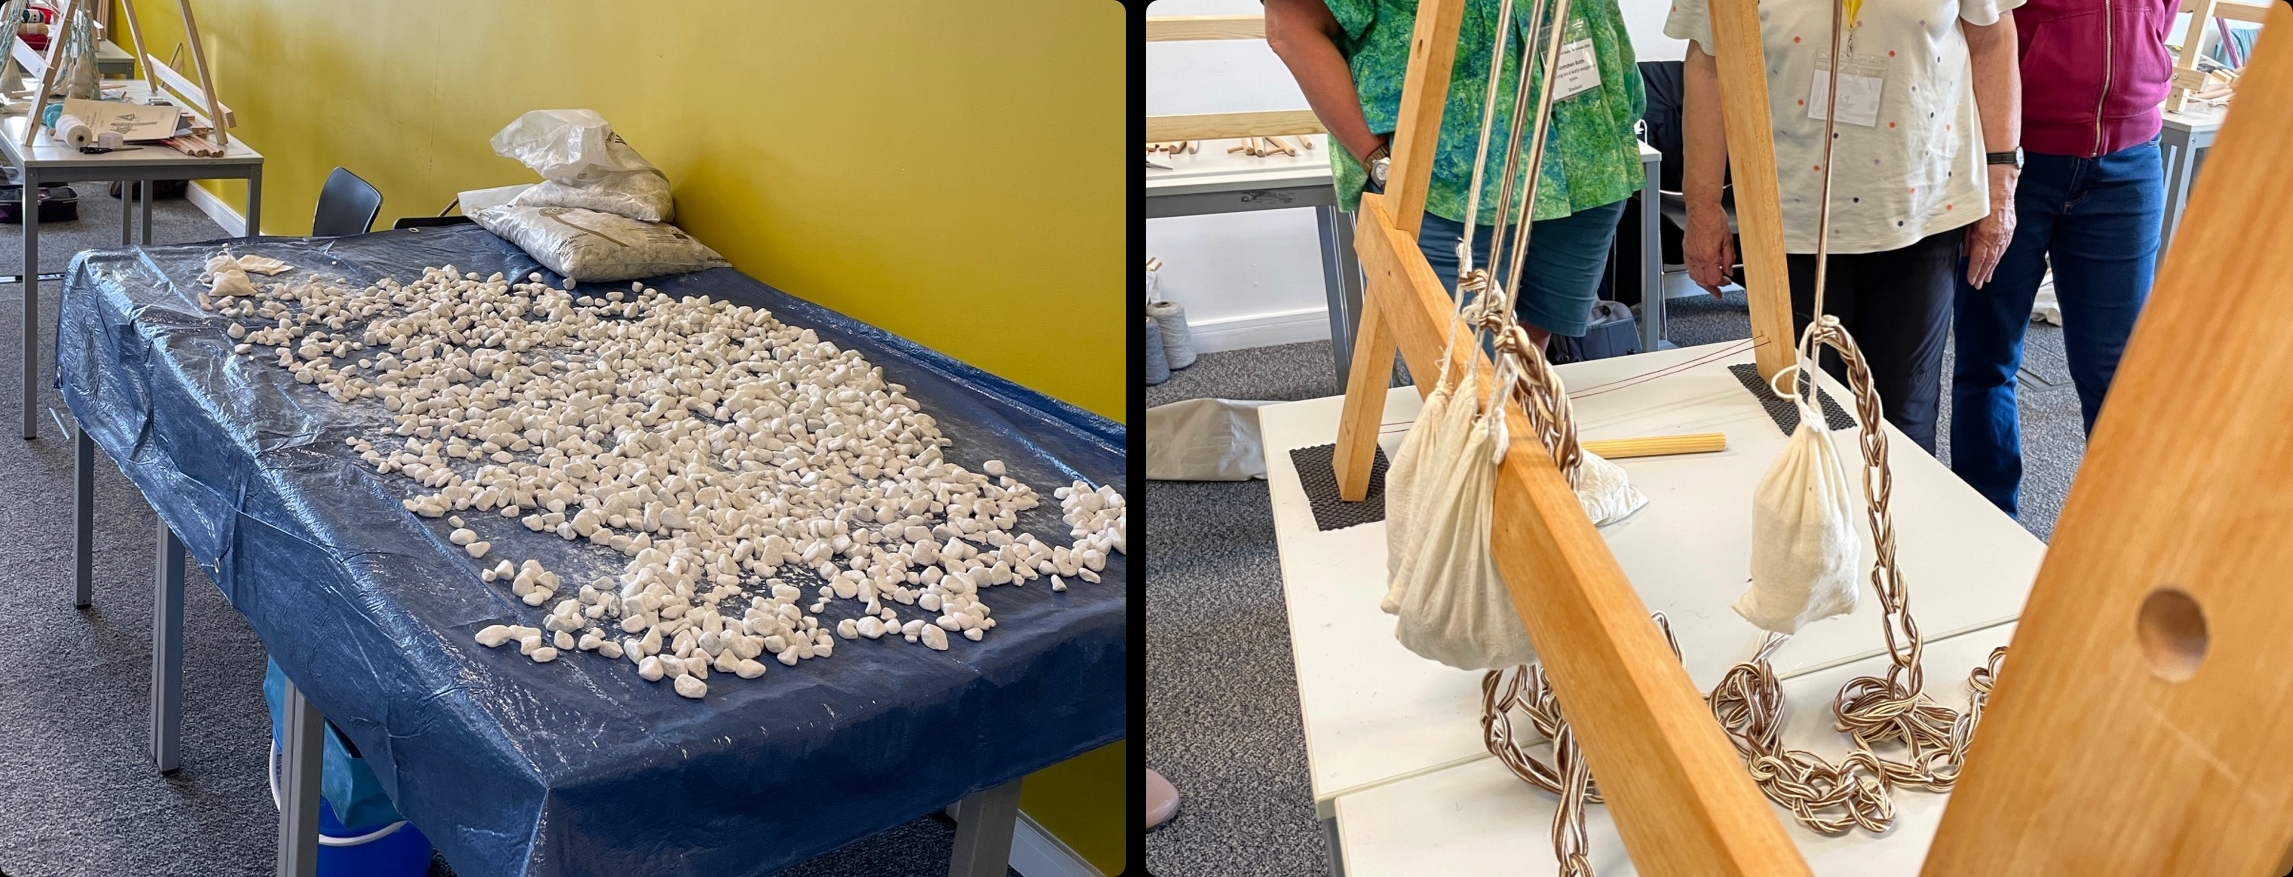
4. Fill small bags with stones to be our warp weights.
5. Last task of the day was chain stitching the warp ends to separate them. This did not come easily for me – took me 2 tries to get front done and 4 tries to get the back done. Good news is by the end of the day I understood why I was missing some of the warp yarns.
Our instructor, Dr. Carey Fleiner, gave the evening lecture about her work atCampus Gallian experimental archaeology project near Messkirch, in Baden-Wurttenberg in southern Germany, near the Swiss border.
Tuesday – 6. Knitting the heddles in the morning and now ready to start weaving!
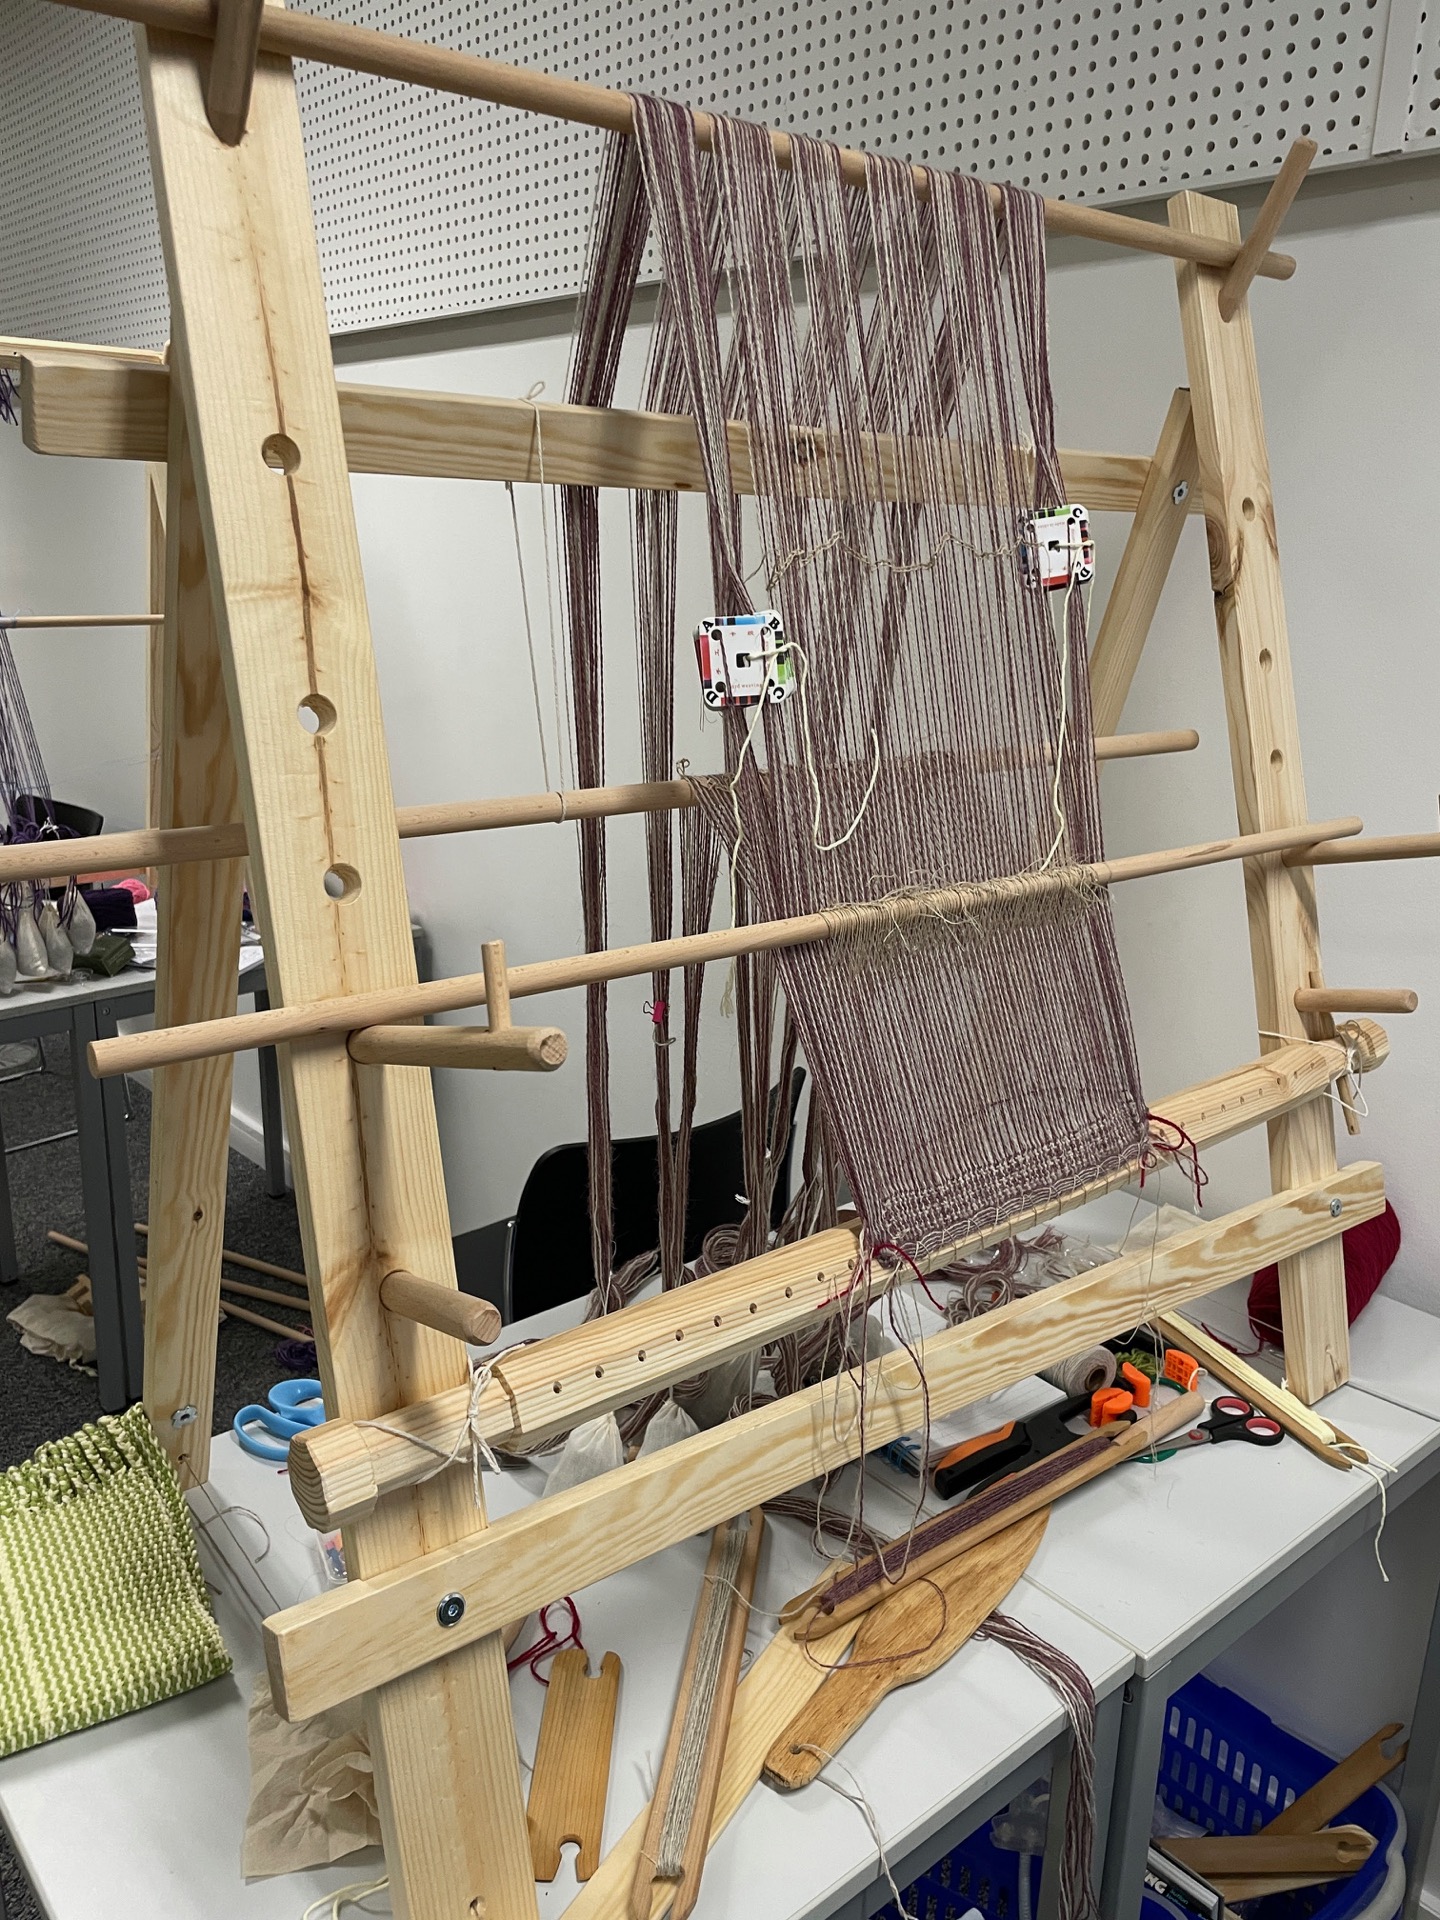
Weaving on a warp weighted loom is different from any other loom. On most looms you beat the yarns down or toward you but a WW-Loom you beat upward using a wooden sword.
7. Finally weaving all afternoon and the first project completed!
Tuesday evening was the Silent Auction. One item caught my eye – a vintage hand-turn Singer sewing machine with its case (similar to the image below) but it was heavy and not going to fit in my suitcase! Oh well…
Wednesday- Half day in the workroom
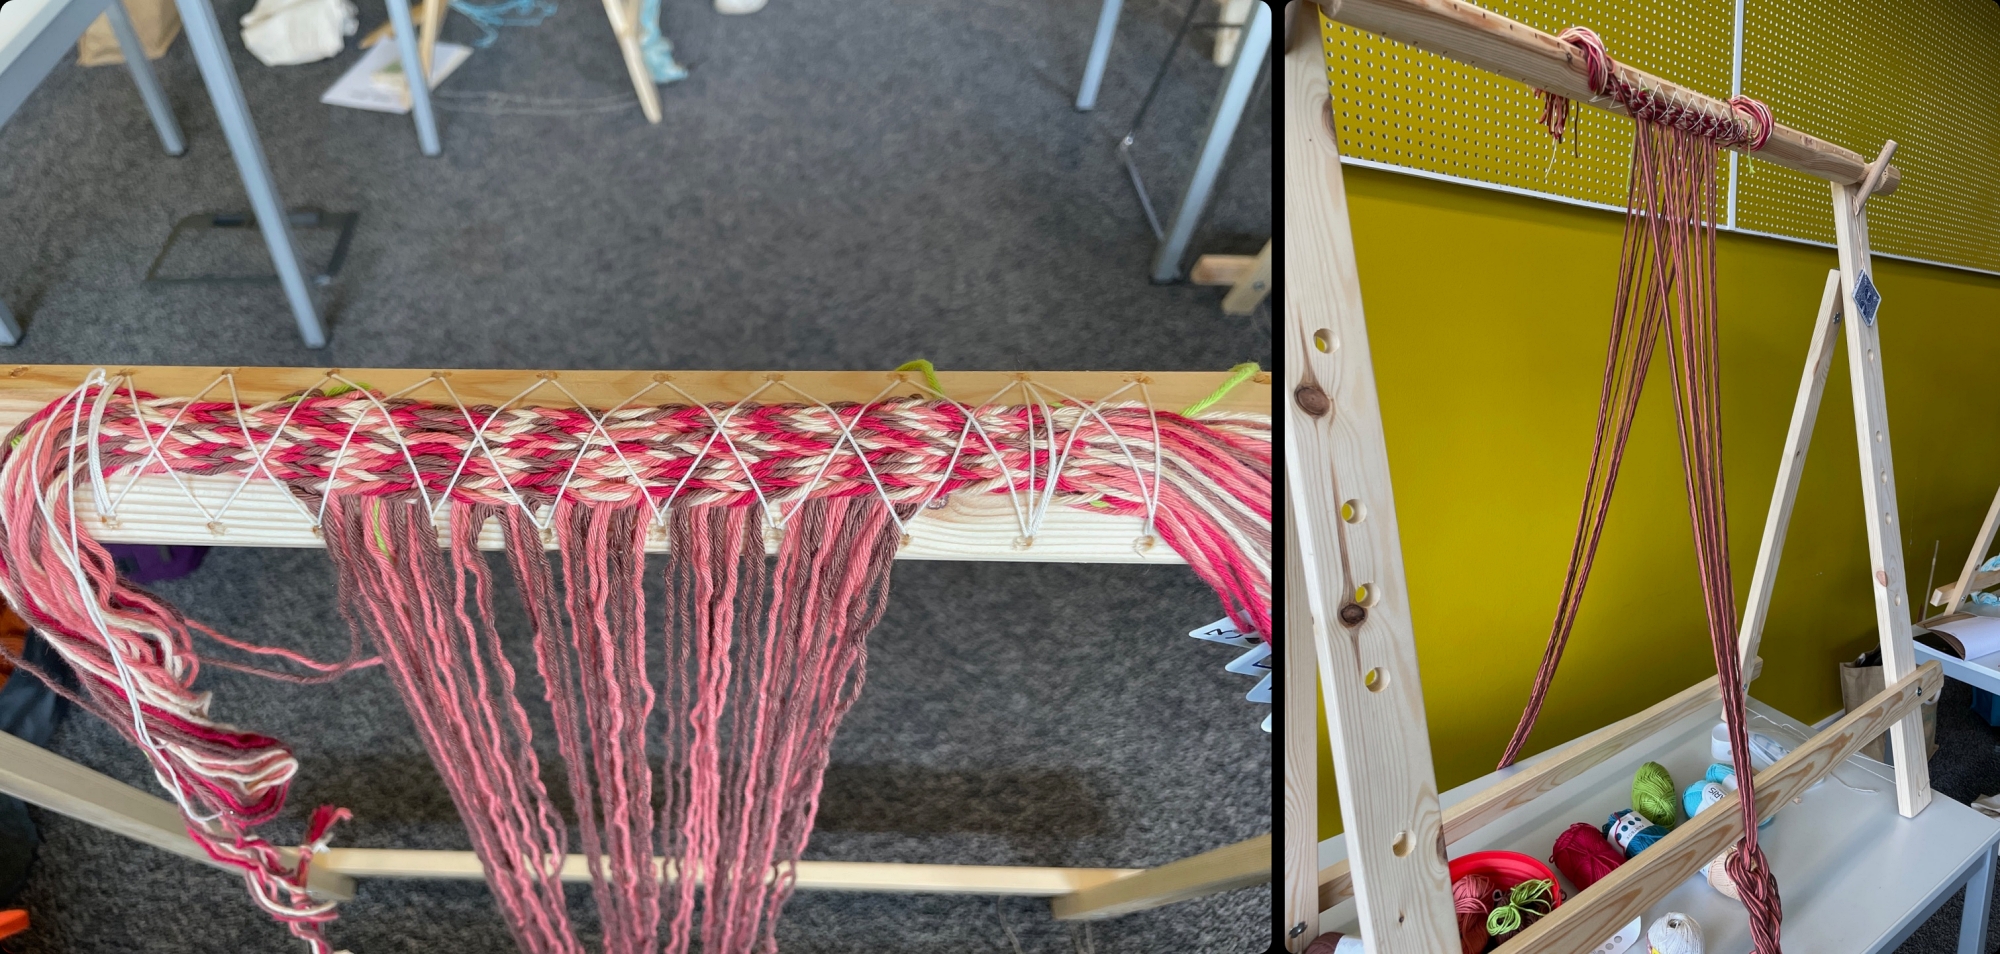
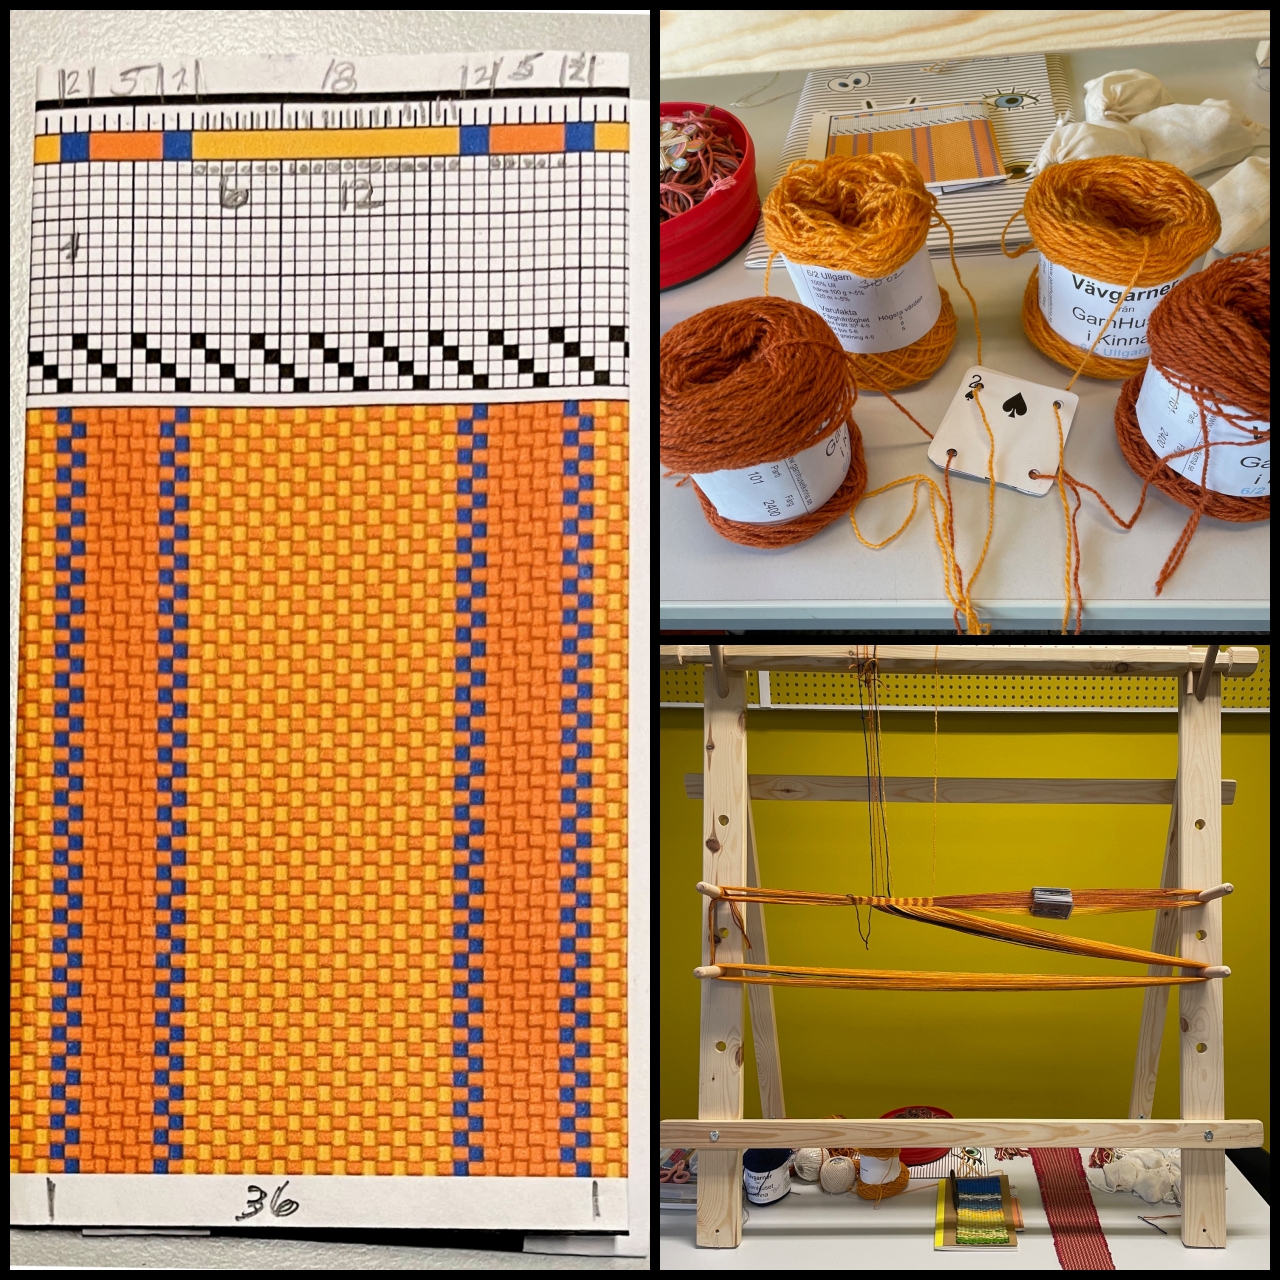
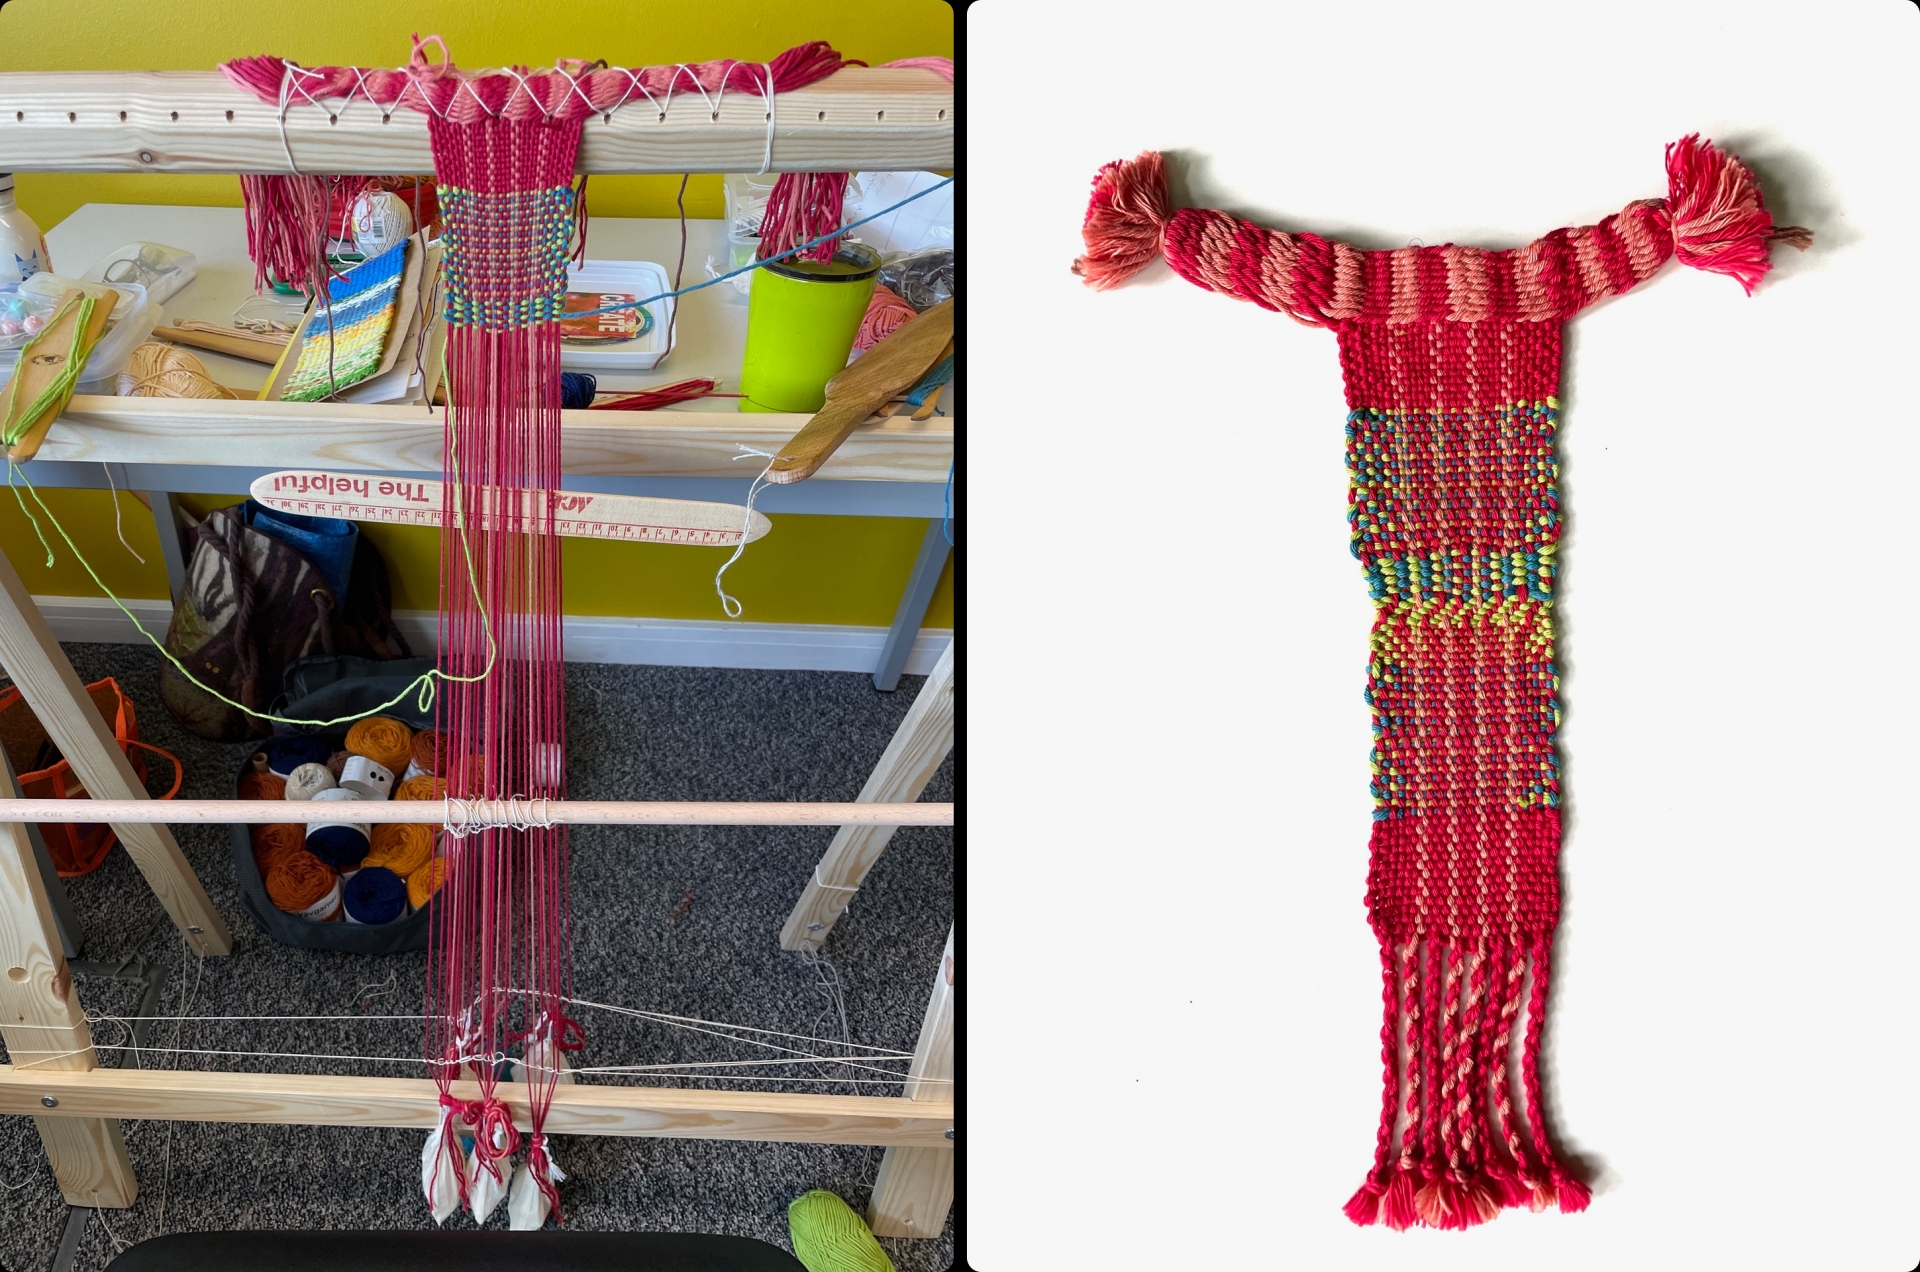
Start Project #2 – using wool yarns. Before coming over I had worked out a pattern to weave.
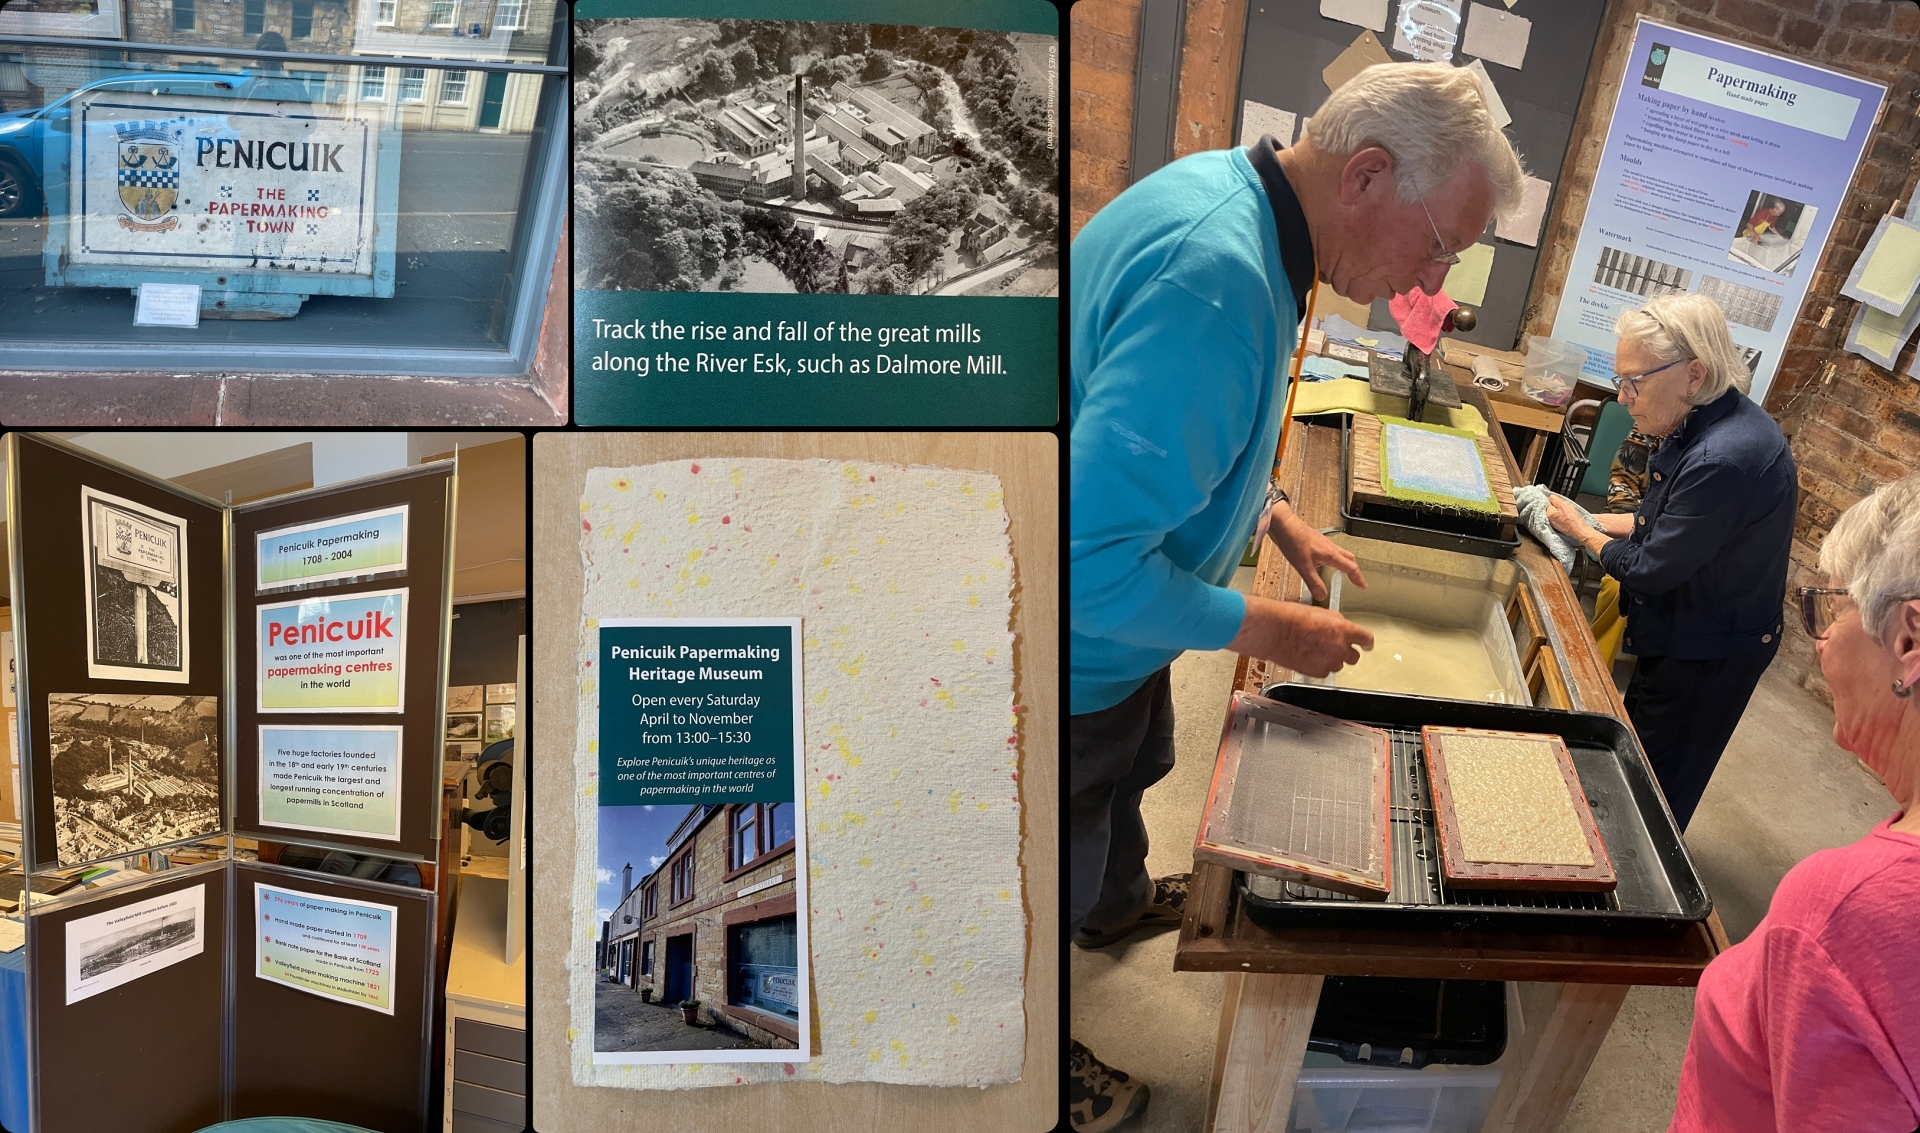
The free afternoon brought a trip to the Penicuik Papermaking Museum. At one point there were 5 paper mills on the River Esk. We were able to make some paper!
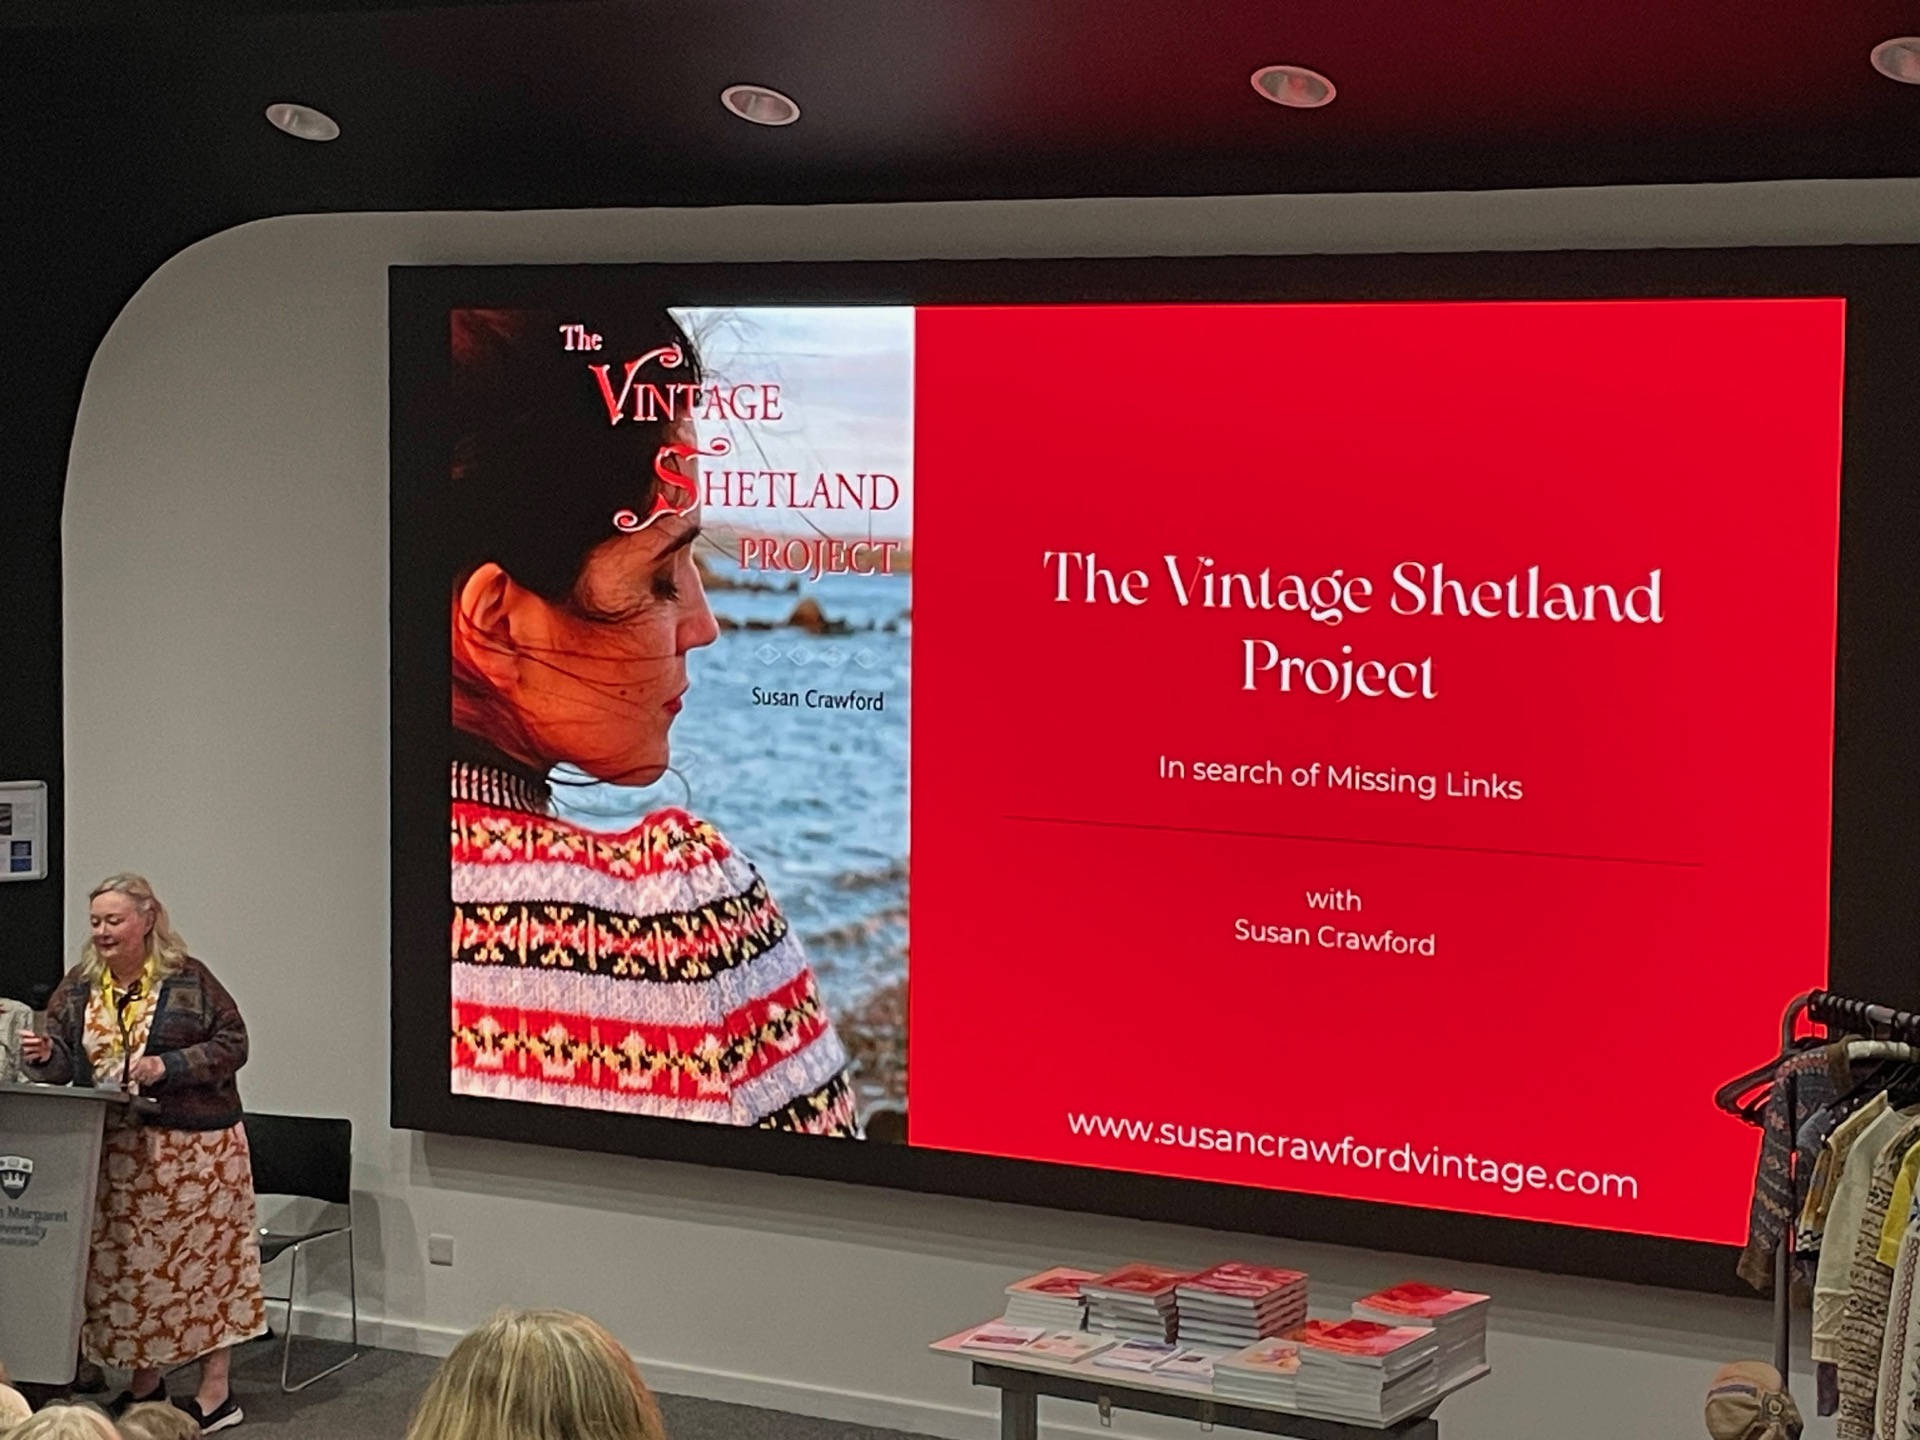
Susan Crawford gave the evening lecture – The Vintage Shetland Project – a celebration of the patterns, colors, and rich heritage of Shetland knitwear, and in particular the pieces held in the Shetland Museum archive.
Thursday- Finish warping project #2 and weaving! Yes… working with wool yarns is very different than working with cotton yarns.
Figuring out the best position for working on the looms continues to be an adventure with: **loom on the table and stand… **loom on the table and sit… **loom on the table and stand on a chair… **loom on the floor and sit… **loom on the floor and sit on the floor.
Plus experimenting with different ways to warp the loom.
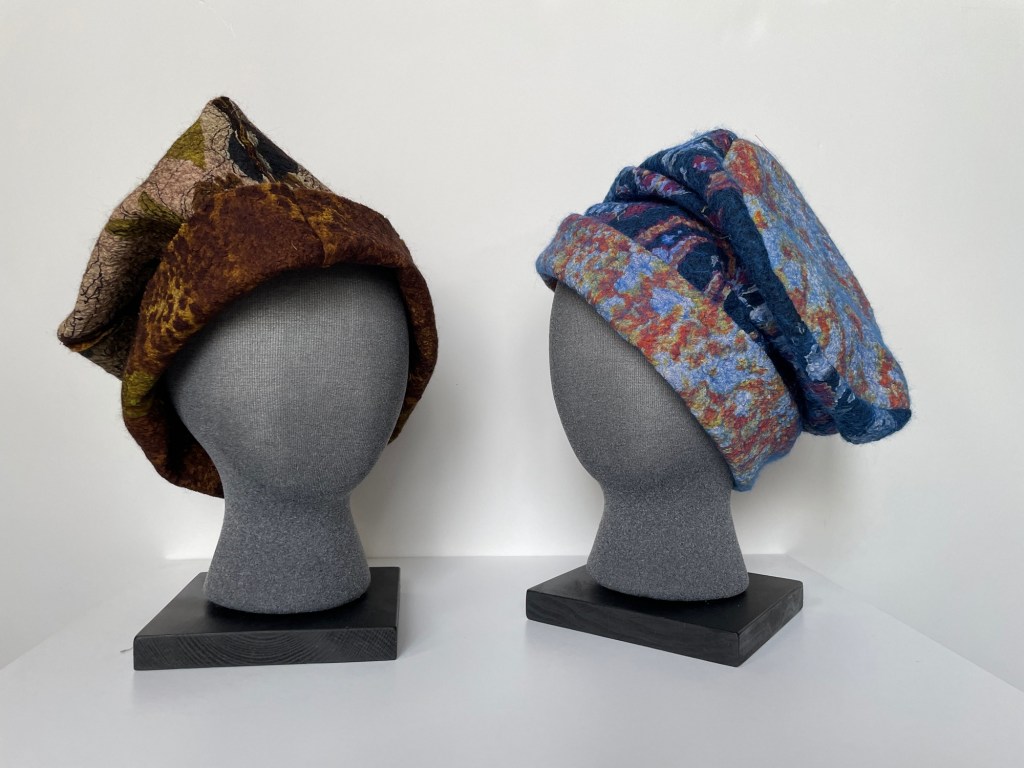
The evening event was the Fashion Show- weaving our way through the cafeteria showing off our wears. I brought one of my reversible felt ponchos and matching hat for the show.
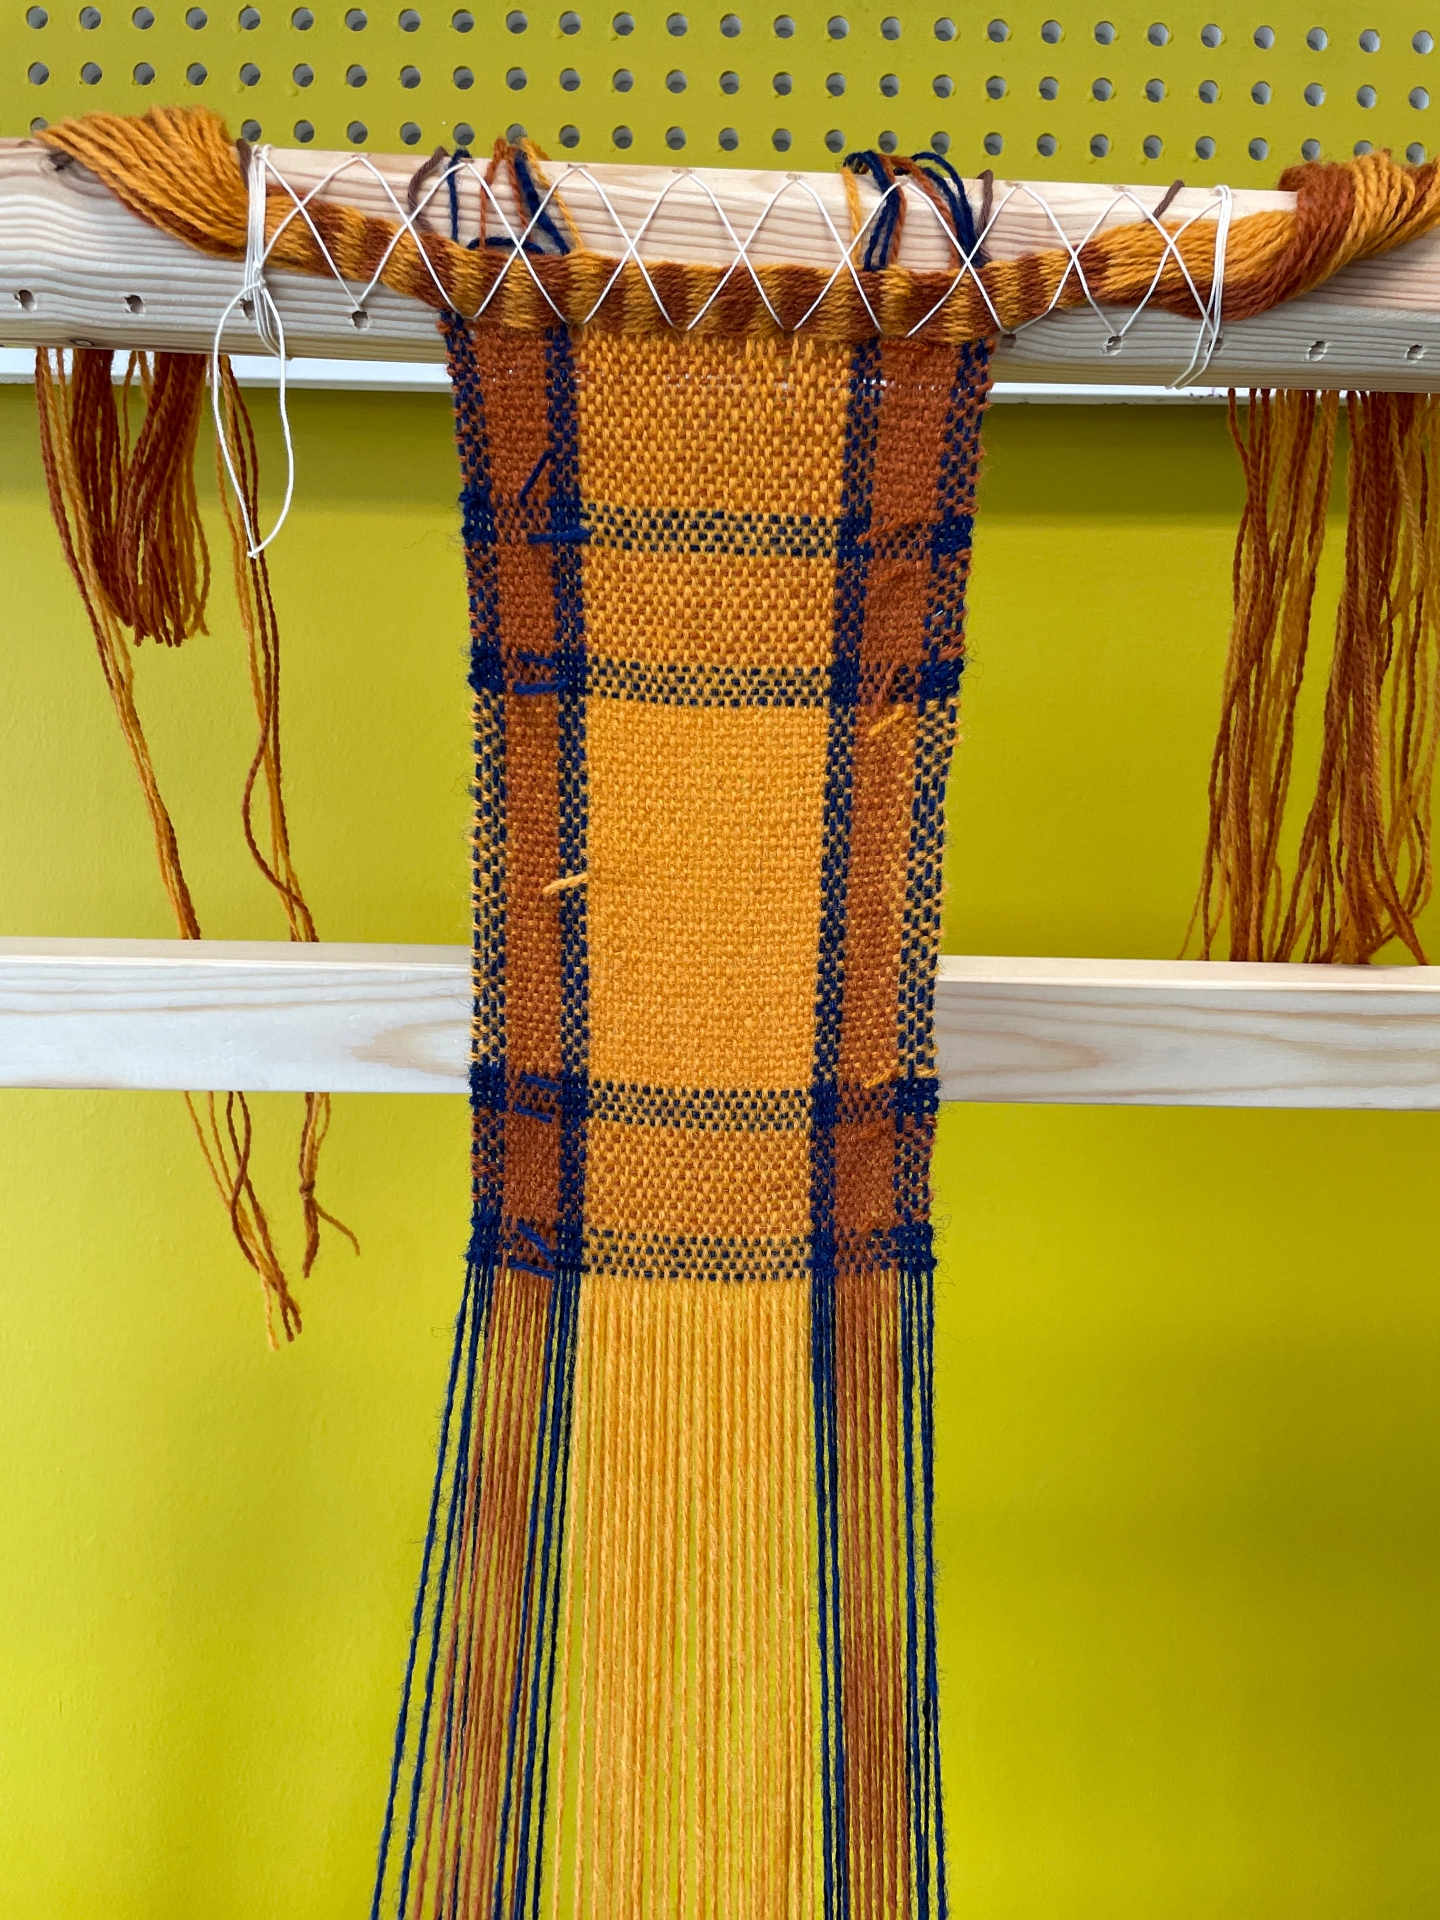
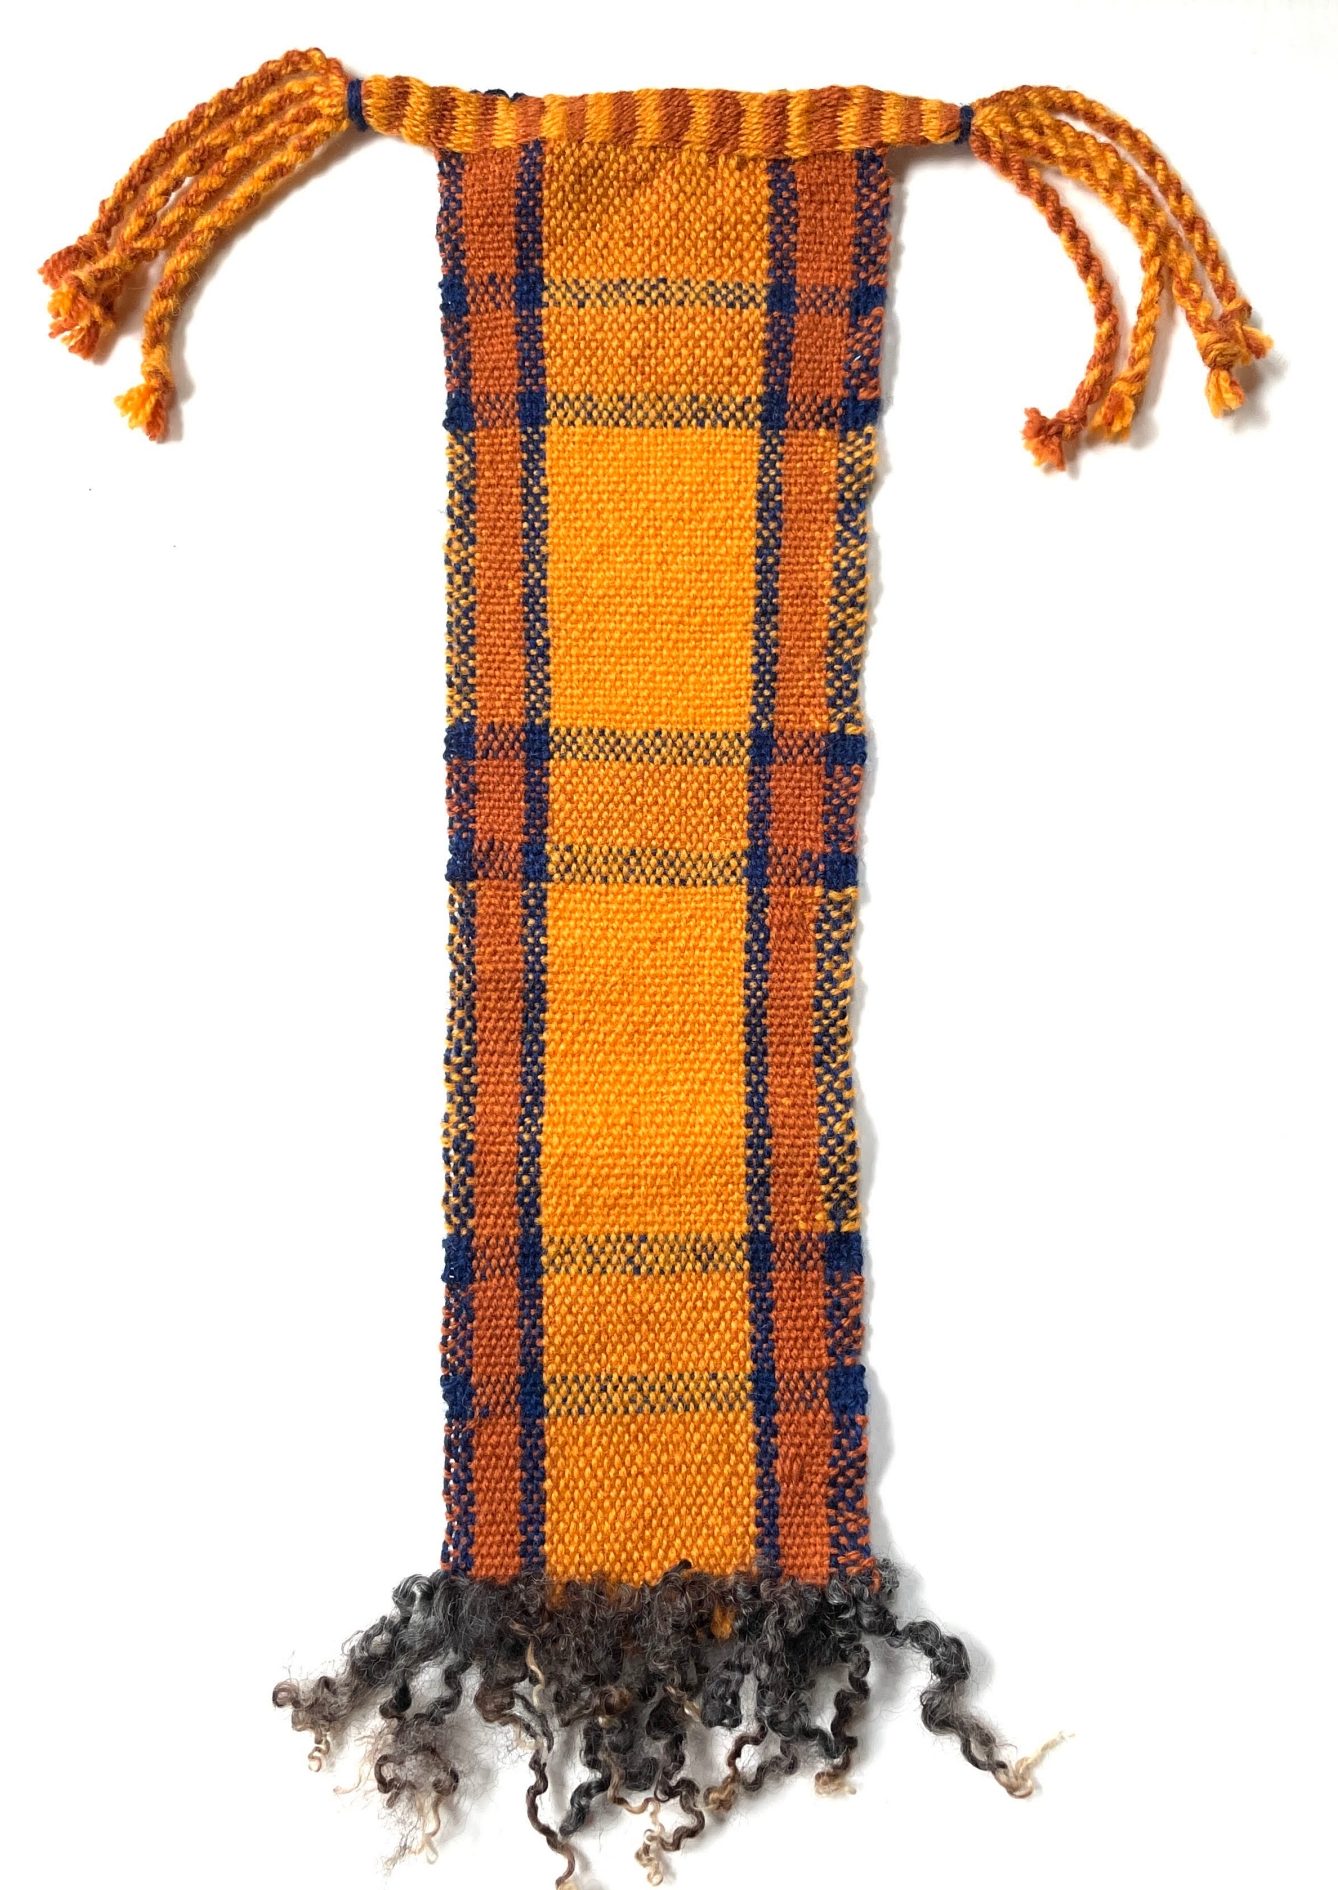
Friday- Morning – finish weaving my ‘2025 Summer School Unofficial Plaid’ and adding wool locks as a fringe at the bottom.
In the afternoon – Back to using cotton yarn to repeat one more time all the steps for warping the loom.
Saturday – Final morning in the workroom and Visitor Open Day. Weaving in the morning – just playing with color combinations, weaving with 2 shuttles and trying out a twill pattern.
Visitor Open Day in the afternoon – time to wrap up our weaving and chat with folks as they stopped in.
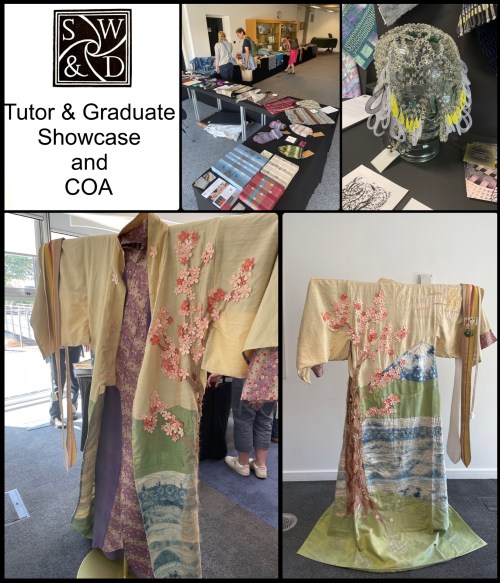
The afternoon Walk-About showcases the 18 courses plus Tutor & Graduate Student Showcase and final presentations for those applying for Certificates of Achievement.
The final event of Summer School is the Gala Dinner Saturday evening with the presentation of Certificates of Achievemnents and I told a Scottish version of the folktale ‘The Three Spinners/Three Aunts’.
~~~~~~~~~~~~~~~~~~~~~ And another GREAT Summer School came to an end. 2027 will be “somewhere in SW England…“ ~~~~~~~~~~~~~~~~~~~~~
I have attended 14 of the AGWSD Summer Schools with courses in a wide range of topics: Weaving w/Bulrushes, Tablet/Card Weaving, Willow Weaving, Narrow Bands, Soft Basketry, Ply Split Braiding, Warp Weighted Loom Weaving, 4 Felting and 3 Tapestry – all taught by fabulous instructors.
One thing I’ve learned over the years telling stories is that stories have a life of their own. Each teller and listener hears something different as it connects to their life experience. The way a story spoke to me in the beginning of my professional career is different than how it speaks to me now 40 years later. I see different nuances and perspectives as I continue to work on my craft….learning, growing, and changing.
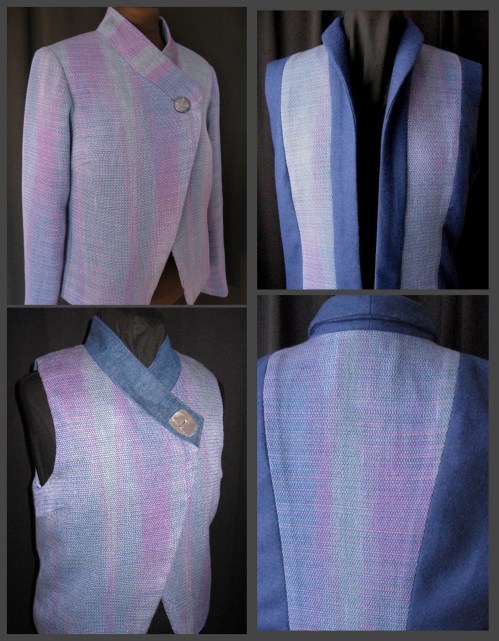
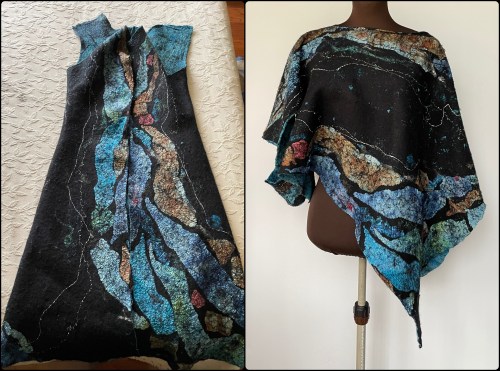
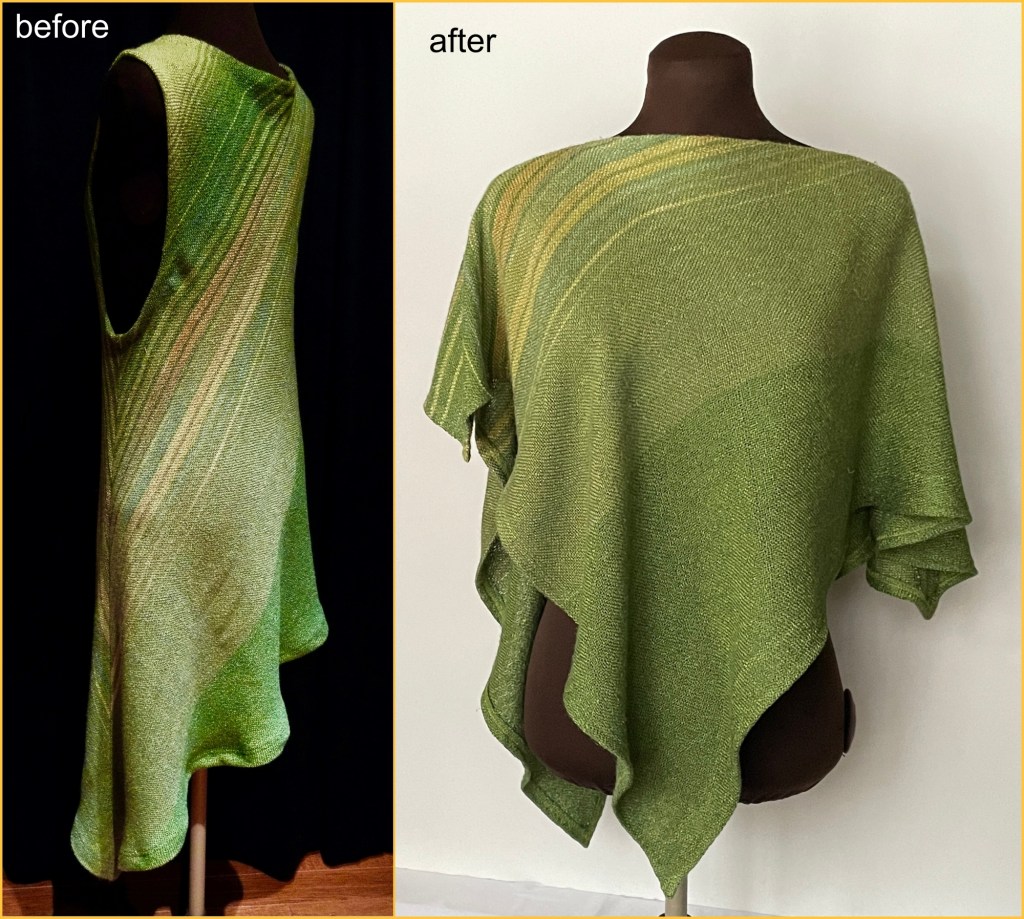
The same has been true with the woven and felted pieces I’ve created. Looking at some of my early felt wall pieces I now see that they need further work. There are shawls, jackets and dresses that a lot of blood, sweat and tears (sometimes literally!) that went into making them and it’s a shame to leave them packed away because they are no longer a style I wear now. I see them hanging in the closet and think how can they be reimagined into pieces that will be worn once again. All of this cultivates my creativity as I think about the solutions.
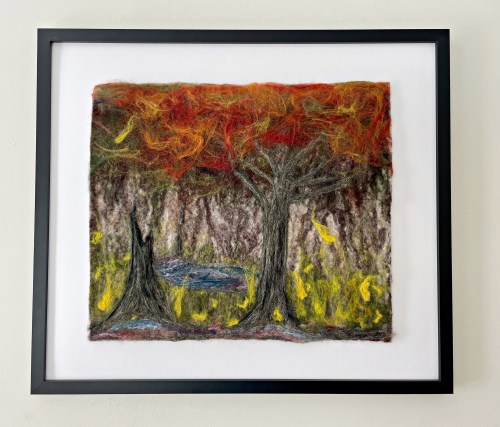
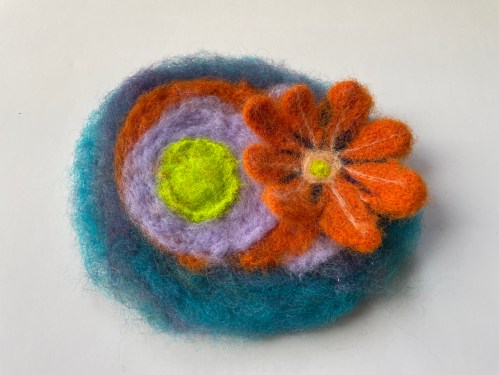
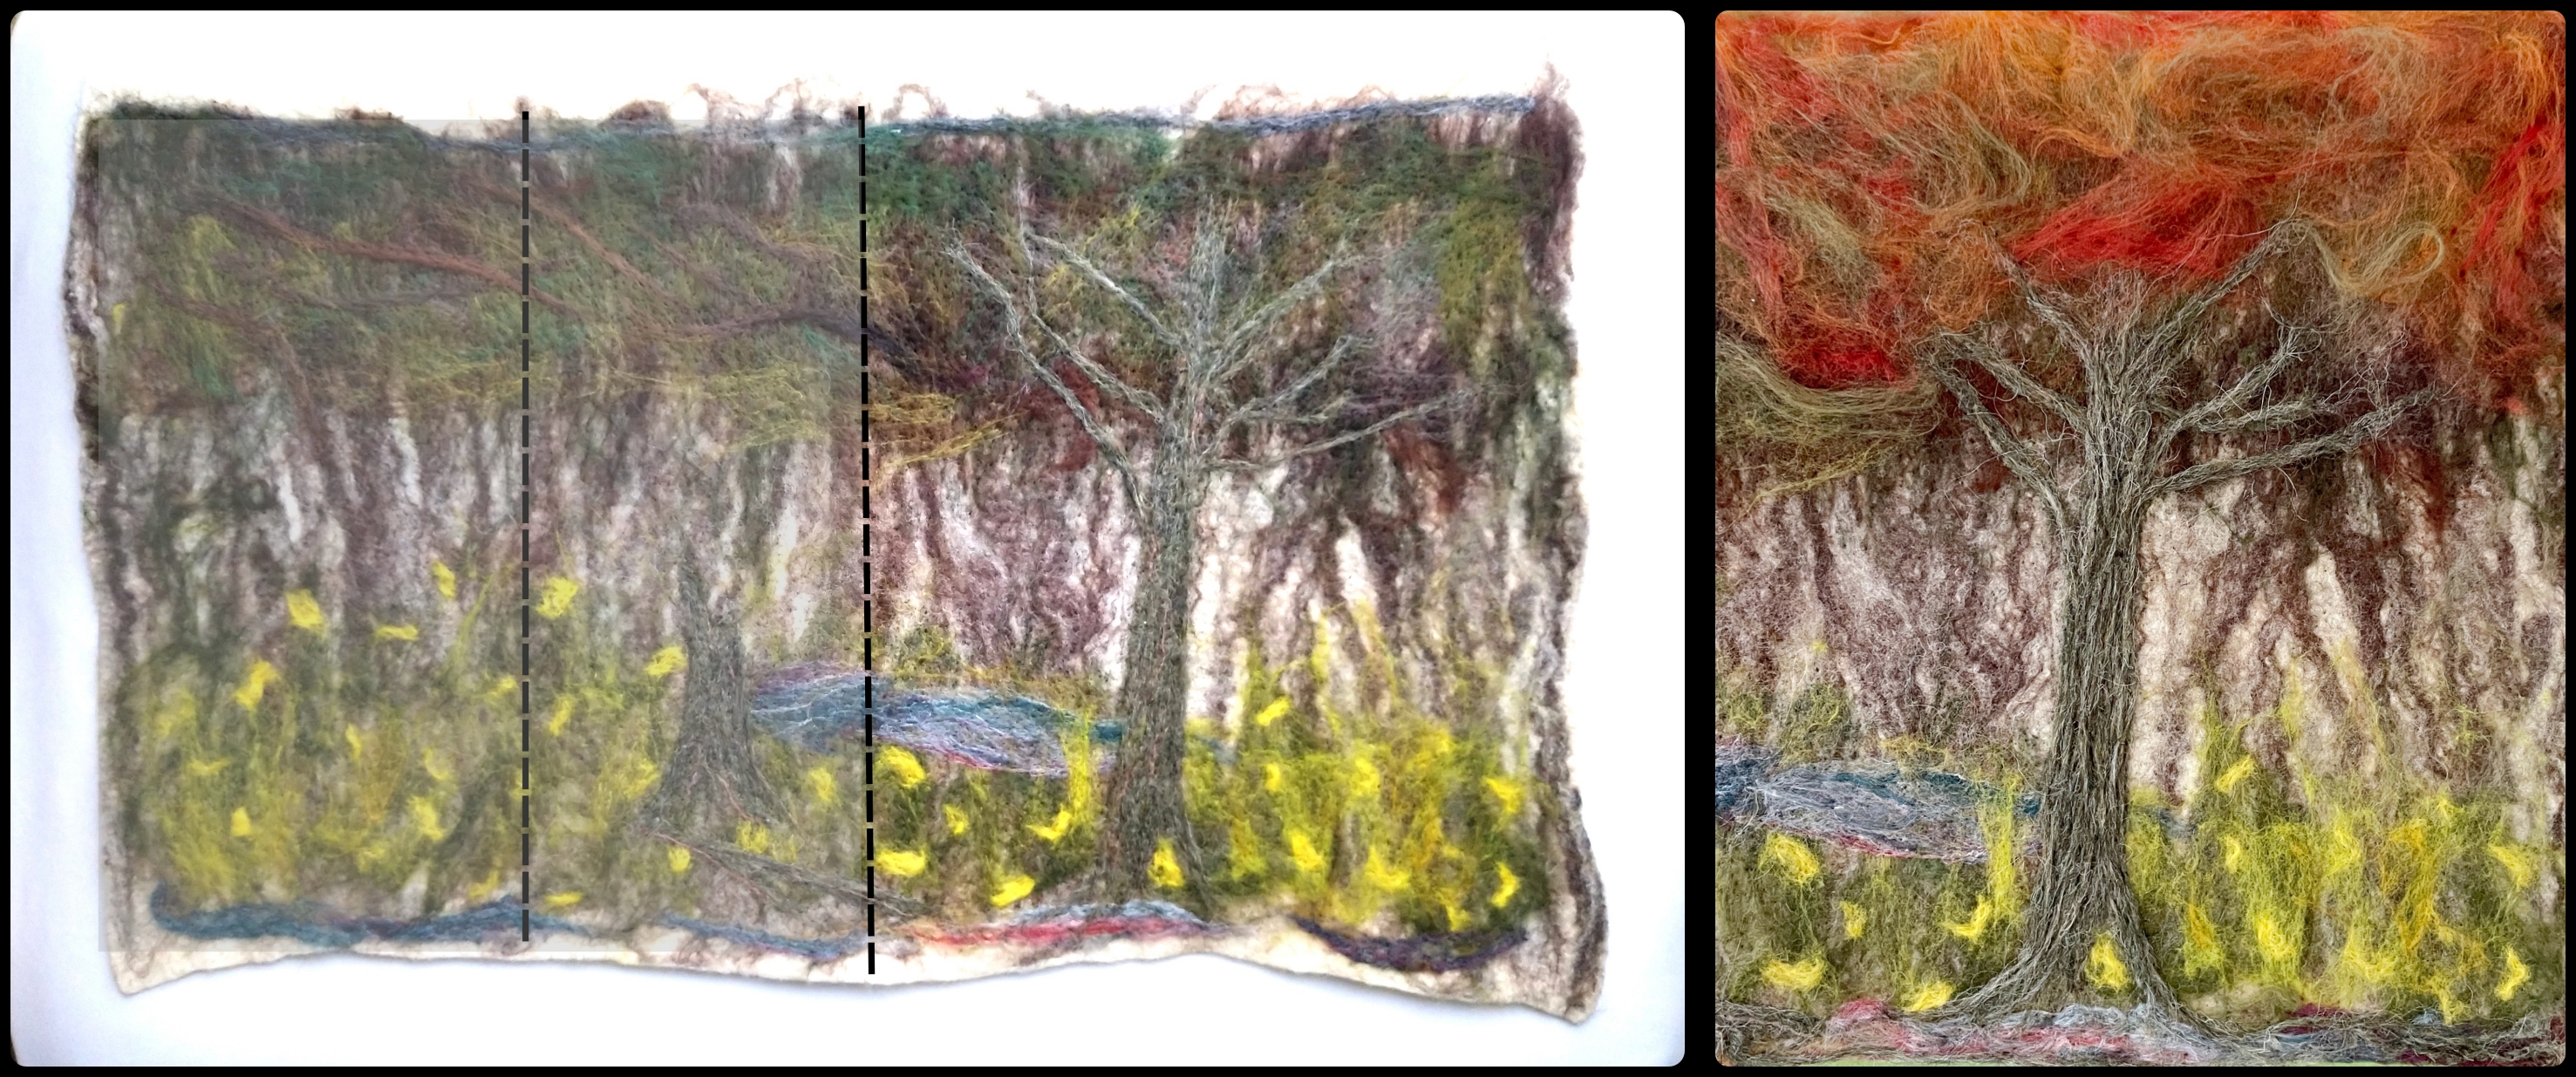
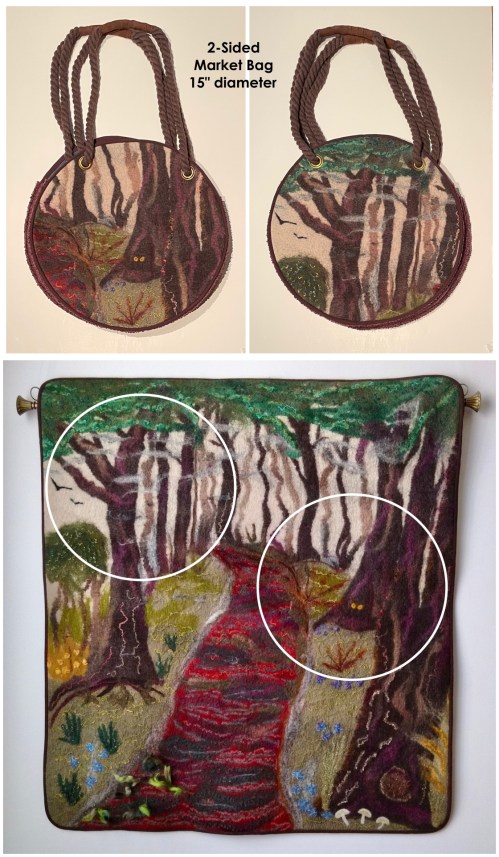
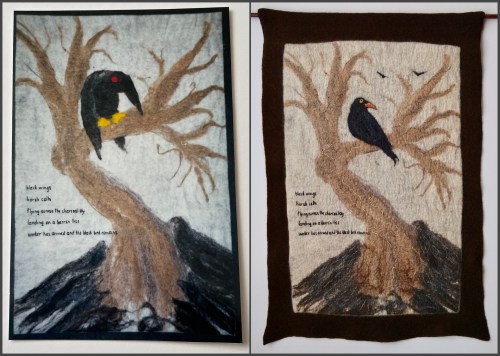
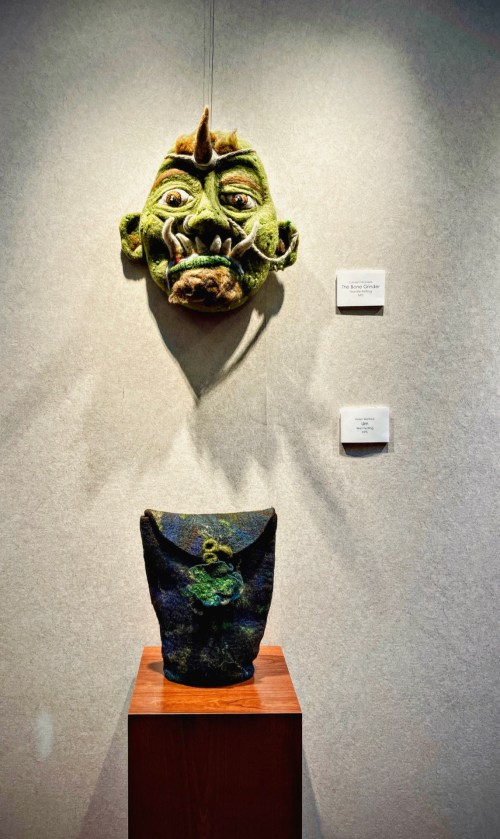
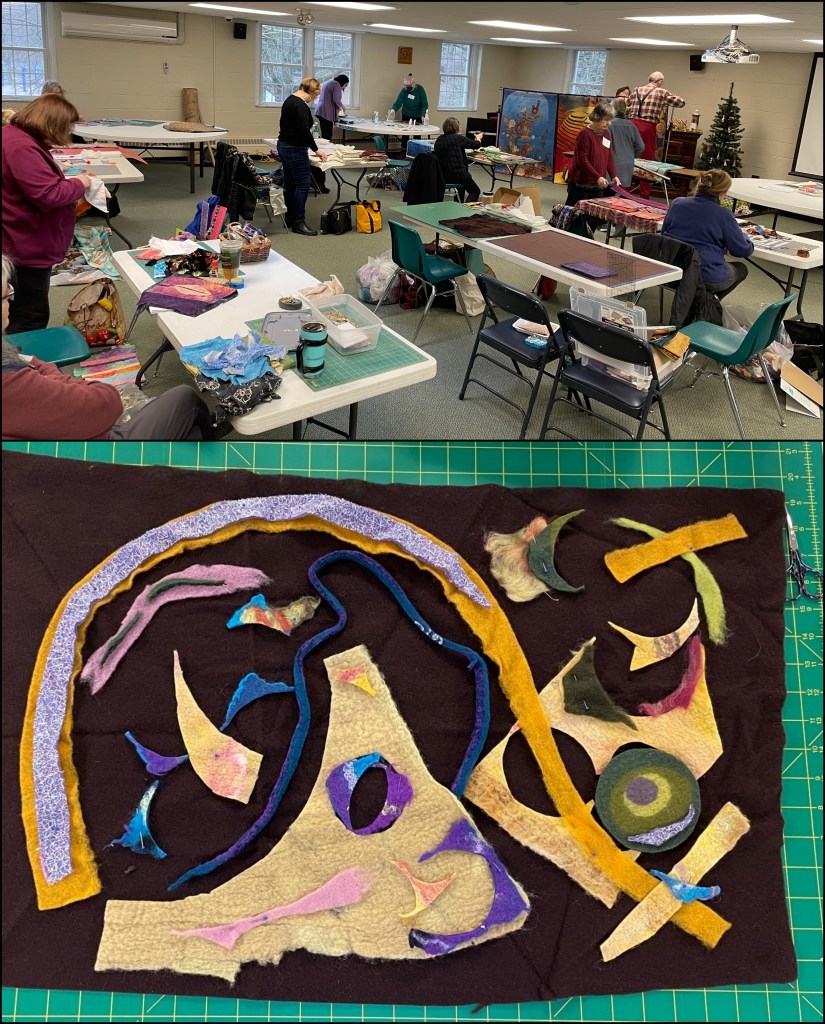
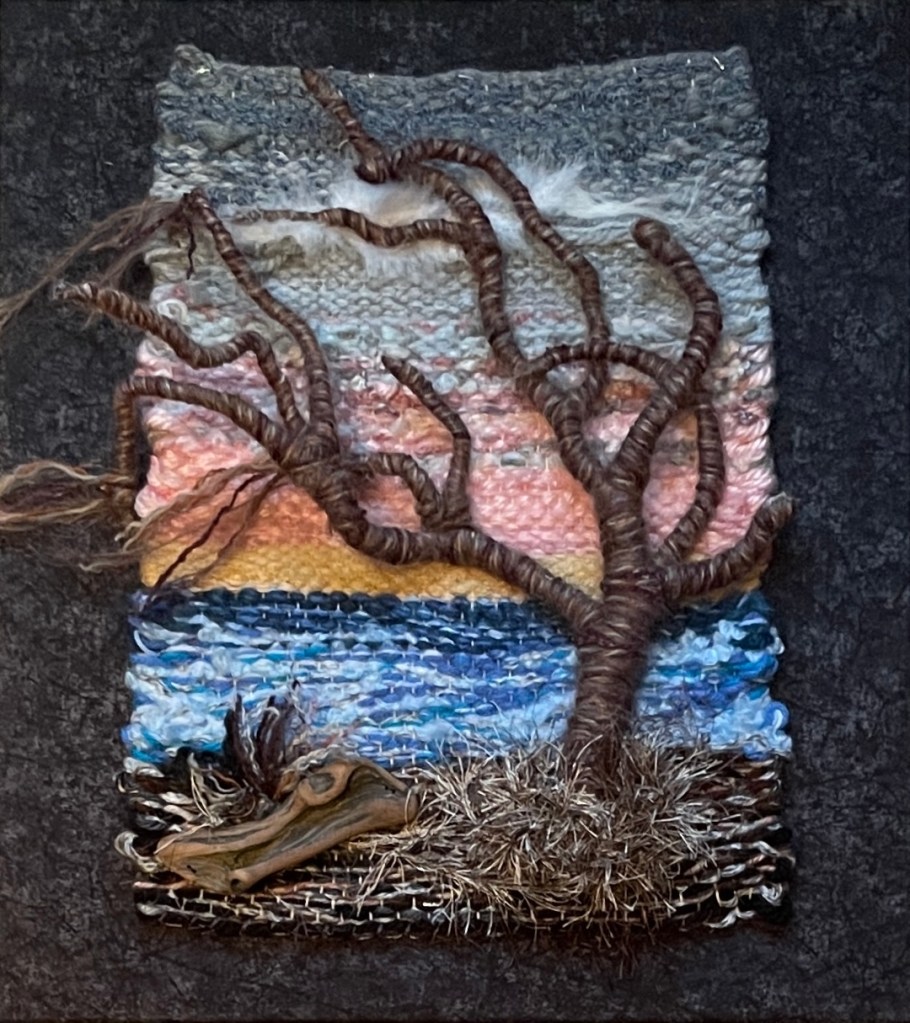
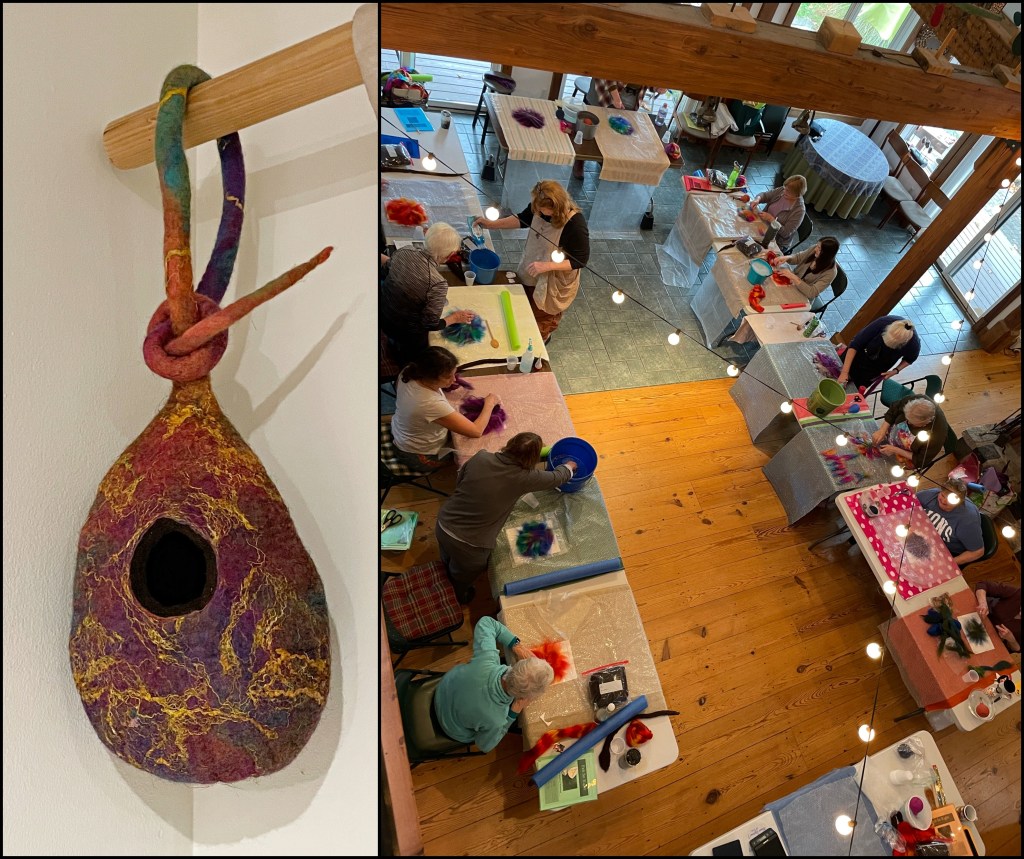
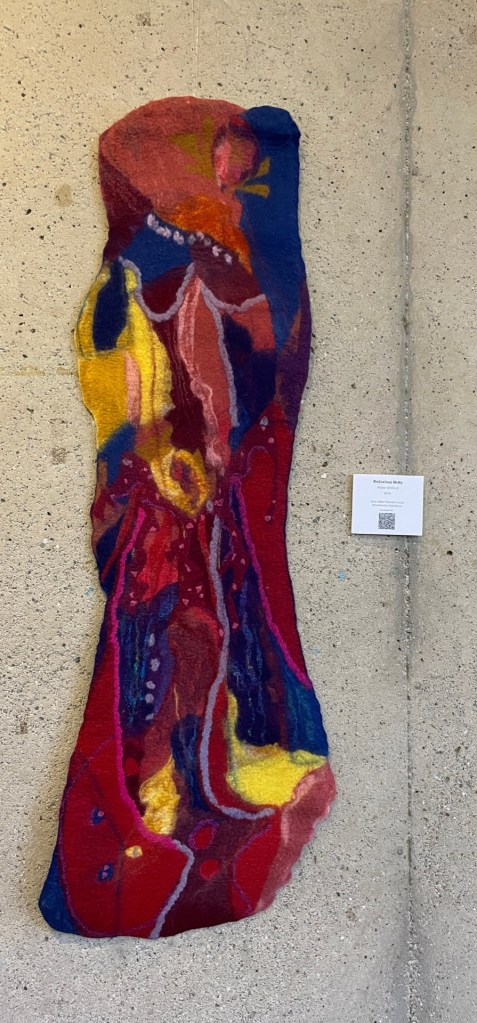
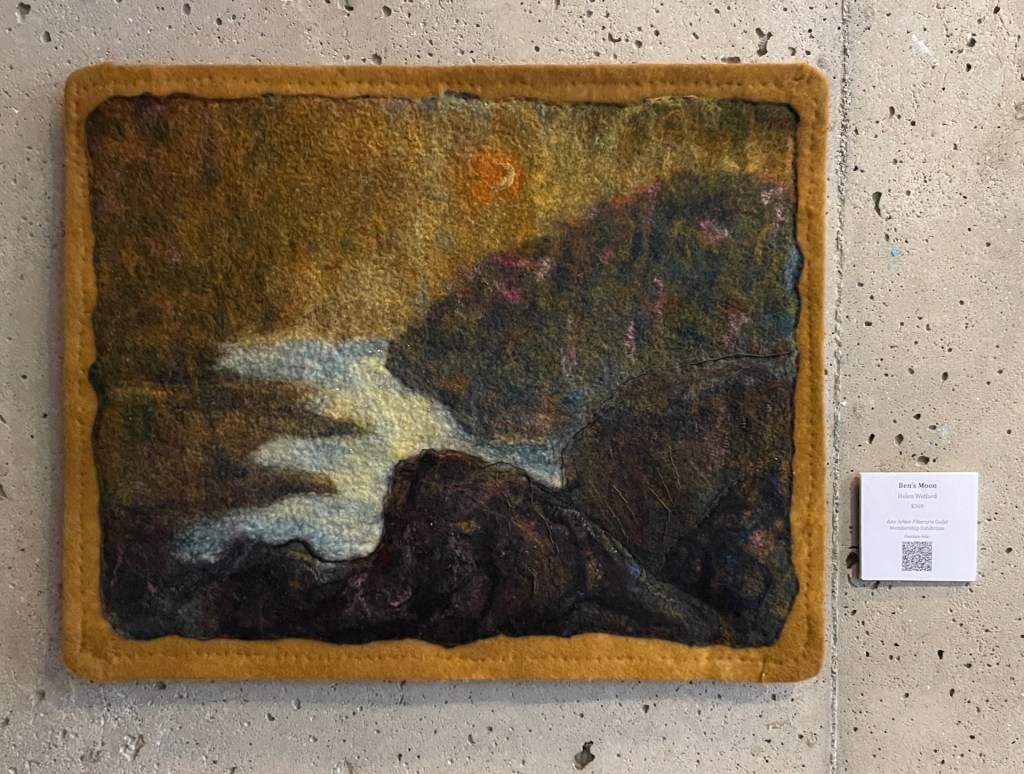
I was reorganizing the storage tubes that hold some of my felt pieces. I pulled out ‘Secret Garden’. It had all started years ago with felting a sample of bicolored roving from a Jacob fleece that ended up as an “OK…now what do I do with it….?” It took several more years to percolate before resulting in ‘Secret Forest’.
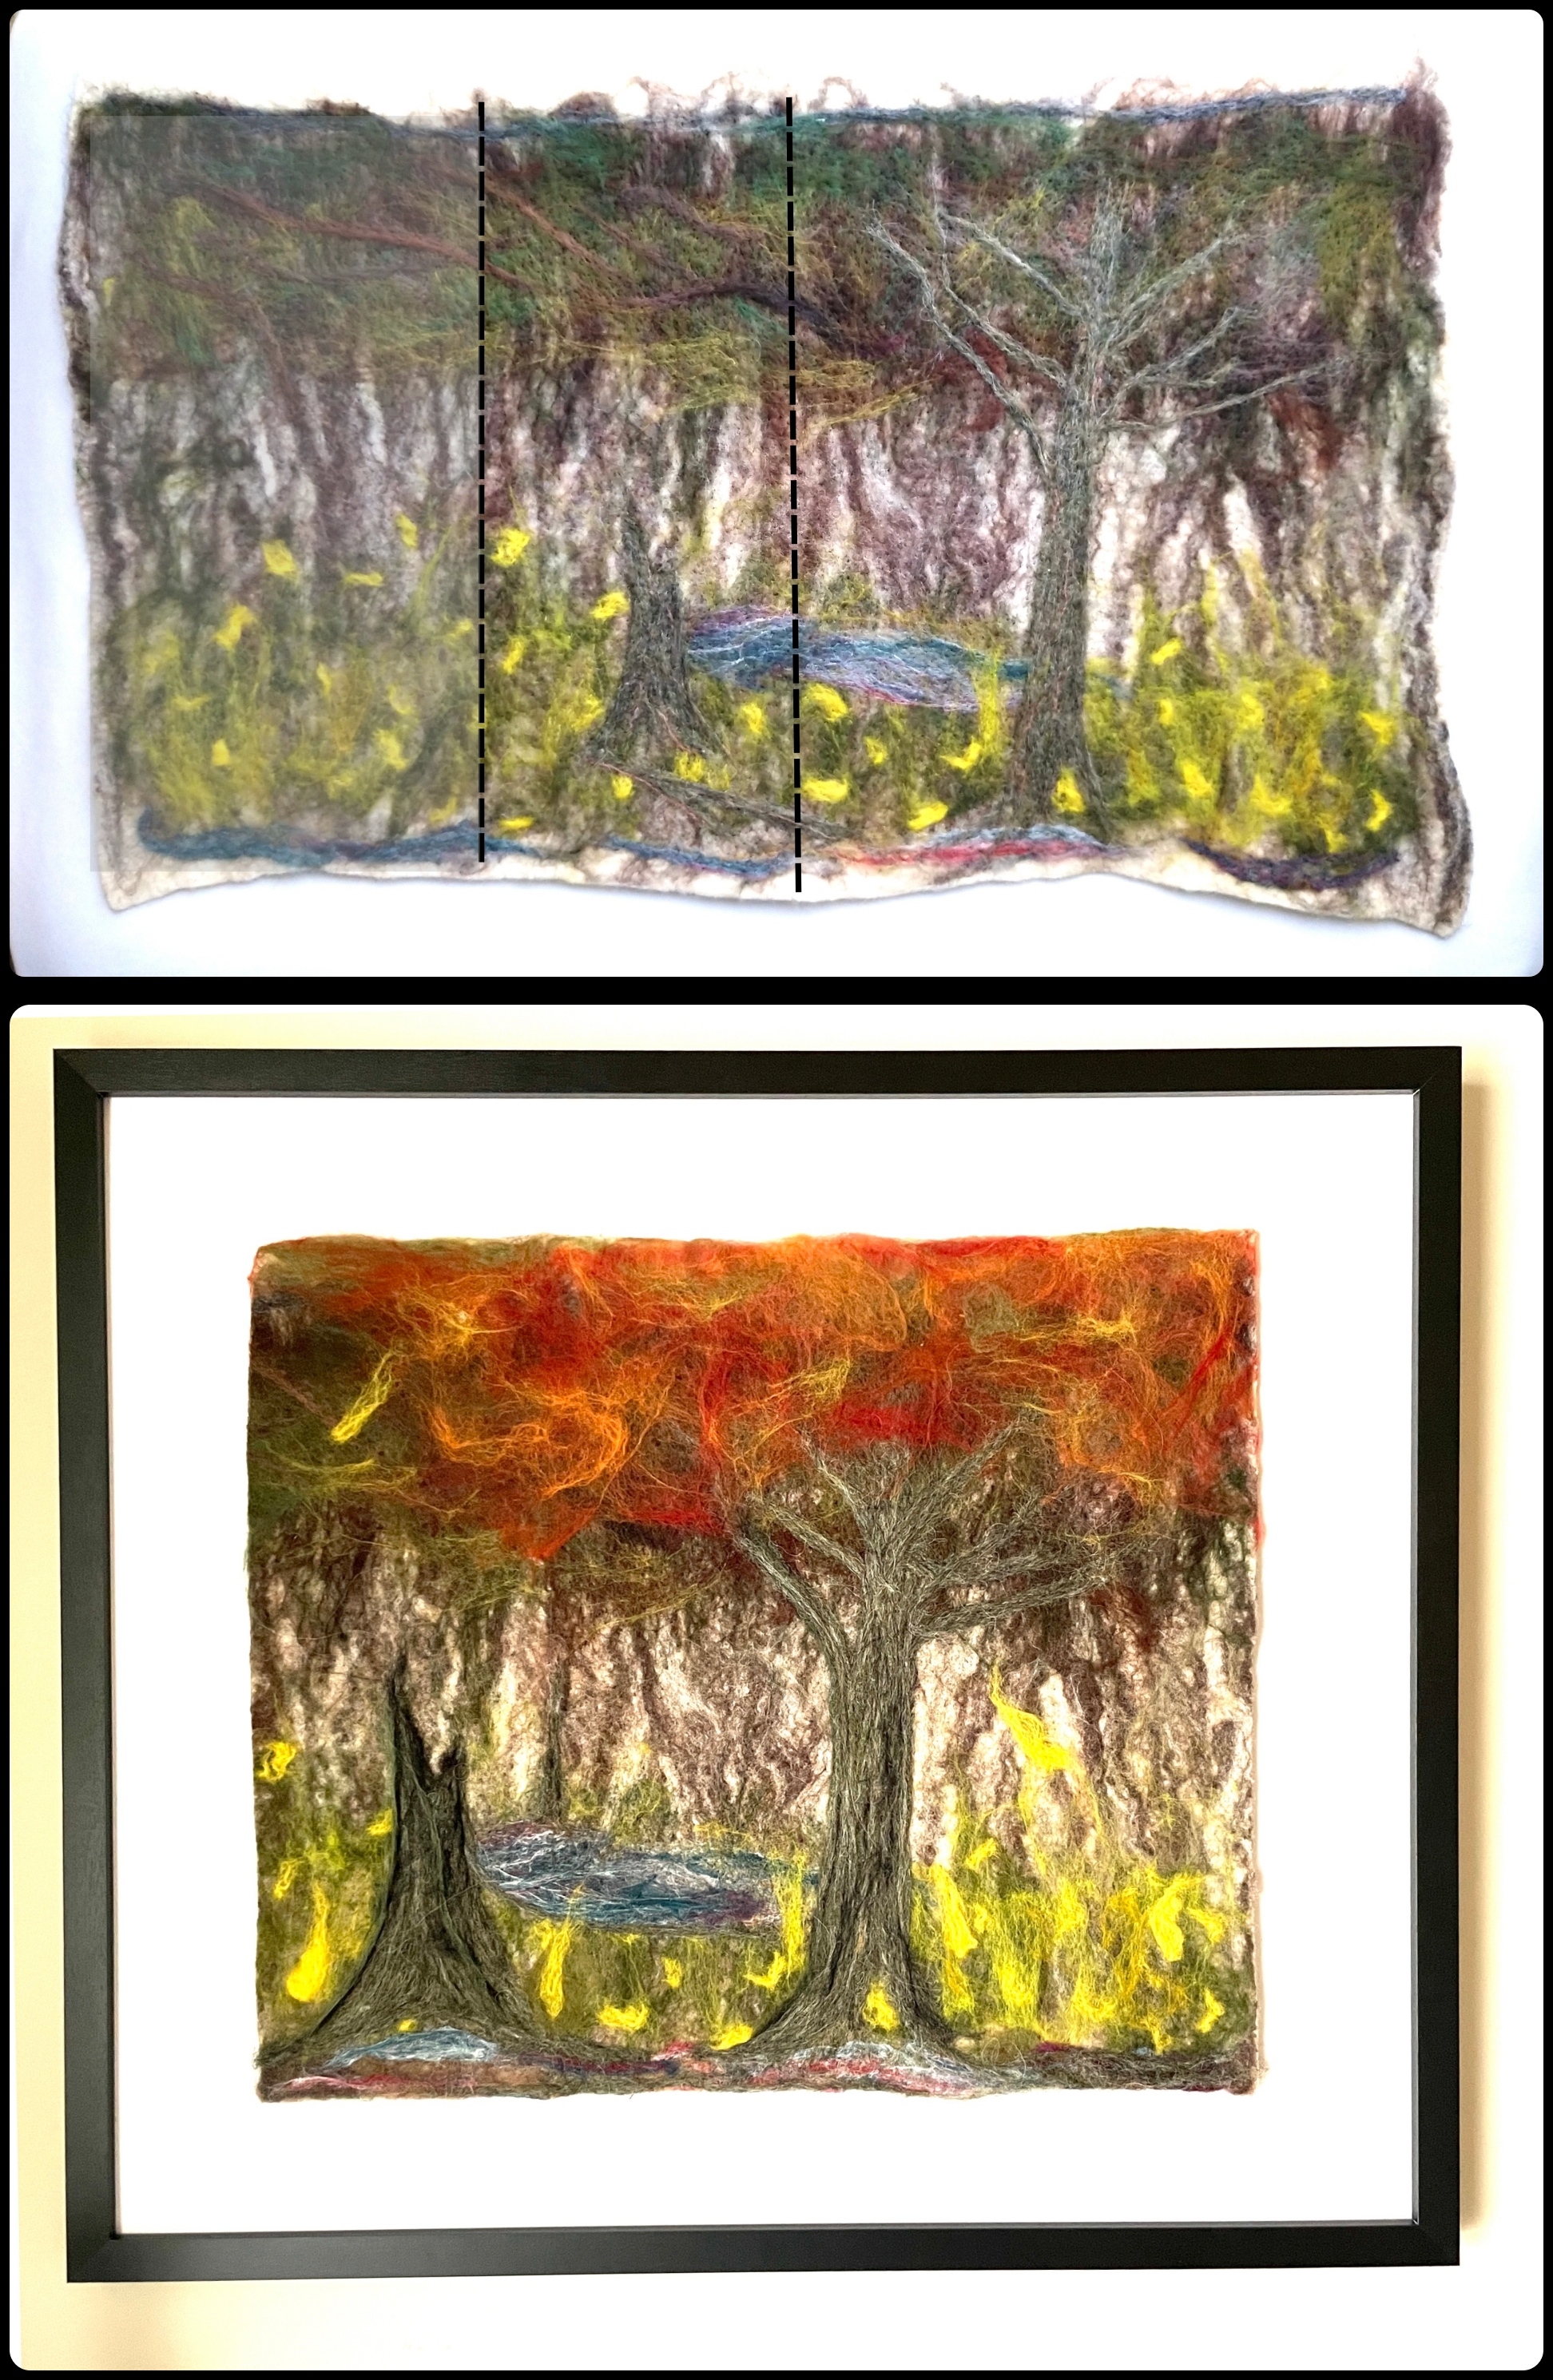
Looking at it now it told me I need to keep working on it. I cut the piece in half and focused on the large tree needle felting additional layers to fill out the trunk and add colorful leaves. I like the tree but overall picture needed more.
The nice thing about working with felt is that you can piece things together. I added back the section with the stump. More needle felting then gentle wet felting to secure the added fibers and ‘Beware the Will-o-the-Wisps’ came into being.
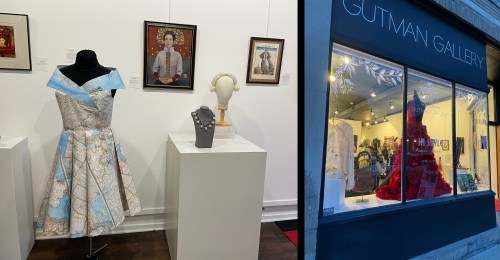
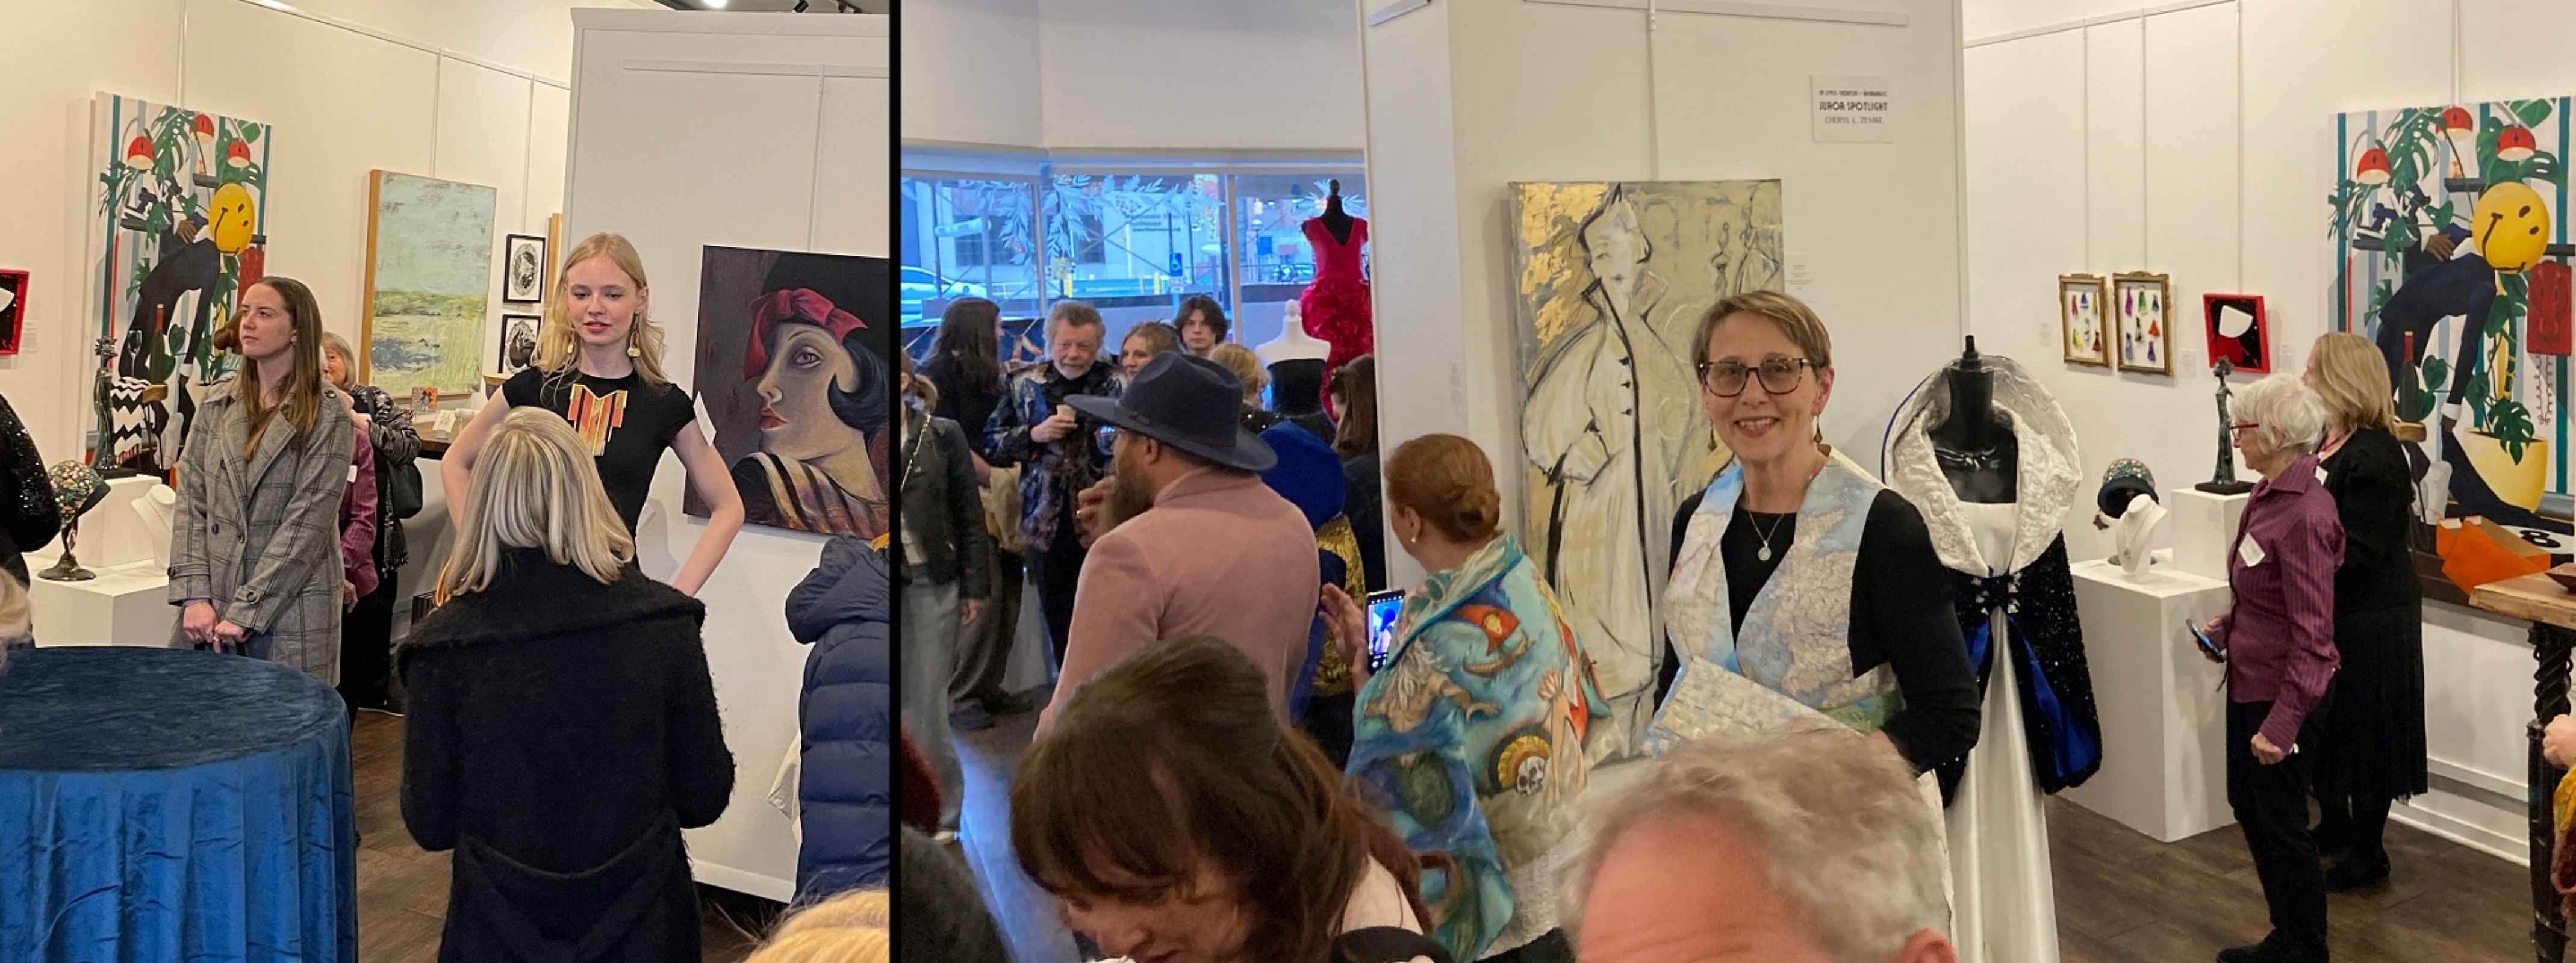
Couture Cartography map dress was selected to be part of the In Style – Fashion & Wearables Exhibit at theGutman Galleryin Ann Arbor, Michigan.
The community was invited to dress to impress for opening reception – an evening of fashion and art, chatting with the artists and experiencing a live mannequin fashion show!
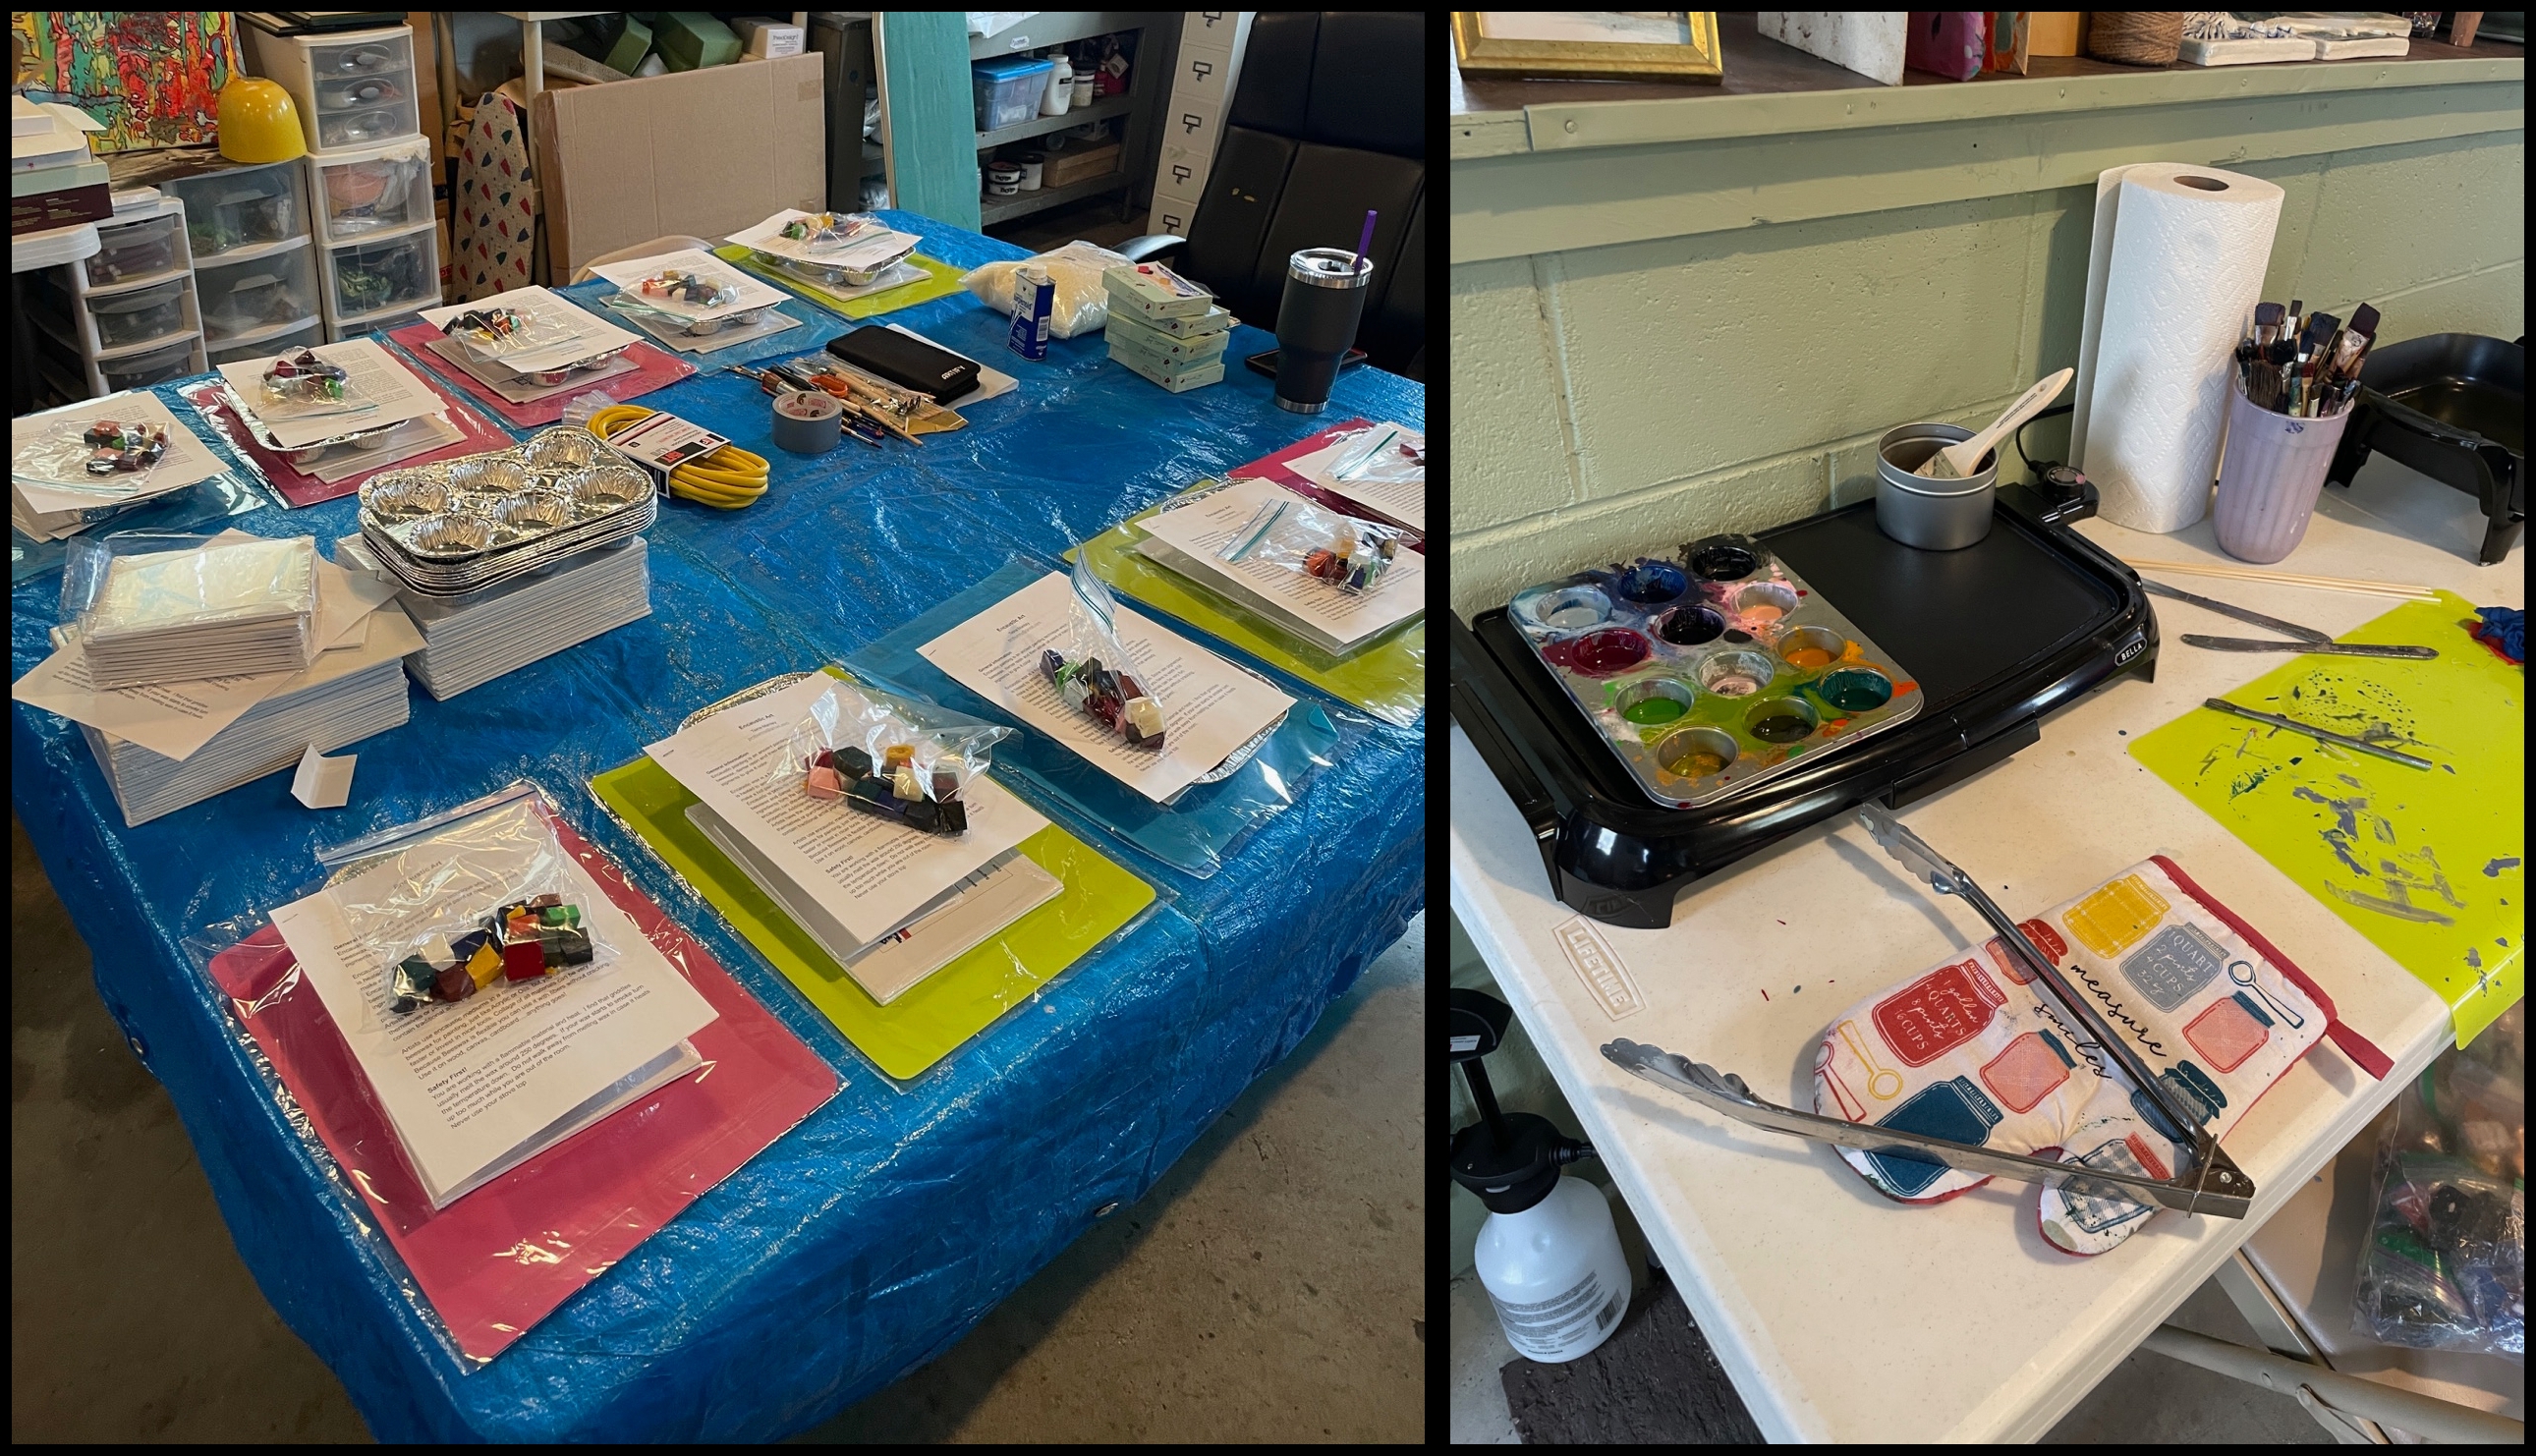
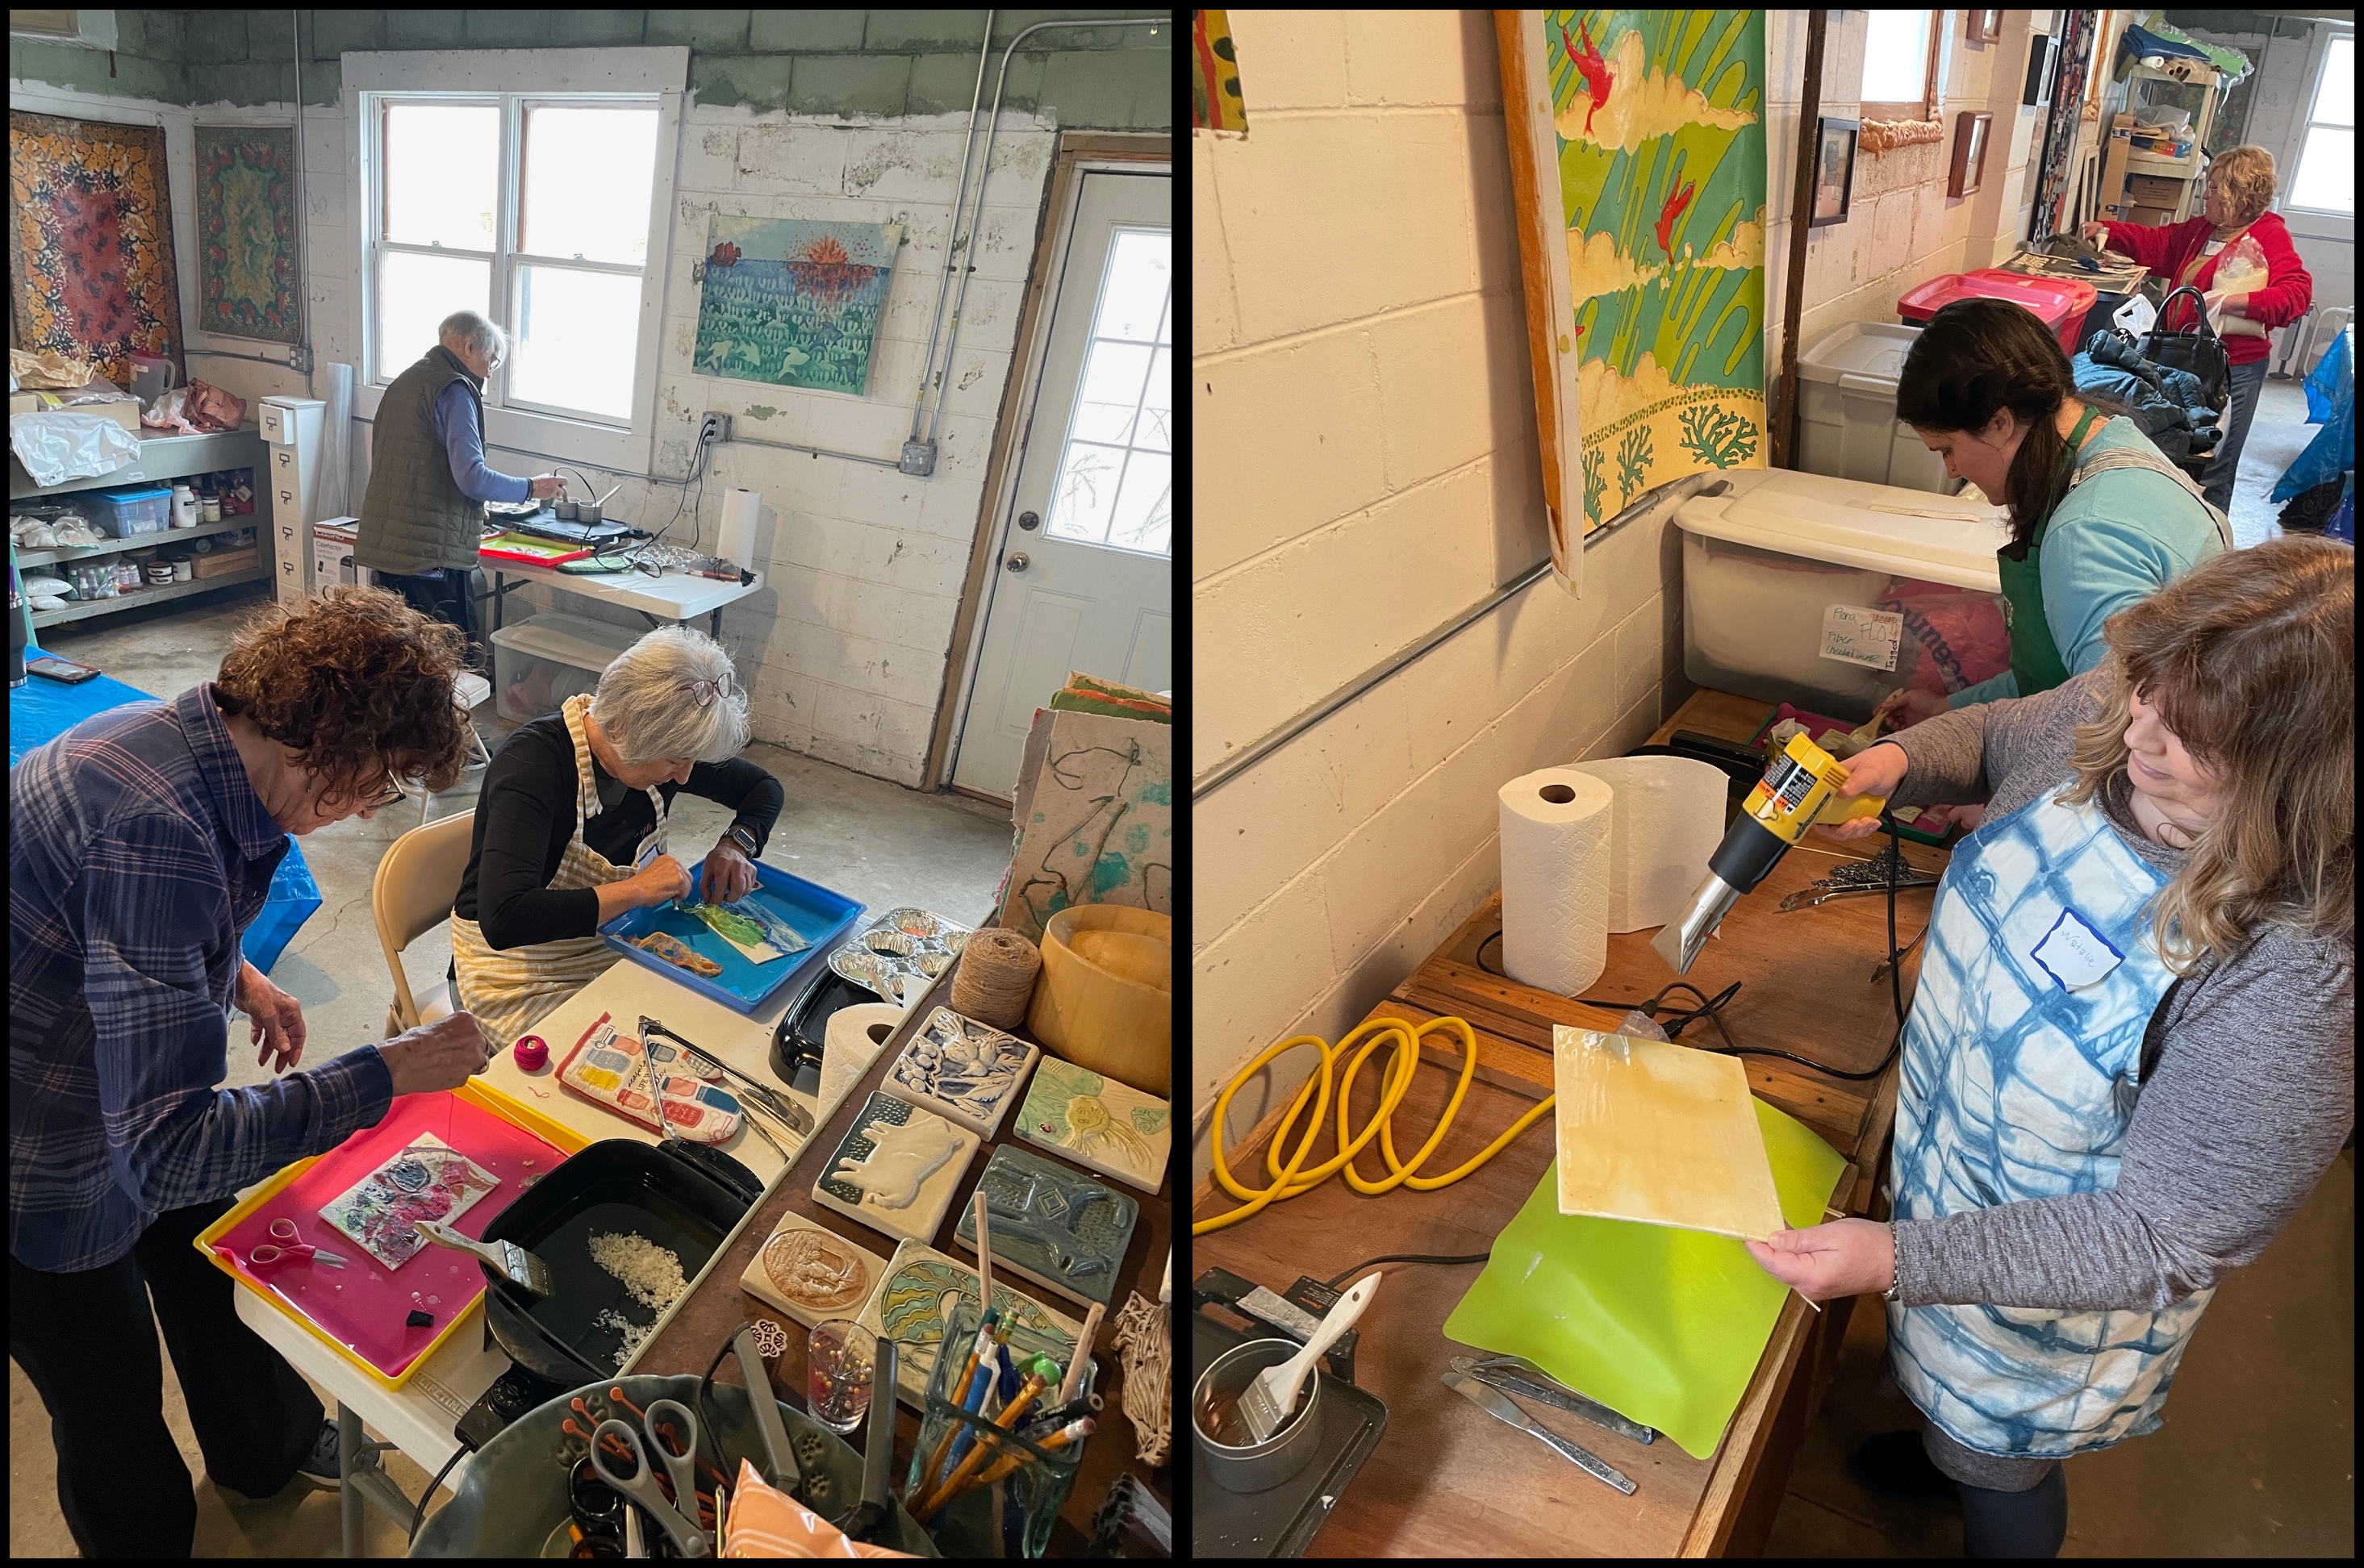
This AAFG workshop was all about adding a new technique to my artistic toolbox by exploring how to use encaustic art materials (heated beeswax, damar resin and pigment) with fiber. By playing with different materials, colors, and textures we created surprising new effects. This is an ancient technique going back to the first century in Greece and Rome.
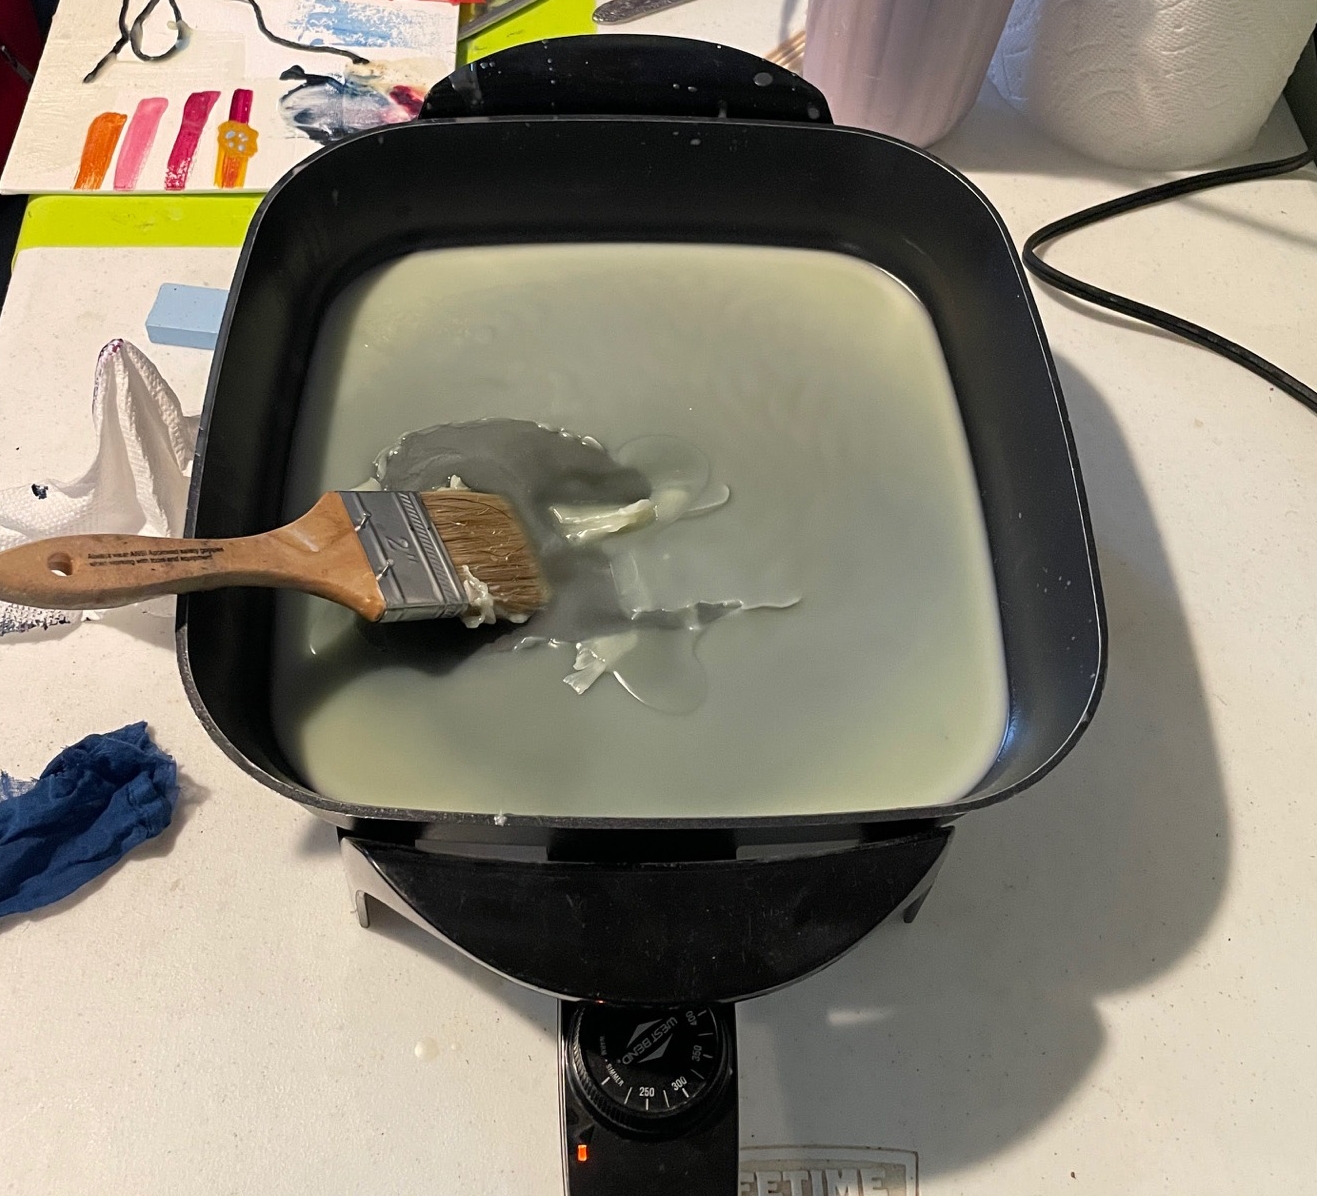
Each of us was given a bag of different colored wax which would be melted in muffin pans using electric griddles as the heat source. Beeswax and the damar resin were in their own tins for melting.
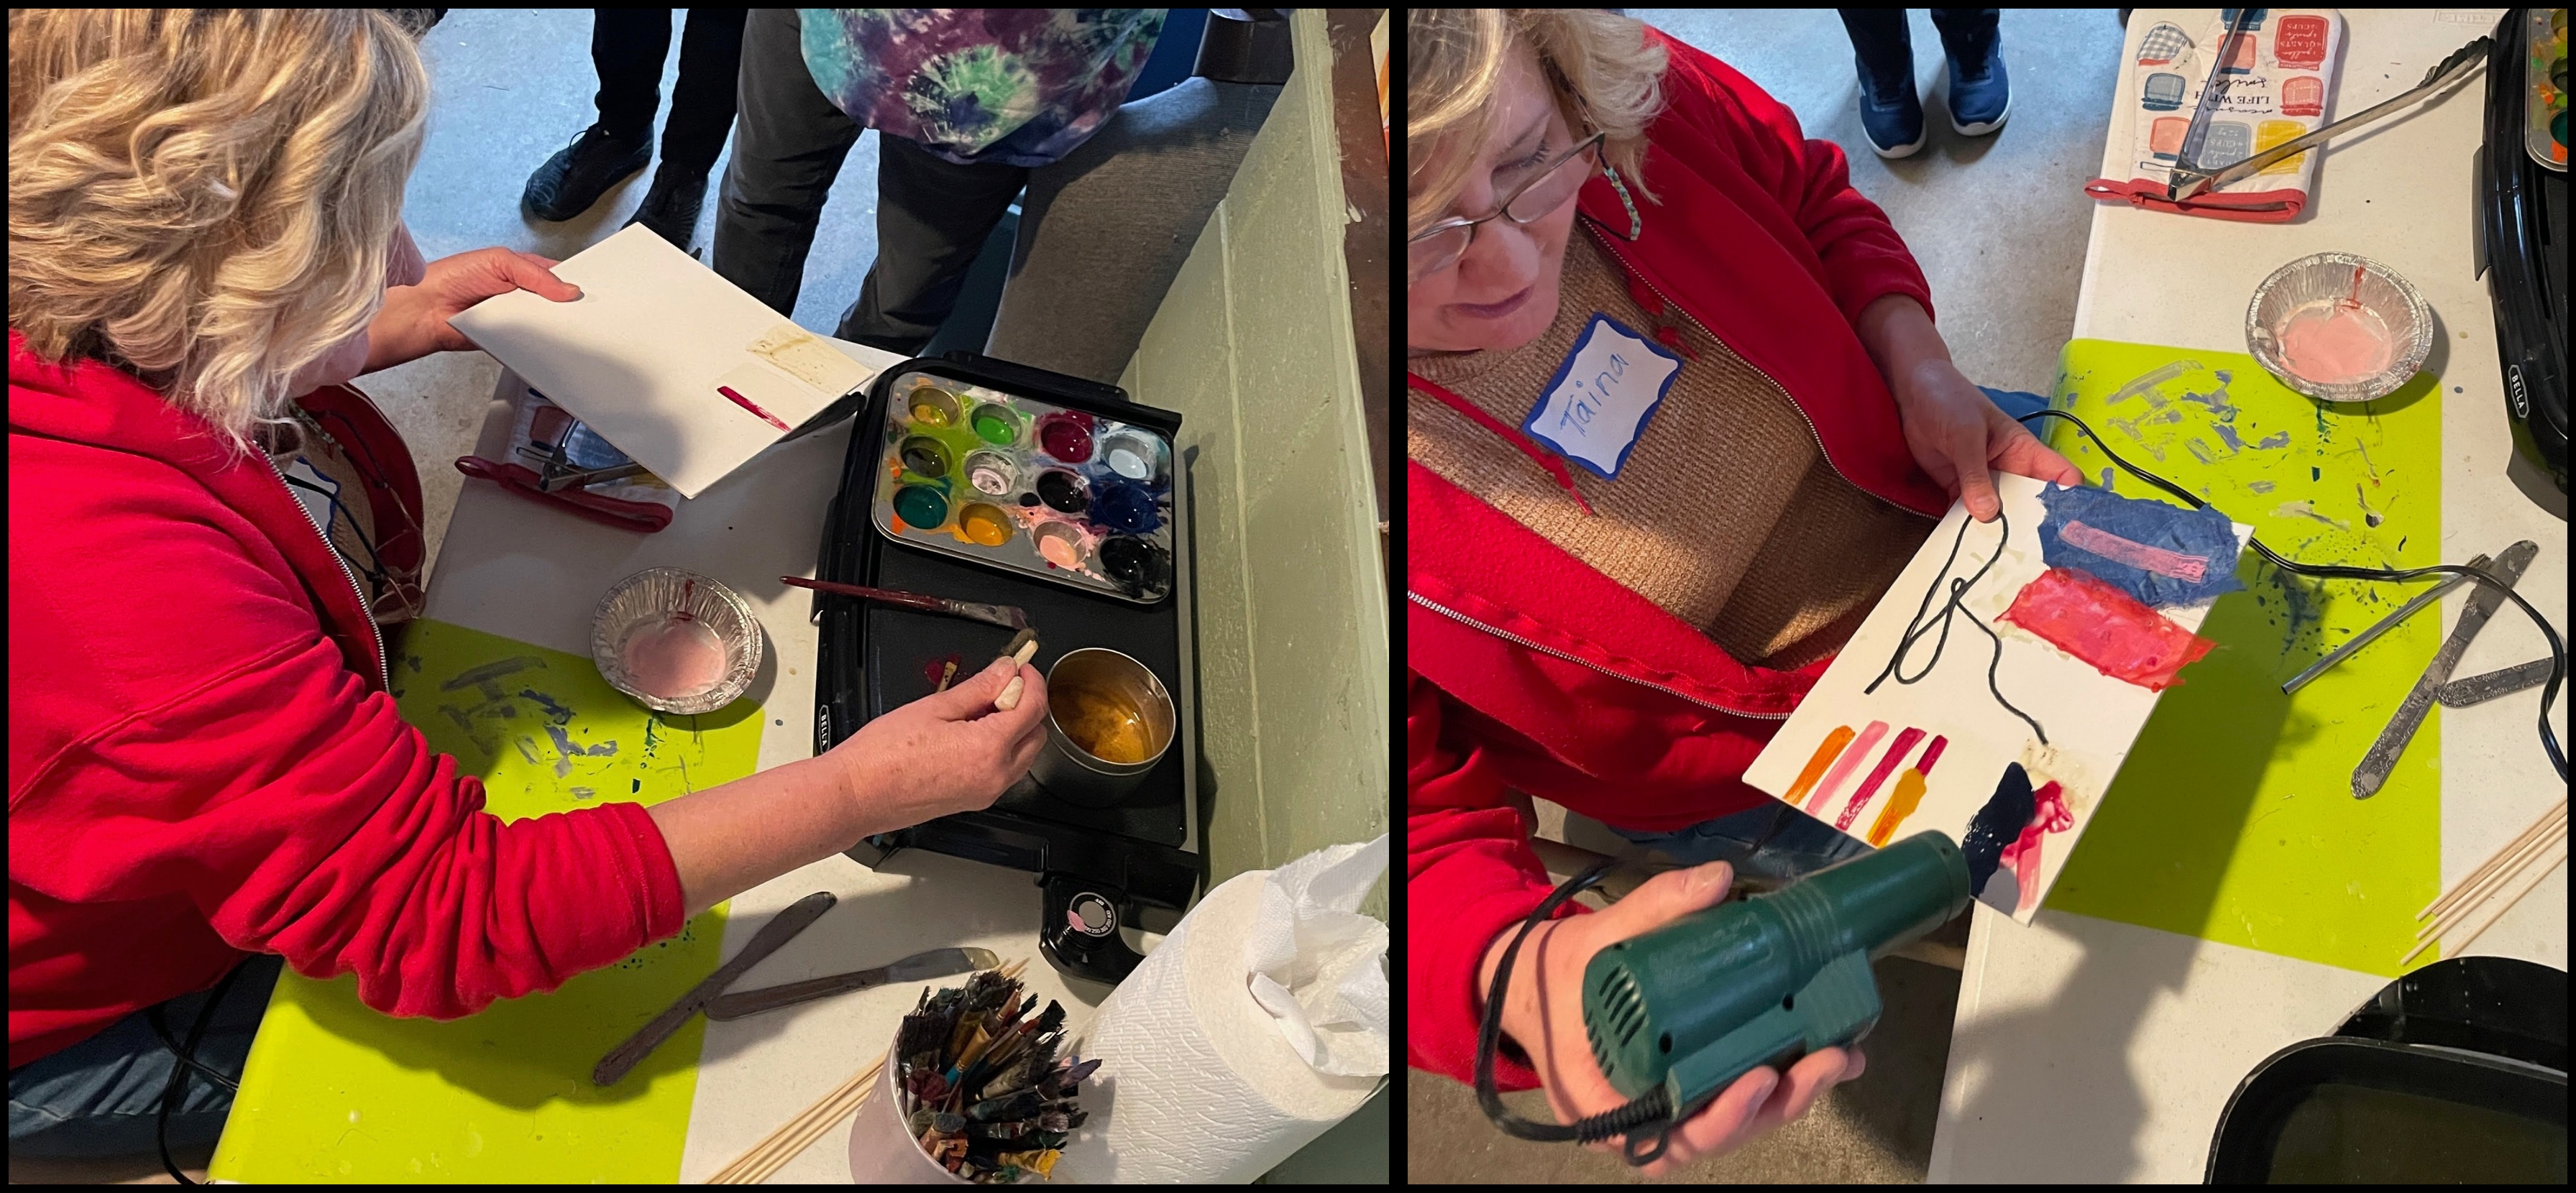
Taina demonstrated how to use paint brushes and heat guns to paint the melted wax and how to mix colors. In some ways this is similar to painting with water colors – but one has to work fast because the melted wax hardens quickly!
The good news is if you reheat what you have already painted, the wax melts again and you can continue adding layers. With this basic introduction and canvas panels to use as the base we were off!
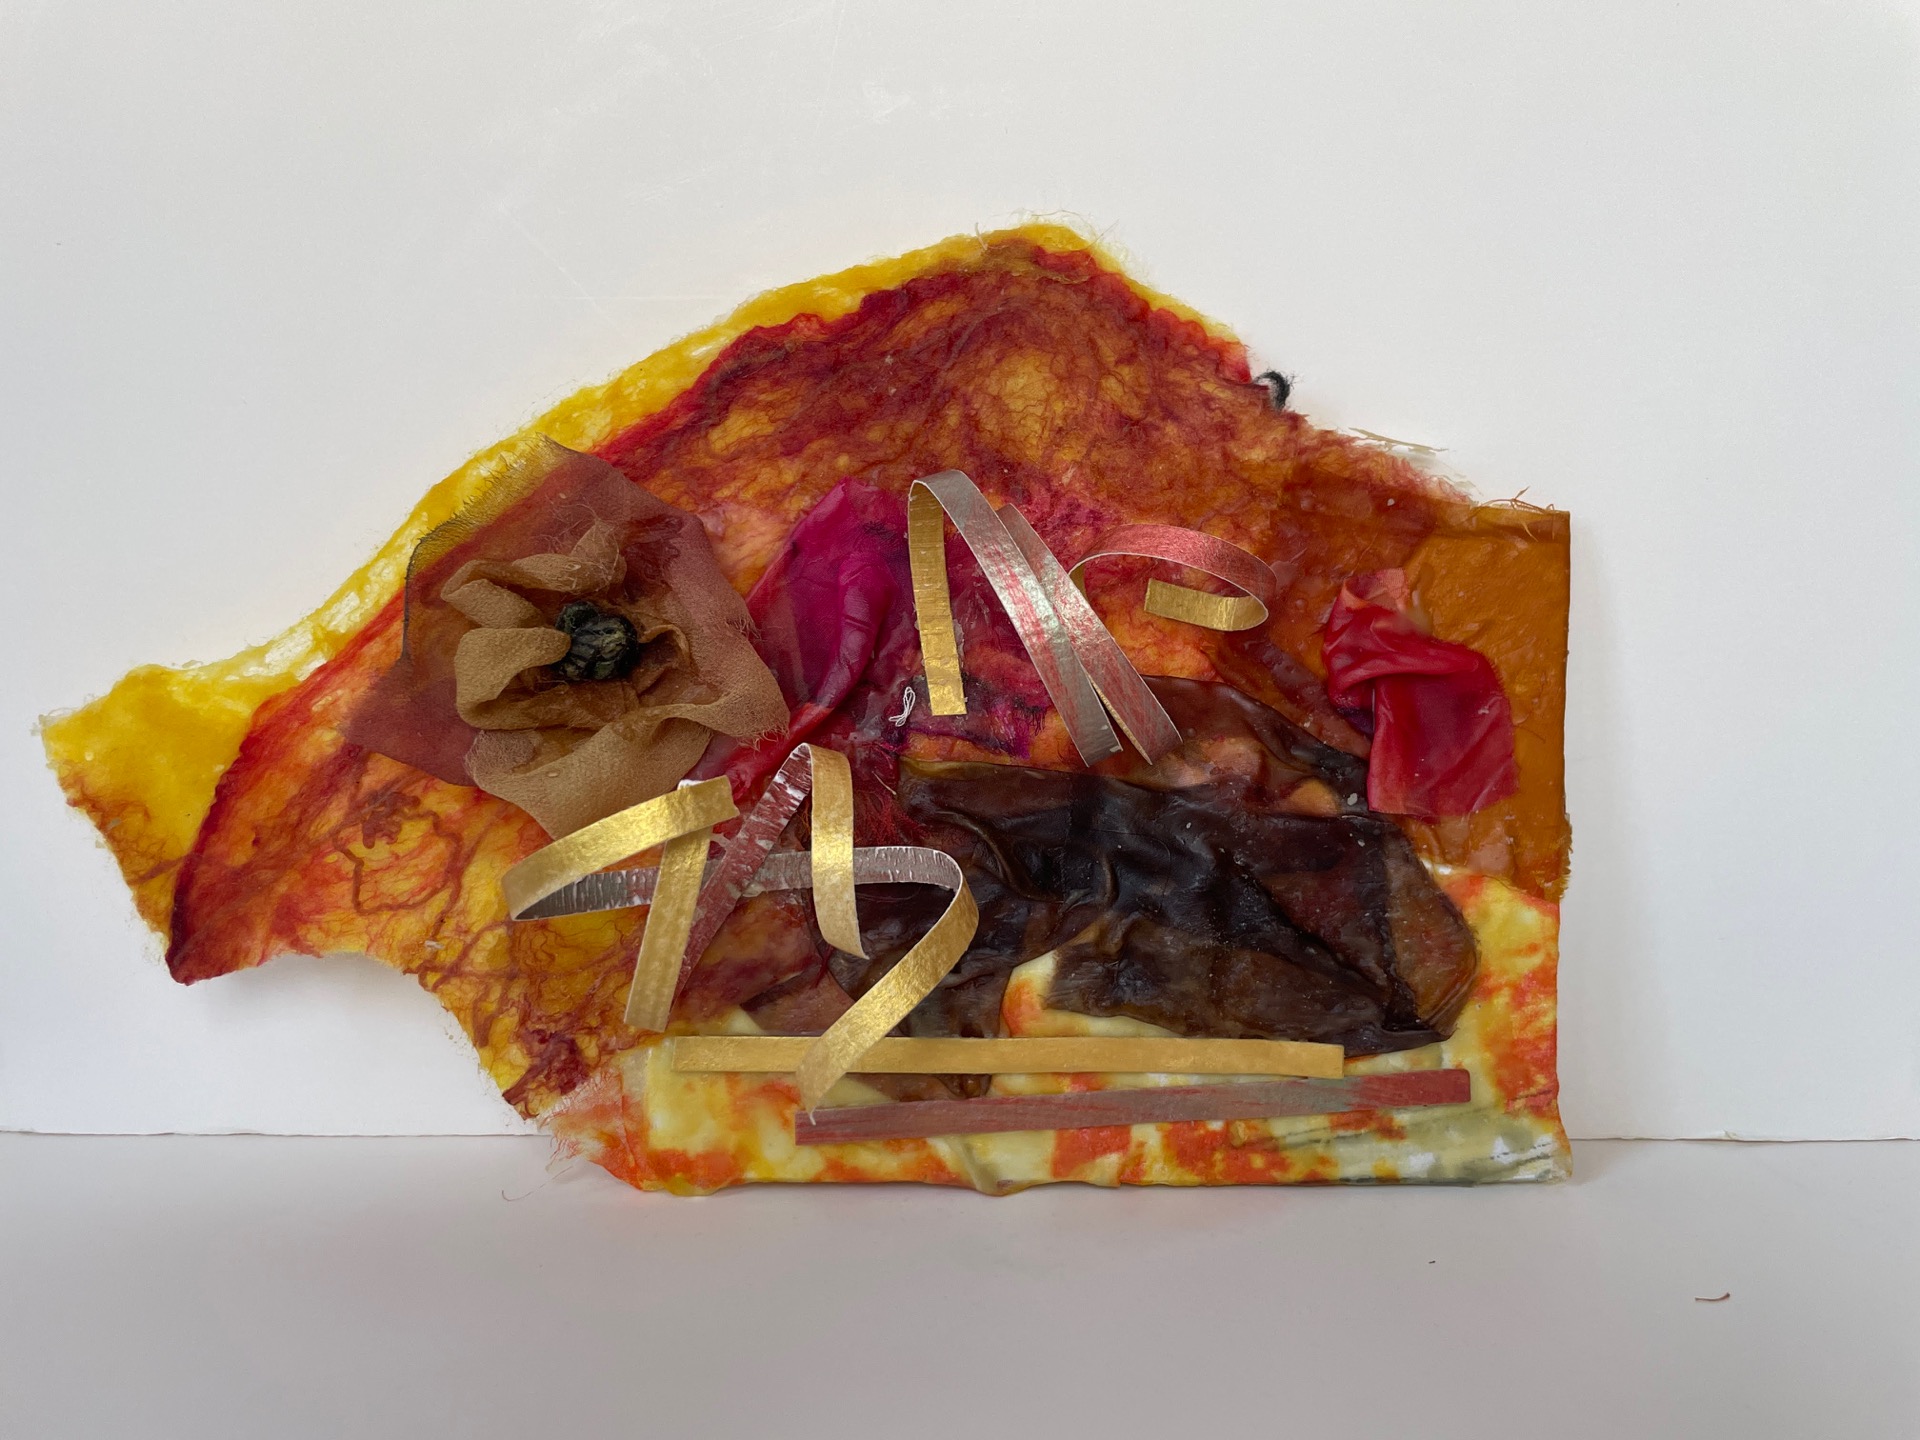
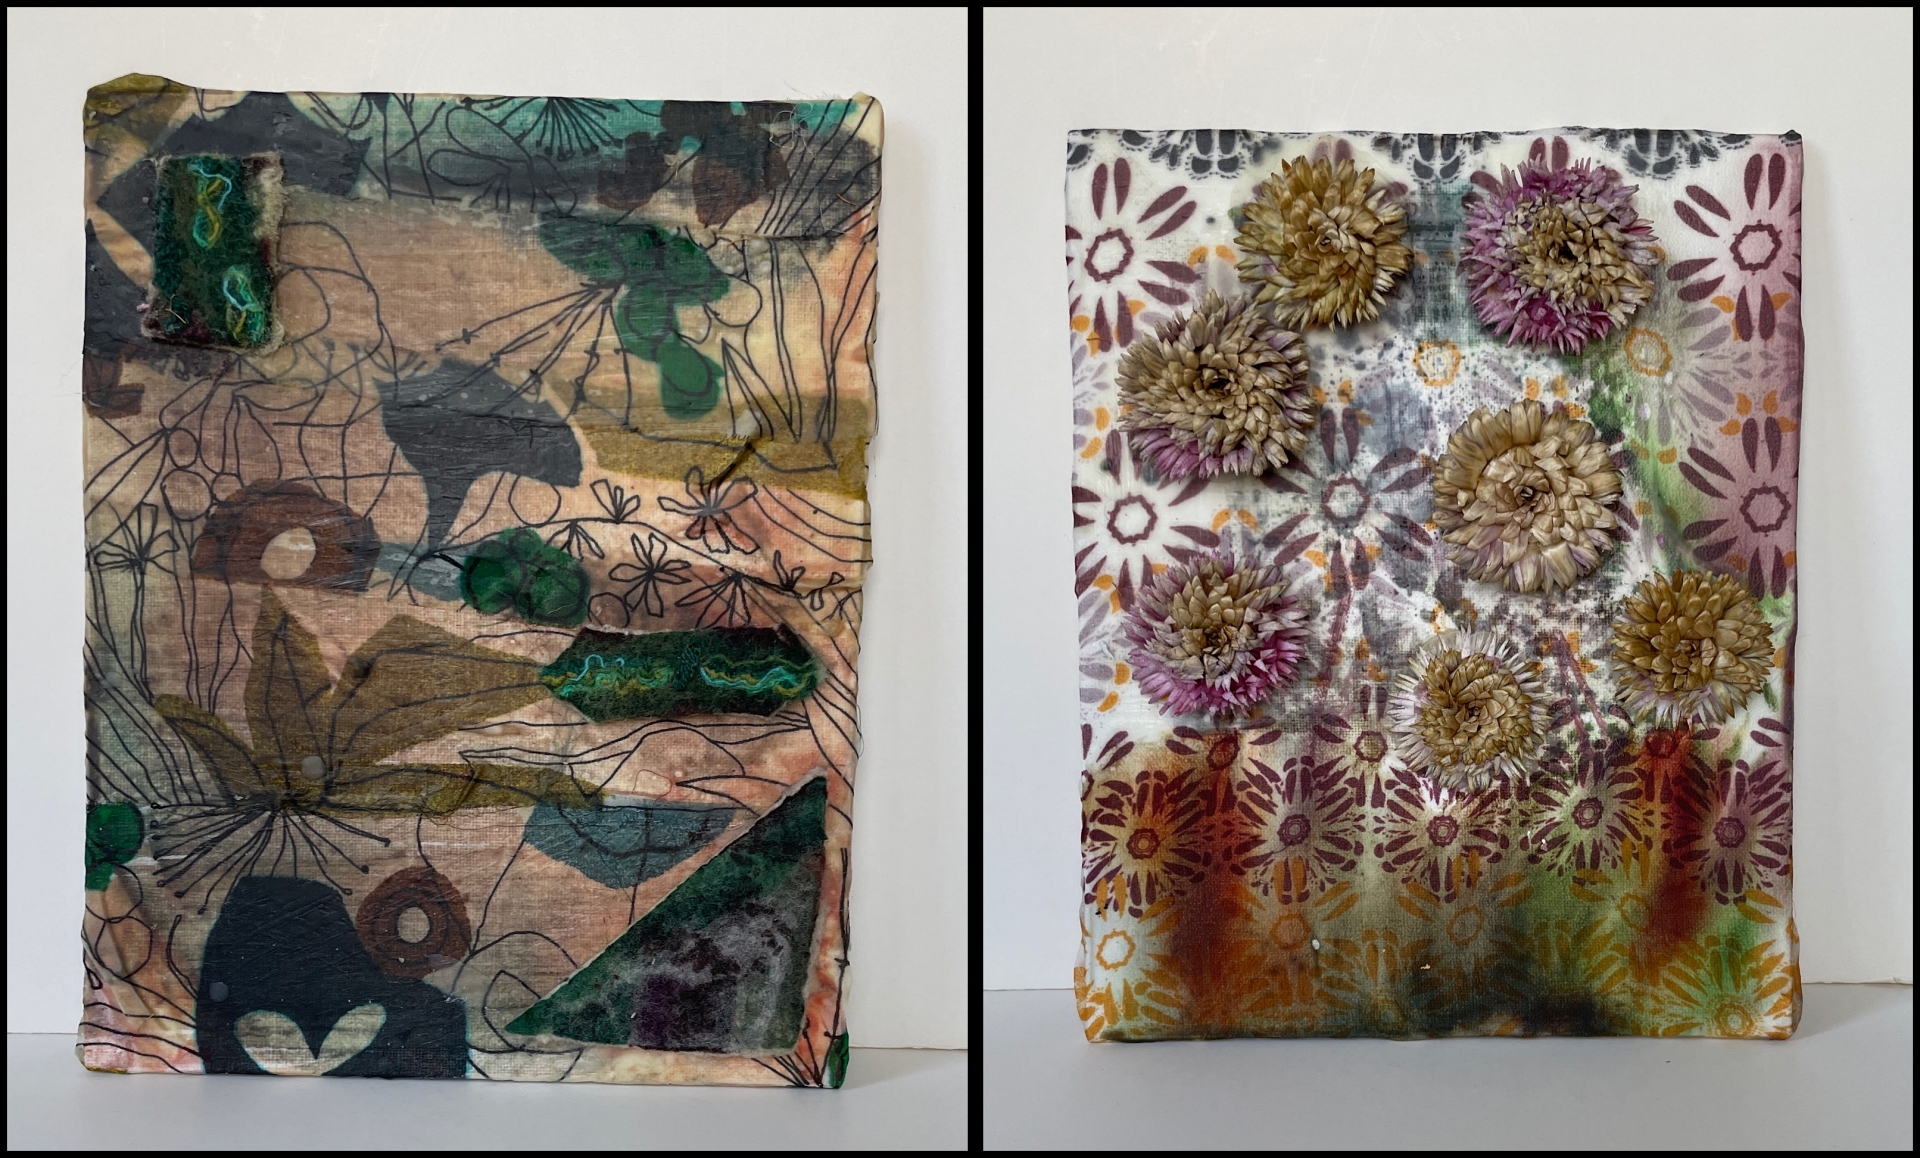
I spent the day experimenting layering felt, fabric, paper and even dried flowers.
I learned….. One can ‘glue’ a variety of materials using beeswax. Silk chiffon print fabric gives a nice base and designs can be highlighted with textured materials. Blending colors can turn into mud very quickly – a little bit of heat goes a long way!
And pushing one’s art can create great things but also great disasters!
All in all….I enjoyed the day and will play a bit more with this medium!
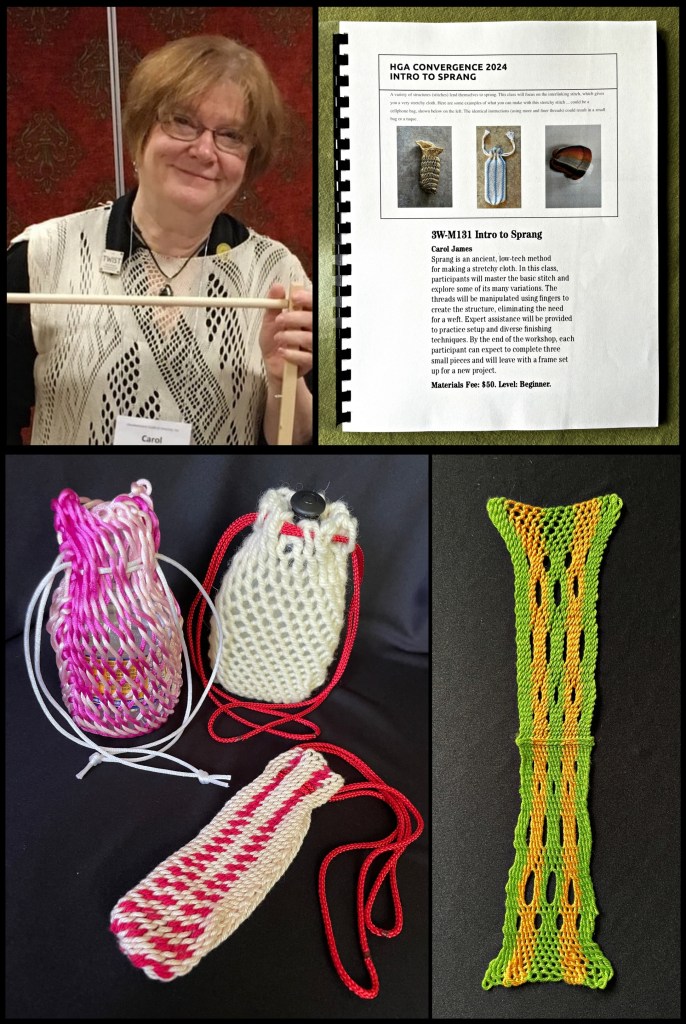
I am an unapologetic workshop junkie with an insatiable curiosity when it comes to different fiber techniques. When I see something new and different my thoughts immediately go to “Wow… that’s cool! How do they do that?” After taking a workshop or seminar some techniques resonate and I continue to play with them, others not so much but I always walk way with an appreciation for the skill and creativity that goes into the technique.
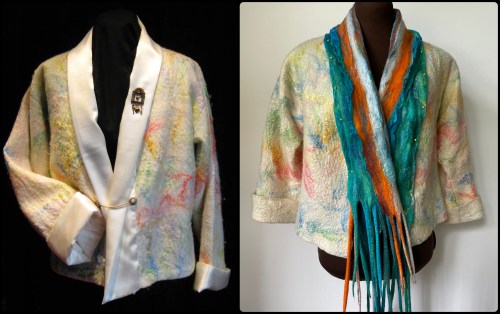
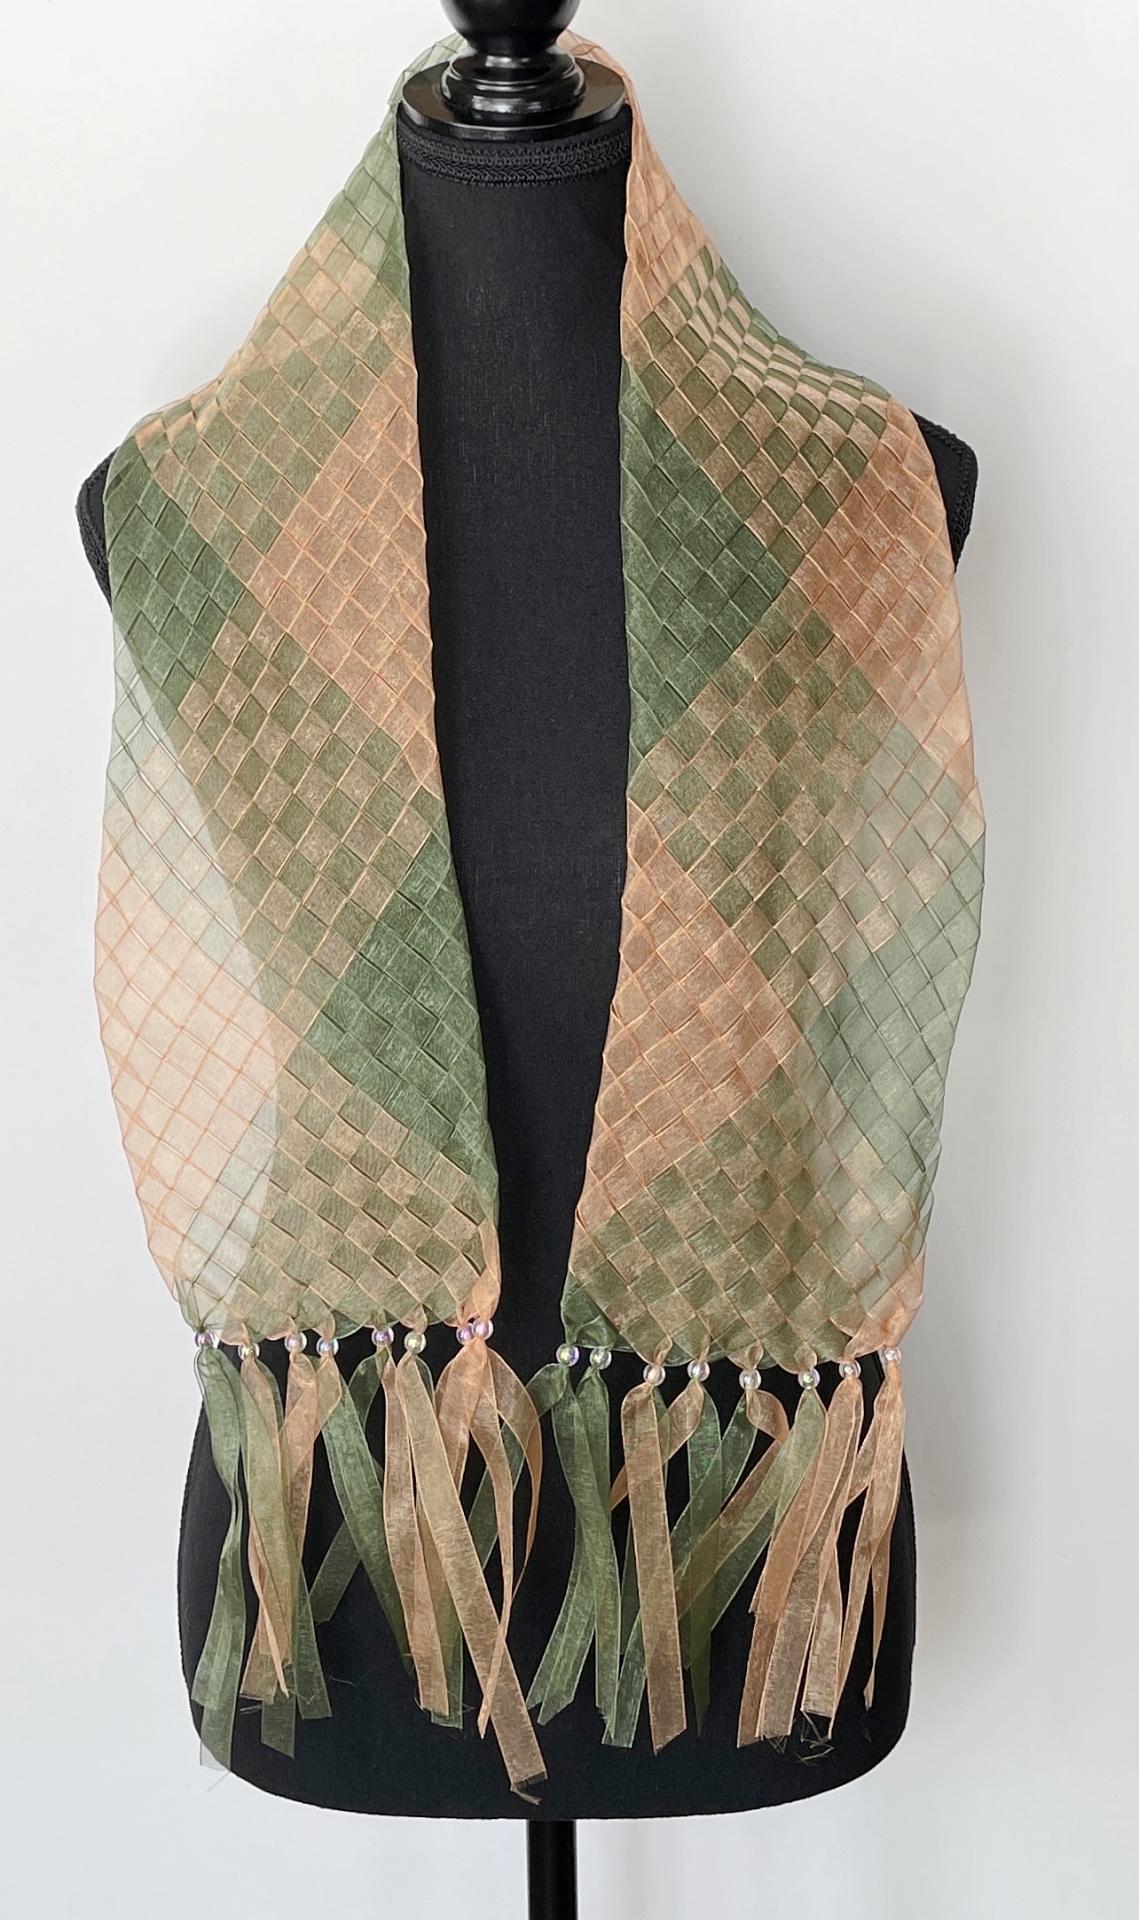
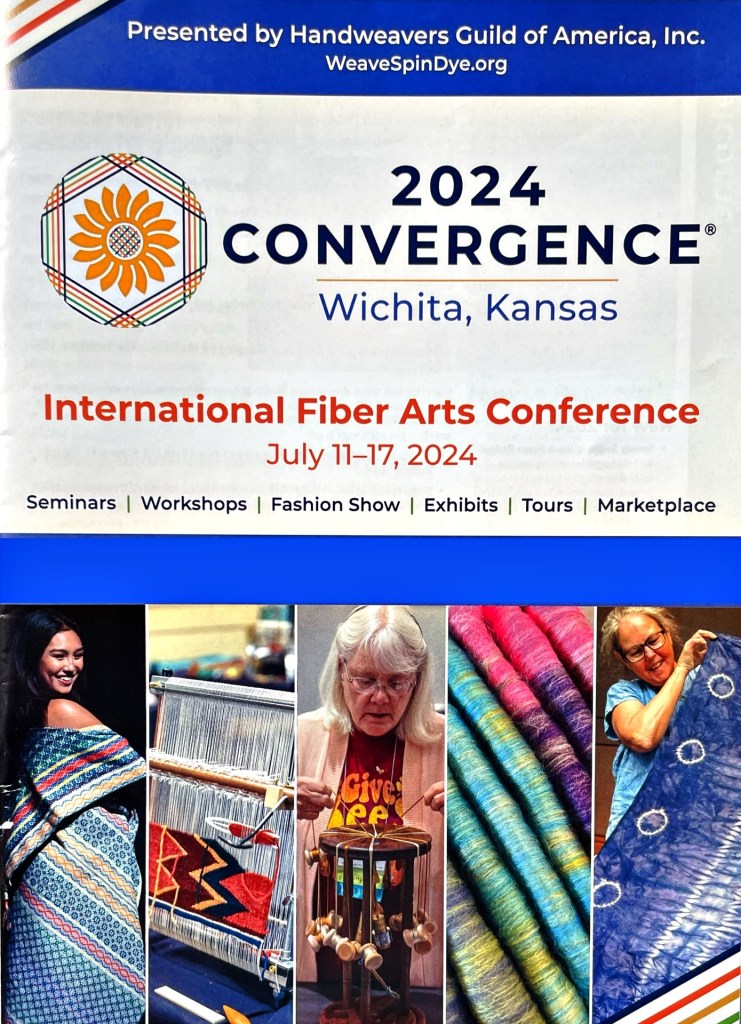
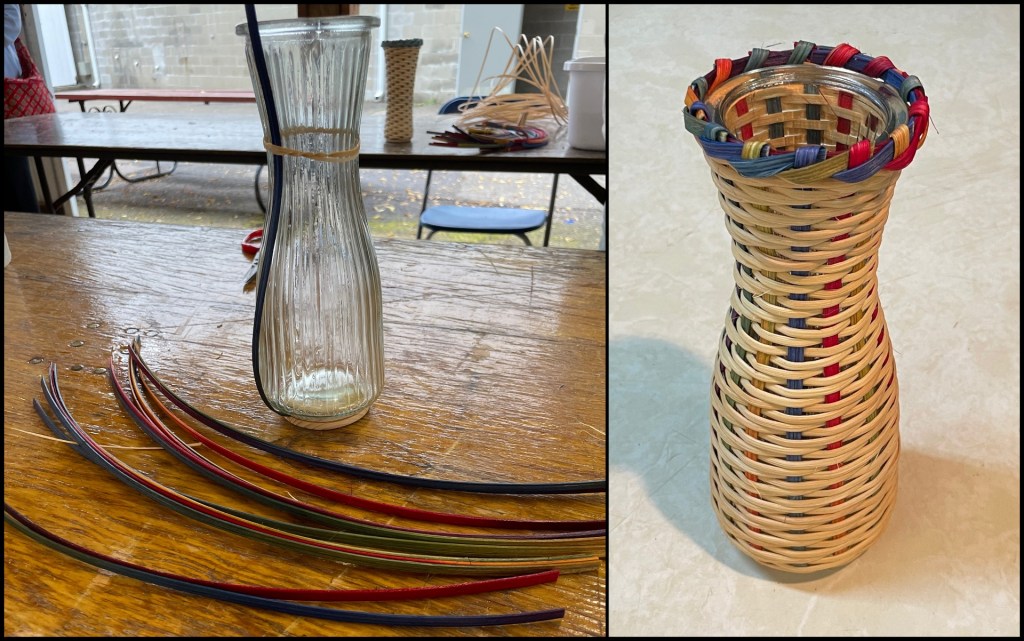
In 2006 at the Handweavers Guild of America (HGA) Convergence I took a 1 day workshop, Ribbon Kumi Scarf, taught by Japan’s Makiko Tada whose 40 years of research, artistry, authorship, and invention is largely responsible for the growing international interest in the art of Kumihimo braiding. An expert on the long history of kumihimo, she creates designs from both traditional patterns and from her own original designs.
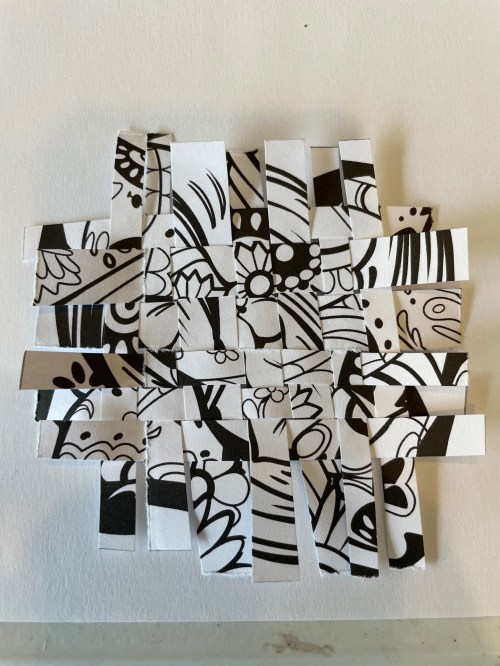
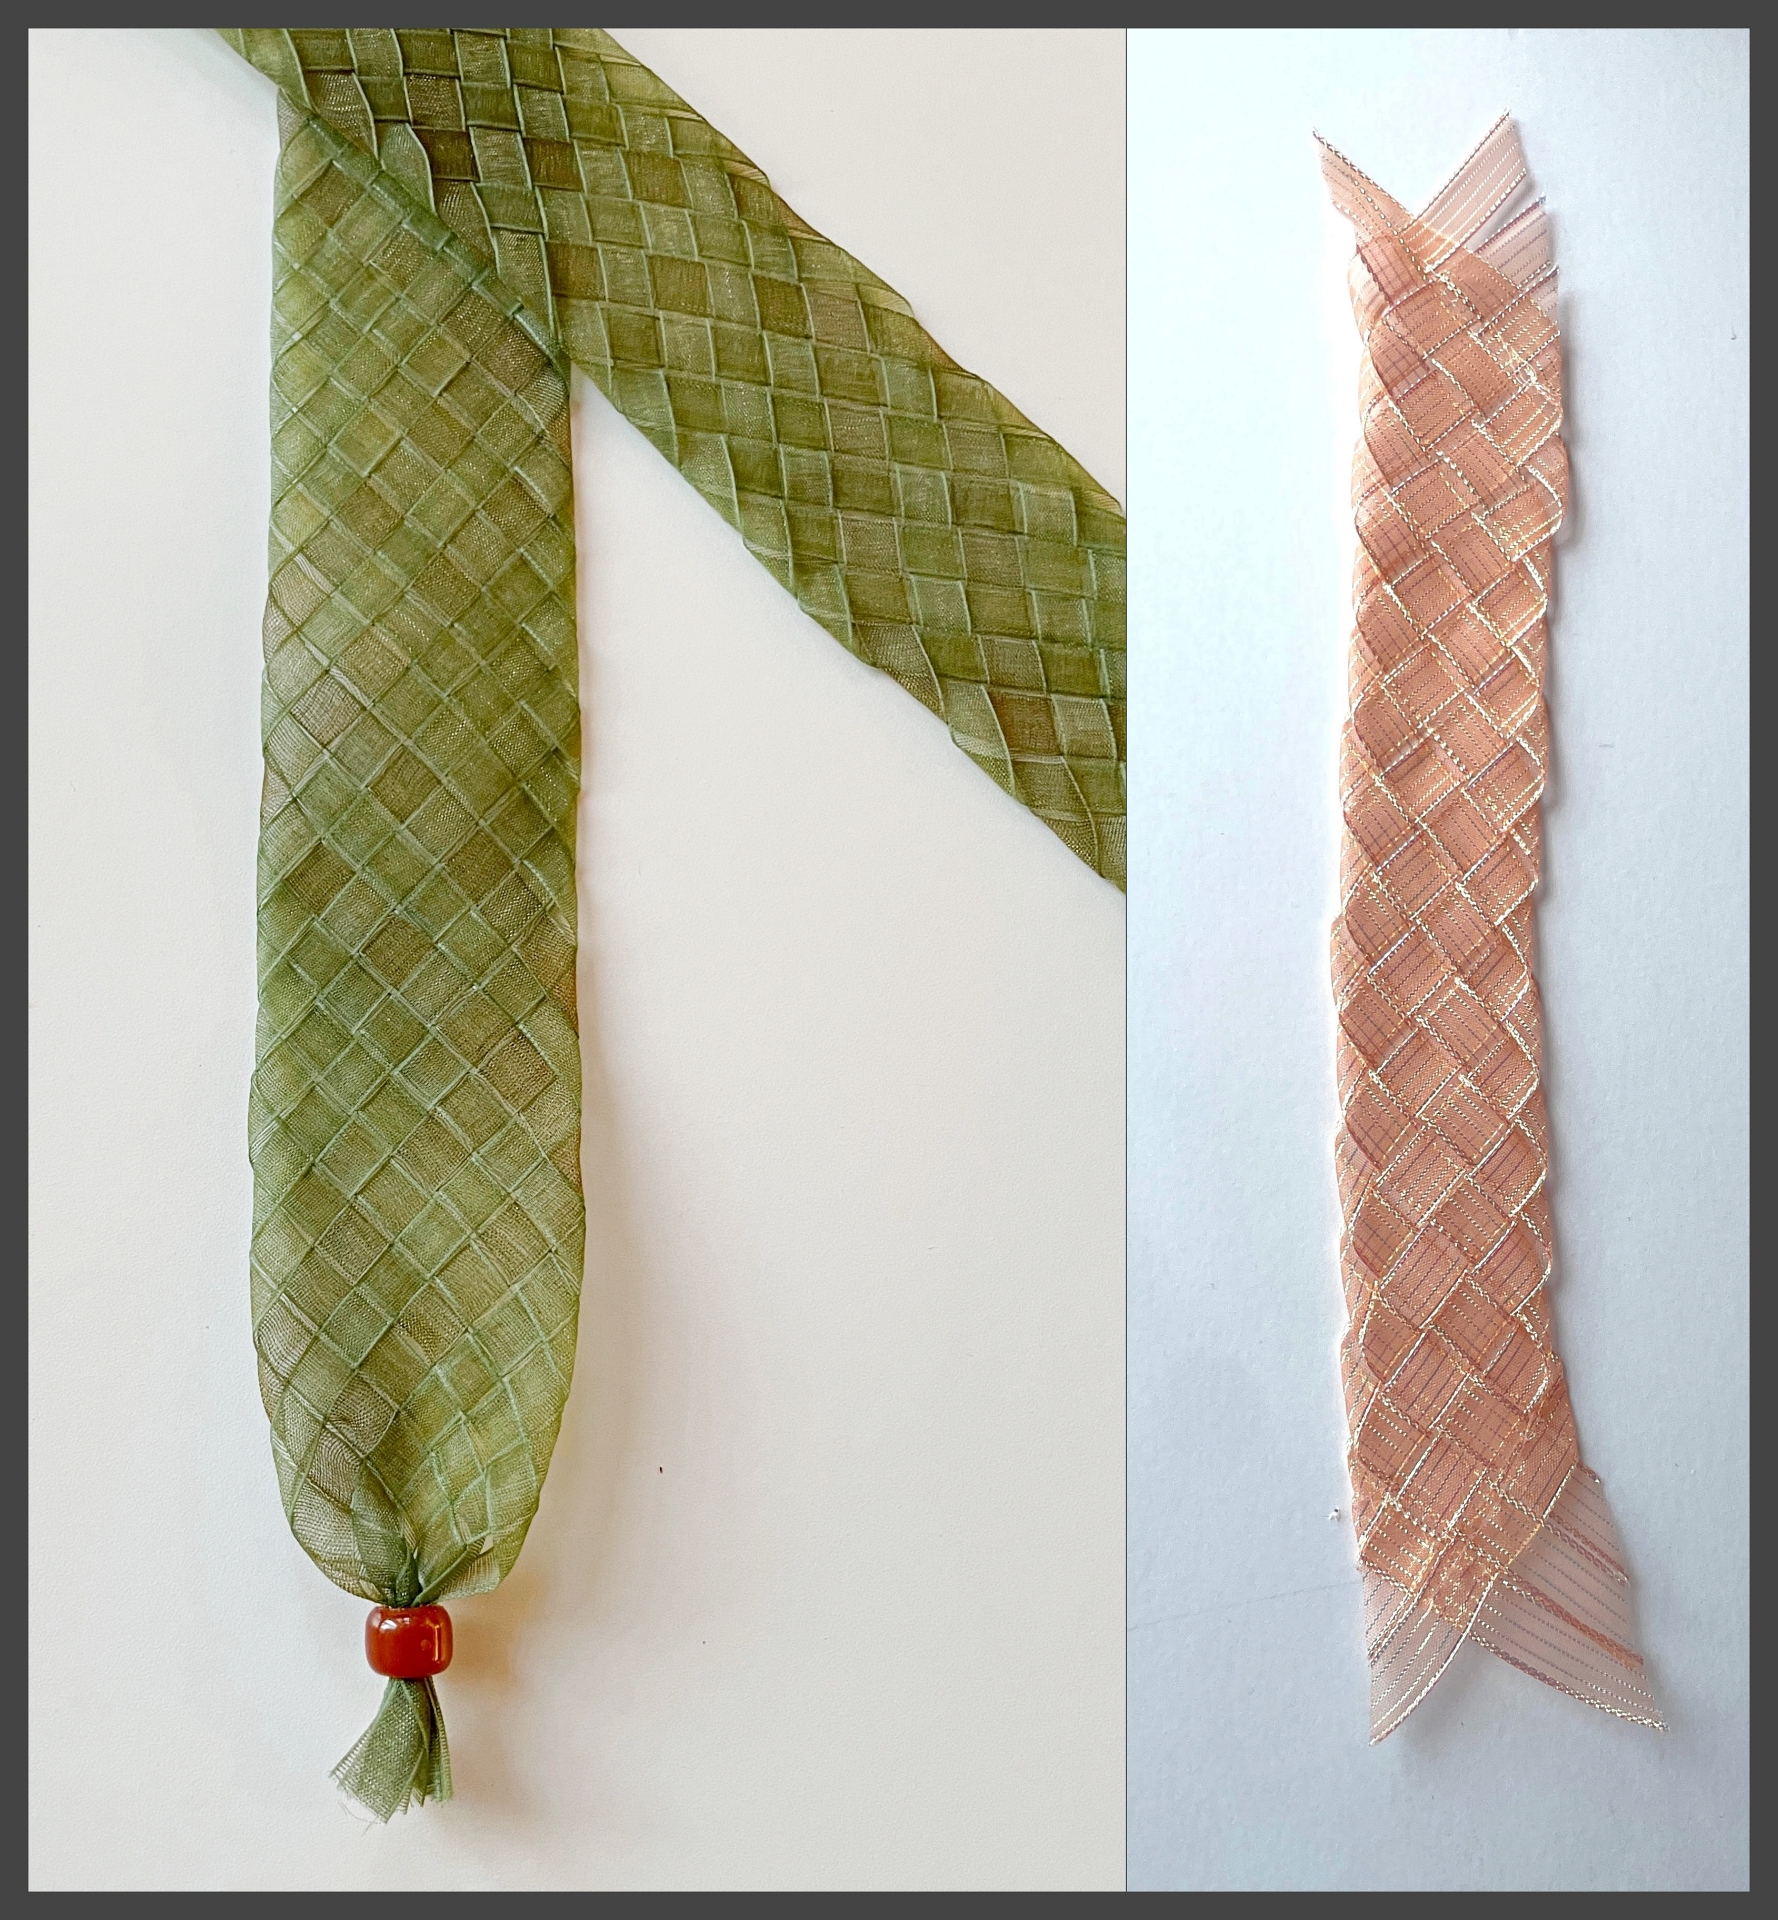
Using free braiding techniques with half-translucent organza ribbon Makiko showed us how to lay out ribbons and begin braiding/plaiting on the the diagonal. We worked on a stiff corrugated cardboard using straight pins to keep the ribbons in place while we braided. Beads were used to hold the ends once we finished our sample. She also showed us how to create as scalloped edge.
Then it was on to making a full length scarf and I was hooked! This is something I will continue to play with.
A scarf woven with organza ribbon is very stiff and not that comfortable to wear. I experimented with 1/4 inch organza ribbon which was not as stiff but still rather scratchy at the back of the neck.
I sampled all sorts of ribbon. Many were great if I wanted a firm structure but for a scarf I settled on a narrow silky nylon ribbon.
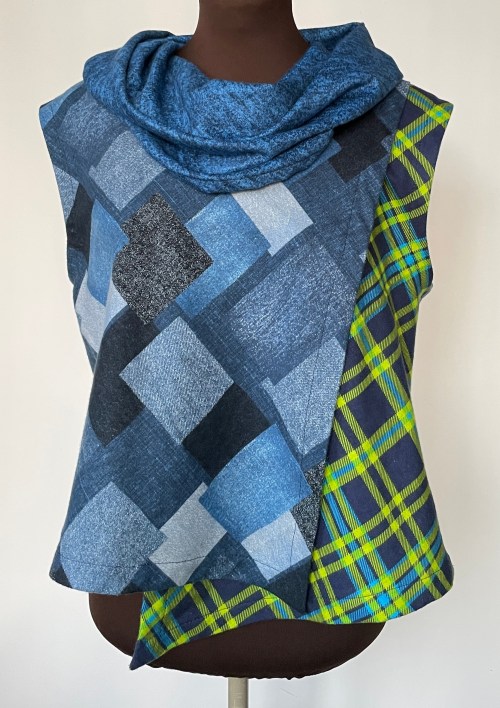
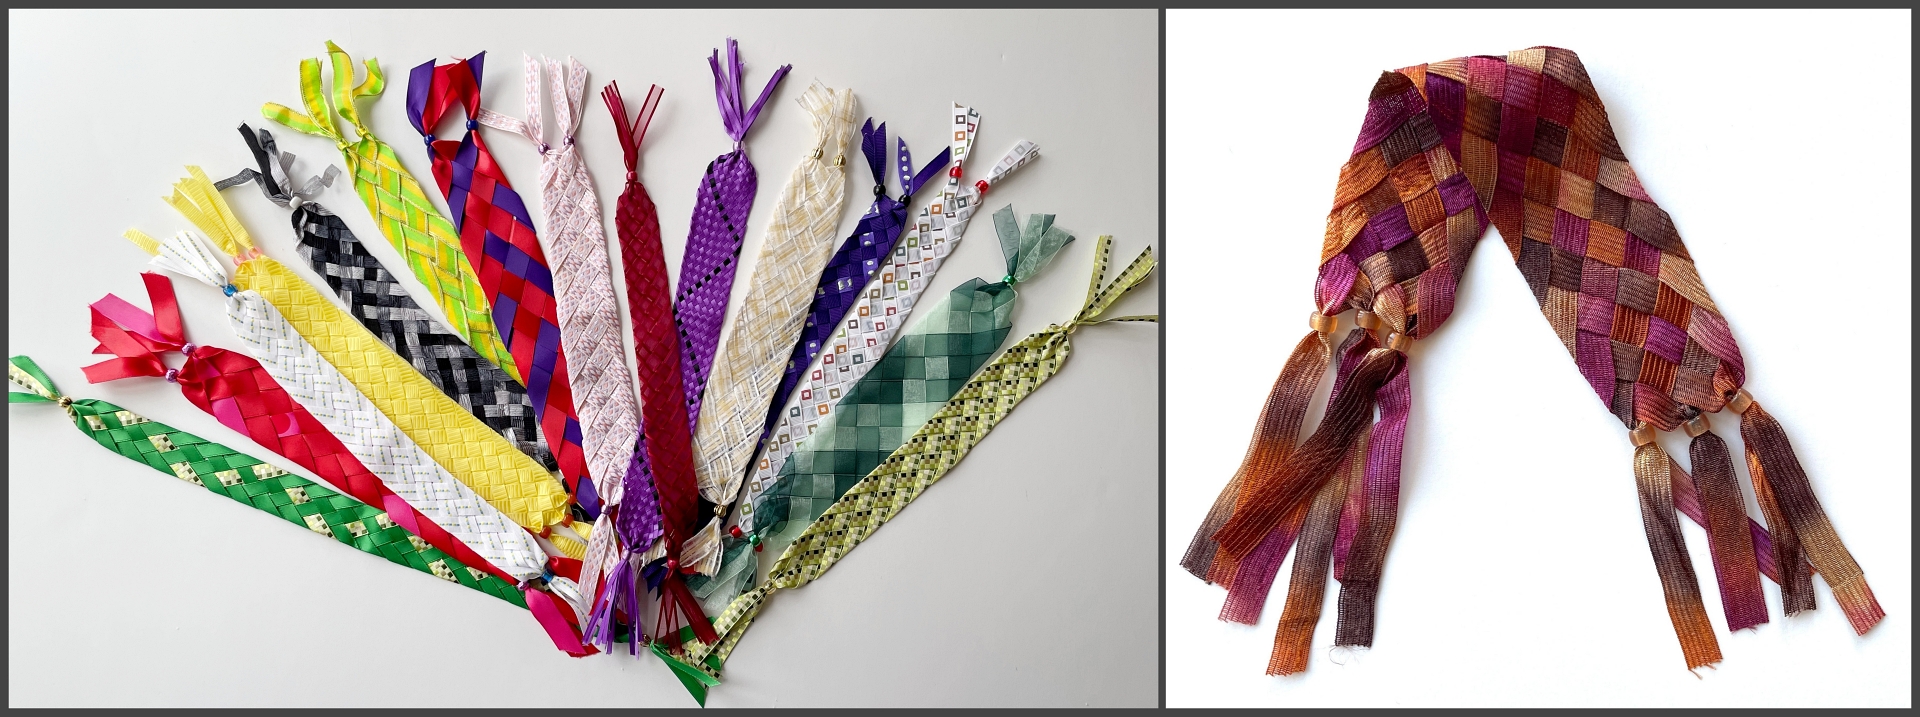
Over the years I’ve tried different width ribbon, some smooth, some with texture, some with metalic elements making a wide range of scarves and cowl neck warmers. It’s always a surprise to see how the color blending will look when using variegated ribbons. Silky ribbons are a challenge because the slightest roughness on my fingers will snag the ribbon.
I stabilized woven ribbon to create a sturdier fabric for making small crossbody purses and accent panels for larger tote bags.
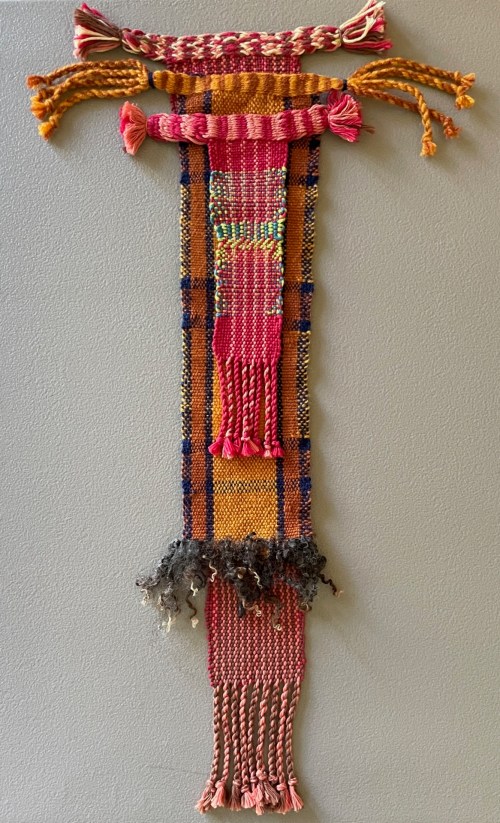
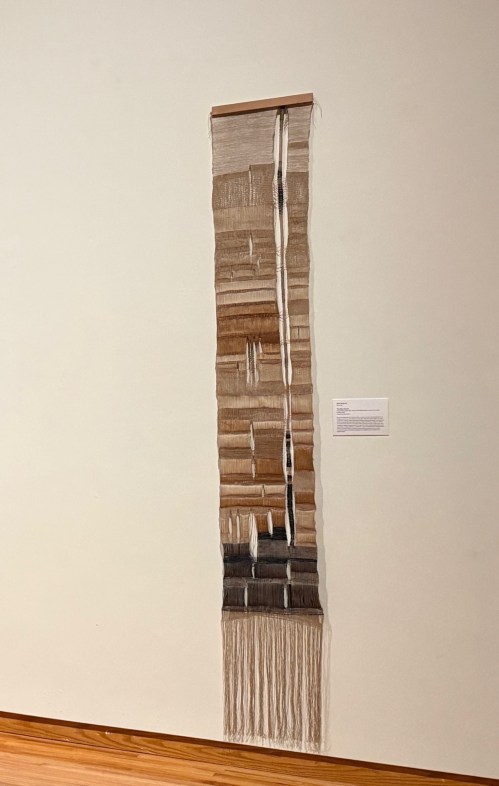
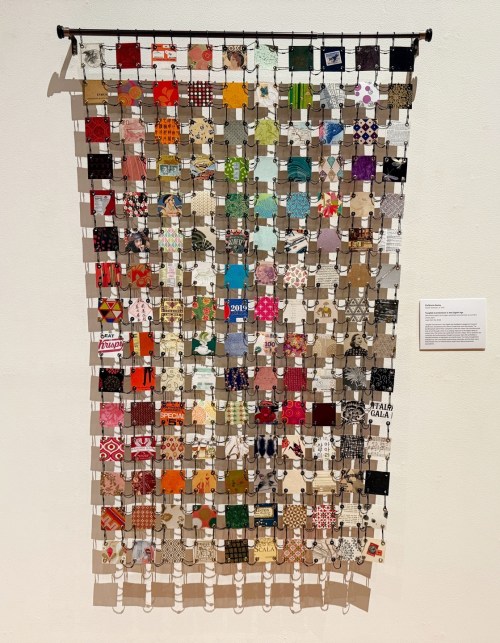
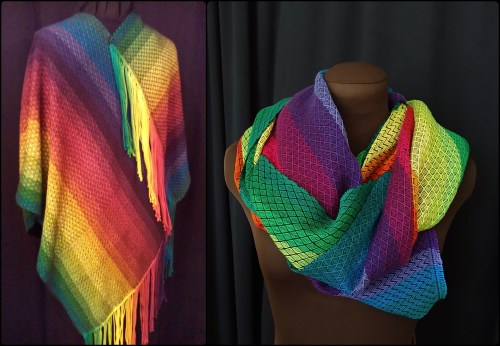
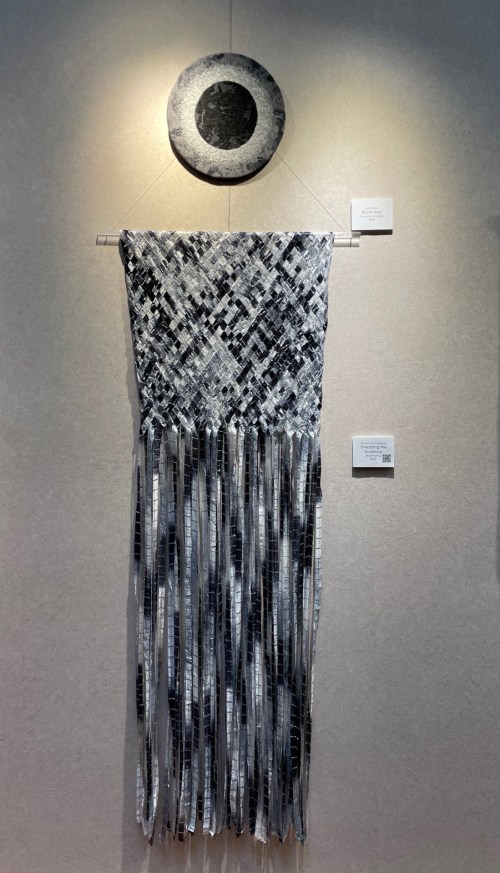
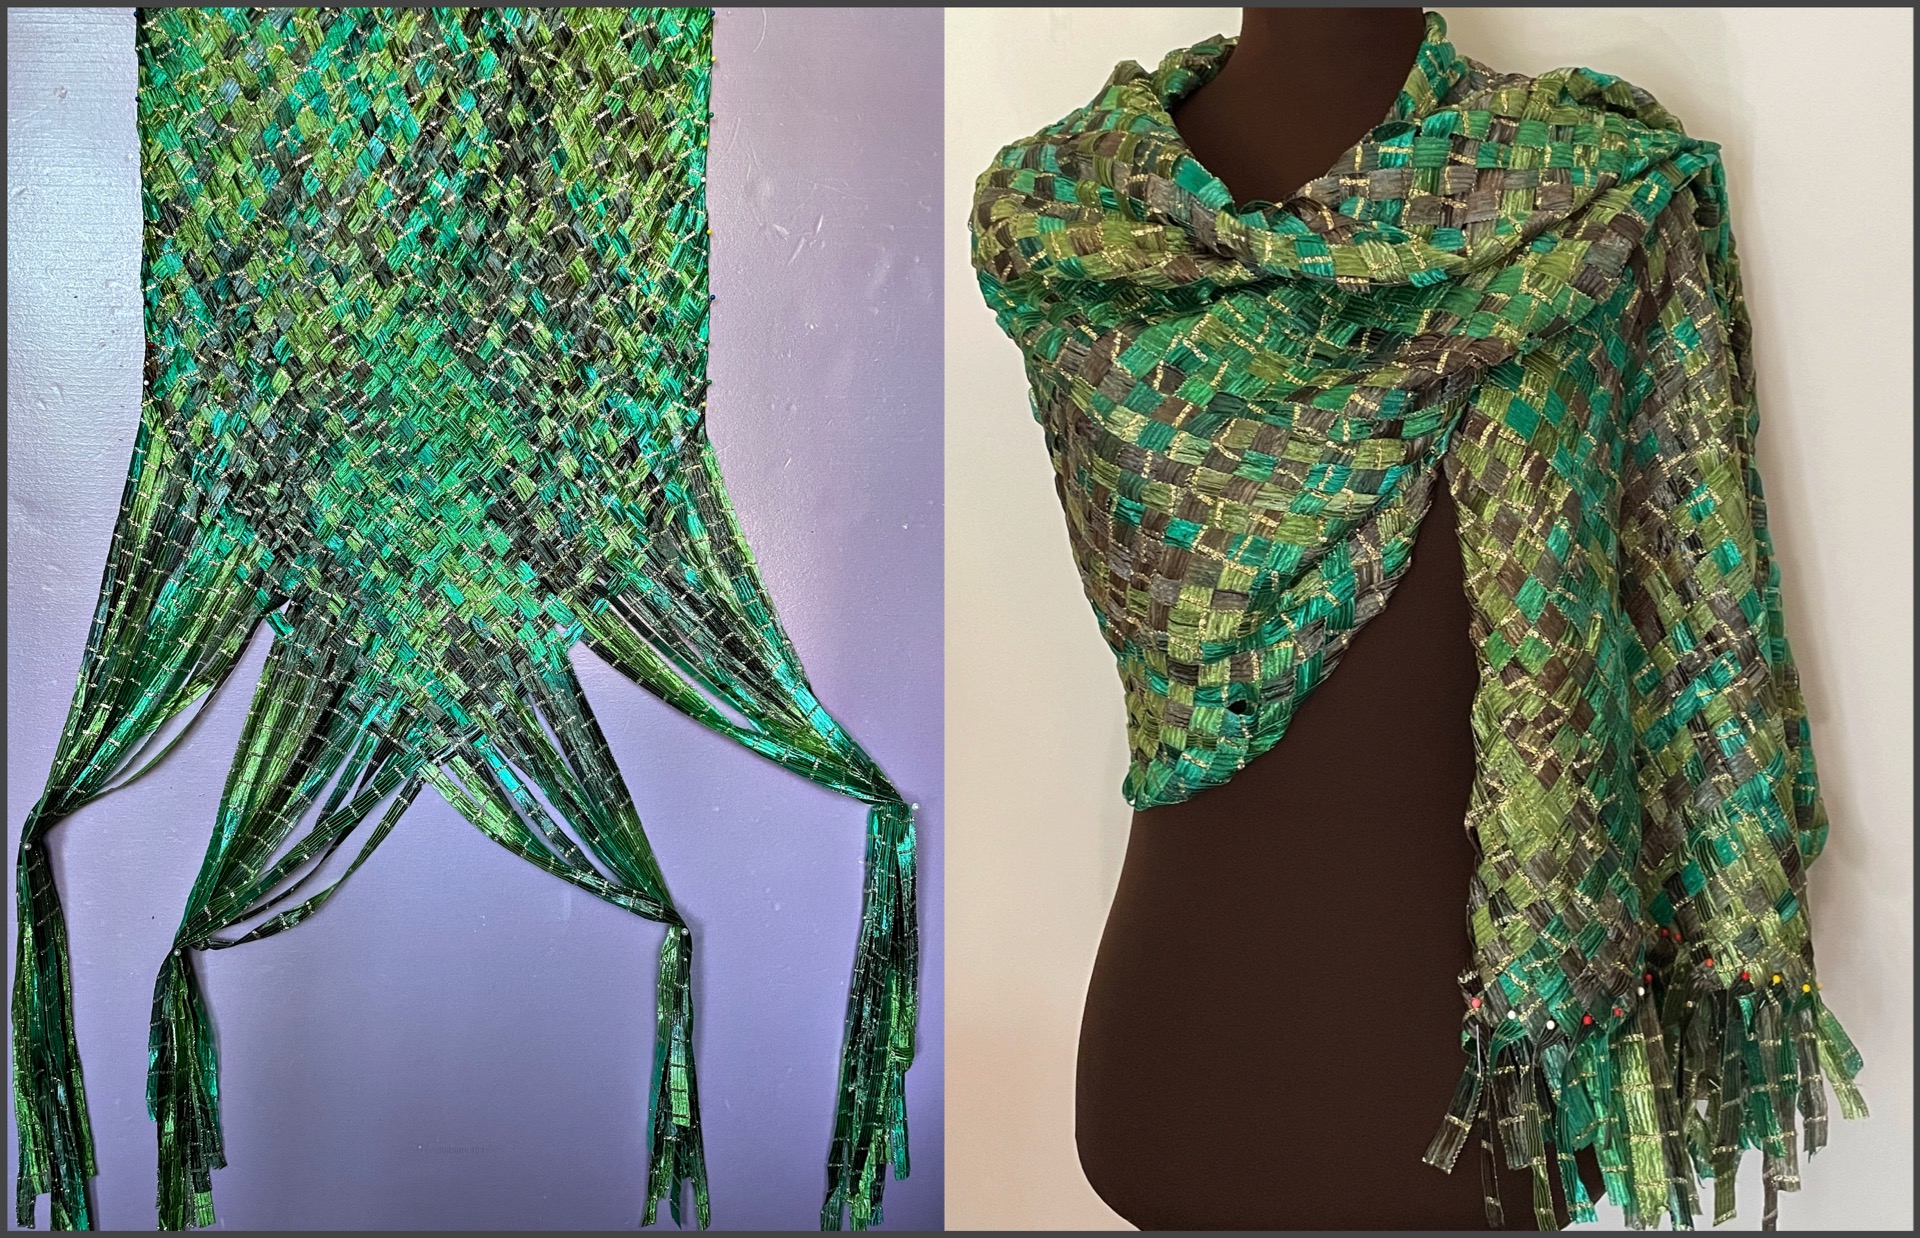
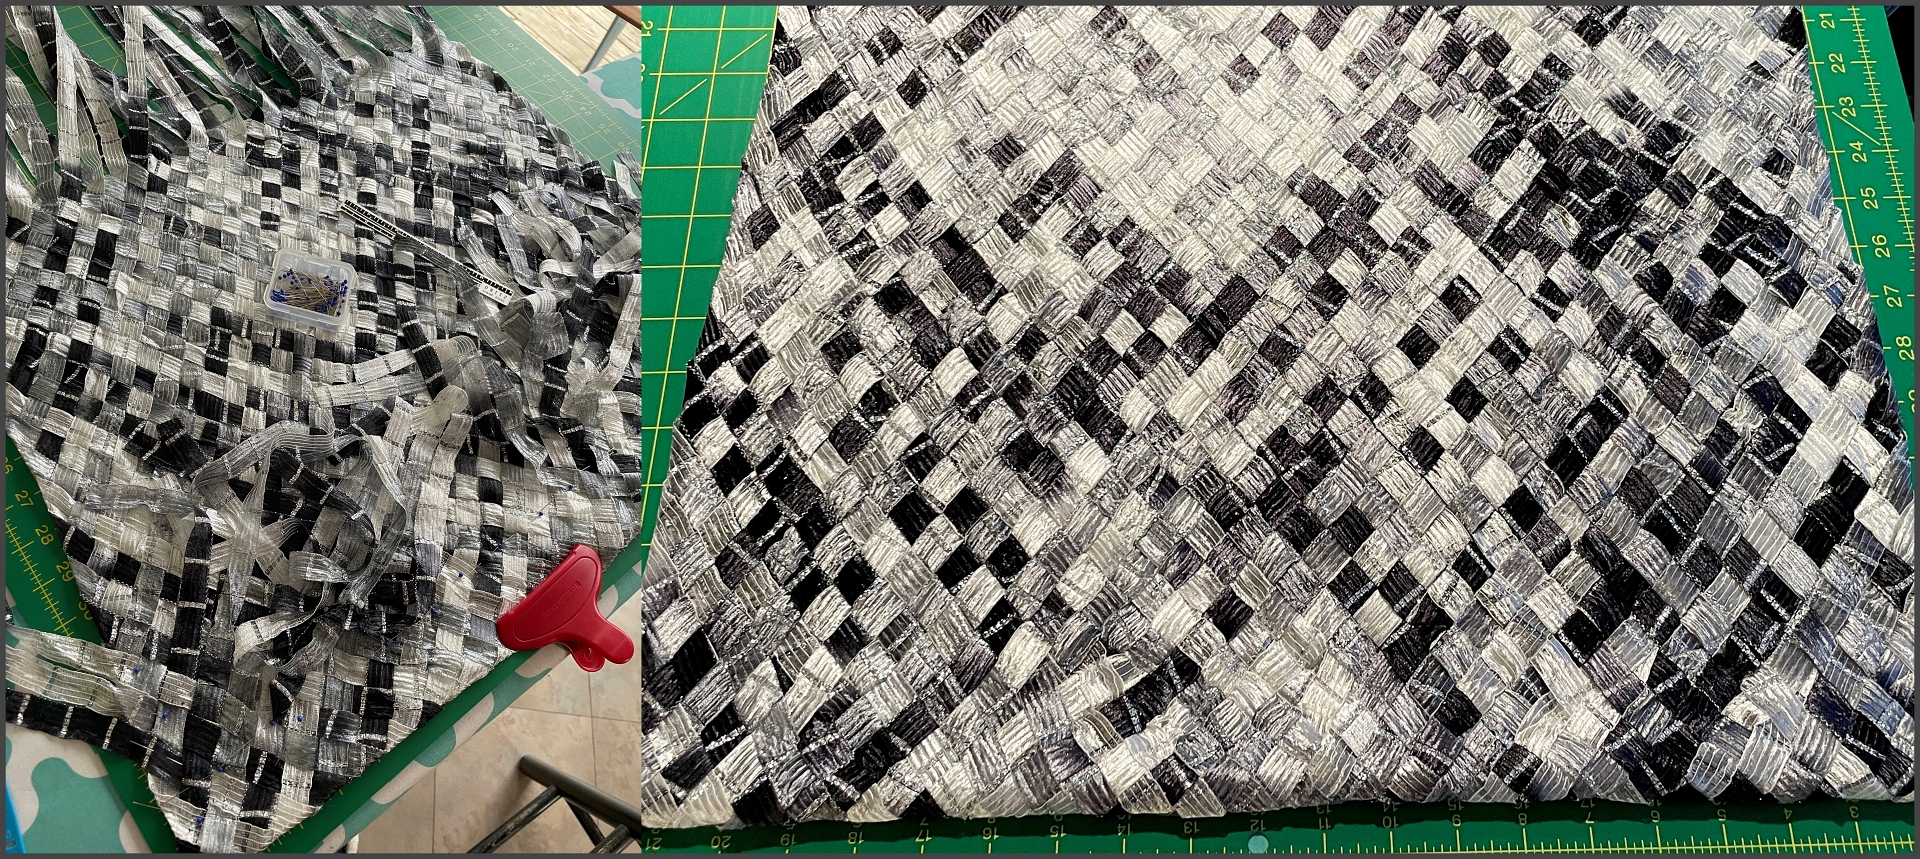
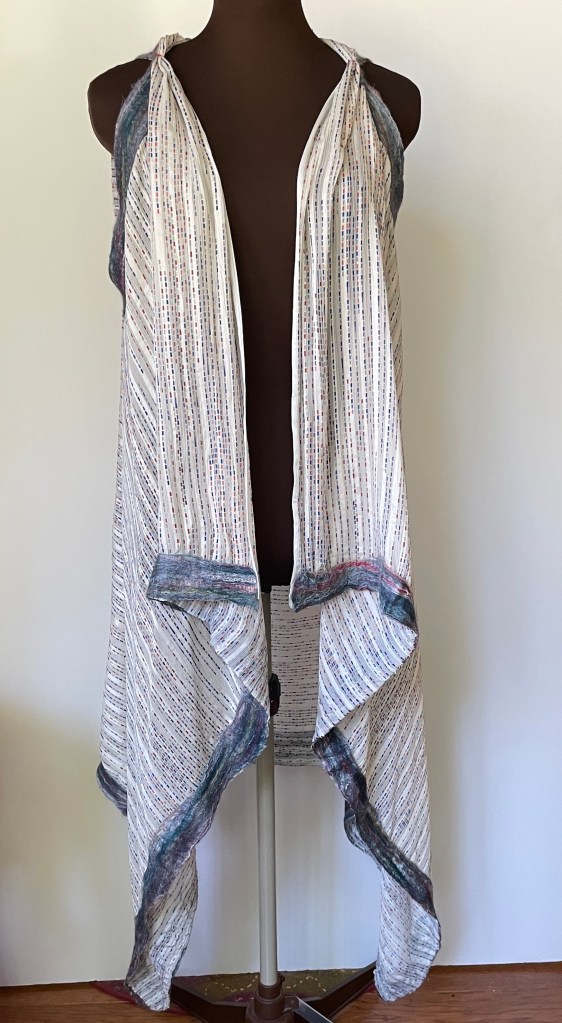
The most recent projects have been working with 53 ribbons/each 2 meters long to make a shawl.
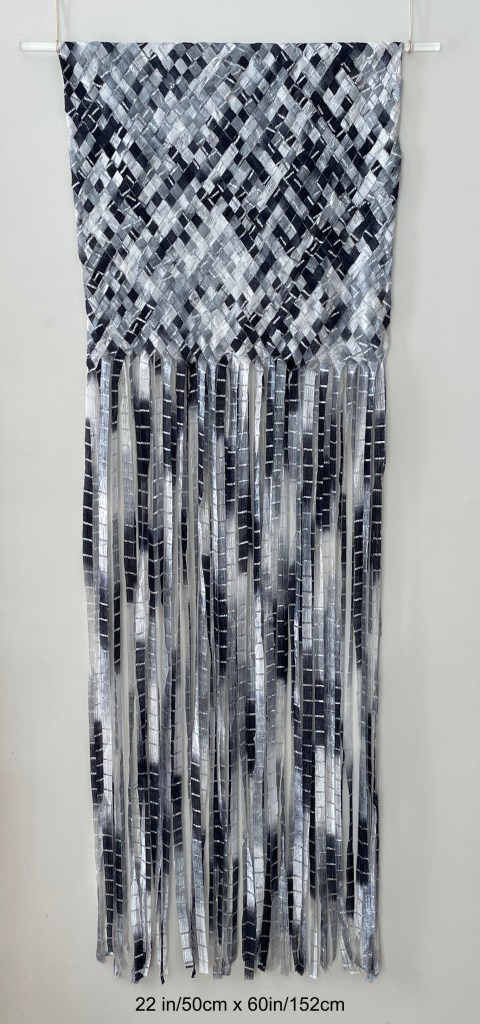
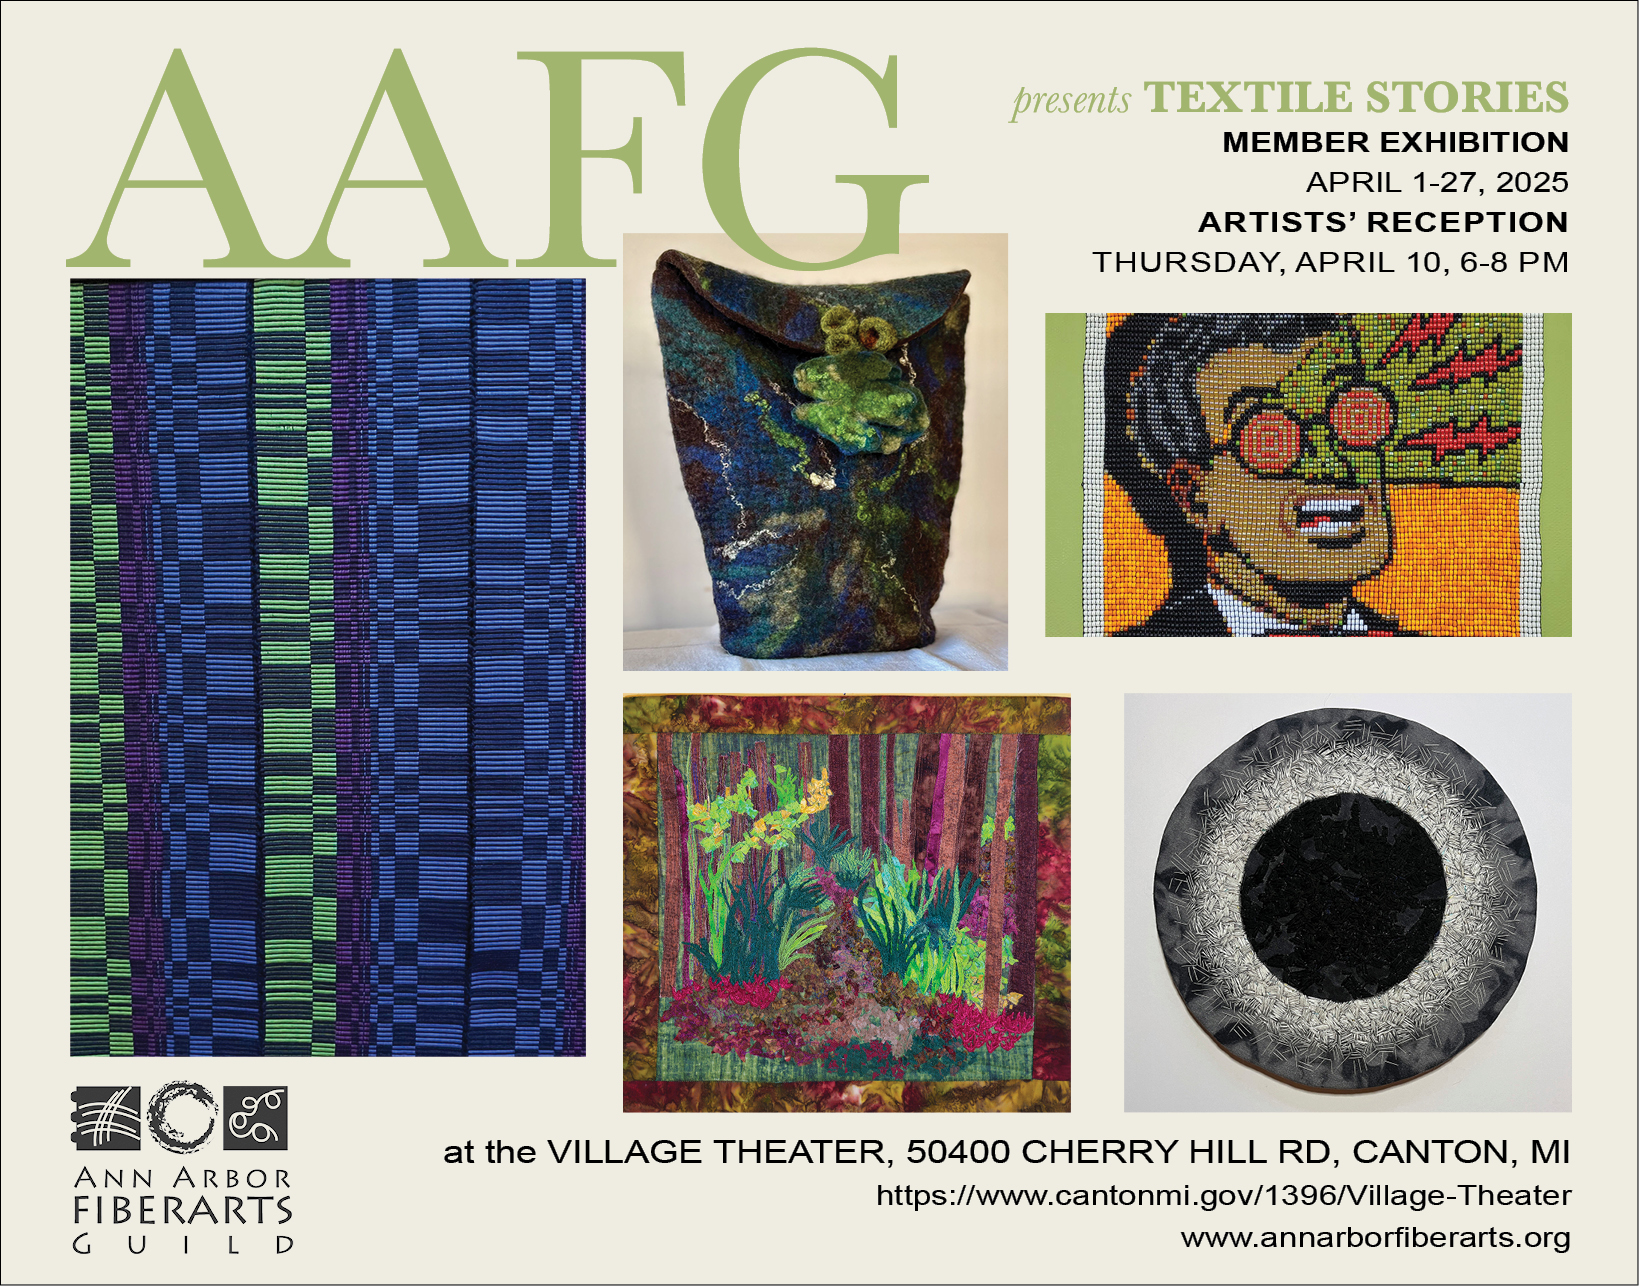
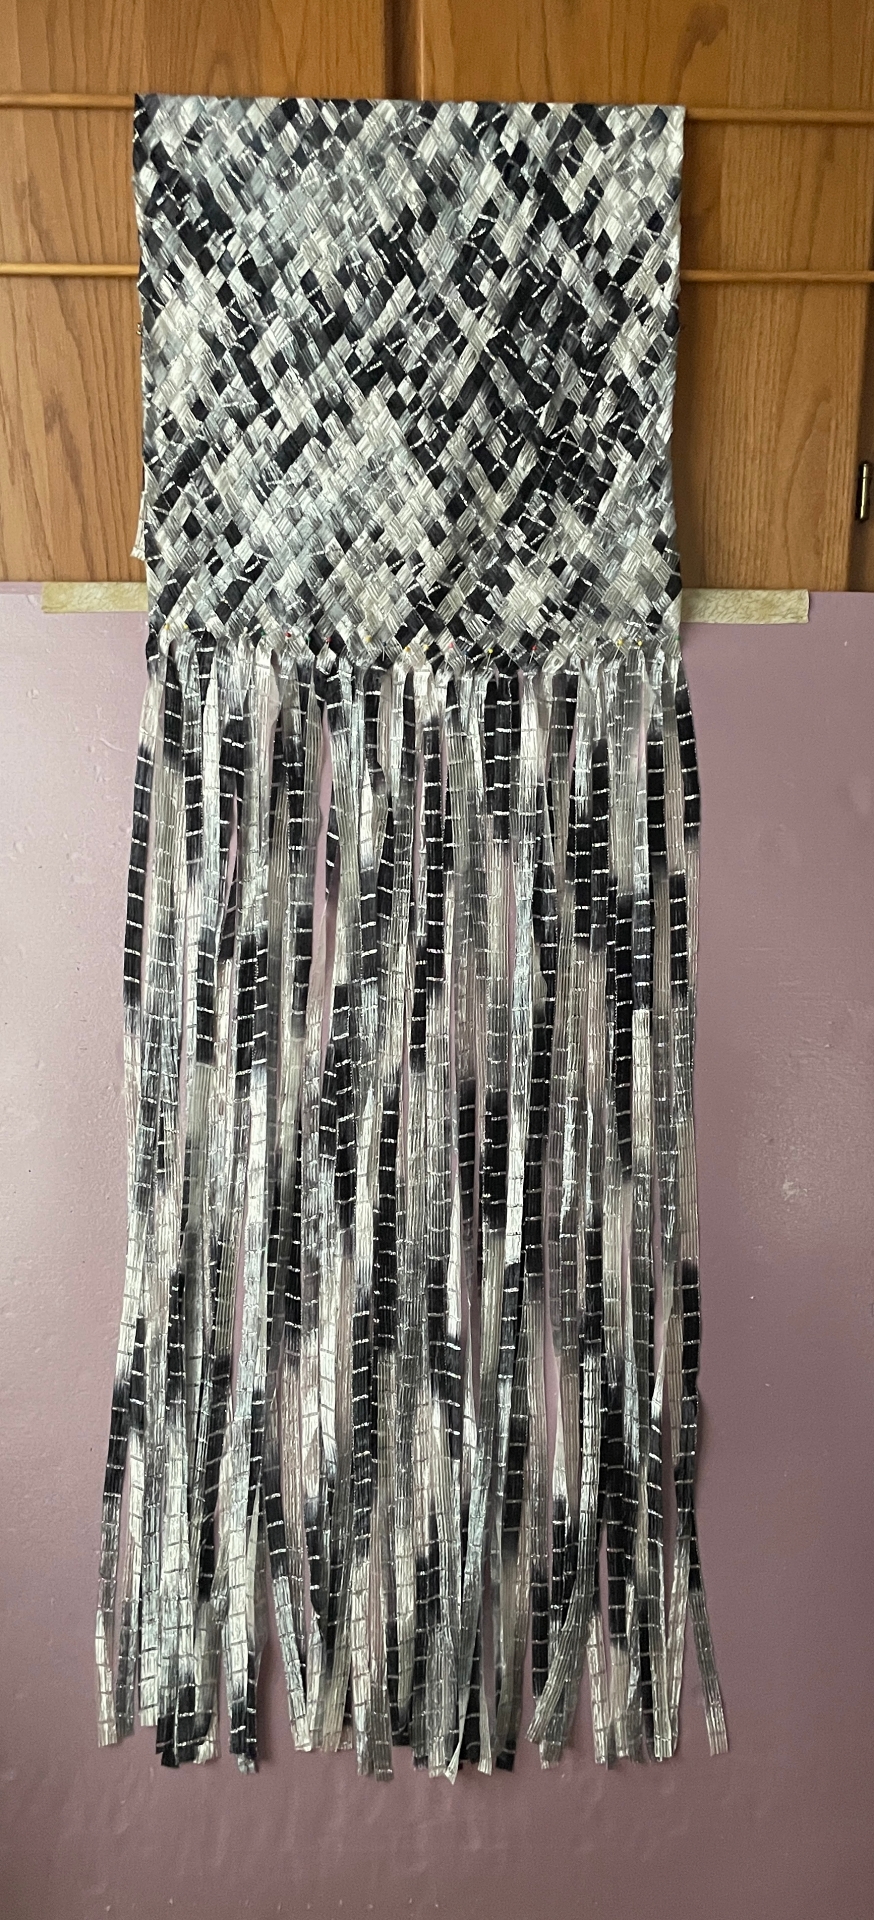
After seeing how the shawl came out I decided to make a wallhanging for theAnn Arbor Fiberarts Guildexhibit at theVillage Theaterin April. This project has been one where the materials have decided what the end result will be. As I wove the first half I wasn’t thrilled with the pattern that was emerging and did a photo mock up of what the full length might look like and still wasn’t thrilled.
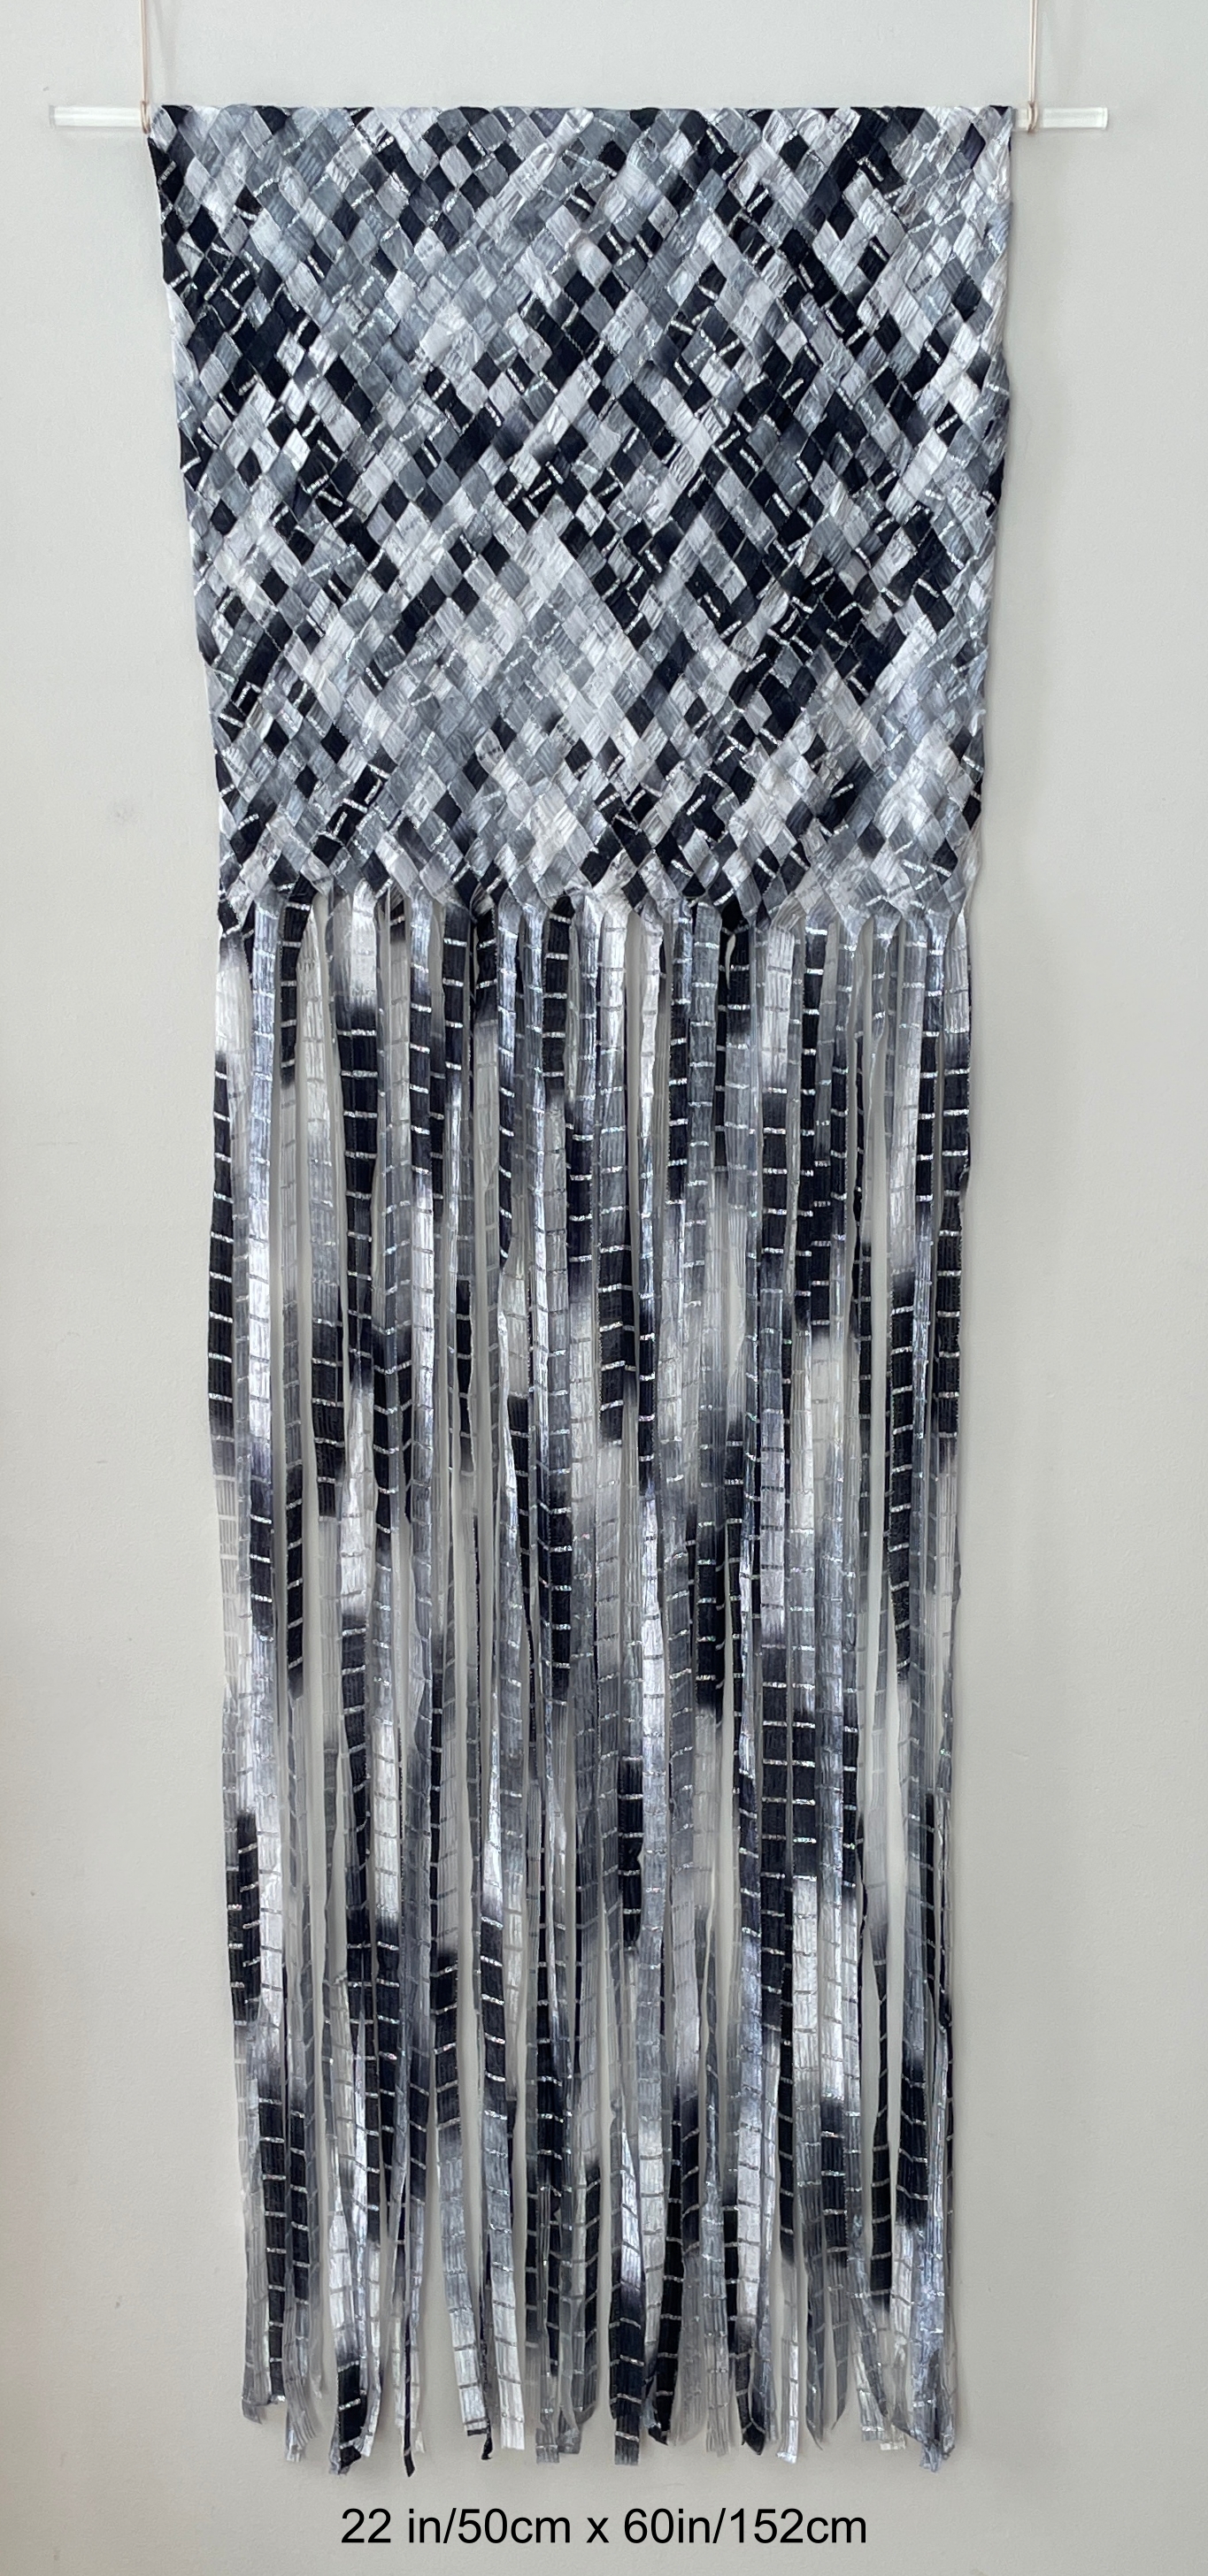
However….. as I advanced the ribbons to begin weaving the second half I really liked the movement of the black, white, and grey colors of the variegated ribbon as it simply hung down.
Now the challenge became how do I keep everything from unravelling. I wanted a smooth continuous line between the woven and unwoven sections so beads are not the answer. I tried stitching across the bottom of the woven section but the stitching restricted the natural expanding and contracting of the bias weave. The solution was using tiny pieces of double stick lite fusible tape each ribbon pair cross. This was a slow and tedious process but the result is exactly what I wanted.
The final challenge was to make a pocket for the hanging rod. This was achieved by folding the top edge to the back and weaving the ends back into woven section leaving a 2 inch pocket.
This past year was filled with Creative challenges and adventures… Learning new techniques… Reimagining & expanding skills… Demonstrations, exhibits & sales. Here’s a look back…..
Scrappy Improvisation – workshop with Thom Atkins
Reimagining Woodland Ferns tunic dress
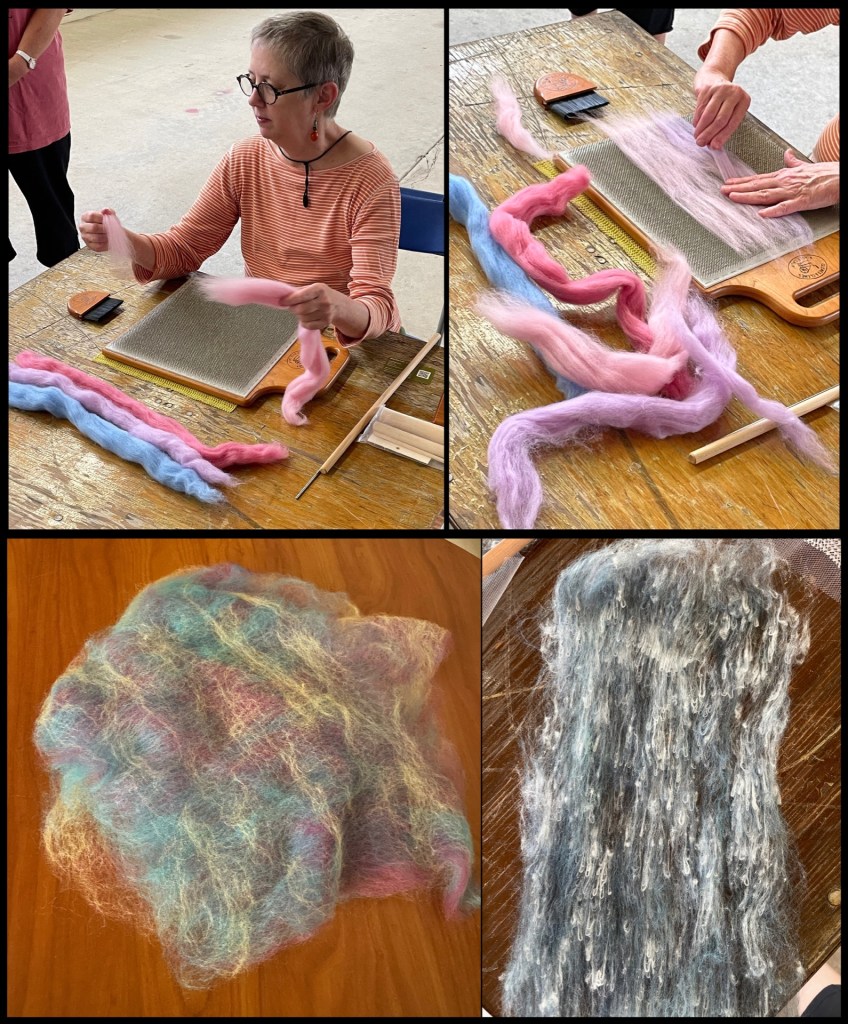
Ann Arbor Fiberarts Guild – Fiber Spa mini workshop
Couture Cartography Collection
1st Place Functional Fiber – Michigan League of Handweavers Biennial Exhibition
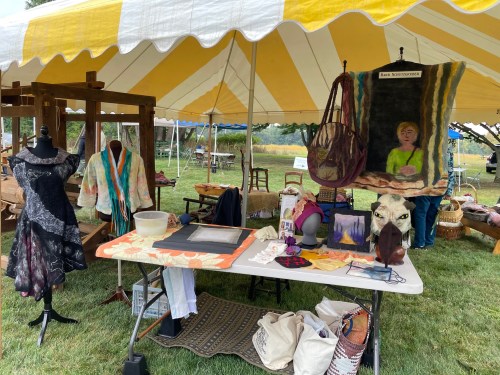
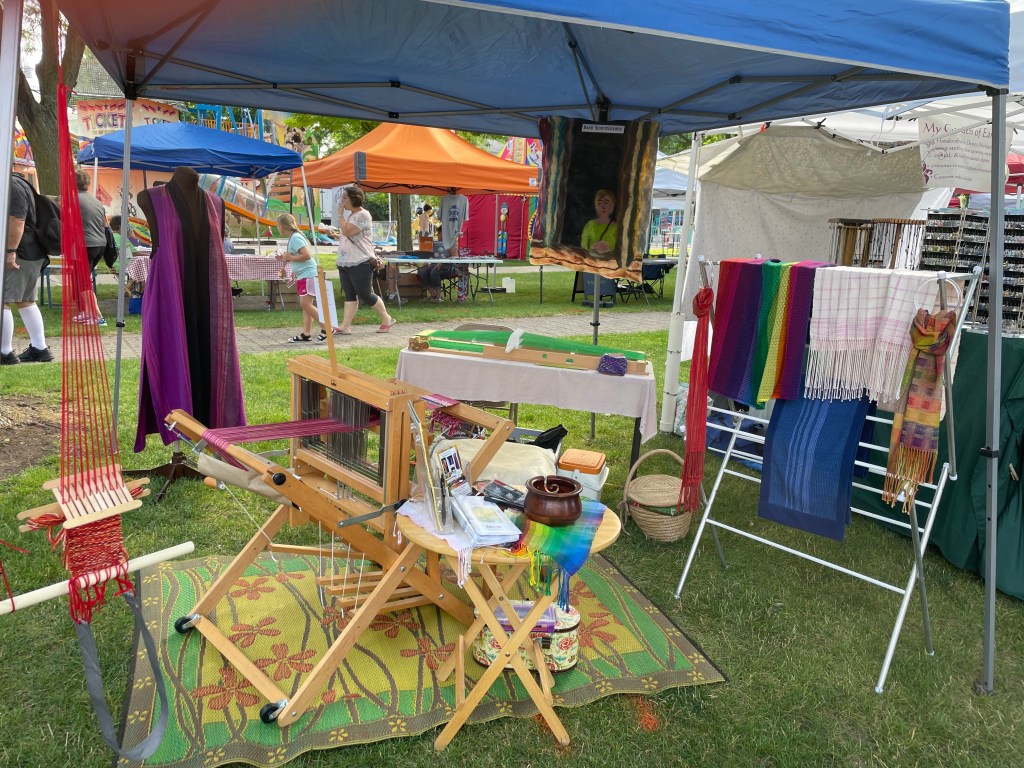
Spring Fling & 4th of July events at Cobblestone Farm – Ann Arbor MI
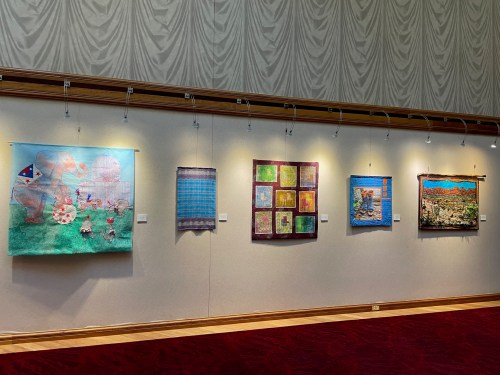
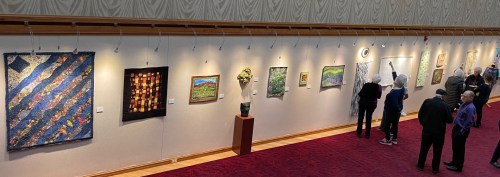
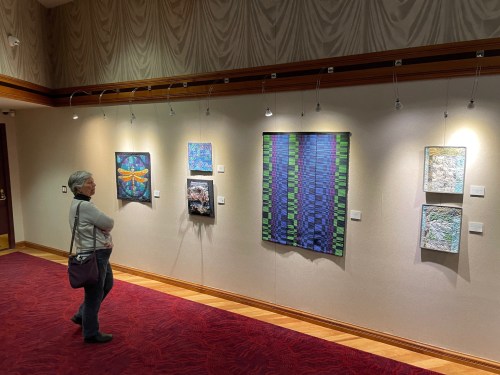
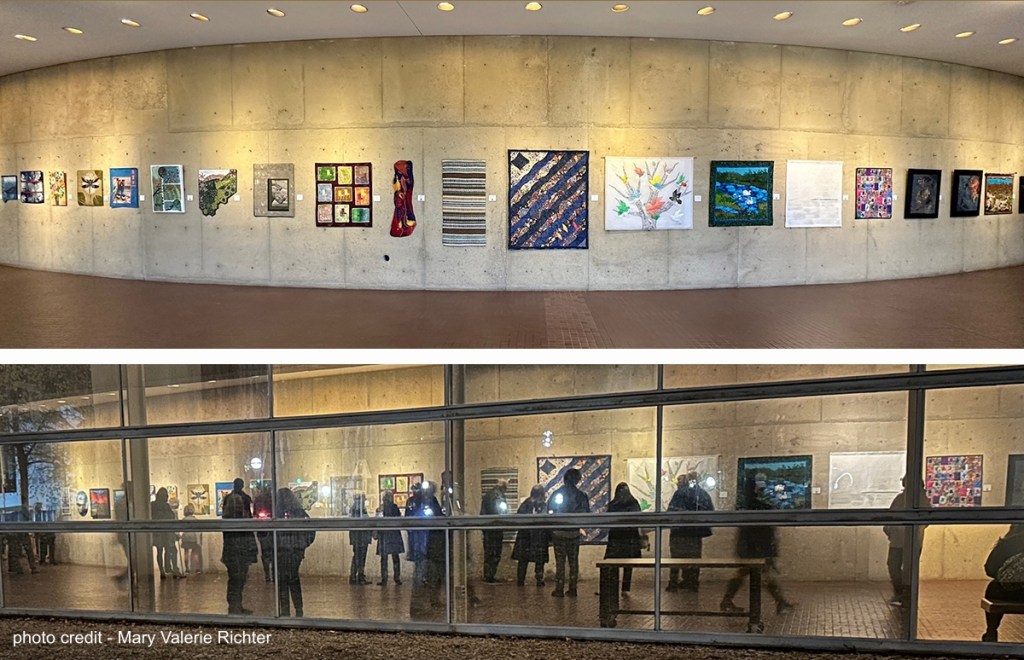
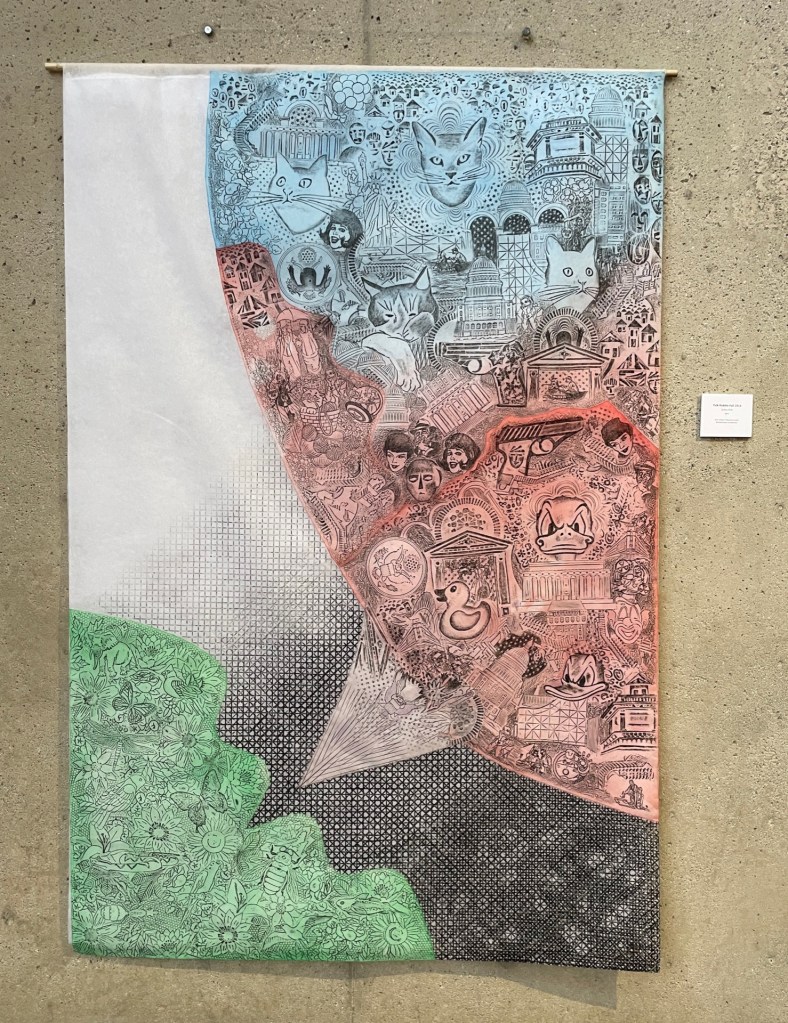
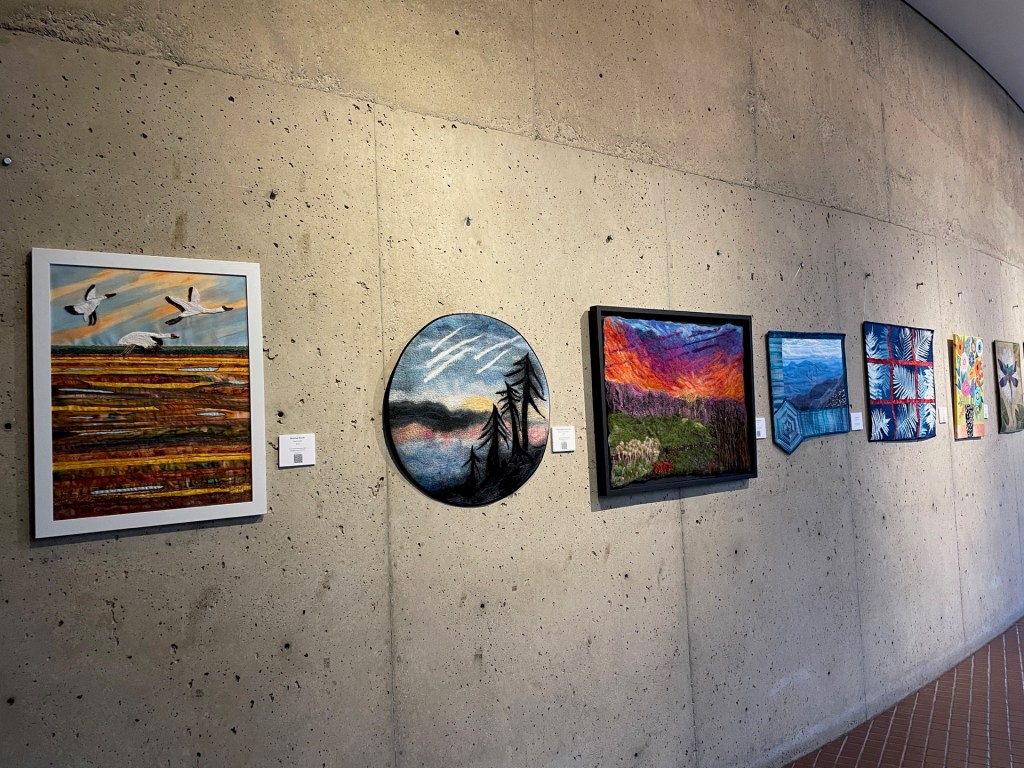
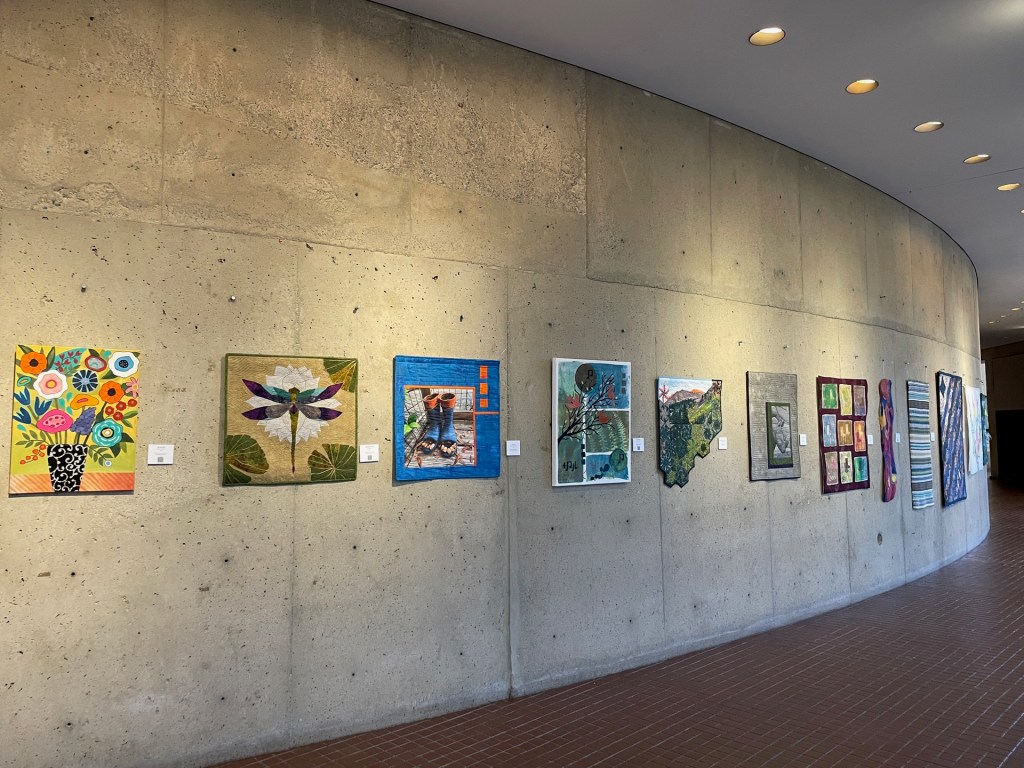
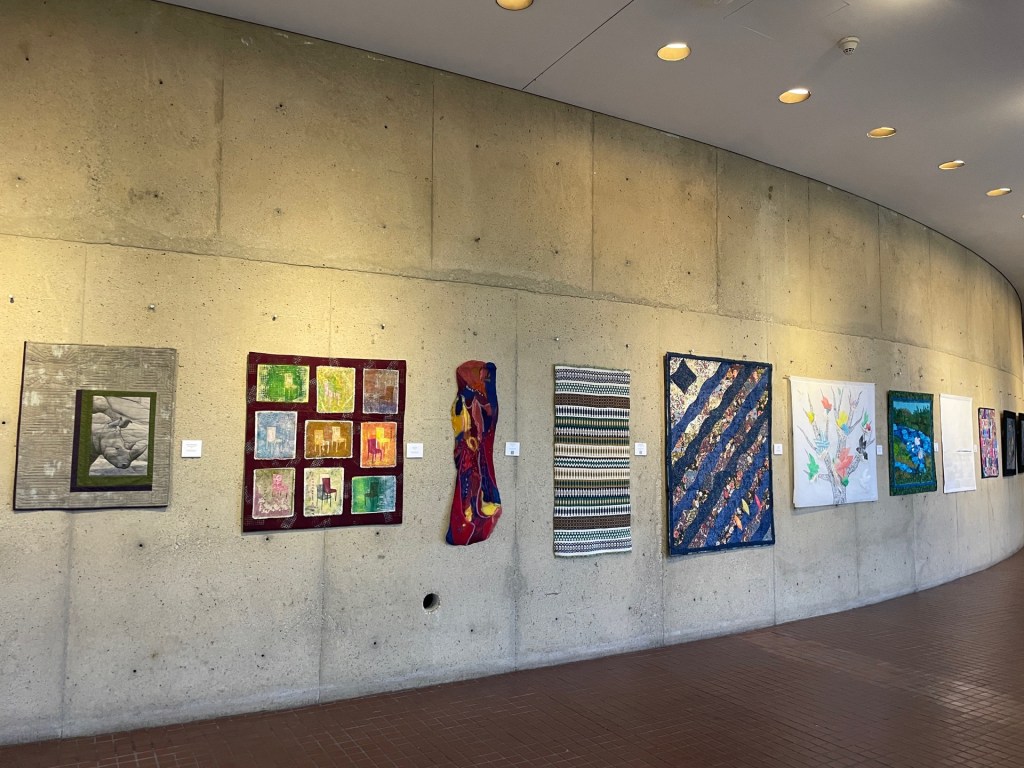
For well over 20 yearsPower Center for the Performing Artspart of theUniversity Musical Societyof the University of Michigan has partnered with theAnn Arbor Fiberarts Guildto host an exhibit of AAFG members artwork in their lobby. On view through December 15, 2024 the exhibit may be viewed any time the Power Center is offering a concert or performance. The doors open one hour prior to a scheduled performance. You do not need a ticket to enter the lobby.
For those not in the Ann Arbor, Michigan area – enjoy!
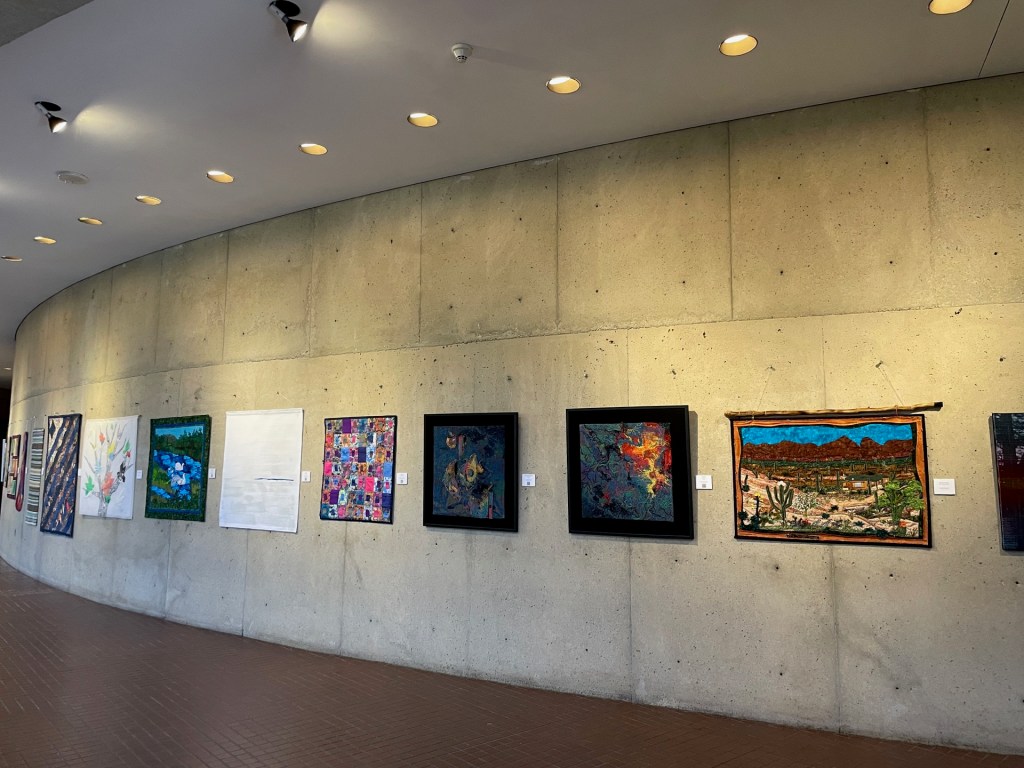
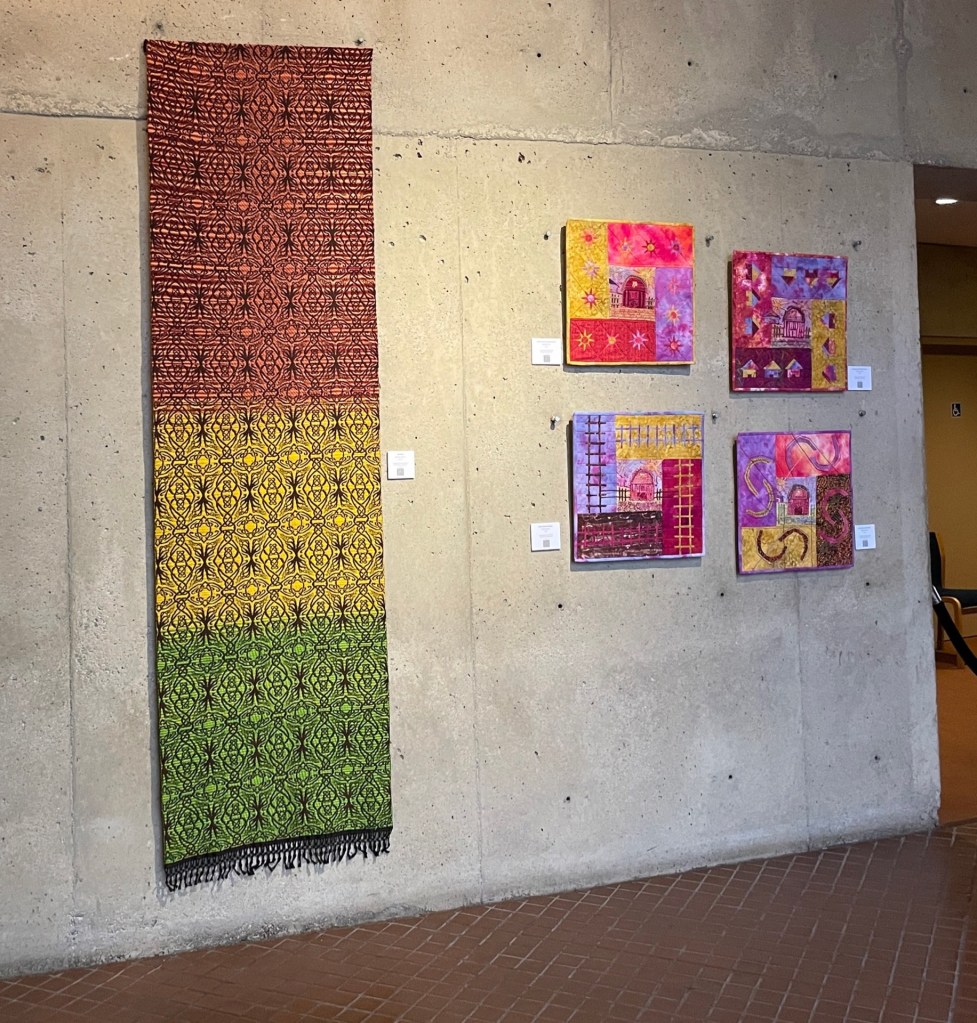
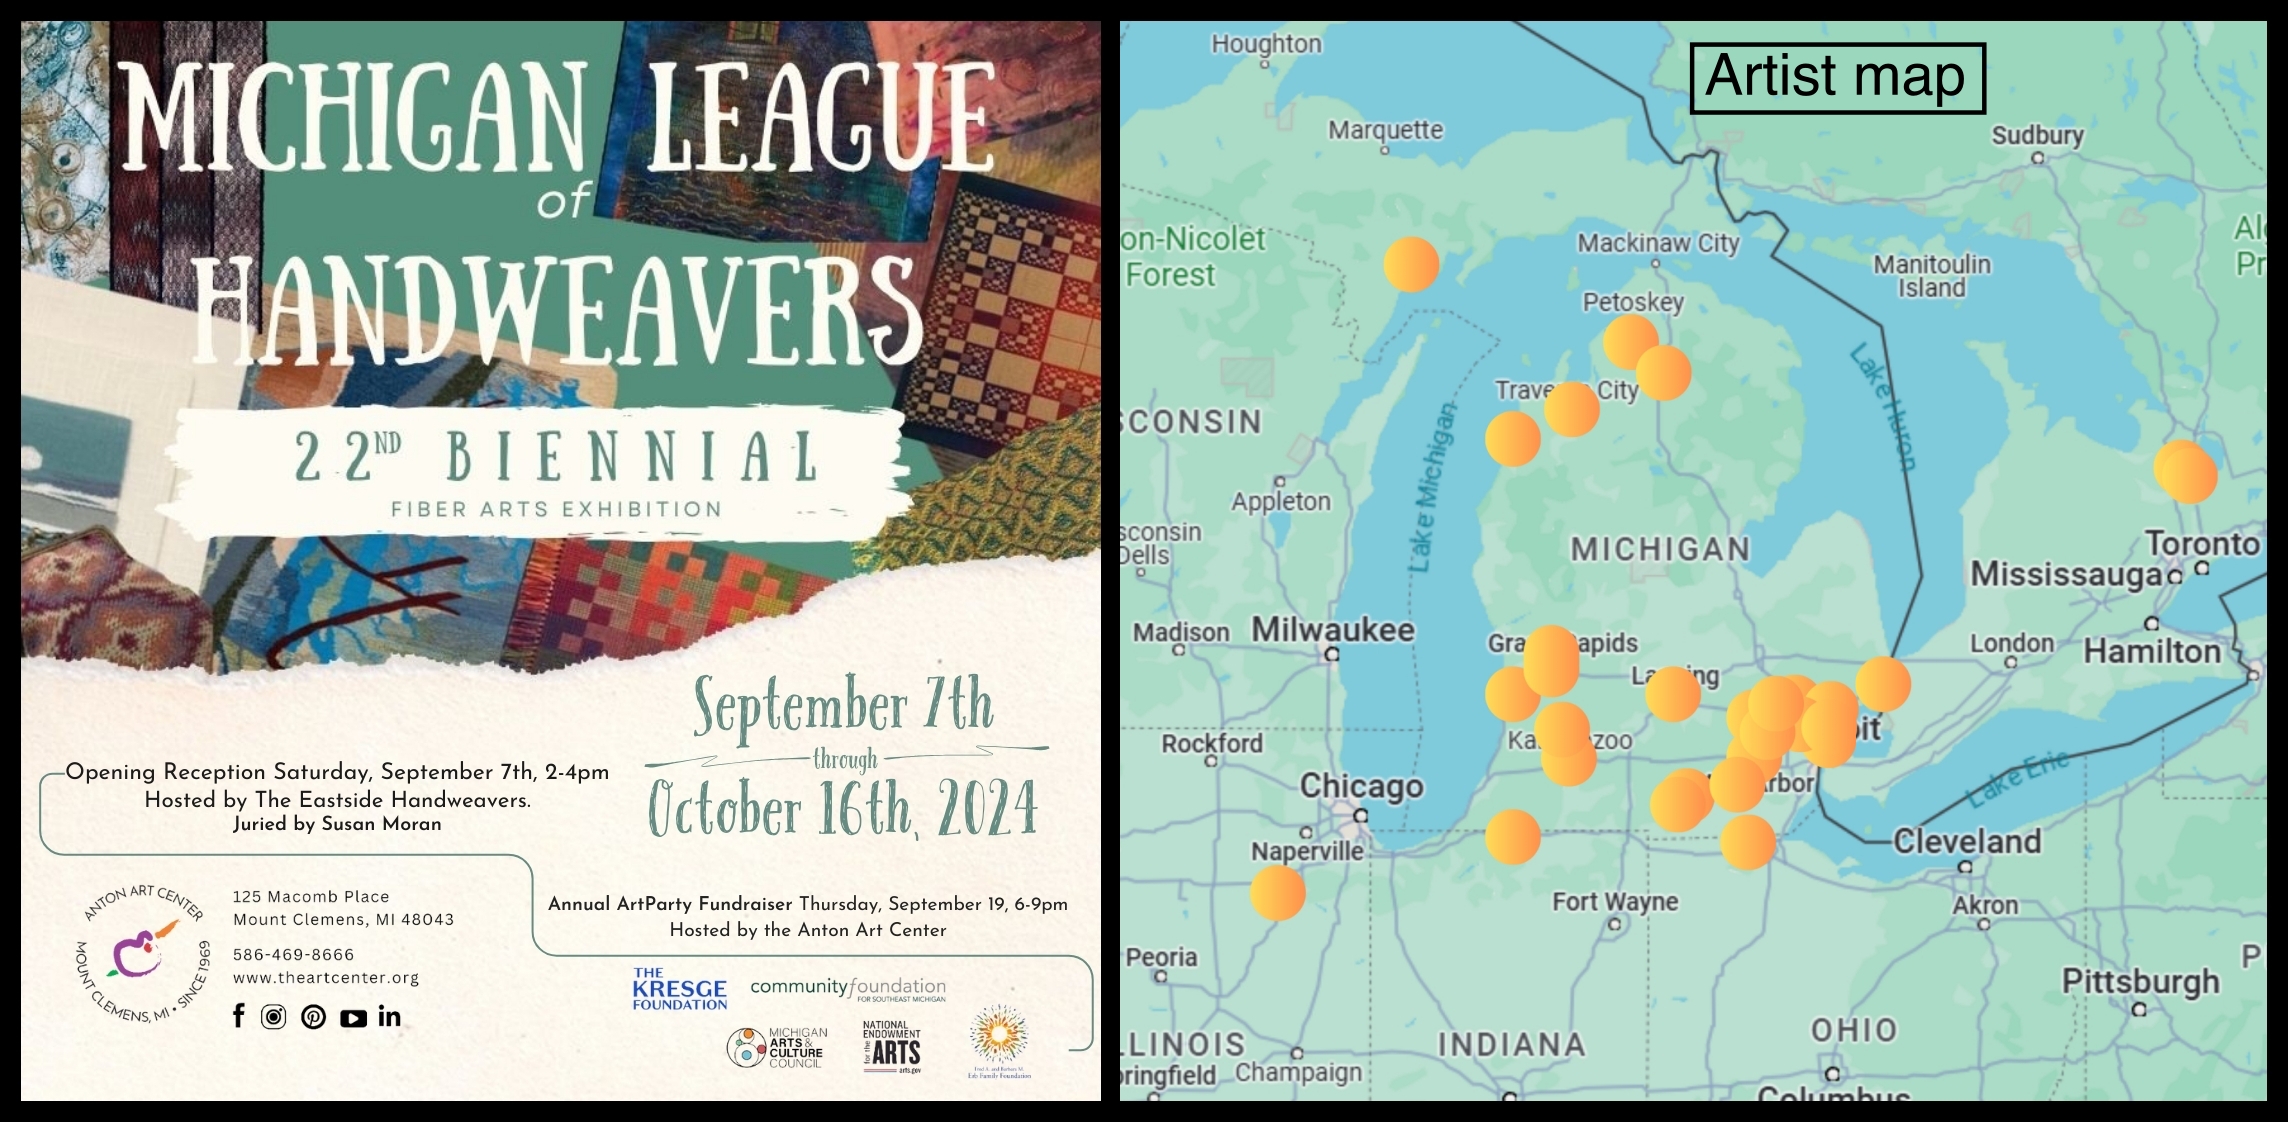
TheMichigan League of Handweavers22nd Biennial Fiber Arts Exhibition is being held at theAnton Art Centerin Mount Clemens, Michigan – September 7 – October 16, 2024. Hosted by the Eastside Handweavers Guild and juried by fiber artist Susan Moran over 80 pieces in two categories, Fiber Art and Functional Fiber, were submitted. 48 pieces by 36 artists from around the Great Lakes Region in the USA and Canada were selected. The Ann Arbor Fiberarts Guild was well represented by members Anne Flora, Jenny Schu, Marla Smith, Jennifer Stafford, Amy Stevenson, Mary Underwood, Kathy Zasuwa, and myself.
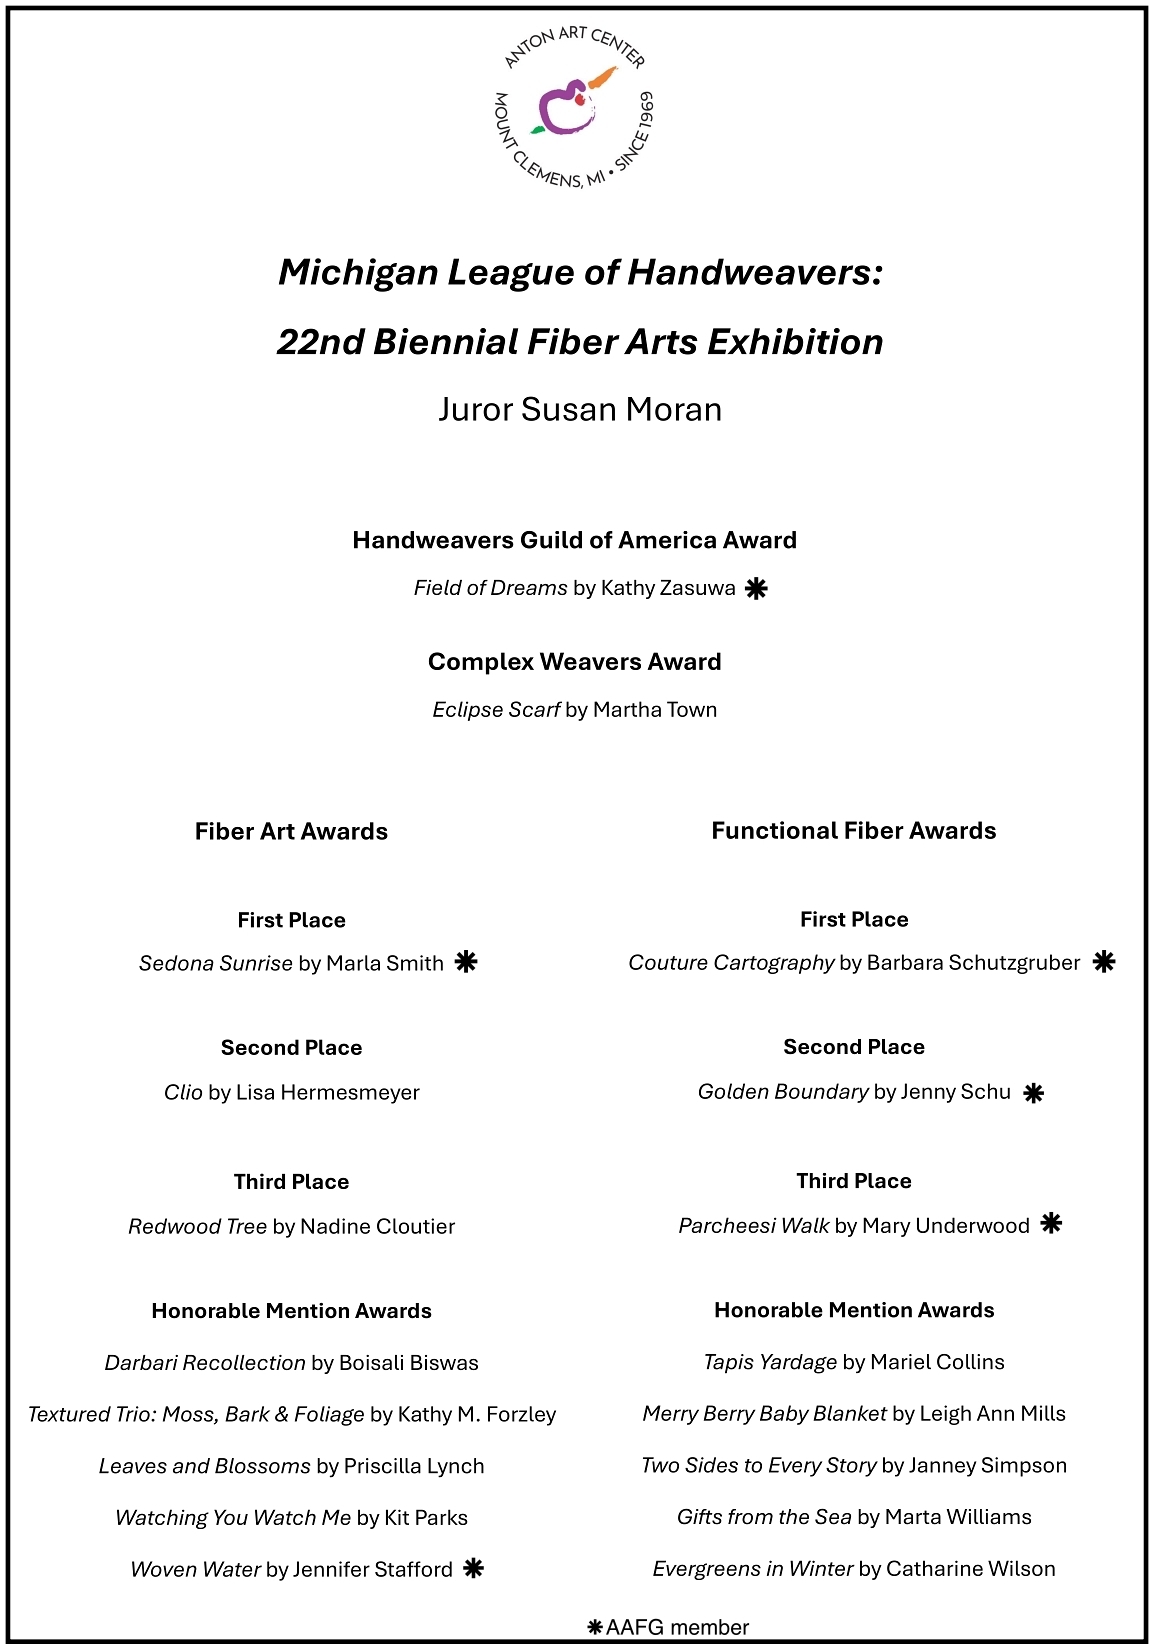
The opening reception included refreshements by the Eastside Handweavers and artist talks by Susan Moran and 7 of the attending artists: Mariel Collins – Tapis Yardage Jennifer Gould – Forest Woman 6 Lisa Hermesmeyer – Clio Thom Koster – Simple Cherry Blossom Temari & Abstract Cherry Blossom Temari Kit Parks – Watching You Watch Me Jenny Schu – Golden Boundary & Is There a Thing to Which Brings Us Less Joy Yet We Devote More Time As well as myself – Couture Cartography [see blog posts March,April and May 2024 about the making of the dress]
Awards were announced – Couture Cartography received 1st Place in the Functional Fiber category! Five other AAFG members also received awards.
The Anton Art Center has been a fabulous space for this wonderful exhibit highlighting the wide and diverse range of fiber art!