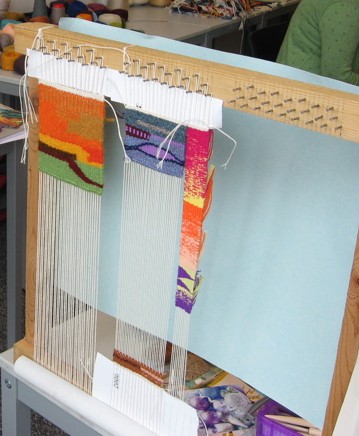
The summer of 2011 I took my first tapestry weaving course at The Association of Guilds of Weavers, Spinners and Dyers summer school held in Edinburgh, Scotland that year. Our instructor, Dot Seddon, had us working on simple frame looms which are very portable, fast and easy to warp, plus I brought along one that I had made.
Midweek we took a field trip to the Dovecot Tapestry Studio in Edinburgh. When I walked into the space I was immediately hit with a déjà vu experience = I’ve been here before!
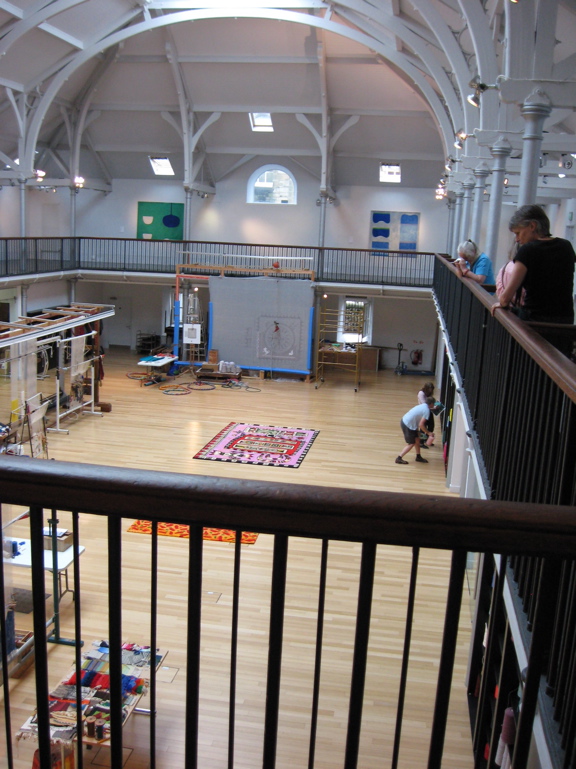
The building that now houses the Dovecot Studio is the old ‘Infirmary Street Baths’, the first public baths in Edinburgh – built in 1885, designed by Robert Morham – and I used to swim there in the mid 1970’s when I was a student at Edinburgh University! The baths closed in the 1990’s and fell into disrepair. The Dovecot Studio moved into the space in 2009 after a 2 year – £12million renovation. This is a perfect studio space with tons of natural light from the glass ceiling, the pool has been filled in to make the weaving floor, the changing rooms have been turned into office and meeting rooms, and the observation walkway is used as gallery space. Click here for a wonderful visual tour of the studio.
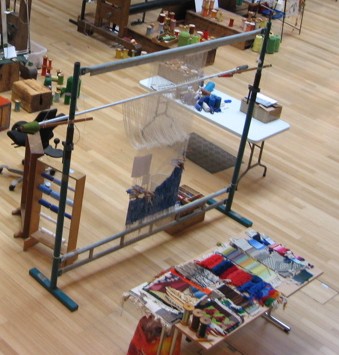
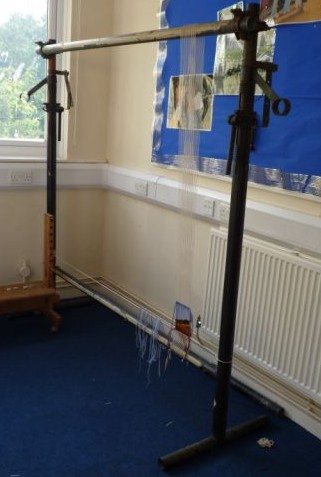
Here I saw vertical/high warp looms built of steel scaffolding pipe.
When I came home I was inspired to try weaving a larger tapestry. But looms are expensive so I adapted a triangle loom I already had into a larger version of what I had used at summer school.
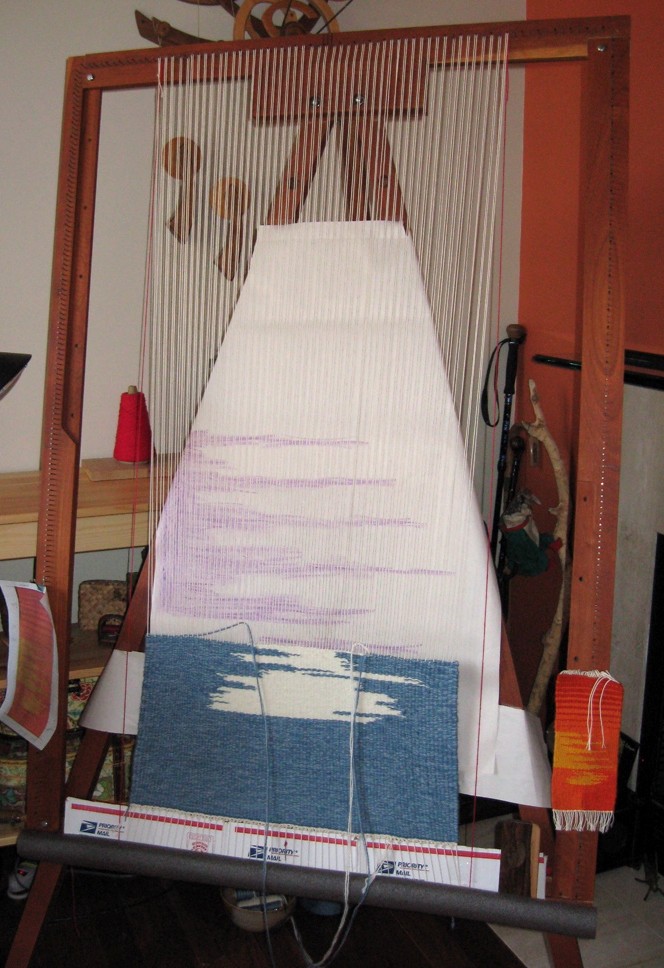
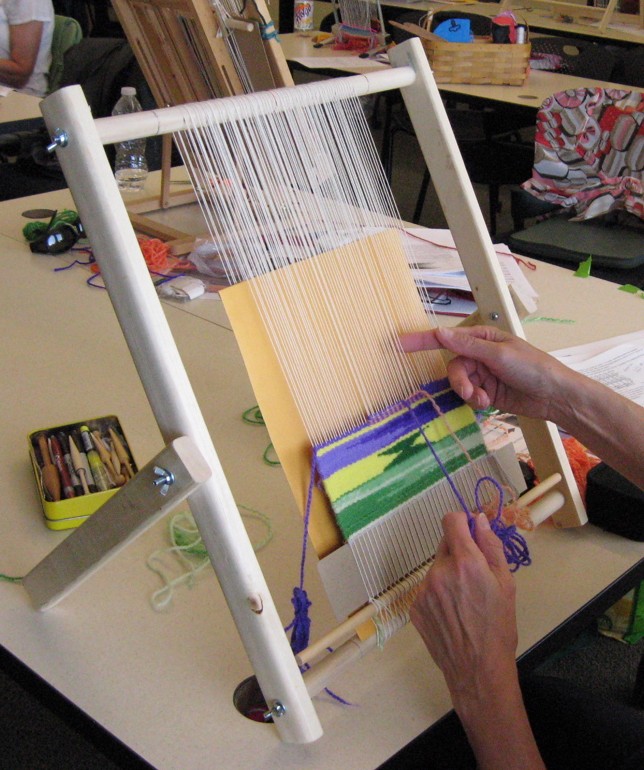
I liked working upright but it was difficult to get and keep an even tension on a warp that large, plus I wanted to have an option of being able to lift the warp threads for faster/easier weaving and the frame I was using had nails on all 4 sides. I got another large frame, added nails to the top and bottom only, and figured out a shedding device to lift my warp threads. This was an improvement but there were still problems with the warp tension and the easel stand took up quite a bit of space.
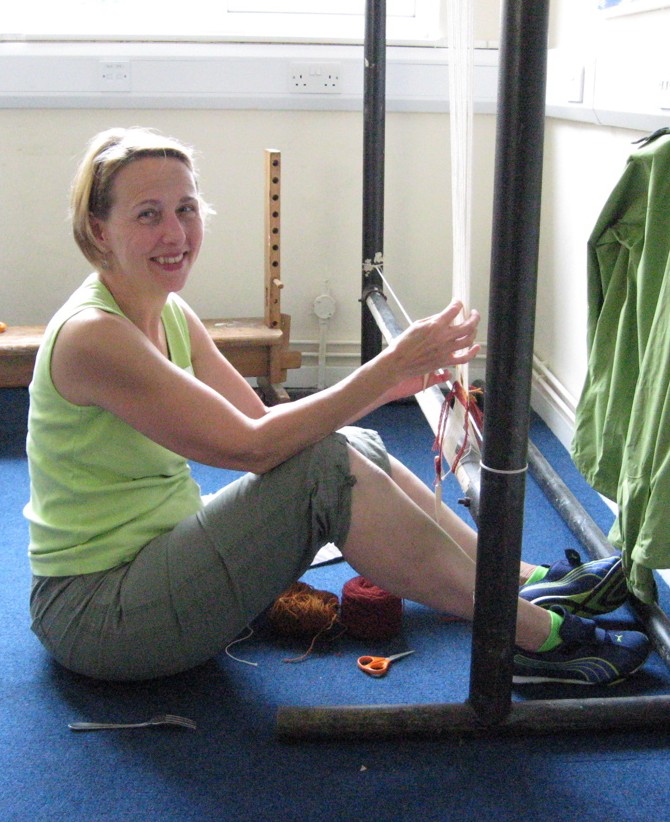
I took another tapestry course at the next AWSD summer school in 2013. [see ‘Weaving in Wales’ posts from September 2013.] Our instructor, Alastair Duncan, brought his scaffold loom. I was able to get a good look at how it’s made and to weave on it for the week.
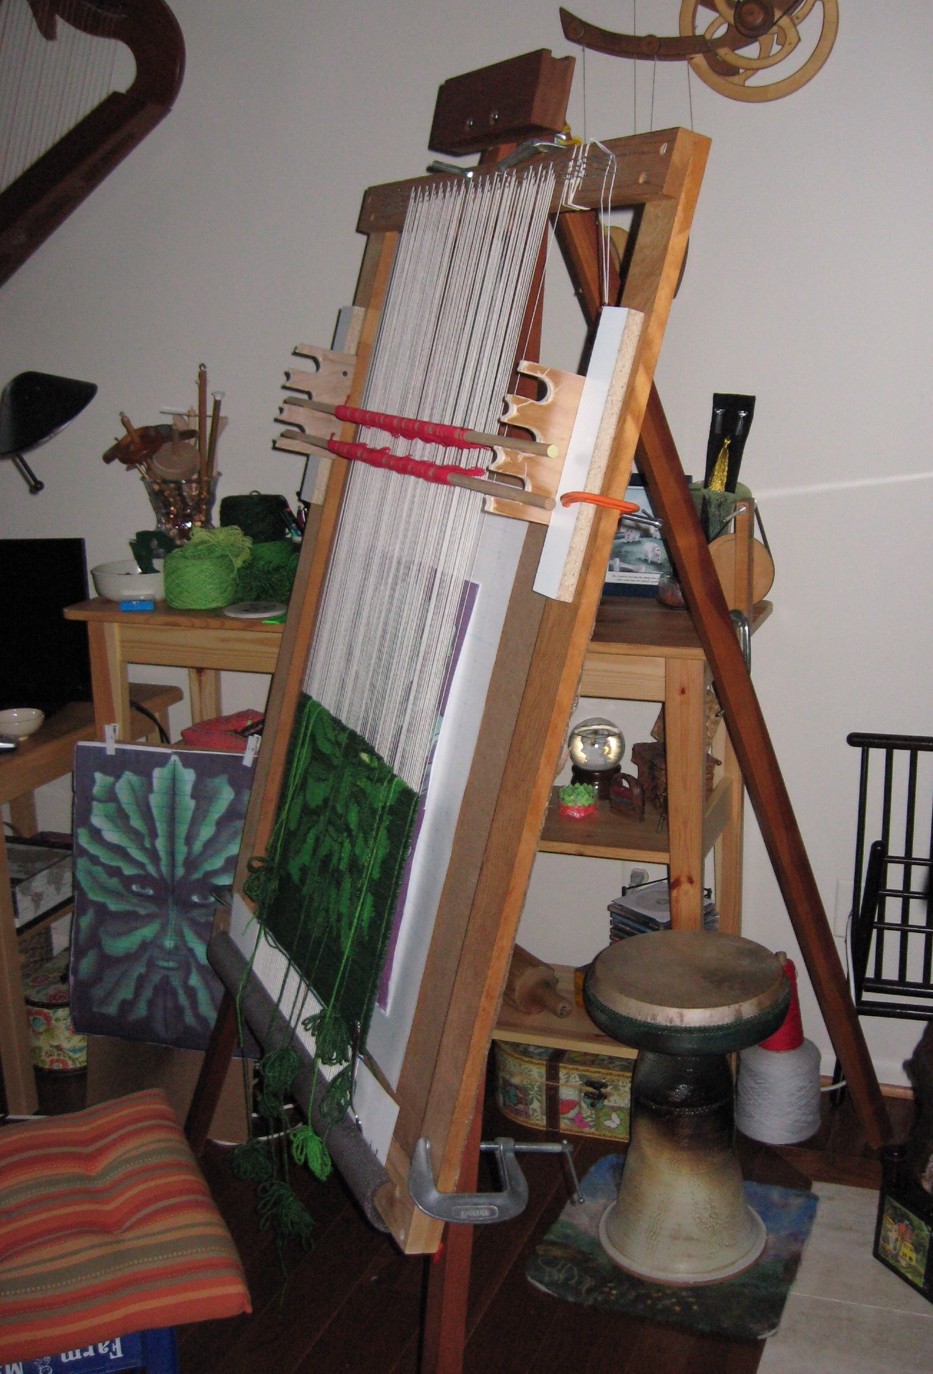
I decided that this is the type of loom I wanted. Looking at my pictures and notes, my engineer husband was able to come up with plan to use galvanized pipe so all the parts would be available at the local hardware store. I received a professional development grant from my guild, The Ann Arbor Fiberarts Guild, to help with the cost of materials.
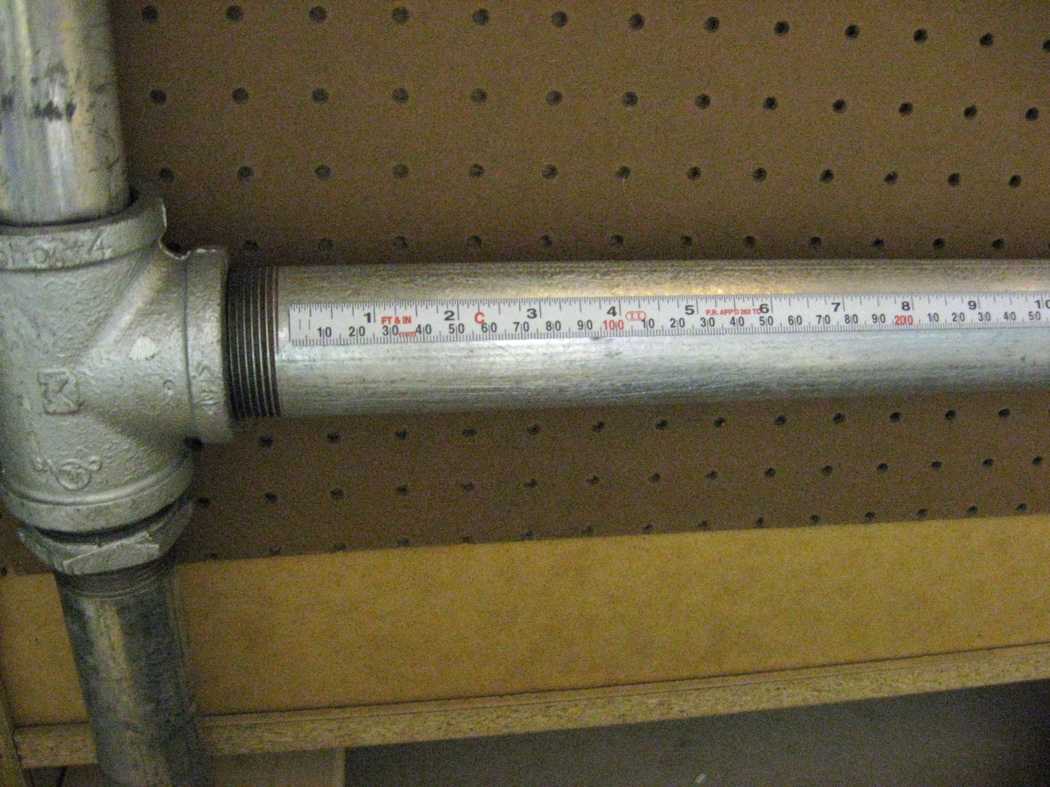
We used 1 1/2″ pipe for the top/bottom and 1 1/4″ pipe for the sides with bushings to connect and it can be taken apart to transport; scaffold level jacks are used to adjust the vertical sides for control of the warp tension; attached it to a wood base; and added measuring tapes to the top and bottom.
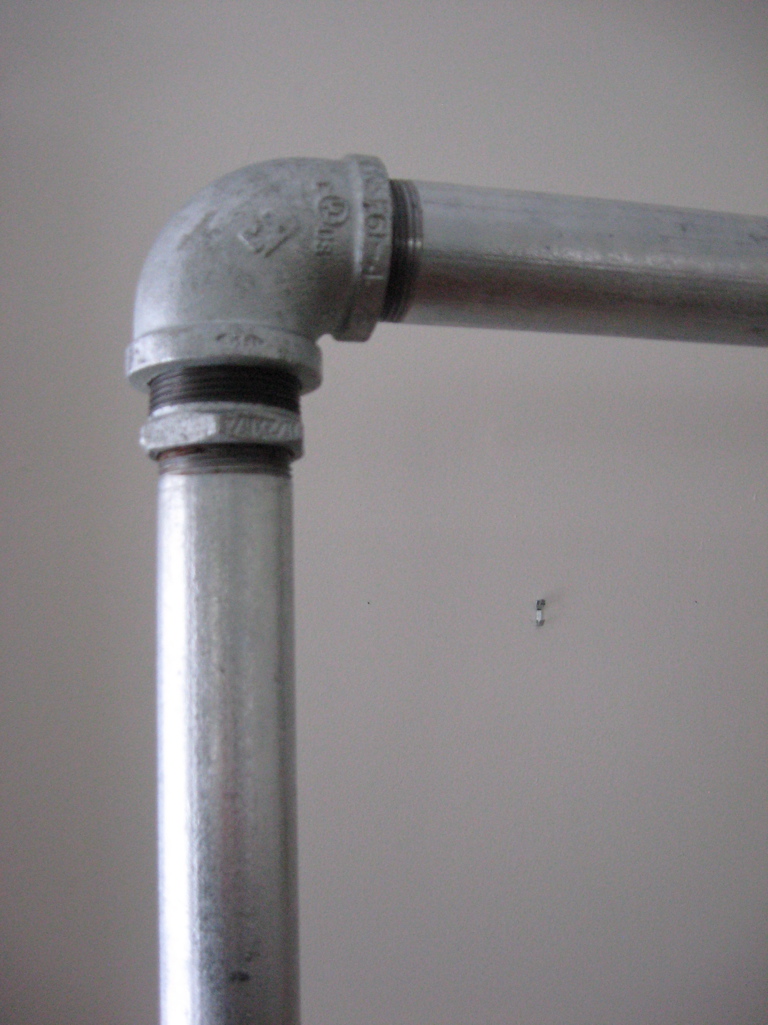
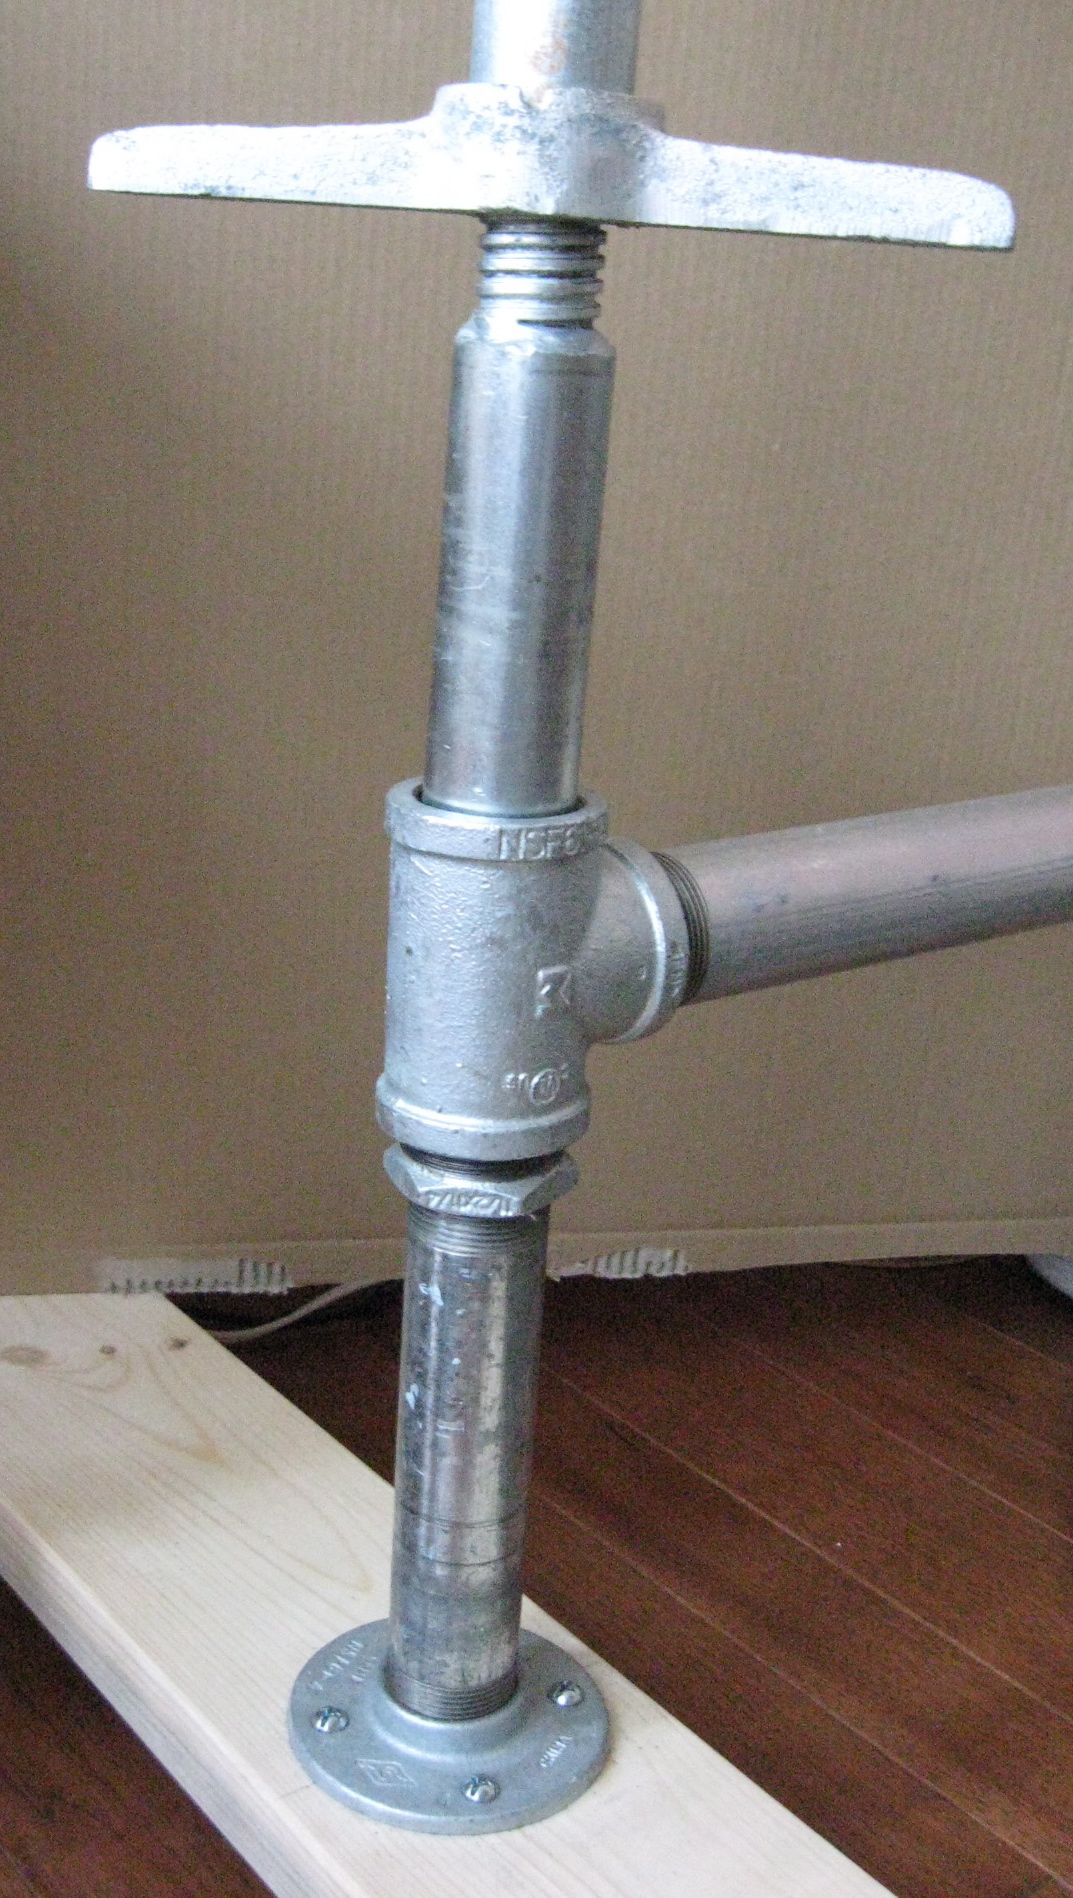
The finished size is 4′ x 6′ with 3 1/2′ x 5′ weaving space.

I still need to create a shedding device like the Dovecot looms have to lift the warp threads but I am excited to get started on a new tapestry!

Nifty! A long way from the little table loom, wow. It looks kind of like the Navaho rug looms, I think they tie strings around different groups of warp strings to help with the shed. Is that right? Can’t wait to see your work-in-progress!
By: Lila Henry on February 28, 2015
at 2:19 pm
Hi Lila-
Yes – I will loop strings around the back warp threads to be able to pull them forward.
By: bschutzgruber on February 28, 2015
at 3:19 pm
Hi! I love this . Thank you for posting. I was wondering…….what did you do about the creation of a shedding device for the DIY/Scaffold Loom pictured above? Would you mind sending some pictures?
By: Jef on August 23, 2017
at 9:01 am
Hi Jef
I don’t have access to the close up photos at the moment but there is a photo on my Dec 18, 2012 blog post ‘Weaving the Green Man’ that shows the basic concept I use for my shed device. The back warps have string and I pull them forward. I can send you some better photos after next week if you’d like.
Barb
By: bschutzgruber on August 24, 2017
at 3:06 am
Hello Barbara,
My name is Danielle Morsette. I am so happy to have come across your blog. The pipe loom that you and your husband made is exactly what I am looking to build only wider. Would you share the exact material list? I am not a handy person and would appreciate being able to take a list to the hardware store so much.
Thank you,
Danielle
By: Danielle M. on December 3, 2020
at 1:14 pm
Hi Danielle-
Email me at Barb@WeaveStory.com and I’ll sent you the list of materials we used as well as construction details.
By: bschutzgruber on December 3, 2020
at 6:14 pm
I wish there was a way to build the type of scaffolding loom that rotates like the type with looms like aluminum piping that freely spins as you warp it. I can’t afford the only other type I know of that has that feature. The Ashford tapestry loom. They used to make a smaller size, seems so perfect why would they stop making it?
By: Erin T. on December 18, 2023
at 5:09 pm
Erin-
I have used and made small table size looms that tilt but I’m not familiar with a full rotating tapestry loom. As to why Ashford has stopped making their smaller version – you will have to write to them.
–Barb
By: bschutzgruber on December 19, 2023
at 9:47 am