I am an unapologetic workshop junkie with an insatiable curiosity when it comes to different fiber techniques. When I see something new and different my thoughts immediately go to “Wow… that’s cool! How do they do that?” After taking a workshop or seminar some techniques resonate and I continue to play with them, others not so much but I always walk way with an appreciation for the skill and creativity that goes into the technique.
In 2006 at the Handweavers Guild of America (HGA) Convergence I took a 1 day workshop, Ribbon Kumi Scarf, taught by Japan’s Makiko Tada whose 40 years of research, artistry, authorship, and invention is largely responsible for the growing international interest in the art of Kumihimo braiding. An expert on the long history of kumihimo, she creates designs from both traditional patterns and from her own original designs.
Using free braiding techniques with half-translucent organza ribbon Makiko showed us how to lay out ribbons and begin braiding/plaiting on the the diagonal. We worked on a stiff corrugated cardboard using straight pins to keep the ribbons in place while we braided. Beads were used to hold the ends once we finished our sample. She also showed us how to create as scalloped edge.

Then it was on to making a full length scarf and I was hooked! This is something I will continue to play with.
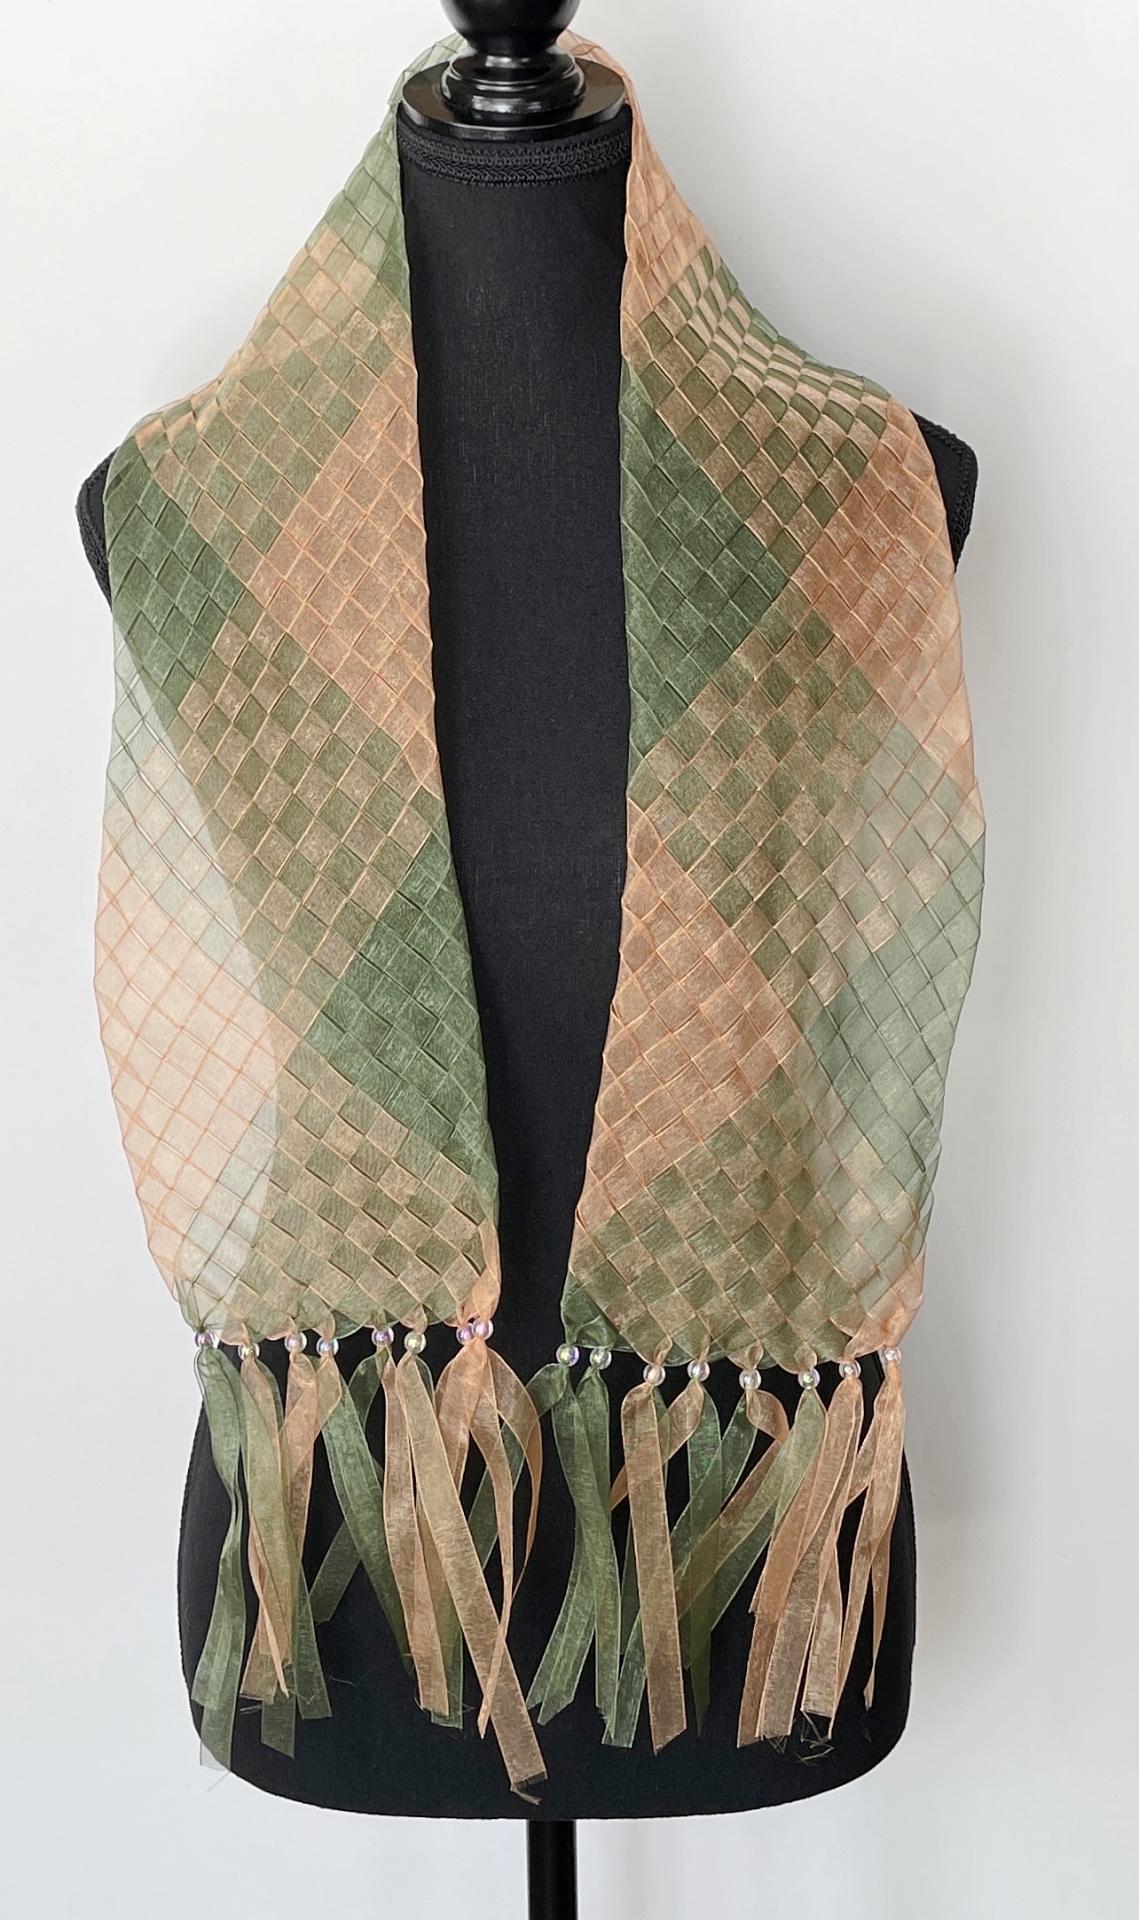
A scarf woven with organza ribbon is very stiff and not that comfortable to wear. I experimented with 1/4 inch organza ribbon which was not as stiff but still rather scratchy at the back of the neck.
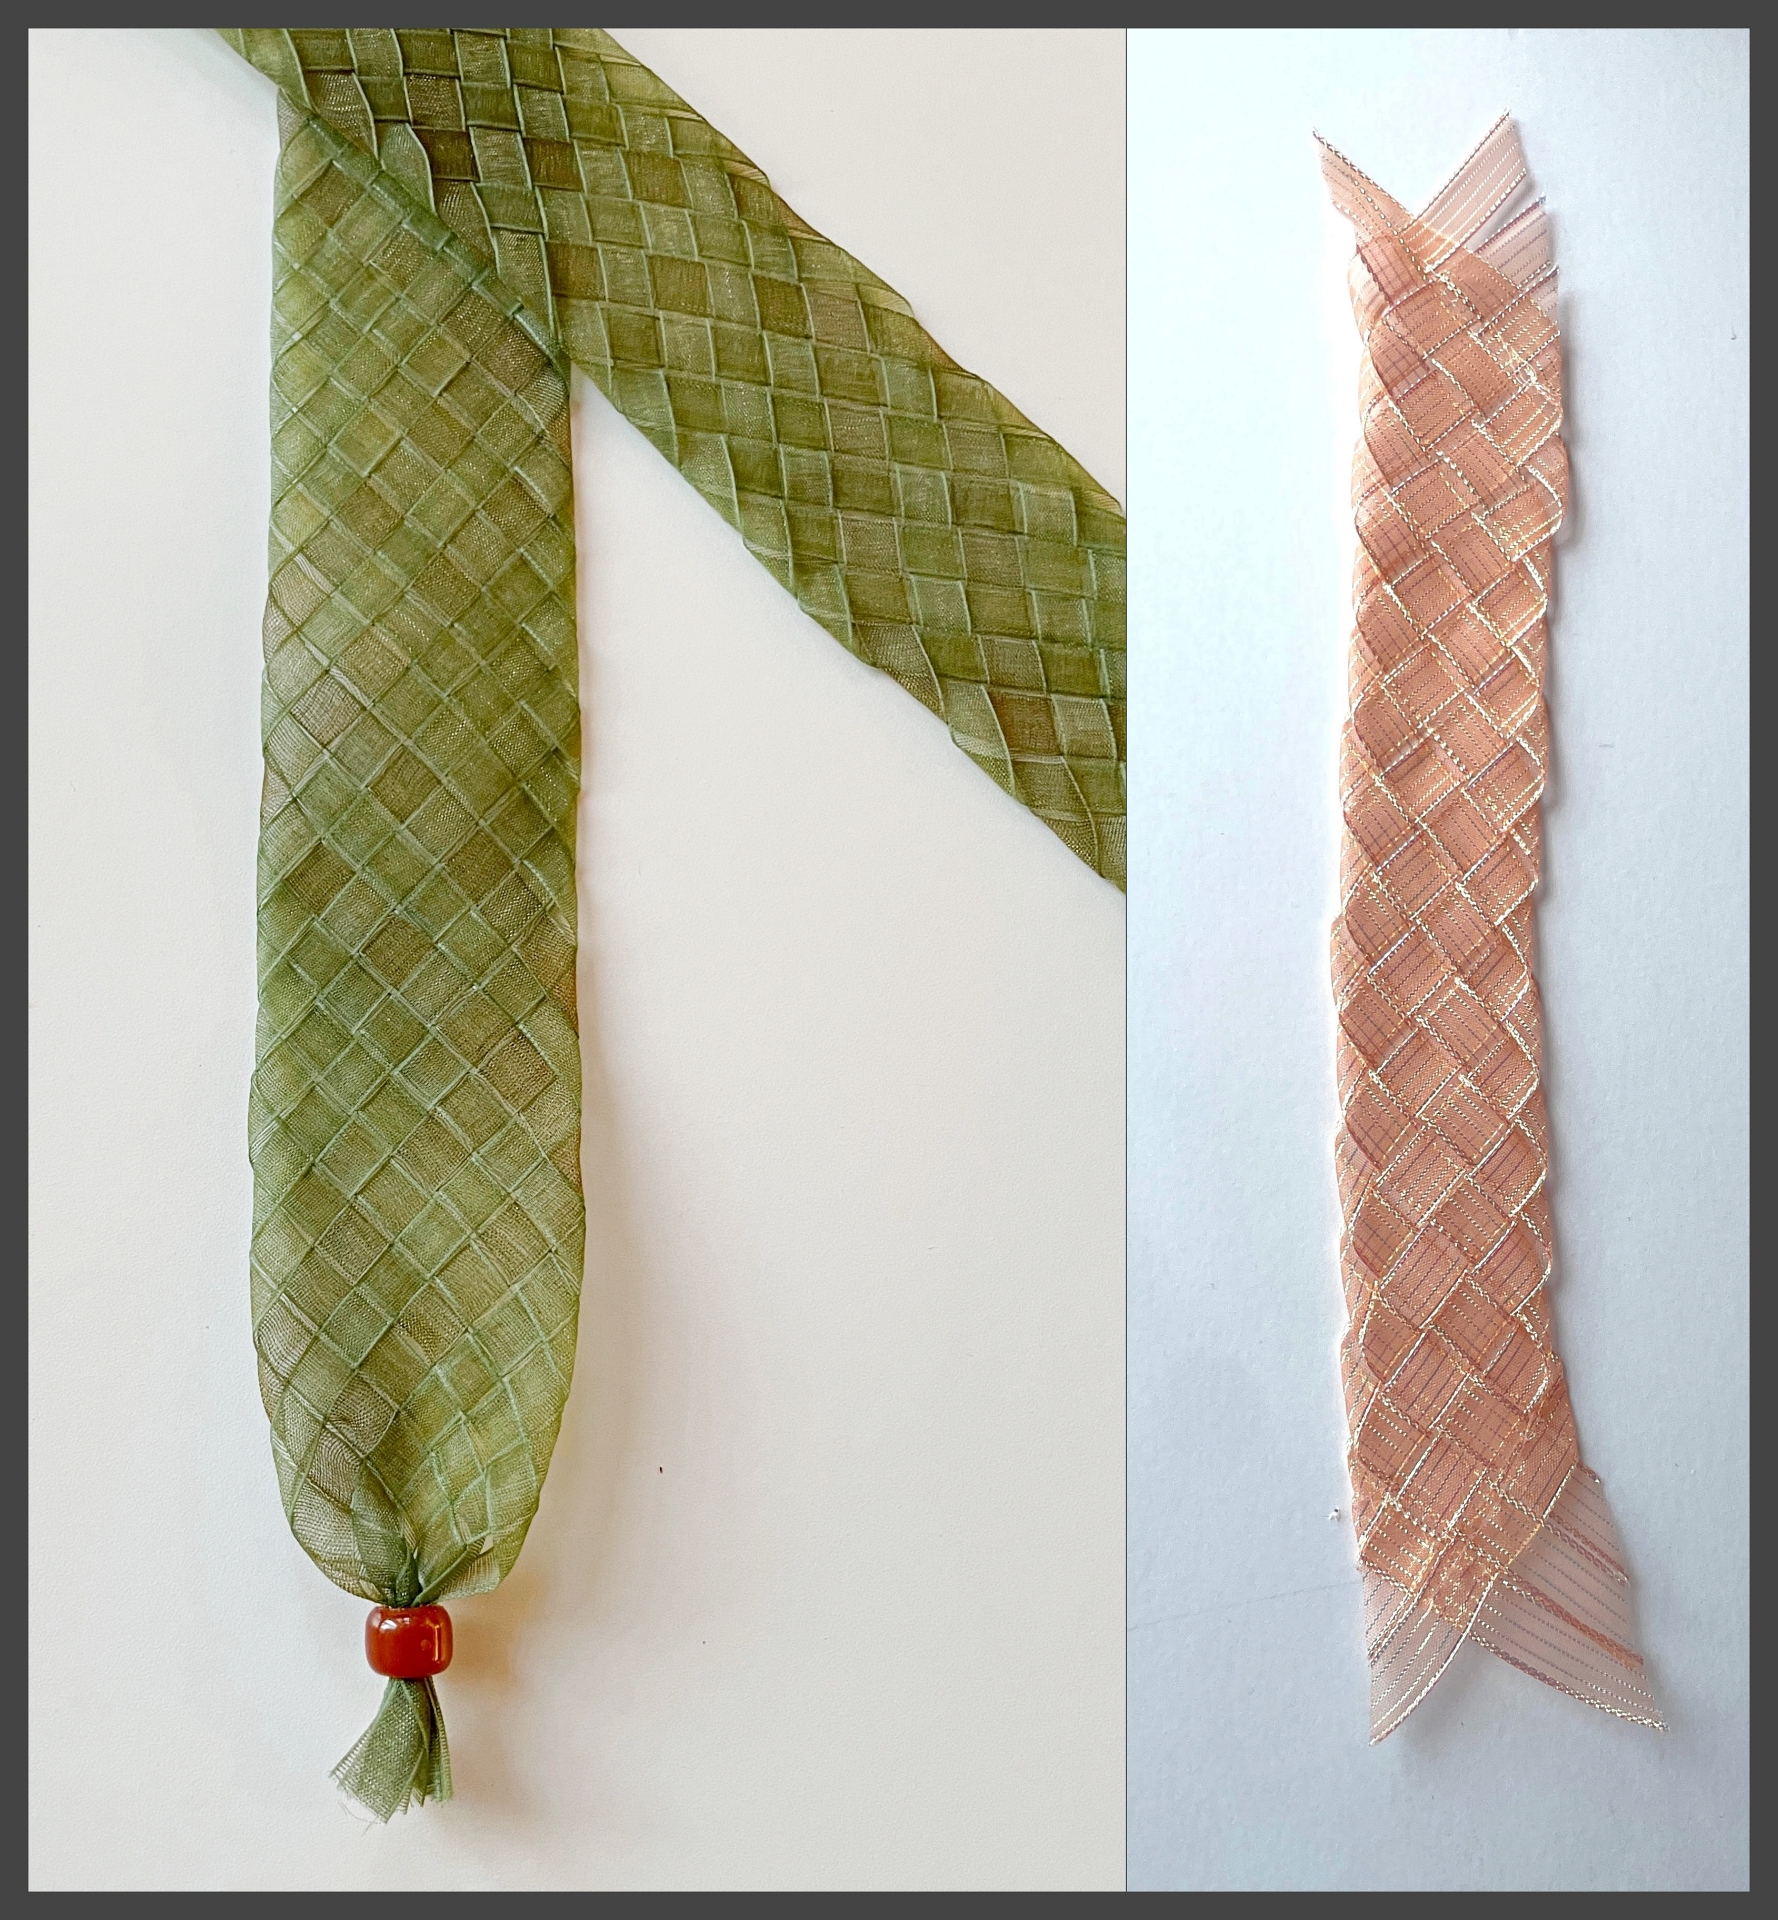
I sampled all sorts of ribbon. Many were great if I wanted a firm structure but for a scarf I settled on a narrow silky nylon ribbon.
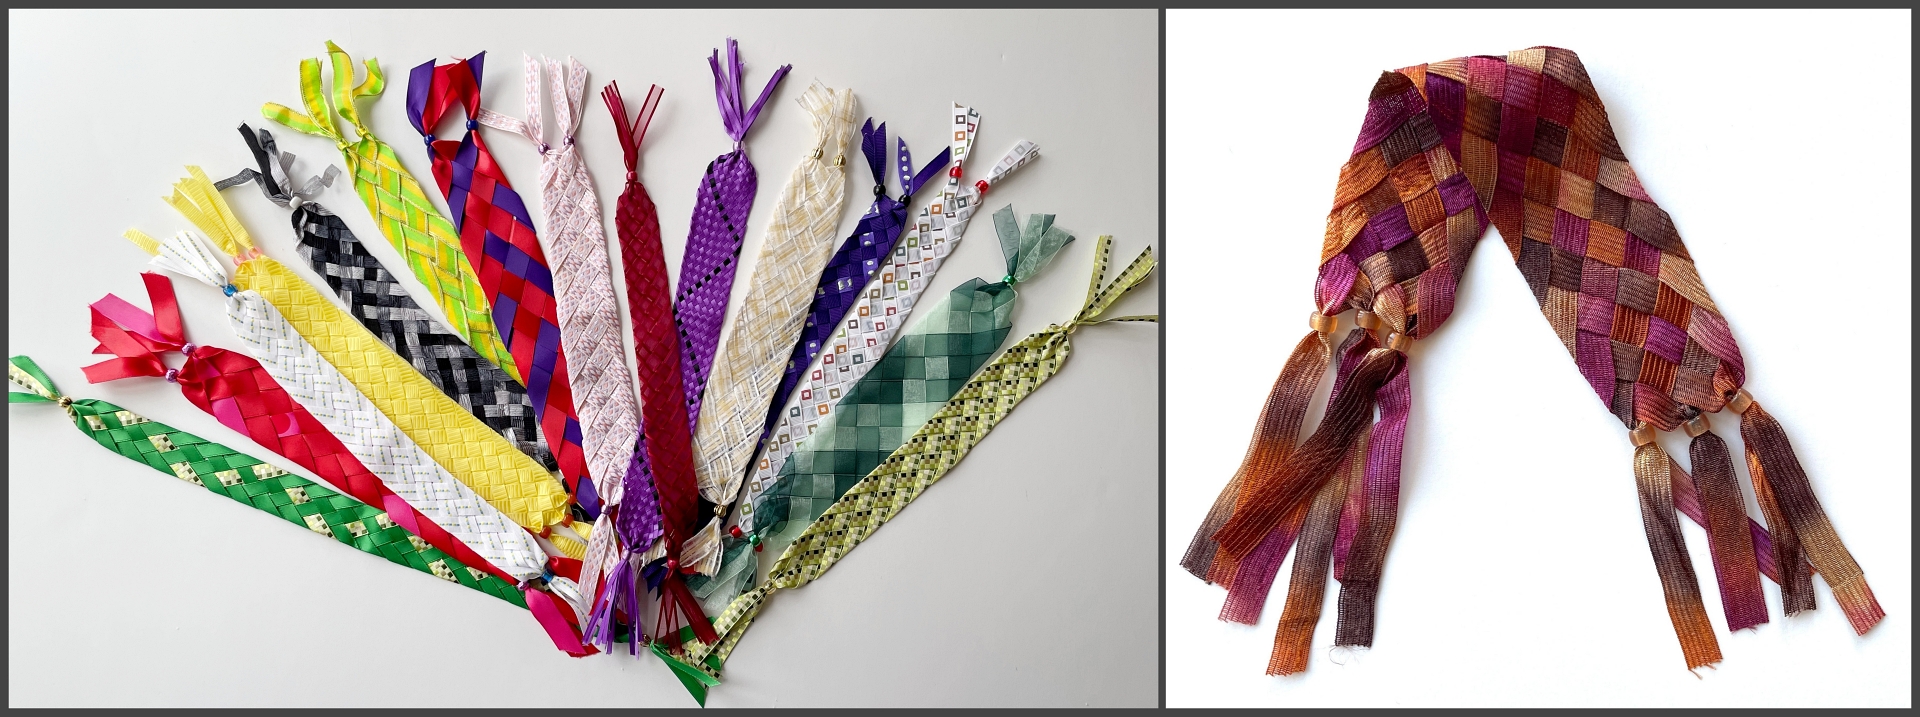
Over the years I’ve tried different width ribbon, some smooth, some with texture, some with metalic elements making a wide range of scarves and cowl neck warmers. It’s always a surprise to see how the color blending will look when using variegated ribbons. Silky ribbons are a challenge because the slightest roughness on my fingers will snag the ribbon.


I stabilized woven ribbon to create a sturdier fabric for making small crossbody purses and accent panels for larger tote bags.

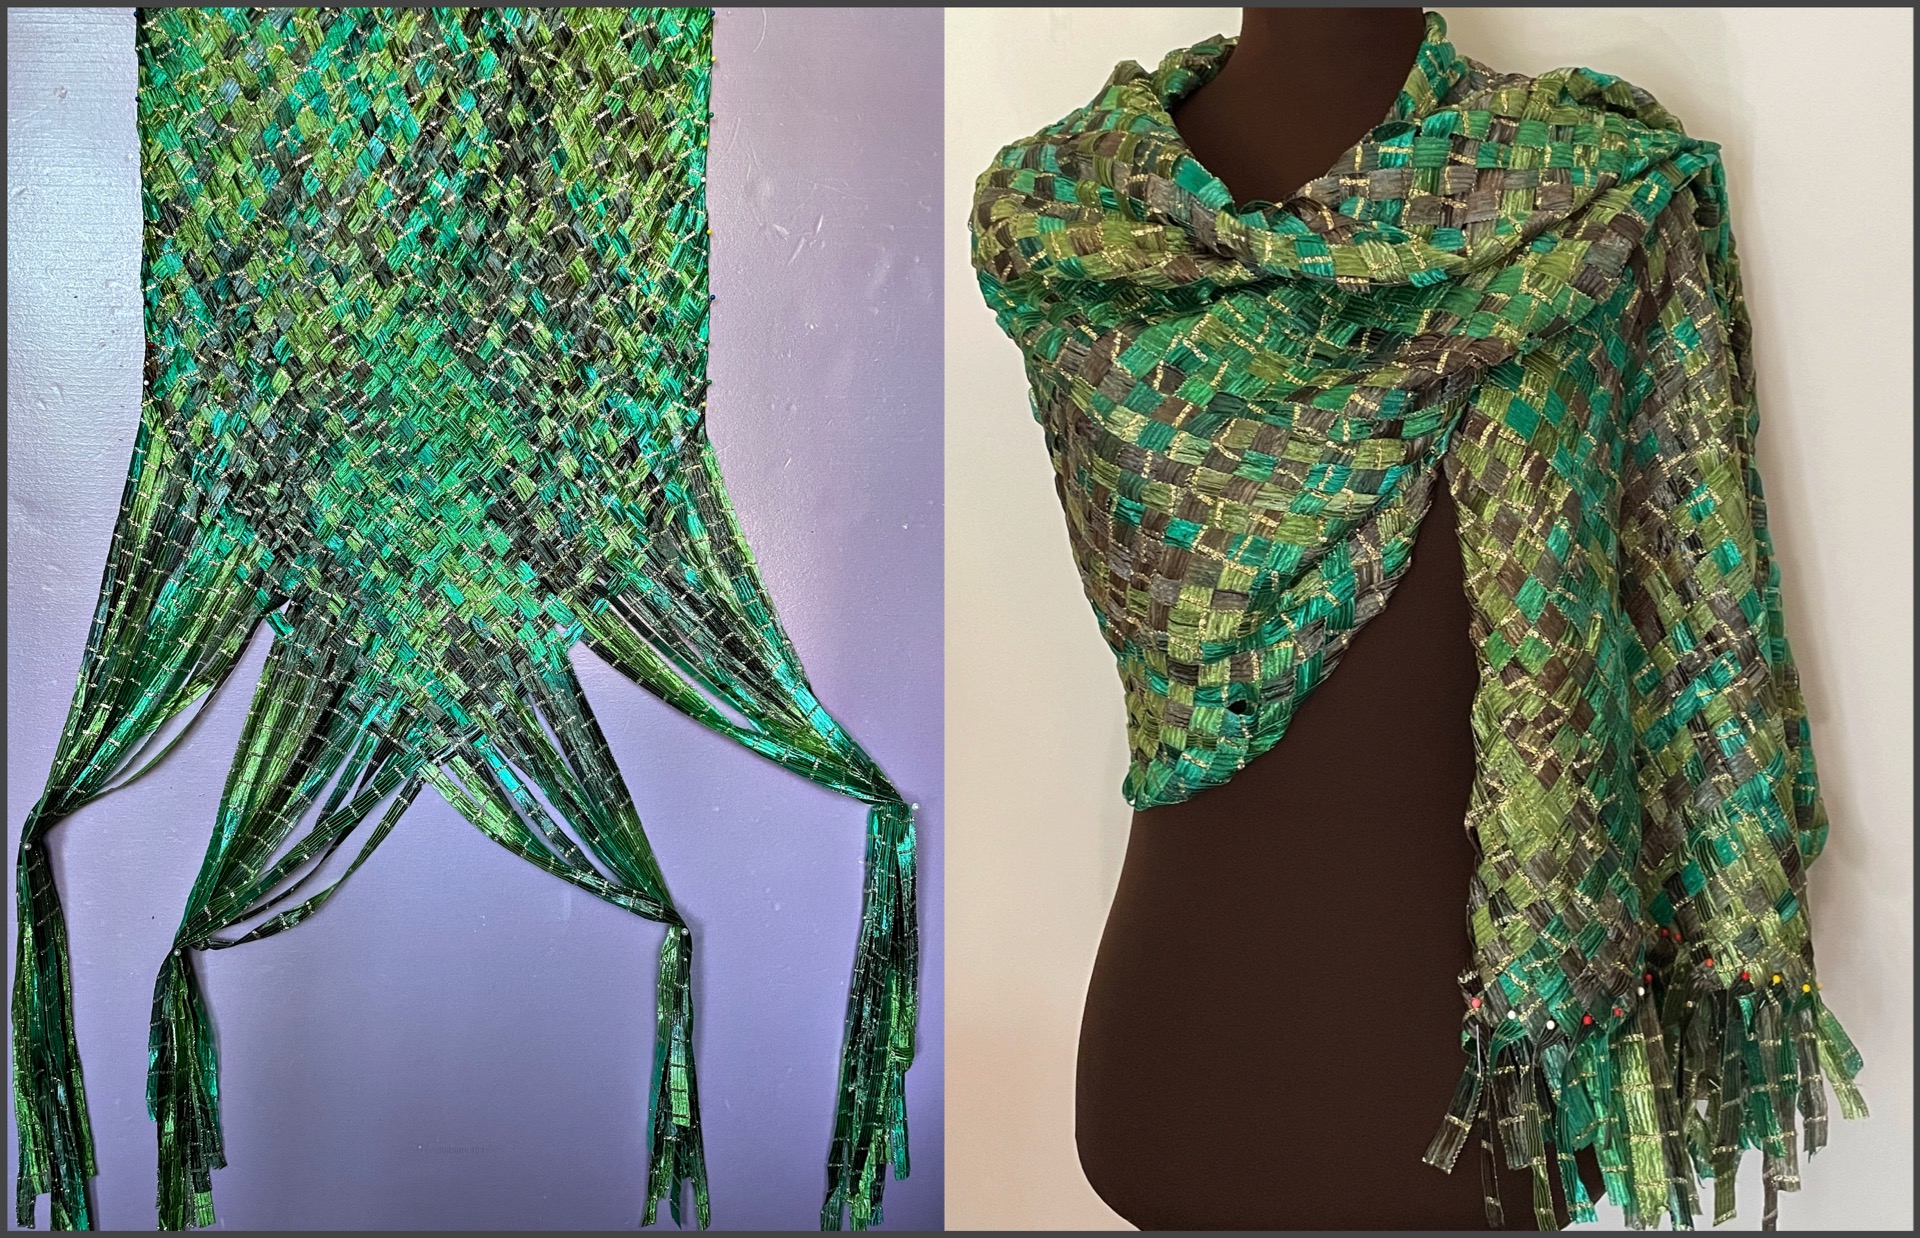
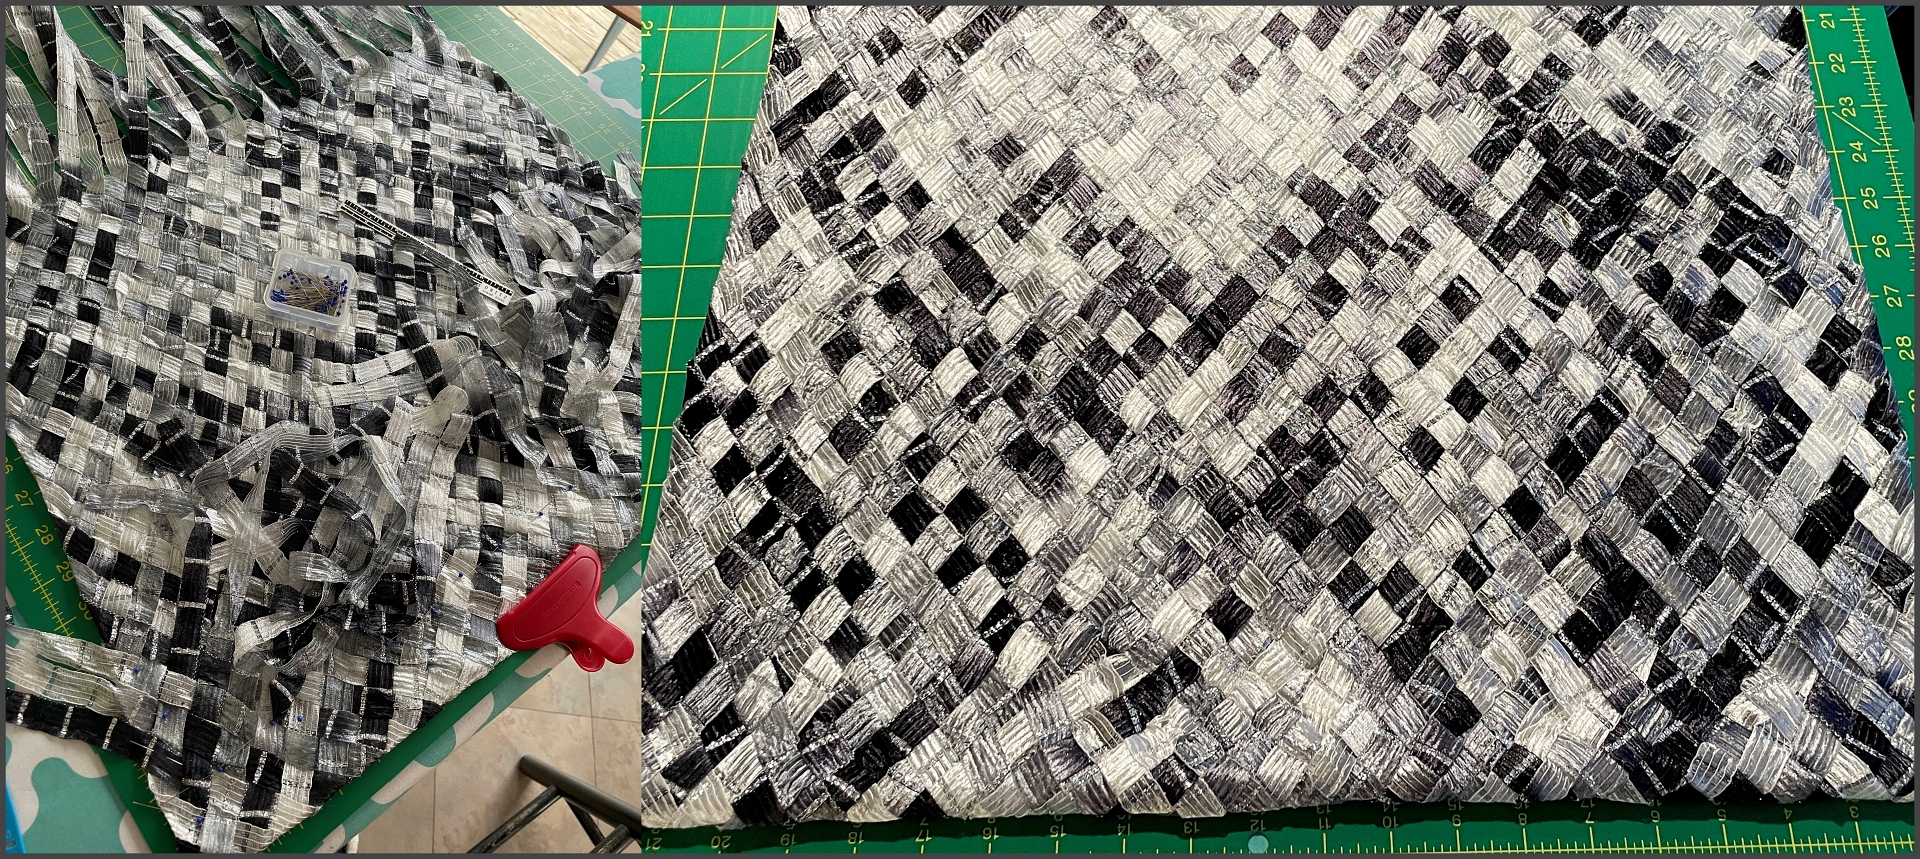
The most recent projects have been working with 53 ribbons/each 2 meters long to make a shawl.
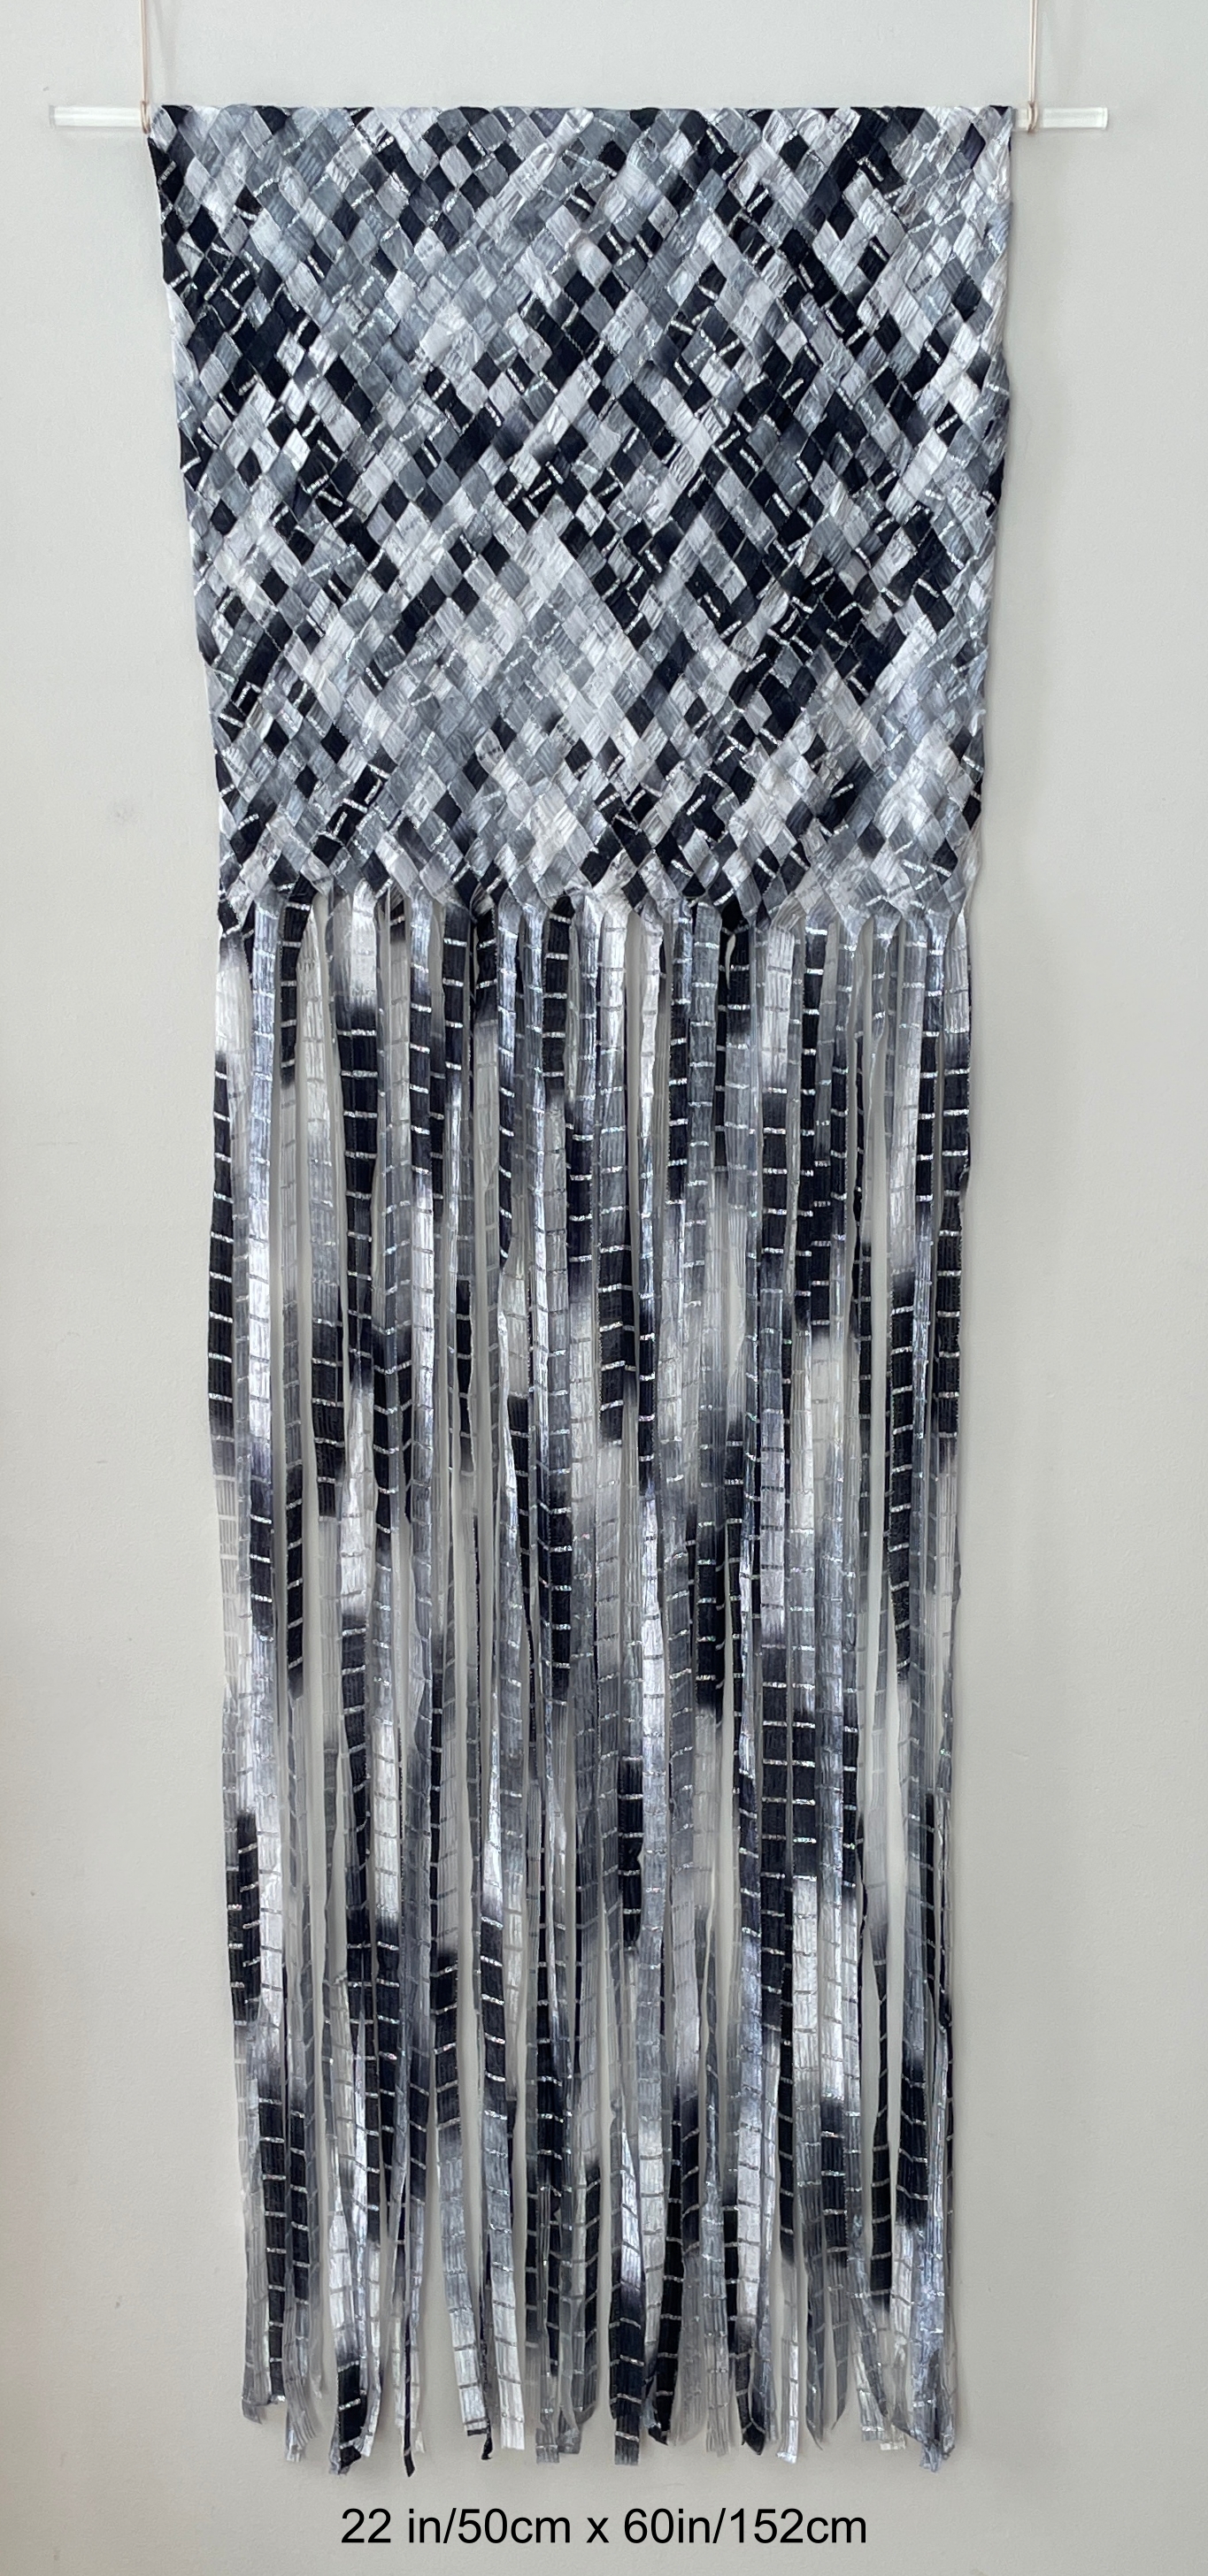
After seeing how the shawl came out I decided to make a wallhanging for the Ann Arbor Fiberarts Guild exhibit at the Village Theater in April. This project has been one where the materials have decided what the end result will be. As I wove the first half I wasn’t thrilled with the pattern that was emerging and did a photo mock up of what the full length might look like and still wasn’t thrilled.

However….. as I advanced the ribbons to begin weaving the second half I really liked the movement of the black, white, and grey colors of the variegated ribbon as it simply hung down.
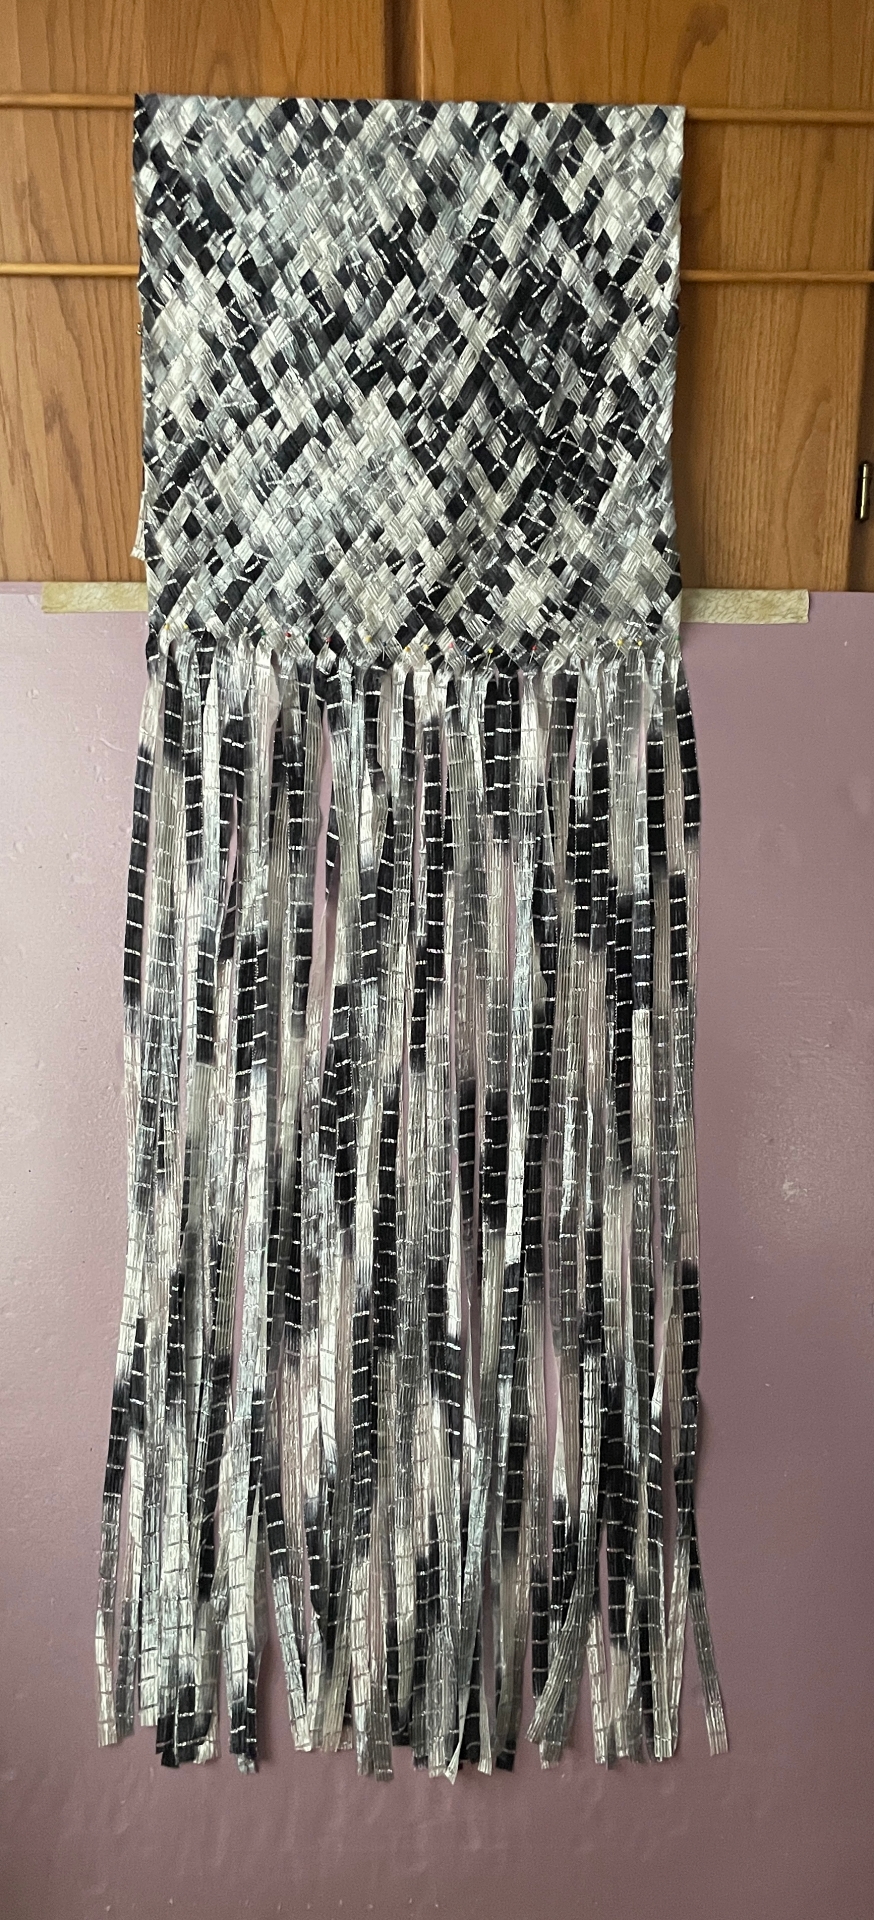
Now the challenge became how do I keep everything from unravelling. I wanted a smooth continuous line between the woven and unwoven sections so beads are not the answer. I tried stitching across the bottom of the woven section but the stitching restricted the natural expanding and contracting of the bias weave. The solution was using tiny pieces of double stick lite fusible tape each ribbon pair cross. This was a slow and tedious process but the result is exactly what I wanted.
The final challenge was to make a pocket for the hanging rod. This was achieved by folding the top edge to the back and weaving the ends back into woven section leaving a 2 inch pocket.
Shredding the Evidence

great experimentation Barb and I love the title of your finished piece!
By: eveweave on February 23, 2025
at 8:06 am
Thanks Eve. It’s been an interesting journey.
By: bschutzgruber on February 23, 2025
at 8:33 am
Very nice!
By: Daisy Hill Studio on February 24, 2025
at 11:49 am
[…] ribbon and map weaving **Weaving on a Warp Weight Loom at the AGWSD Summer School **Creating woven and […]
By: Looking Back at 2025 | Barbara Schutzgruber - Storyteller & Weaver on December 28, 2025
at 5:28 pm